# WP Social Importer - Wordpress Plugin

<p>
<strong>WP Social Importer</strong> is a <strong>wordpress</strong> plugin that imports news from <strong>Facebook</strong>, <strong>Instagram</strong>, <strong>Twitter</strong> into your website. This plugin transforms automatically the news from your social networks into wordpress posts.
</p>

<br />
<p align="center">
	<b><a href="https://www.danielefavi.com/wp-social-importer/">You can find more info at https://www.danielefavi.com/wp-social-importer/</a></b>
</p>
<br />

<p>
The content of the news will automatically be processed: links, hash-tags and people you mention in the news will be converted into real links. The main picture of your news will be set as a featured image on the wordpress post.
</p>
<p>
You can also set the categories, tags and post-type you want to associate with the posts you are importing.
</p>
<p>
Following you can find tutorials to set up the:
<ul>
<li>Facebook</li>
<li>Instagram</a></li>
<li>Twitter</li>
</ul>
</p>

<h3 id="facebook-account">Facebook</h3>
<p>
First of all we have to create a Facebook app in order to create an App ID and an App Secret that is required from the importer.
</p>

<h4>How to create a Facebook app</h4>

<p>
<b>1)</b> Login to facebook developers: <a href="https://developers.facebook.com/apps/" rel="noopener" target="_blank">https://developers.facebook.com/apps/</a>
<br />
<b>2)</b> Create a new app clicking on Add a new App
<br />
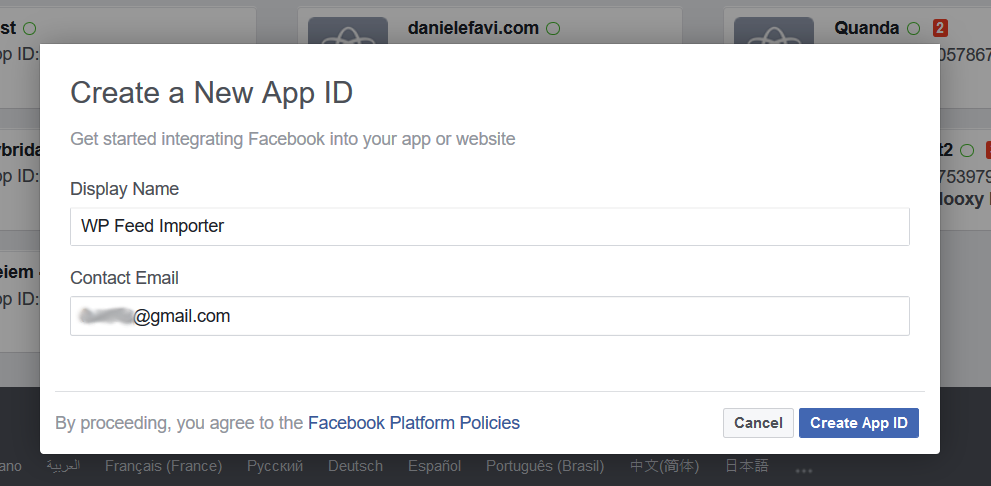
<b>3)</b> Choose a name for your app. In my case WP Feed Importer And then press Create App ID button.
</p>

<p align="center">
<img src="https://www.danielefavi.com/wp-content/uploads/2018/02/ok_01.png" alt="WP Social Importer - Facebook Create new app" style="" width="991" height="486" class="aligncenter size-full wp-image-544" />
</p>

<p>
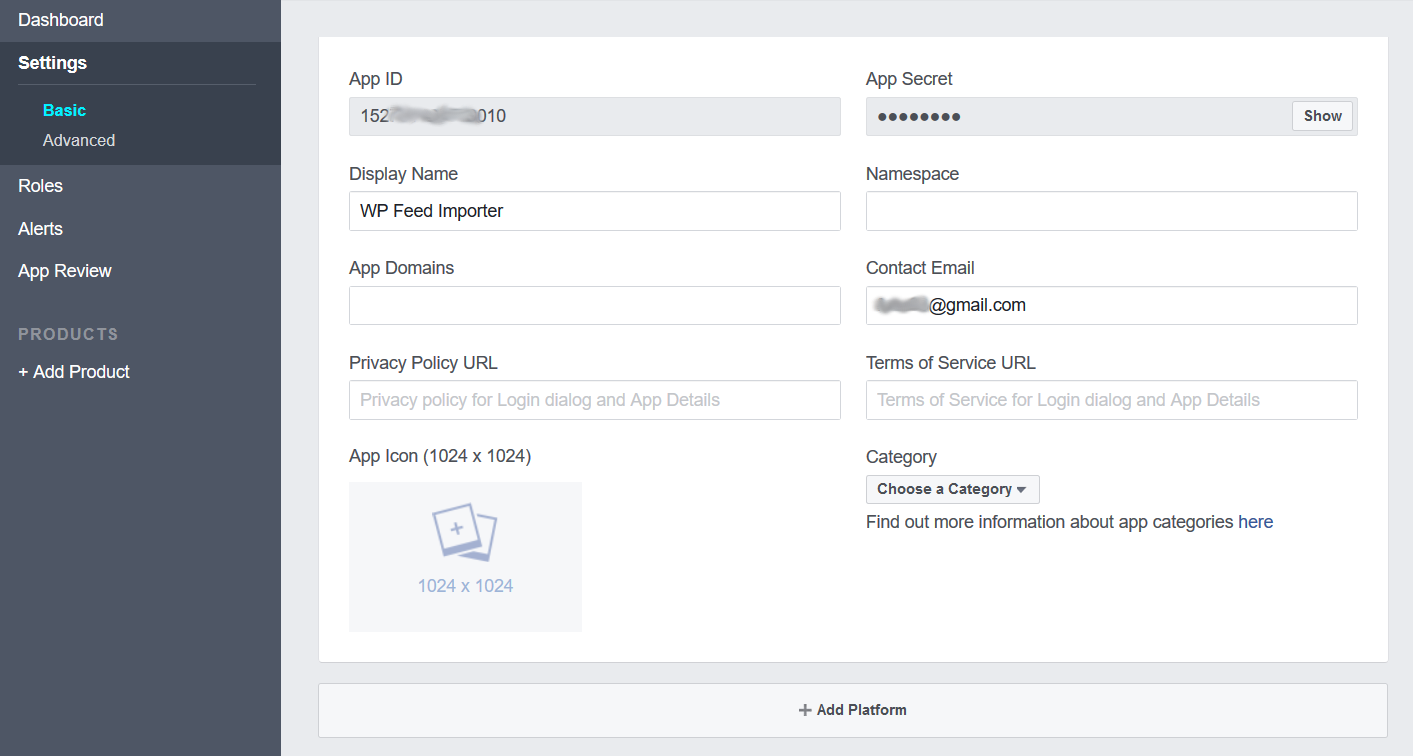
<strong>4)</strong> From the left menu click on <strong>Settings > Basic</strong> and on the page that will appear click <strong>Add new platform</strong> at the bottom of the page
</p>

<p align="center">
<img src="https://www.danielefavi.com/wp-content/uploads/2018/02/ok_02.png" alt="WP Social Importer - Facebook app details" width="1413" height="756" class="aligncenter size-full wp-image-546" />
</p>

<p>
<strong>5)</strong> On the dialog box choose <strong>Website</strong>. Then insert the URL of your website, in this tutorial example it is <em><strong>http://localhost/wp-test/</strong></em> and press the button <strong>Save Changes</strong>
</p>

<p align="center">
<img src="https://www.danielefavi.com/wp-content/uploads/2018/02/wp_social_importer_3.png" alt="WP Social Importer - Facebook sites" width="1088" height="206" class="aligncenter size-full wp-image-548" />
</p>

<p>
<strong>6)</strong> Copy the <strong>App ID</strong> and <strong>App Secret</strong>, you will need them for the importer settings.
</p>

<p>
The setup of the Facebook App is completed. Now let’s set up the Facebook account on the WP Social Importer plugin.
</p>

<h4>Facebook settings for WP Social Importer</h4>

<p>
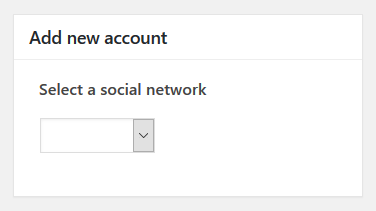
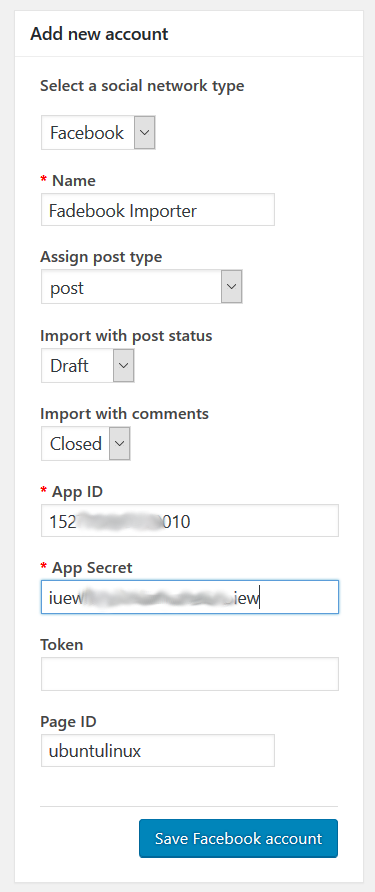
<strong>7)</strong> Go to your website and login into the wordpress administration. Click on <strong>Social Importer</strong> on the left menu.
On the importer page you will see a box on the top-right <strong>Add new account</strong>; in that box in <strong>Select a social network type</strong> section choose <strong>Facebook</strong> from the dropdown menu.
</p>

<p align="center">
<img src="https://www.danielefavi.com/wp-content/uploads/2018/02/wp_social_importer_add_new_accounr.png" alt="WP Social Importer - Facebook add new account" width="376" height="211" class="aligncenter size-full wp-image-549" />
</p>

<p>
Fill in all the required fields and make sure that the Page ID has a valid page name or page ID. Then click the button Save Facebook Account
</p>

<p align="center">
<img src="https://www.danielefavi.com/wp-content/uploads/2018/02/wp_social_importer_facebook.png" alt="WP Social Importer - Facebook add new account 2" width="375" height="892" class="aligncenter size-full wp-image-550" />
</p>

<p align="center">--------------</p>

<h3 id="instagram-account">Instagram</h3>
<p>First we have to create an Instagram app in order to create a Client ID and a Client Secret that is required from the importer.</p>

<h4>How to create an Instagram app</h4>

<p>
<strong>1)</strong> Go to <a href="https://www.instagram.com/developer/" rel="noopener" target="_blank">https://www.instagram.com/developer/</a> and click on <strong>Manage Clients</strong> from the menu on the top.
<br />
2) Click on the button <strong>Register a New Client</strong>
</p>

<p align="center">
<img src="https://www.danielefavi.com/wp-content/uploads/2018/02/02.png" alt="WP Social Importer - Instagram new app" width="974" height="157" class="aligncenter size-full wp-image-552" />
</p>

<p>
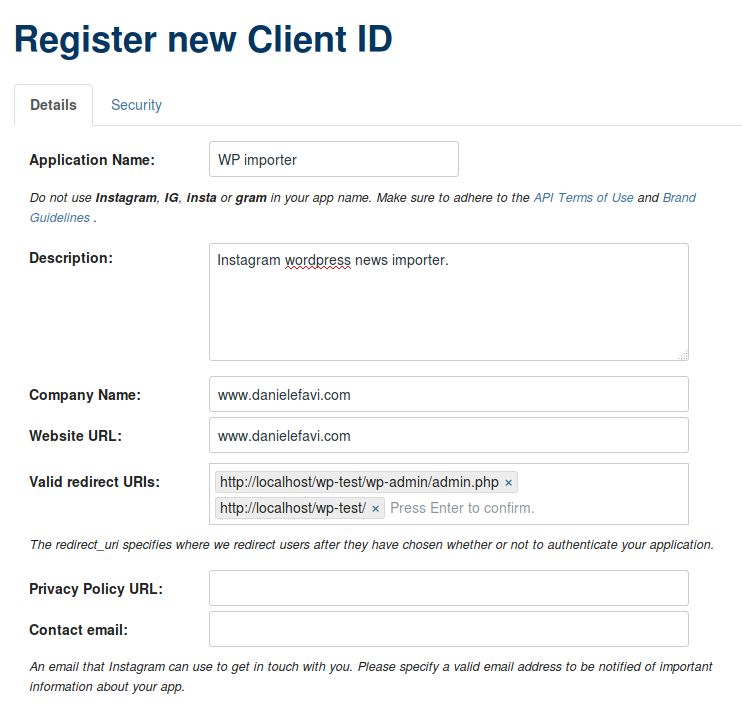
<strong>3)</strong> Fill in all the required fields as shown in the picture below.
<br />
<br />
NOTE: it is important that you fill in the field <strong>Valid redirect URIs</strong> with the proper wordpress administration home URI path adding <code>/wp-admin/admin.php</code> to your URL.
For example <em><strong>http://www.yourwebsite.com/wp-admin/admin.php</strong></em>; if you are testing this plugin locally <em><strong>http://localhost/your-folder/wp-admin/admin.php</strong></em>
<br />
If the URI is wrong you will get the error <strong>OAuthException - 400 - Redirect URI does not match registered redirect URI</strong>
</p>

<p align="center">
<img src="https://www.danielefavi.com/wp-content/uploads/2018/02/03_2.png" alt="WP Social Importer - Instagram register app" width="742" height="705" class="aligncenter size-full wp-image-553" />
</p>

<p>
<strong>4)</strong> Click on the tab <strong>Security</strong> and make sure that both <strong>Disable implicit OAuth</strong> and <strong>Enforce signed requests</strong> are unchecked. Then press the button <strong>Register</strong>
</p>
<p>
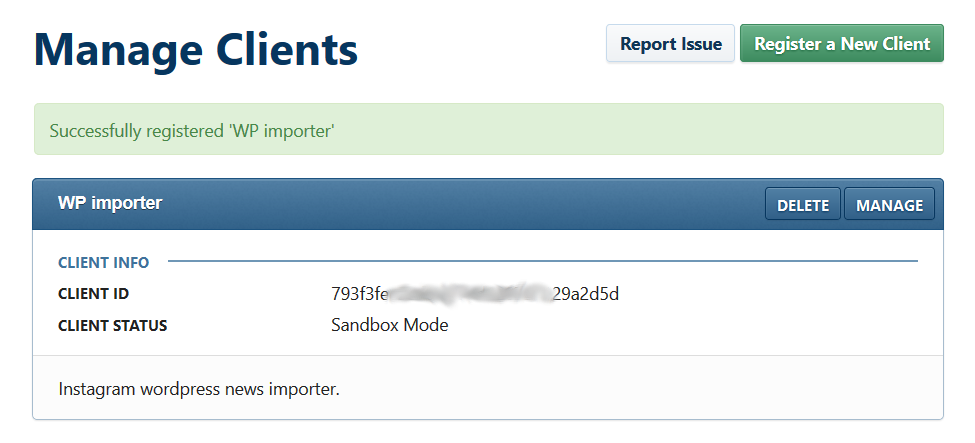
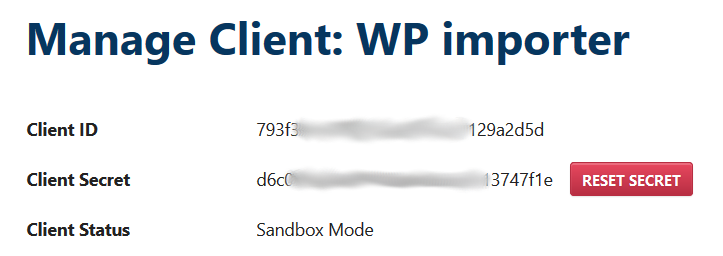
<strong>5)</strong> Now your Instagram web app is set! Click on the <strong>Manage</strong> button of the app you have just created.
<br />
Then copy the  <strong>Client ID</strong> and <strong>Client Secret</strong>
</p>

<p align="center">
<img src="https://www.danielefavi.com/wp-content/uploads/2018/02/05.png" alt="WP Social Importer - Instagram app details" width="975" height="443" class="aligncenter size-full wp-image-554" />
</p>

<p align="center">
<img src="https://www.danielefavi.com/wp-content/uploads/2018/02/06.png" alt="WP Social Importer - Instagram app details 2" width="723" height="256" class="aligncenter size-full wp-image-555" />
</p>

<h4>Instagram settings for WP Social Importer</h4>

<p>
<strong>6)</strong> Now open your website and go to the wordpress administration; then click on the link <strong>Social Importer</strong> on the left menu.
</p>
<p>
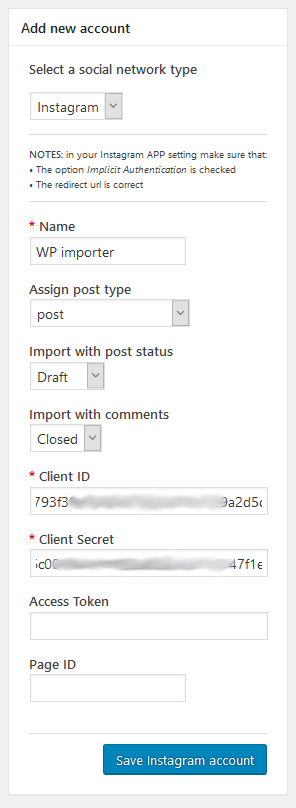
<strong>7)</strong> On the importer page you will see the box <strong>Add new account</strong> on the top-right: there from the <strong>Select a social network type</strong> section choose <strong>Instagram</strong> from the dropdown menu.
<br />
Give a name to the account and fill in <strong>Client ID</strong> and <strong>Client Secret</strong> with the Instagram web app you have just created and then click on the button <strong>Save Instagram Account</strong>
</p>

<p align="center">
<img src="https://www.danielefavi.com/wp-content/uploads/2018/02/07.png" alt="WP Social Importer - Instagram new account" width="296" height="808" class="aligncenter size-full wp-image-556" />
</p>

<p>
<strong>8)</strong> Once saved you will see your new account in the list: click <strong>IMPORT</strong>
</p>

<p align="center">
<img src="https://www.danielefavi.com/wp-content/uploads/2018/02/08.png" alt="WP Social Importer - Instagram account list" width="1250" height="176" class="aligncenter size-full wp-image-557" />
</p>

<p>
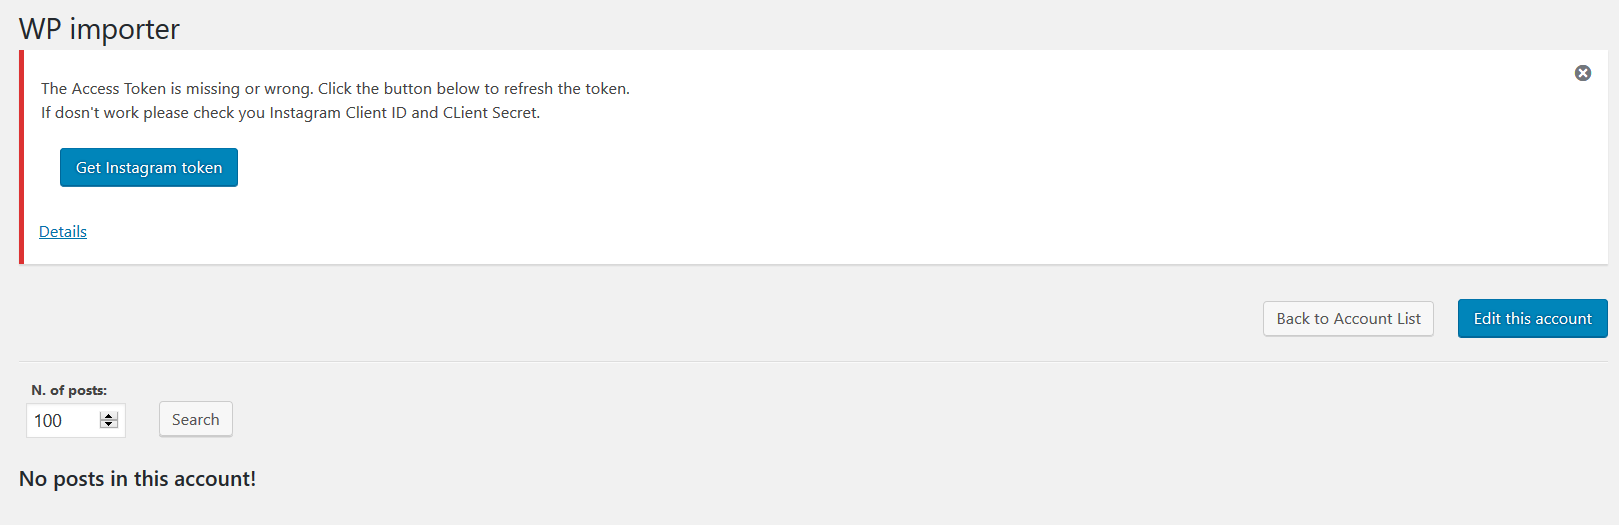
<strong>9)</strong> On the page that will appear there will be an error message: this is because we still have not granted the permission. So just click on the button <strong>Get Instagram Token</strong>
</p>

<p align="center">
<img src="https://www.danielefavi.com/wp-content/uploads/2018/02/09.png" alt="" width="1619" height="525" class="aligncenter size-full wp-image-558" />
</p>

<p>
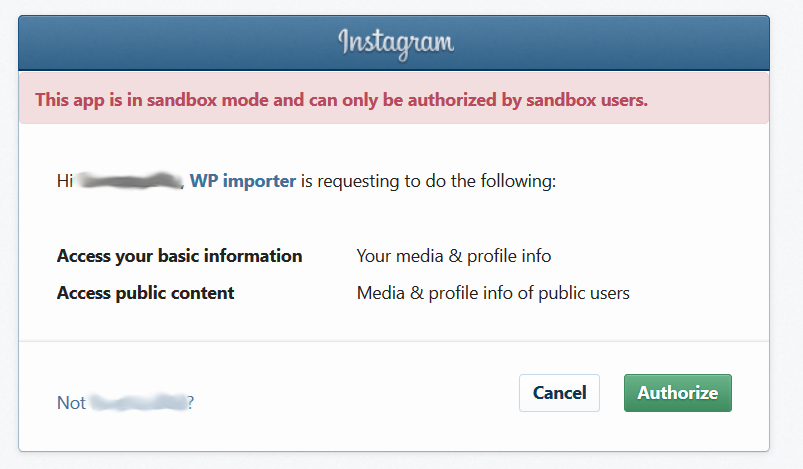
Then you will be redirected to an Instagram page where you have to press the button <strong>Authorize</strong>
</p>

<p align="center">
<img src="https://www.danielefavi.com/wp-content/uploads/2018/02/12.png" alt="Instagram authorize app" width="803" height="469" class="aligncenter size-full wp-image-559" />
</p>

<p>
And you are ready to import your Instagram news!
</p>

<p align="center">--------------</p>

<h3 id="twitter-account">Twitter</h3>

<p>
First we have to create a Twitter app in order to create the API Key and an API Secret required from the importer.
</p>

<h4>How to create a Twitter app</h4>

<p>
<strong>1)</strong> Go to <a href="https://apps.twitter.com" rel="noopener" target="_blank">https://apps.twitter.com</a> to set the Twitter app and click on the button <strong>Create New App</strong>
</p>
<p>
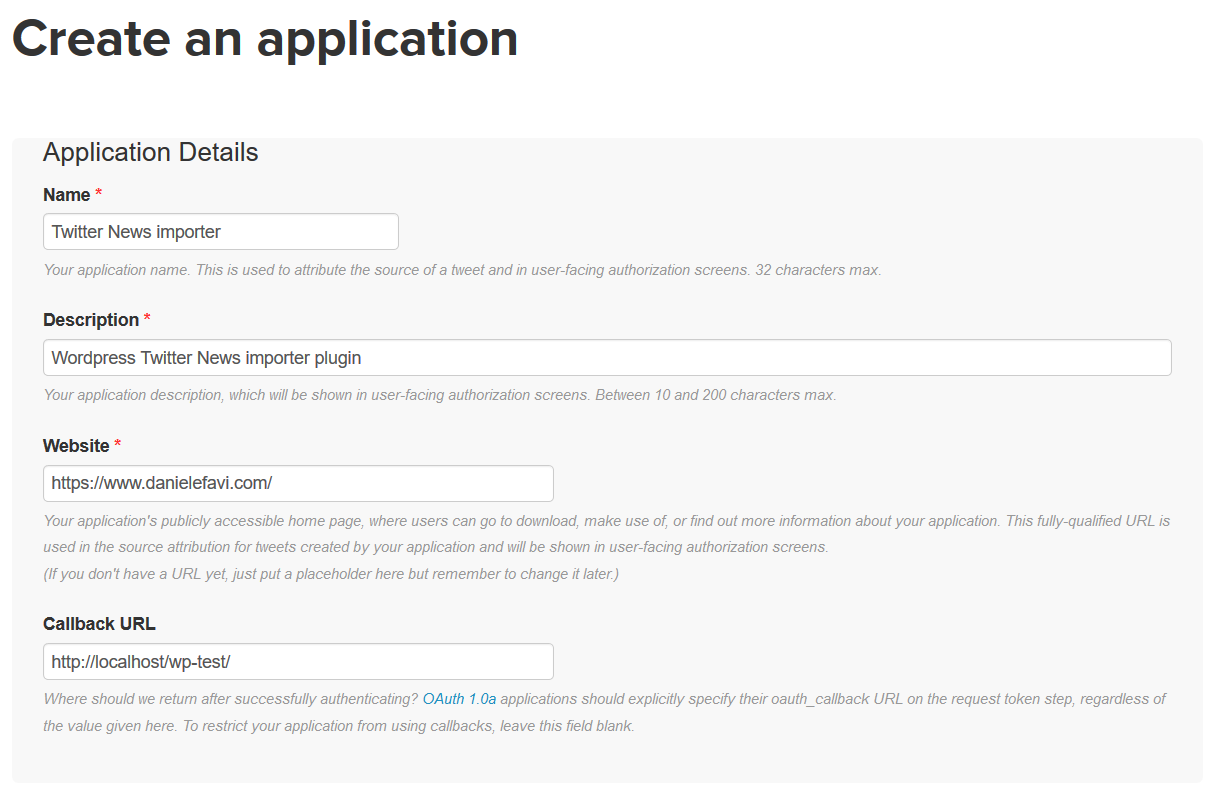
<strong>2)</strong> Fill in all the required fields as shown on the image and click the button <strong>Create your Twitter application</strong>
</p>

<p align="center">
<img src="https://www.danielefavi.com/wp-content/uploads/2018/02/twitter_create_app.png" alt="WP Social Post Importer - Twitter create app" width="1208" height="794" class="aligncenter size-full wp-image-564" />
</p>

<p>
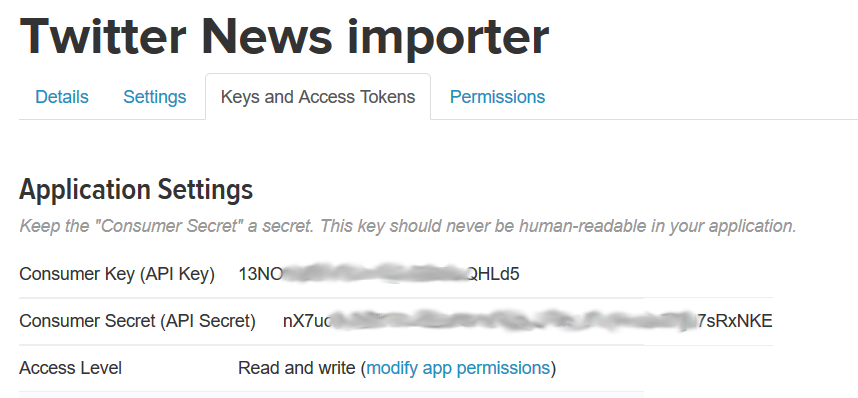
<strong>3)</strong> Once saved, open the twitter app you have just created and click the tab <strong>Keys and Access Tokens</strong>; here you will find the <strong>API key</strong> and <strong>API secret</strong>.
</p>

<p align="center">
<img src="https://www.danielefavi.com/wp-content/uploads/2018/02/03.png" alt="WP Social Importer - Twitter create app" width="858" height="398" class="aligncenter size-full wp-image-561" />
</p>

<h4>Twitter settings for WP Social Importer</h4>

<p>
<strong>4)</strong> Now open your website and go to the admin panel. Then go to the Social Network Importer plugin page by clicking the link <strong>Social Importer</strong> on the left menu.
</p>
<p>
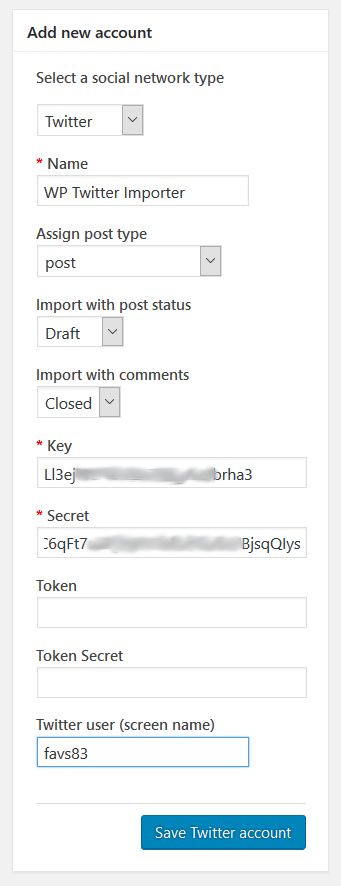
<strong>7)</strong> On the importer page you will see the box <strong>Add new account</strong> on the top-right: there from the <strong>Select a social network type</strong> section choose <strong>Twitter</strong> from the dropdown menu.
<br />
Give a name to this account, fill up the <strong>API Key</strong> and <strong>API Secret</strong> with the <strong>Twitter</strong> web app you have just created; it is important you fill in the field <strong>Twitter user (screen name)</strong> with a valid name. Then click the button <strong>Save Twitter Account</strong>
</p>

<p align="center">
<img src="https://www.danielefavi.com/wp-content/uploads/2018/02/06-1.png" alt="WP Social Post Importer - Twitter account" width="343" height="891" class="aligncenter size-full wp-image-566" />
</p>

<p>
NOTE: if the field <strong>Twitter user (screen name)</strong> is not correct you will get the error <strong>Not Authorized</strong>
</p>