## About The Project
**TicketSonic** is the ticketing engine that integrates with your platform behind the scenes enabling you to become a full featured ticket seller.
This is a WooCommerce based plugin for integrating the TicketSonic Engine with any WooCommerce platform.
What you get from this plugin?
* No more redirects to third party ticketing providers
* Effortless integration
* Super fast response times
(back to top)
### Built With
* [Guzzle](https://github.com/guzzle/guzzle/)
* [QR Code generator](https://github.com/Bacon/BaconQrCode/)
(back to top)
## Getting Started
### Prerequisites
You have to be able to use composer
* composer
```sh
composer install
```
* [WordPress installation](https://wordpress.org)
* [WooCommerce Plugin](https://wordpress.org/plugins/woocommerce) installed and activated
* Ensure wp-content/uploads dir is writable. In most cases it is by default. The plugin will create a subdirectory called woocommerce-ticketsonic and it will be used for storage of ticket files when the admin manually generates ones.
### Installation
1. Get a API credentials at [https://www.ticketsonic.com/user/registration](https://www.ticketsonic.com/user/registration)
2. Go to the TicketSonic plugin
```sh
cd /wp-content/plugins
3. Clone the repo
```sh
git clone https://github.com/ticketsonic/woocommerce-ticketsonic.git .
```
Or get it from the WordPress plugins page and unpack at the plugins folder
4. Install dependencies
```sh
composer install
```
5. Enable the TicketSonic plugin
6. Enter your API credentials in `/wp-admin/admin.php?page=ts_yts&tab=settings`
(back to top)
## Settings
Once installed the plugin page is available as one of the WooCommerce menu items.
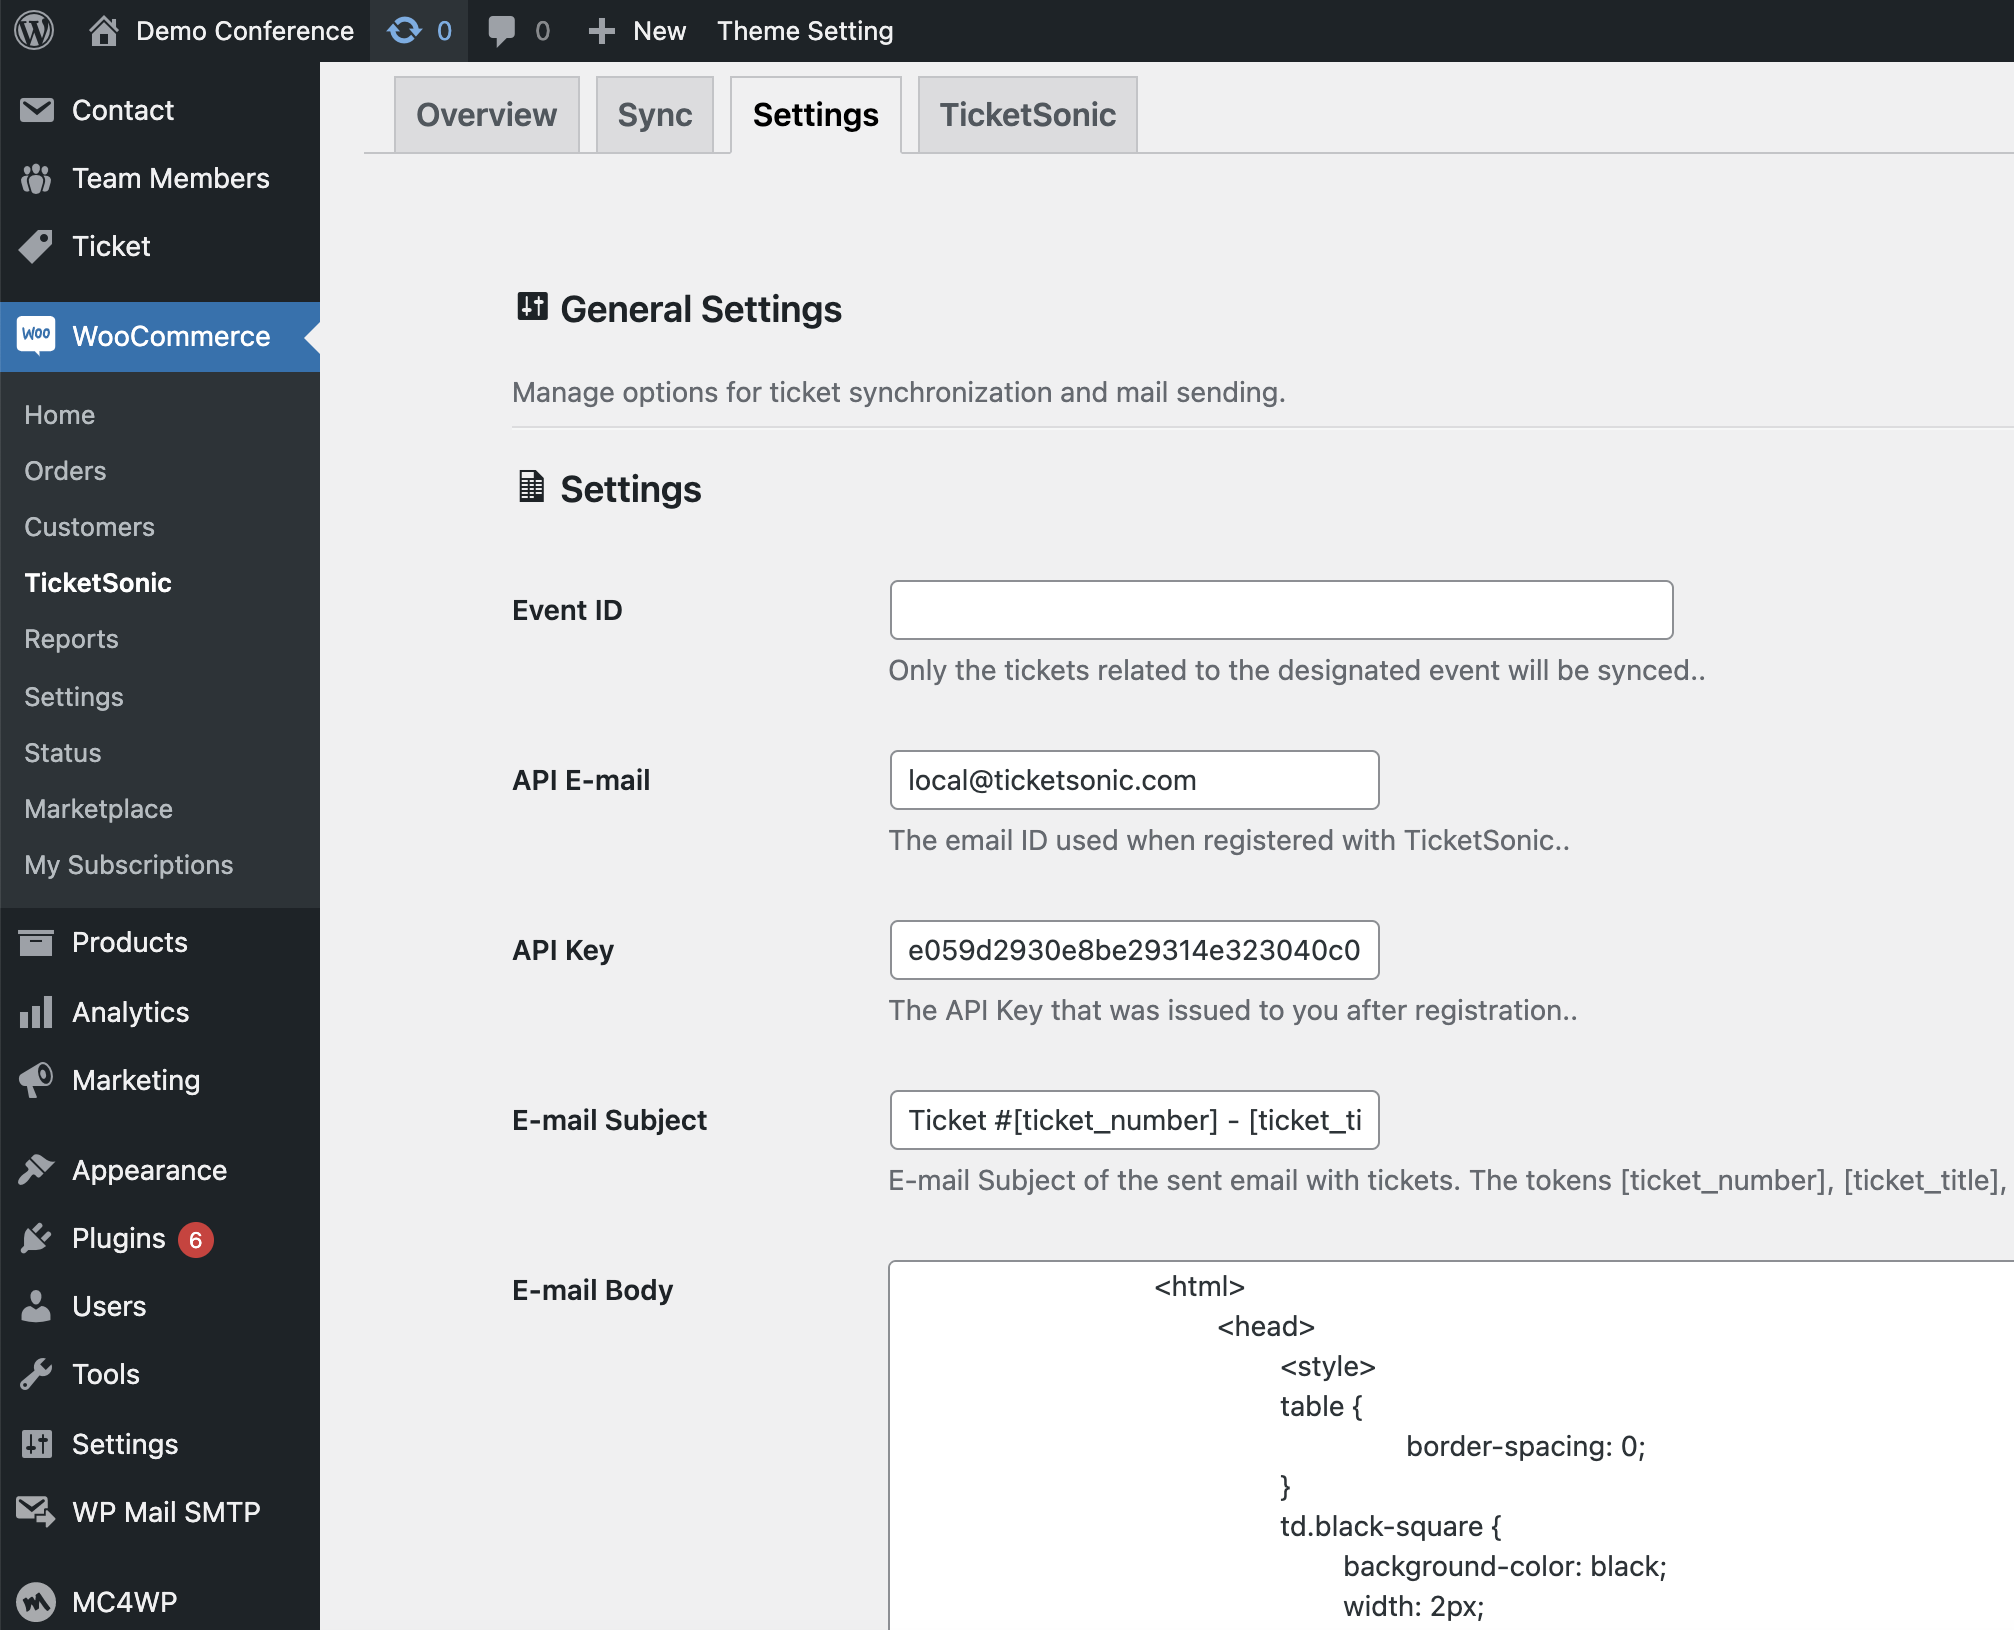 ### General settings
The settings that have to be set are:
* **Event ID** - when syncing with TicketSonic only the tickets related to the event with the set EventID will be synced as WooCommerce Product. Leave empty to sync all tickets from TicketSonic/
* **API credentials** - the API key identifier available at your [TicketSonic account](https://www.ticketsonic.com/user)
### E-mail settings
You can customize the e-mail containing the tickets that will be sent upon successful ticket purchase
* **E-mail subject** - set the subject of the e-mail. The following tokens could be used [ticket_number], [ticket_title], [ticket_description], [ticket_price] for the current ticket number, its title, description and formatted price.
* **E-mail body** - set the html contents of the e-mail. The following tokens could be used [ticket_qr], [ticket_number], [ticket_title], [ticket_description], [ticket_price] for the ticket QR code, current ticket number, its title, description and formatted price.
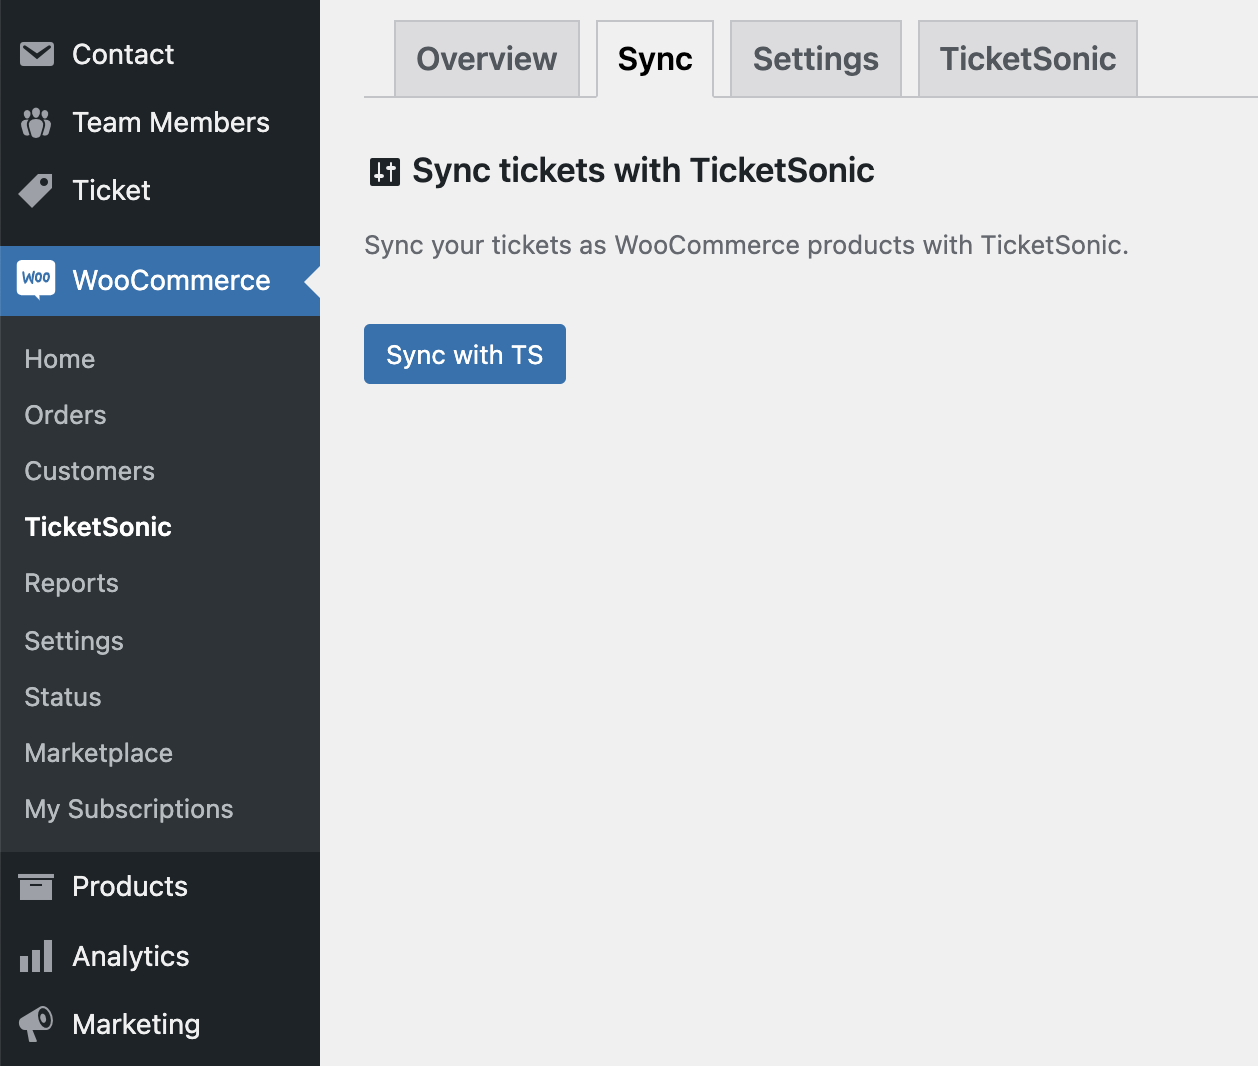
## Syncing
Once the settings are set you have to sync the tickets from TicketSonic with your WooCommerce store and be ready for sales!
You should go to `/wp-admin/admin.php?page=ts_yts&tab=sync` and click the Sync button
### General settings
The settings that have to be set are:
* **Event ID** - when syncing with TicketSonic only the tickets related to the event with the set EventID will be synced as WooCommerce Product. Leave empty to sync all tickets from TicketSonic/
* **API credentials** - the API key identifier available at your [TicketSonic account](https://www.ticketsonic.com/user)
### E-mail settings
You can customize the e-mail containing the tickets that will be sent upon successful ticket purchase
* **E-mail subject** - set the subject of the e-mail. The following tokens could be used [ticket_number], [ticket_title], [ticket_description], [ticket_price] for the current ticket number, its title, description and formatted price.
* **E-mail body** - set the html contents of the e-mail. The following tokens could be used [ticket_qr], [ticket_number], [ticket_title], [ticket_description], [ticket_price] for the ticket QR code, current ticket number, its title, description and formatted price.
## Syncing
Once the settings are set you have to sync the tickets from TicketSonic with your WooCommerce store and be ready for sales!
You should go to `/wp-admin/admin.php?page=ts_yts&tab=sync` and click the Sync button
 _For more examples, please refer to the [Developer Documentation](https://www.ticketsonic.com/developer)_
(back to top)
## Roadmap
- [x] Request new Tickets
- [x] Request new Event
- [ ] Improve the UI
See the [open issues](https://github.com/ticketsonic/woocommerce-ticketsonic/issues) for a full list of proposed features (and known issues).
(back to top)
## Contributing
Contributions are what make the open source community such an amazing place to learn, inspire, and create. Any contributions you make are **greatly appreciated**.
If you have a suggestion that would make this better, please fork the repo and create a pull request. You can also simply open an issue with the tag "enhancement".
Don't forget to give the project a star! Thanks again!
1. Fork the Project
2. Create your Feature Branch (`git checkout -b feature/AmazingFeature`)
3. Commit your Changes (`git commit -m 'Add some AmazingFeature'`)
4. Push to the Branch (`git push origin feature/AmazingFeature`)
5. Open a Pull Request
(back to top)
## License
Distributed under the GPL2 License. See `LICENSE.txt` for more information.
(back to top)
## Contact
TicketSonic Team - [Contact us](https://www.ticketsonic.com/contact-us)
Project Link: [https://github.com/ticketsonic/woocommerce-ticketsonic/](https://github.com/ticketsonic/woocommerce-ticketsonic/)
(back to top)
## Acknowledgments
* [Guzzle](https://github.com/guzzle/guzzle/)
* [QR Code generator](https://github.com/Bacon/BaconQrCode/)
(back to top)