# Connect Asana (OAuth)

**Introduction**
This guide will walk you step-by-step through connecting your Asana
account to IAWGF using OAuth 2.0. Once authorized, you’ll be able to
configure feeds and send tasks directly to Asana.

**Tip:** You’ll also get step-by-step guidance inside the plugin as you
go—the interface walks you through each part of the connection.

------------------------------------------------------------------------

### Step 1: Create an Asana App

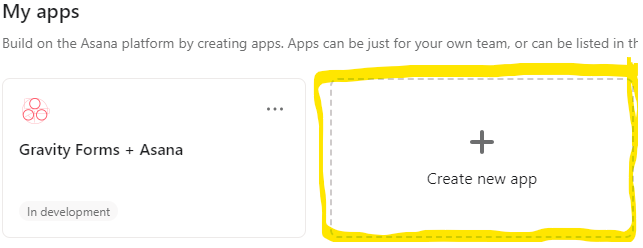
1.  Go to your Asana
    **<a href="https://app.asana.com/0/my-apps" target="_blank"
    rel="noreferrer noopener">My Apps</a>** page.
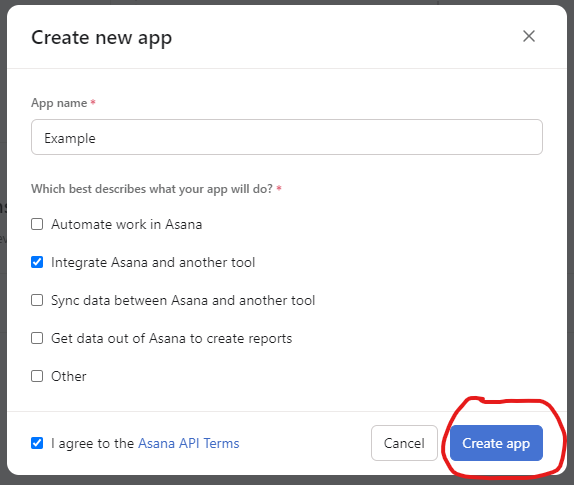
2.  Click **Create new app**, name it (e.g., “Gravity Forms
    Integration”), and select **Integrate Asana and another tool**.
3.  Accept the Asana API Terms, then click **Create app**.

<div class="wp-block-uagb-container uagb-block-0c770ffa alignfull uagb-is-root-container">

<div class="uagb-container-inner-blocks-wrap">

<div class="wp-block-uagb-container uagb-block-2d52d9c8">

<figure class="wp-block-image size-full">
<img
src="https://brightleafdigital.io/wp-content/uploads/sites/6/2025/08/Create_new_app.png"
class="wp-image-3901" alt="picture of the create app screen" />
</figure>

</div>

<div class="wp-block-uagb-container uagb-block-a396f5e6">

<figure class="wp-block-image size-full">
<img
src="https://brightleafdigital.io/wp-content/uploads/sites/6/2025/08/Create_app.png"
class="wp-image-3902" alt="Creating the asana app" />
</figure>

</div>

</div>

</div>

------------------------------------------------------------------------

### Step 2: Enter App Credentials in the Plugin

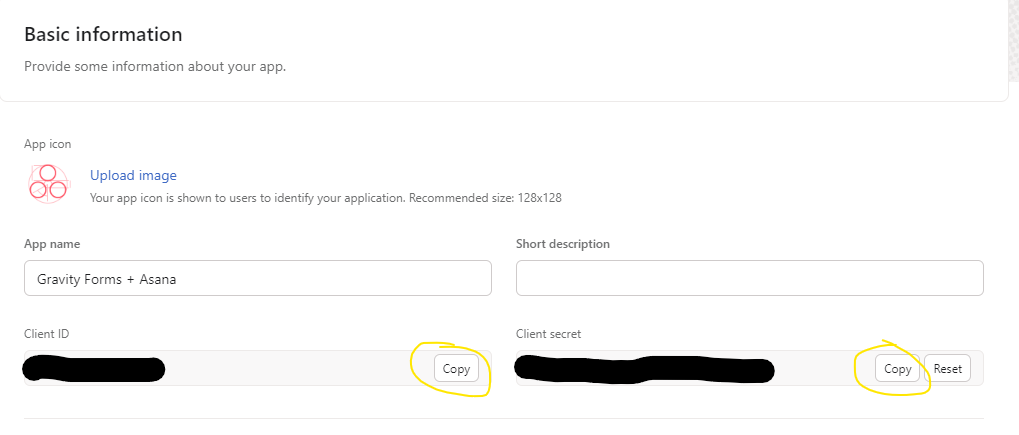
1.  In your Asana app's settings, go to the **Basic information** tab.
2.  Copy the **Client ID** and **Client Secret**.
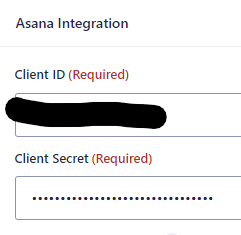
3.  In WordPress, navigate to **GravityOps → Asana Integration →
    Settings** (or **Forms → Settings → Asana Integration**).
4.  Paste the **Client ID** and **Client Secret** into the respective
    fields.
5.  Click **Save**.

<div class="wp-block-uagb-container uagb-block-4a6ae72f alignfull uagb-is-root-container">

<div class="uagb-container-inner-blocks-wrap">

<div class="wp-block-uagb-container uagb-block-daaaee4f">

<figure class="wp-block-image size-full">
<img
src="https://brightleafdigital.io/wp-content/uploads/sites/6/2025/08/Basic_info_page.png"
class="wp-image-3904"
alt="screenshot of the basic info page inside the asana app" />
</figure>

</div>

<div class="wp-block-uagb-container uagb-block-f39727b3">

<figure class="wp-block-image size-full">
<img
src="https://brightleafdigital.io/wp-content/uploads/sites/6/2025/08/Client_info.png"
class="wp-image-3905"
alt="screenshot of the client id and secret pasted into the plugin settings" />
</figure>

</div>

</div>

</div>

------------------------------------------------------------------------

### Step 3: Configure OAuth in Asana

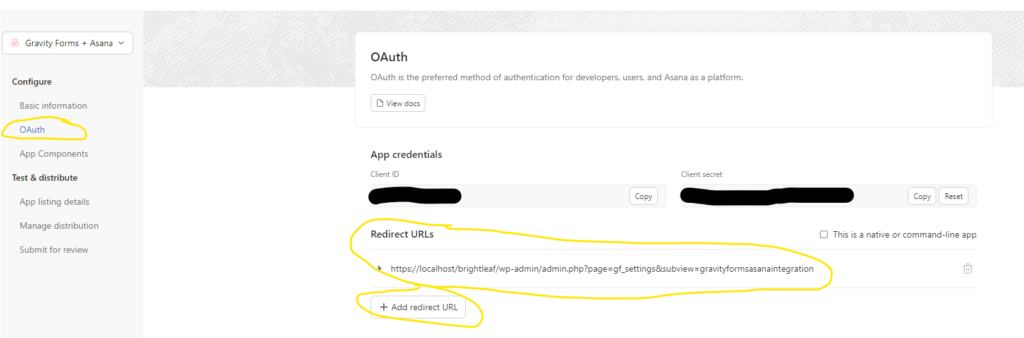
1.  In your Asana app’s settings, open the **OAuth** tab.
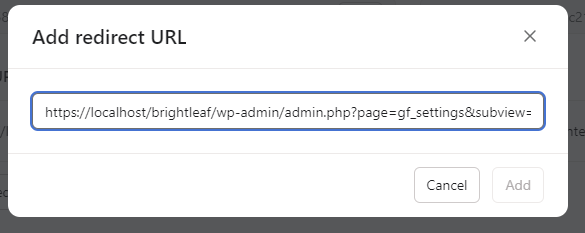
2.  Add the plugin’s **Redirect URL** (from Step 2 of the plugin settings)
    under **Authorized Redirect URIs**.
    Use the base plugin settings URL (without any `&step=` query
    parameter).
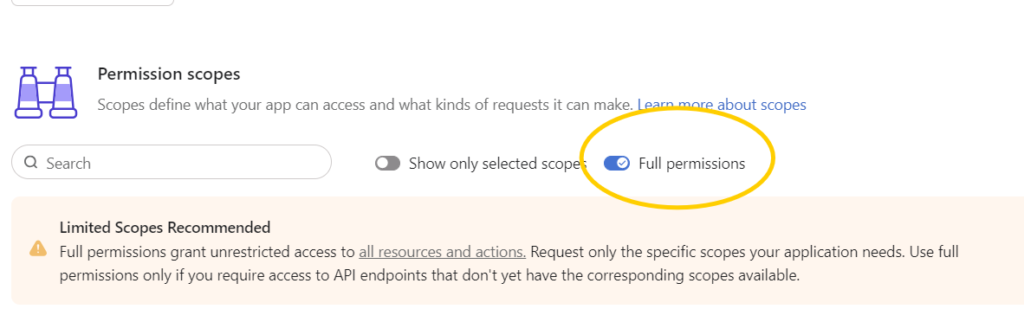
3.  Choose **Full permissions** (Asana is moving to a scoped model, but
    for now, this ensures the plugin can fetch projects, sections, and
    custom fields).
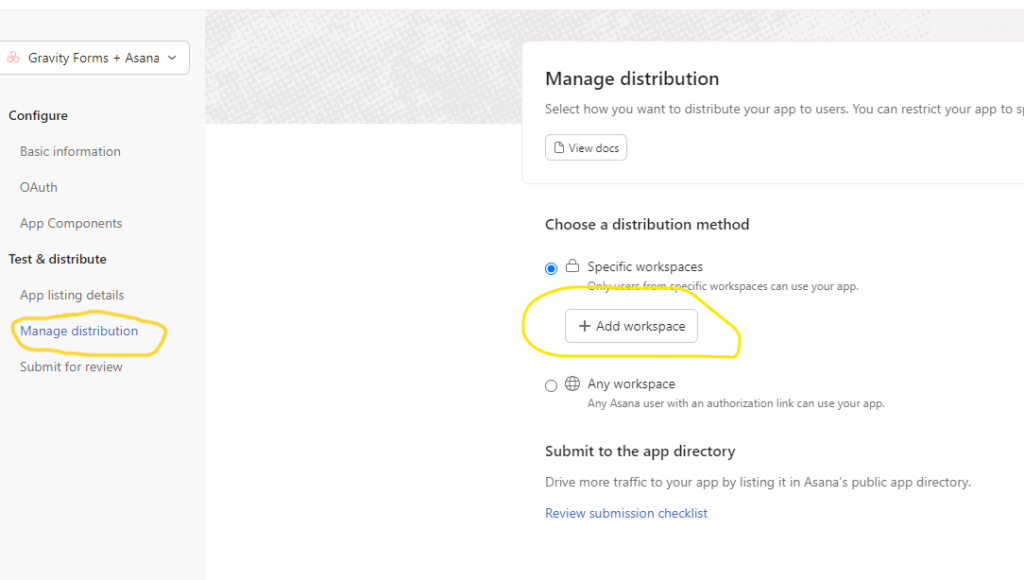
4.  Under the **Manage distribution** tab, add the workspace(s) you want
    the plugin to have access to.

<div class="wp-block-uagb-container uagb-block-837fb808 alignfull uagb-is-root-container">

<div class="uagb-container-inner-blocks-wrap">

<div class="wp-block-uagb-container uagb-block-79e8f498">

<figure class="wp-block-image size-large">
<img
src="https://brightleafdigital.io/wp-content/uploads/sites/6/2025/08/asana_redirect_url-1024x338.png"
class="wp-image-3906"
alt="screenshot of configuring the redirect url" />
</figure>

</div>

<div class="wp-block-uagb-container uagb-block-e3d6b872">

<figure class="wp-block-image size-full">
<img
src="https://brightleafdigital.io/wp-content/uploads/sites/6/2025/08/adding_url.png"
class="wp-image-3907" alt="screenshot of adding the redirect url" />
</figure>

</div>

</div>

</div>

<div class="wp-block-uagb-container uagb-block-40c30e8a alignfull uagb-is-root-container">

<div class="uagb-container-inner-blocks-wrap">

<div class="wp-block-uagb-container uagb-block-dc677677">

<figure class="wp-block-image size-large">
<img
src="https://brightleafdigital.io/wp-content/uploads/sites/6/2025/08/scopes-1024x322.png"
class="wp-image-3909" style="object-fit:cover"
alt="screenshot of configuring permissions" />
</figure>

</div>

<div class="wp-block-uagb-container uagb-block-94fa0927">

<figure class="wp-block-image size-large">
<img
src="https://brightleafdigital.io/wp-content/uploads/sites/6/2025/08/add_workspace_button-1024x580.png"
class="wp-image-3908" style="object-fit:cover"
alt="configuring workspaces for the asana app" />
</figure>

</div>

</div>

</div>

------------------------------------------------------------------------

### Step 4: Authorize the Plugin

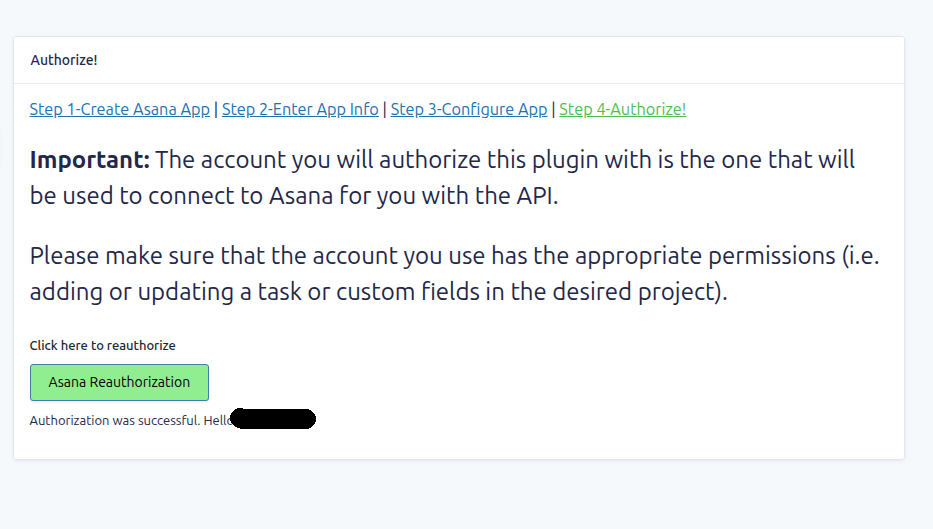
1.  In WordPress, go to **Step 3** of the plugin settings.
2.  Click **Authorize with Asana**—you’ll be redirected to Asana’s
    authorization screen.
3.  Log in if prompted, and **approve access**. Remember to log in as a
    user with necessary permissions.
4.  Upon success, the plugin will display a confirmation message and
    greet you.

<figure class="wp-block-image size-full">
<img
src="https://brightleafdigital.io/wp-content/uploads/sites/6/2025/08/Screenshot-from-2025-08-26-18-08-37-1.png"
class="wp-image-4035" />
</figure>

------------------------------------------------------------------------

For a deeper dive into how OAuth works, including the authorization code
flow, token exchange, and specific scopes used by the plugin, see the
**“Explanations & Concepts”** section.