# flyyer-php
The AI-powered preview system built from your website (no effort required).

**This package is agnostic to any PHP framework.**
## Index
- [Get started (5 minutes)](#get-started-5-minutes)
- [Advanced usage](#advanced-usage)
- [Flyyer Render](#flyyer-render)
- [Development](#development)
- [Test](#test)
## Get started (5 minutes)
Haven't registered your website yet? Go to [Flyyer.io](https://flyyer.io?ref=flyyer-php) and create a project (e.g. `website-com`).
### 1. Install the library
This package supports PHP >= 7.1.
```sh
composer require flyyer/flyyer
```
### 2. Get your Flyyer.io smart image link
In your website code (e.g. your landing or product/post view file), set the following:
```php
$flyyer = new Flyyer(
// Your project slug
'website-com',
// The current path of your website
'/path/to/product', // in Laravel 6 you can use `Route::getCurrentRoute()->getName()`
);
// Check:
print($flyyer->href());
// > https://cdn.flyyer.io/v2/website-com/_/__v=1618281823/path/to/product
```
### 3. Put your smart image link in your `` tags
You'll get the best results like this:
```php
```
### 4. Create a `rule` for your project
Go to your dashboard [here](https://flyyer.io/dashboard/_/projects/_/manage) and create a rule like the following:
[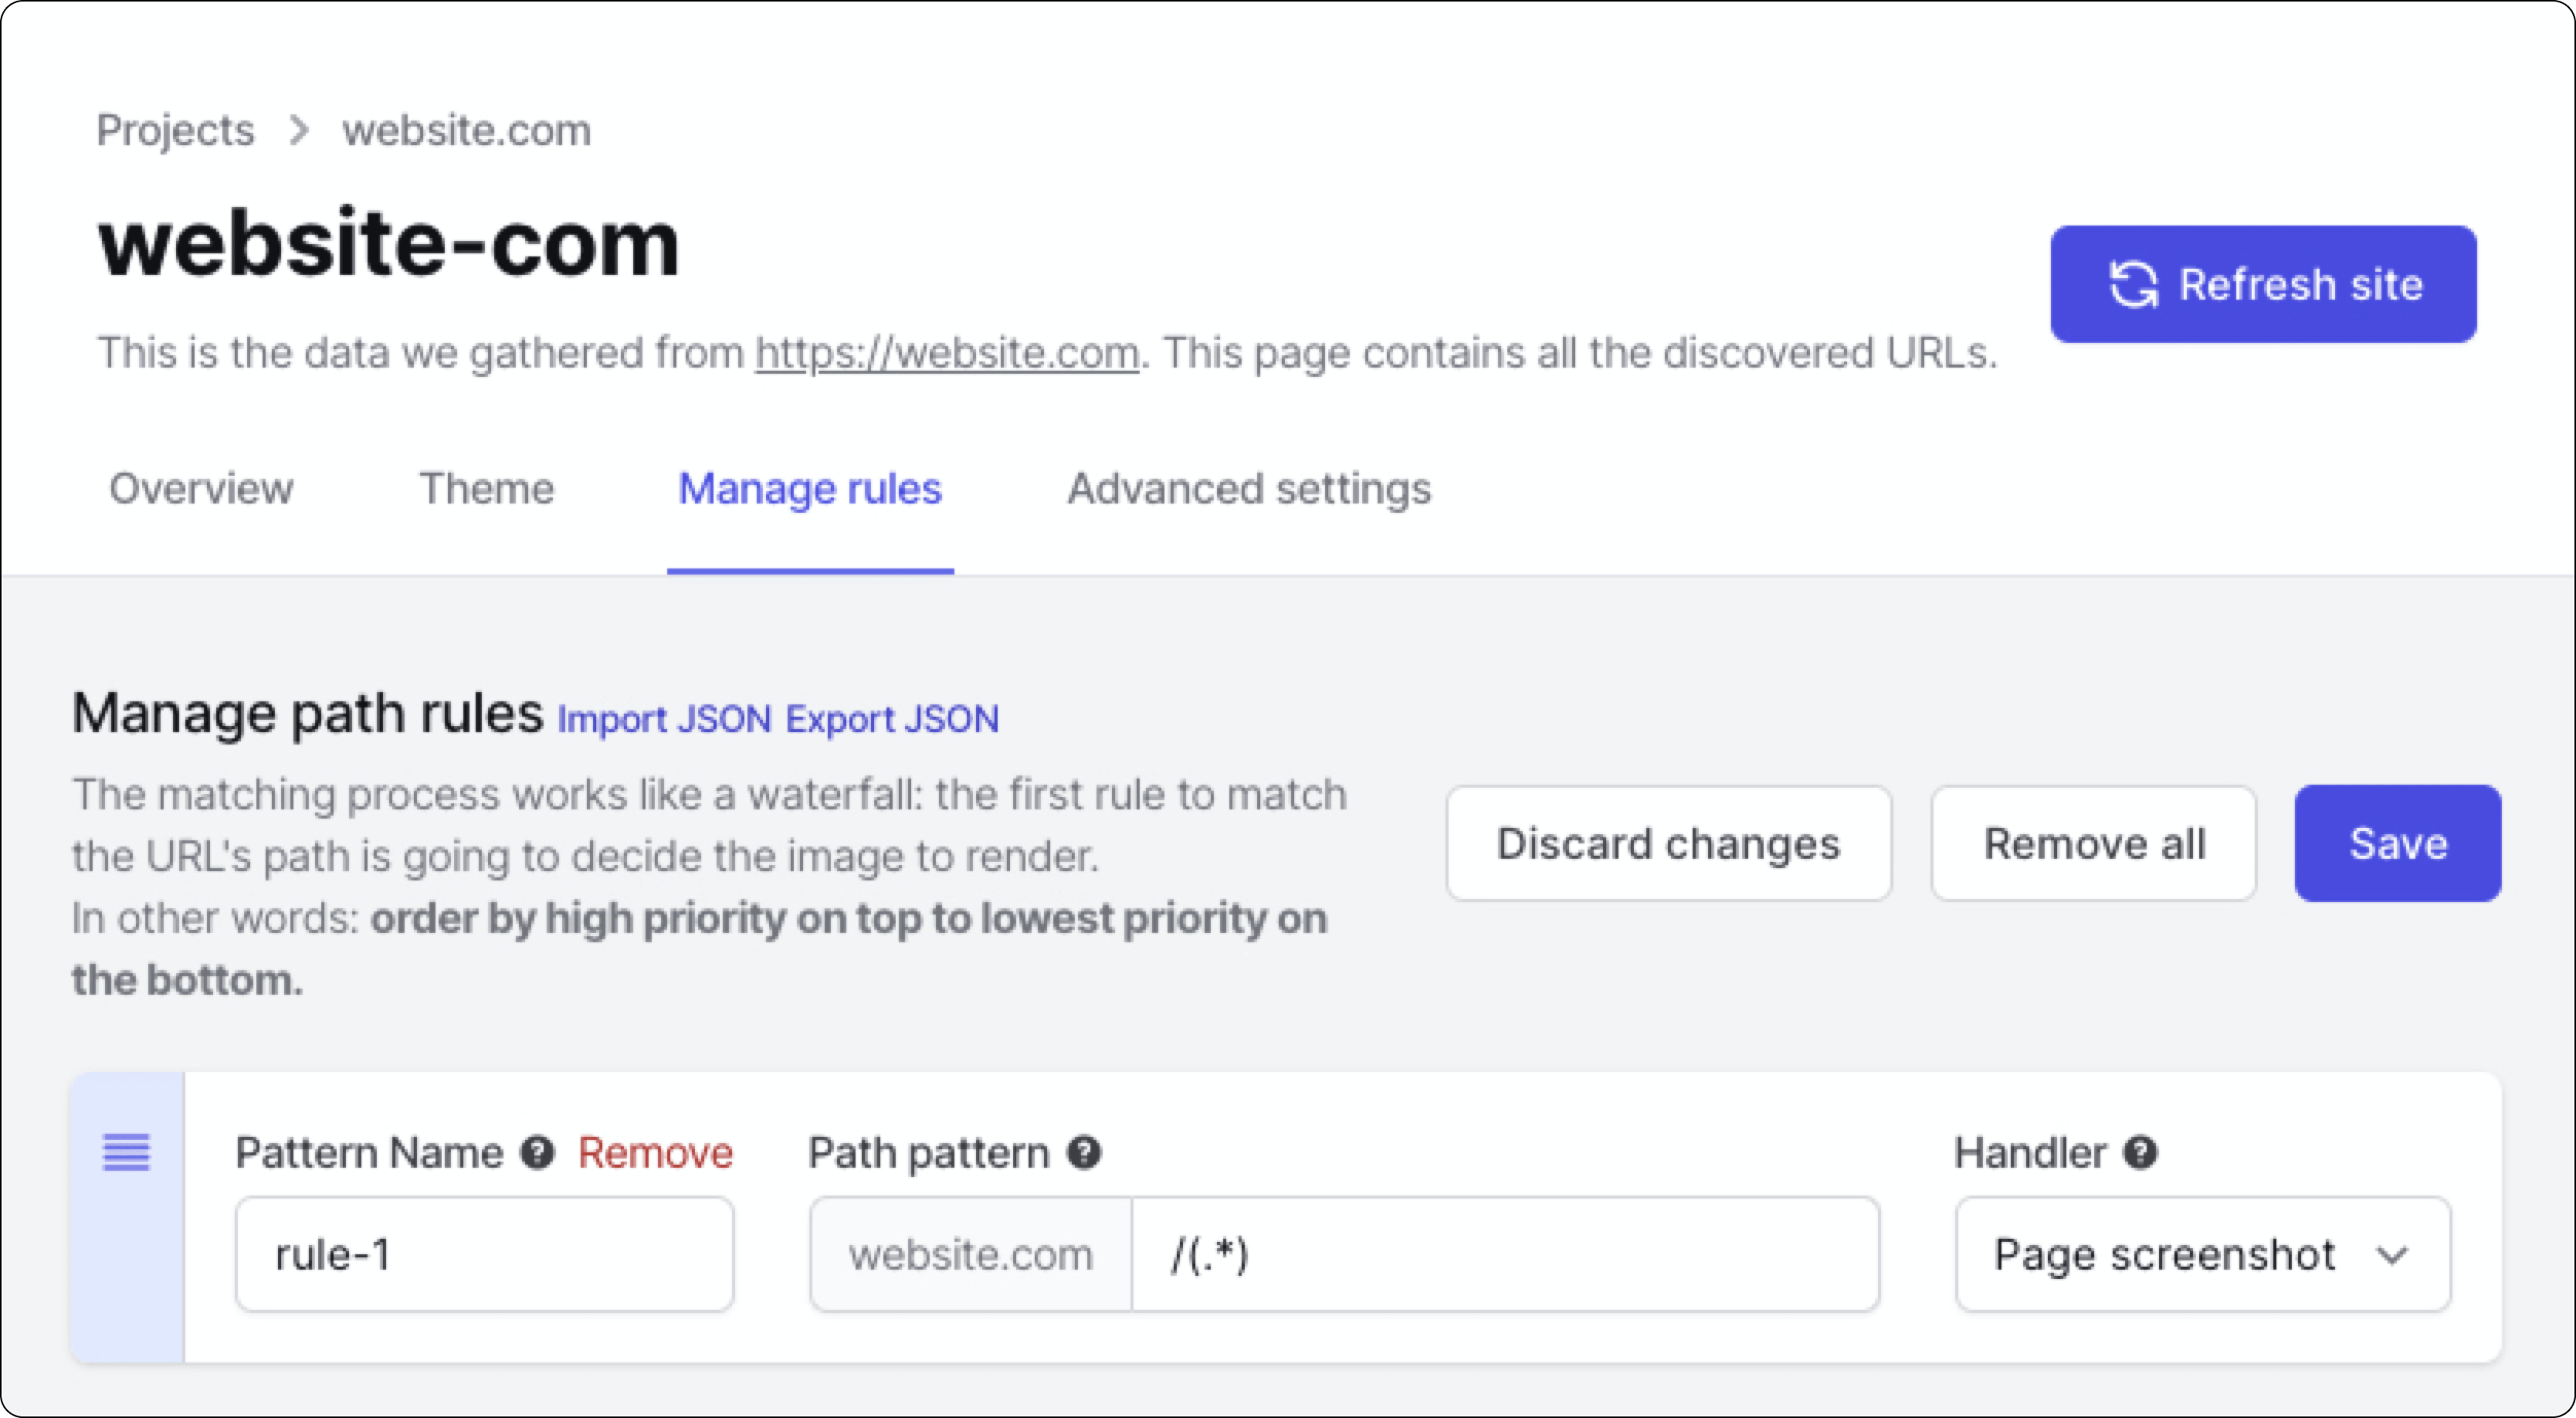](https://flyyer.io/dashboard)
Voilà!
## Advanced usage
Here you have a detailed full example for project `website-com` and path `/path/to/product`.
Advanced features include:
- Custom variables: additional information for your preview that is not present in your website. [Note: if you need customization you should take a look at [Flyyer Render](#flyyer-render)]
- Custom metadata: set custom width, height, resolution, and more (see example).
- Signed URLs.
```php
$flyyer = new Flyyer(
// [Required] Your project slug, find it in your dashboard https://www.flyyer.io/dashboard/_/projects/_/integrate.
'website-com',
// [Recommended] The current path of your website (by default it's `/`).
'/path/to/product',
// [Optional] In case you want to provide information that is not present in your page set it here.
[
'title' => 'Product name',
'img' => 'https://flyyer.io/img/marketplace/flyyer-banner.png'
],
// [Optional] Custom metadata for rendering the image. ID is recommended so we provide you with better statistics.
[
'id' => 'jeans-123', // recommended for better stats
'v' => '12369420123', // specific handler version, by default it's a random number to circumvent platforms' cache,
'width' => 1200,
'height' => 600,
'resolution' => 0.9, // from 0.0 to 1.0
'agent' => 'whatsapp', // force dimensions for specific platform
]);
// Use this image in your tags (og:image & twitter:image)
print($flyyer->href());
// > https://cdn.flyyer.io/v2/website-com/_/__id=jeans-123&__v=1618281823&img=https%3A%2F%2Fflyyer.io%2Fimg%2Fmarketplace%2Fflyyer-banner.png&title=Product+name/path/to/product
```
For signed URLs, just provide your secret (find it in Dashboard > Project > Advanced settings) and choose a strategy (`HMAC` or `JWT`).
```php
$flyyer = new Flyyer(
'website-com',
'/path/to/product',
[],
[ 'id' => 'jeans-123' ],
'your-secret-key',
'JWT', // or 'HMAC'
);
$url = $flyyer->href();
// > https://cdn.flyyer.io/v2/website-com/jwt-eyJ0eXAiOiJKV1QiLCJhbGciOiJIUzI1NiJ9.eyJwYXJhbXMiOnsiX19pZCI6ImplYW5zLTEyMyJ9LCJwYXRoIjoiXC9wYXRoXC90b1wvcHJvZHVjdCJ9.X8Vs5SGEA1-3M6bH-h24jhQnbwH95V_G0f-gPhTBTzE?__v=1618283086
```
## Flyyer Render
As you probably realized, **Flyyer** uses the [rules defined on your dashboard](https://flyyer.io/dashboard/_/projects) to decide how to handle every image based on path patterns. It analyses your website to obtain information and then render a content-rich image with no effort. Let's say _"Flyyer delivers images based on the content of this route"_.
**Flyyer Render** instead requires you to explicitly declare template and variables for the images to render, **giving you more control for customization**. Let's say _"FlyyerRender delivers an image using this template and these explicit variables"_.
```php
$flyyer = new FlyyerRender("tenant", "deck", "template");
$flyyer->variables = [
"title" => "Hello world!"
];
// Use this image in your