# Getting Started Guide - Using the TV Platform Player Studio to Create a Player
### Table of Contents
- [Creating a New Vidiun Player](#create)
- [Generating the Vidiun Player Embed Code](#generate)
- [Embedding the Vidiun Player into Your Website](#embed)
- [Configuring Your Player](#config)
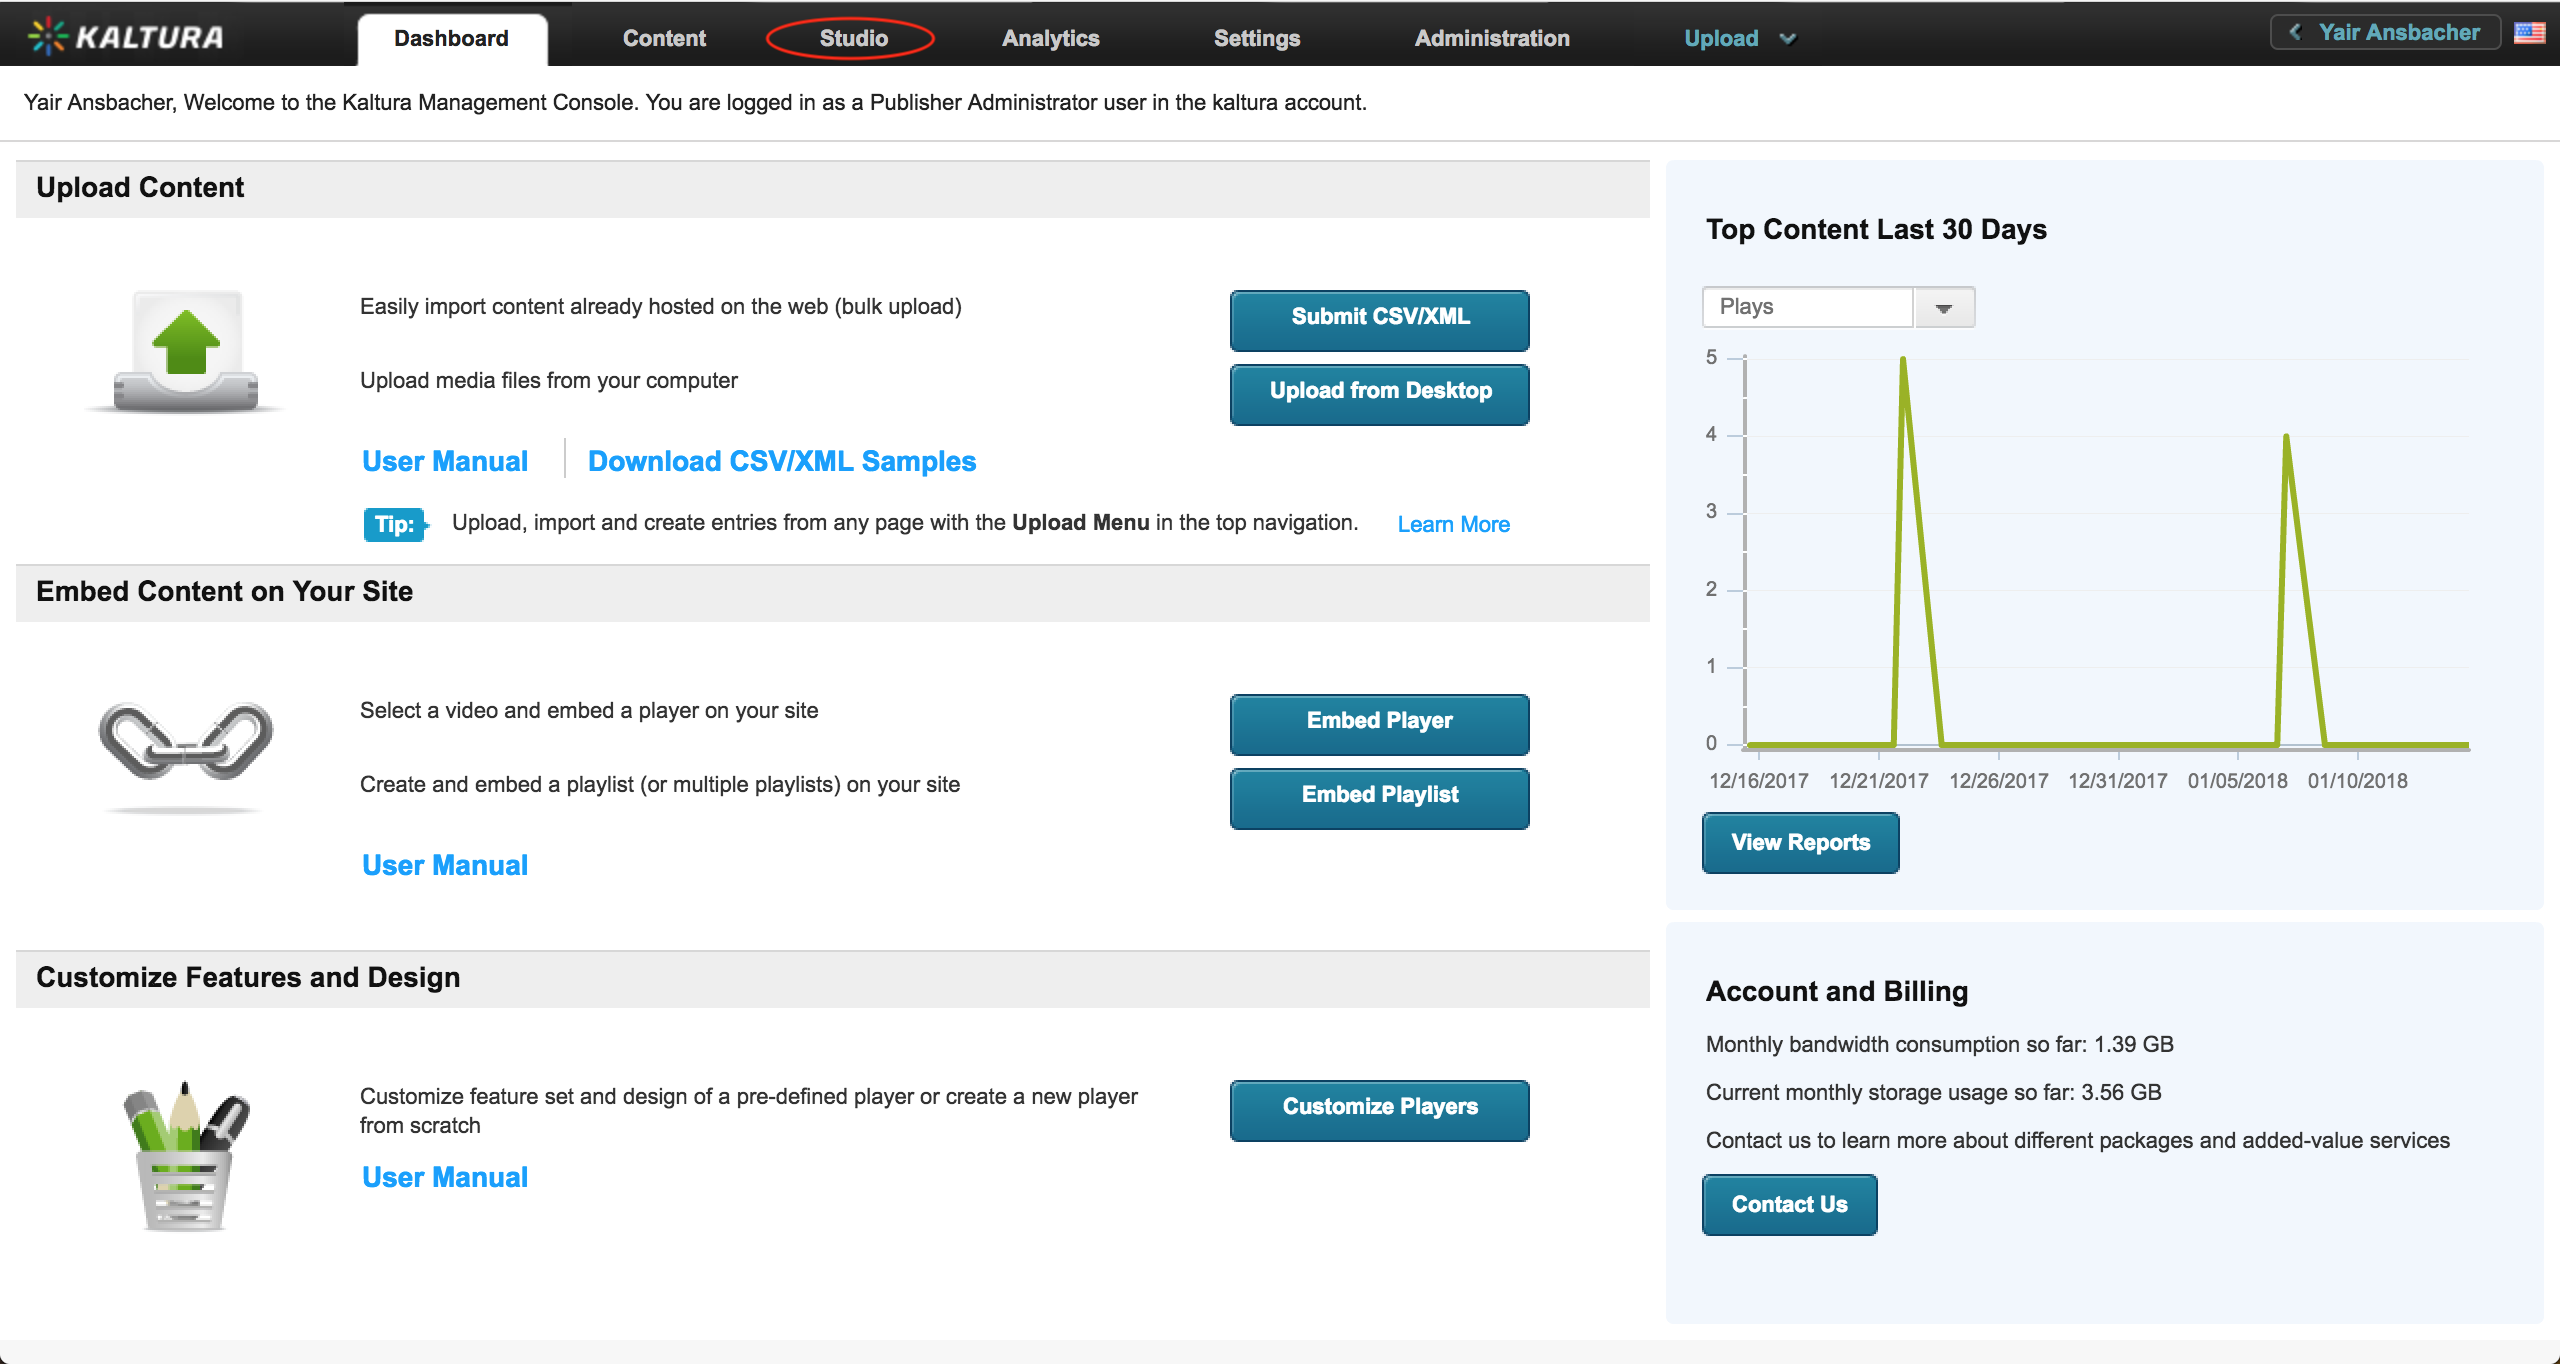
To create a new Vidiun Player using the TV Platform Player Studio, you'll need to have an active Vidiun Management Console (VMC) account. For more information on getting an account, see [here](https://corp.vidiun.com/Products/Video-Applications/Vidiun-Video-Management-Console).
## Creating a New Vidiun Player
1. Open the [VMC](https://vmc.vidiun.com/index.php/vmc/vmc4#studio%7Cuniversal_studio) and select the **Studio** tab.
2. Next, select **TV Platform Player Studio**.
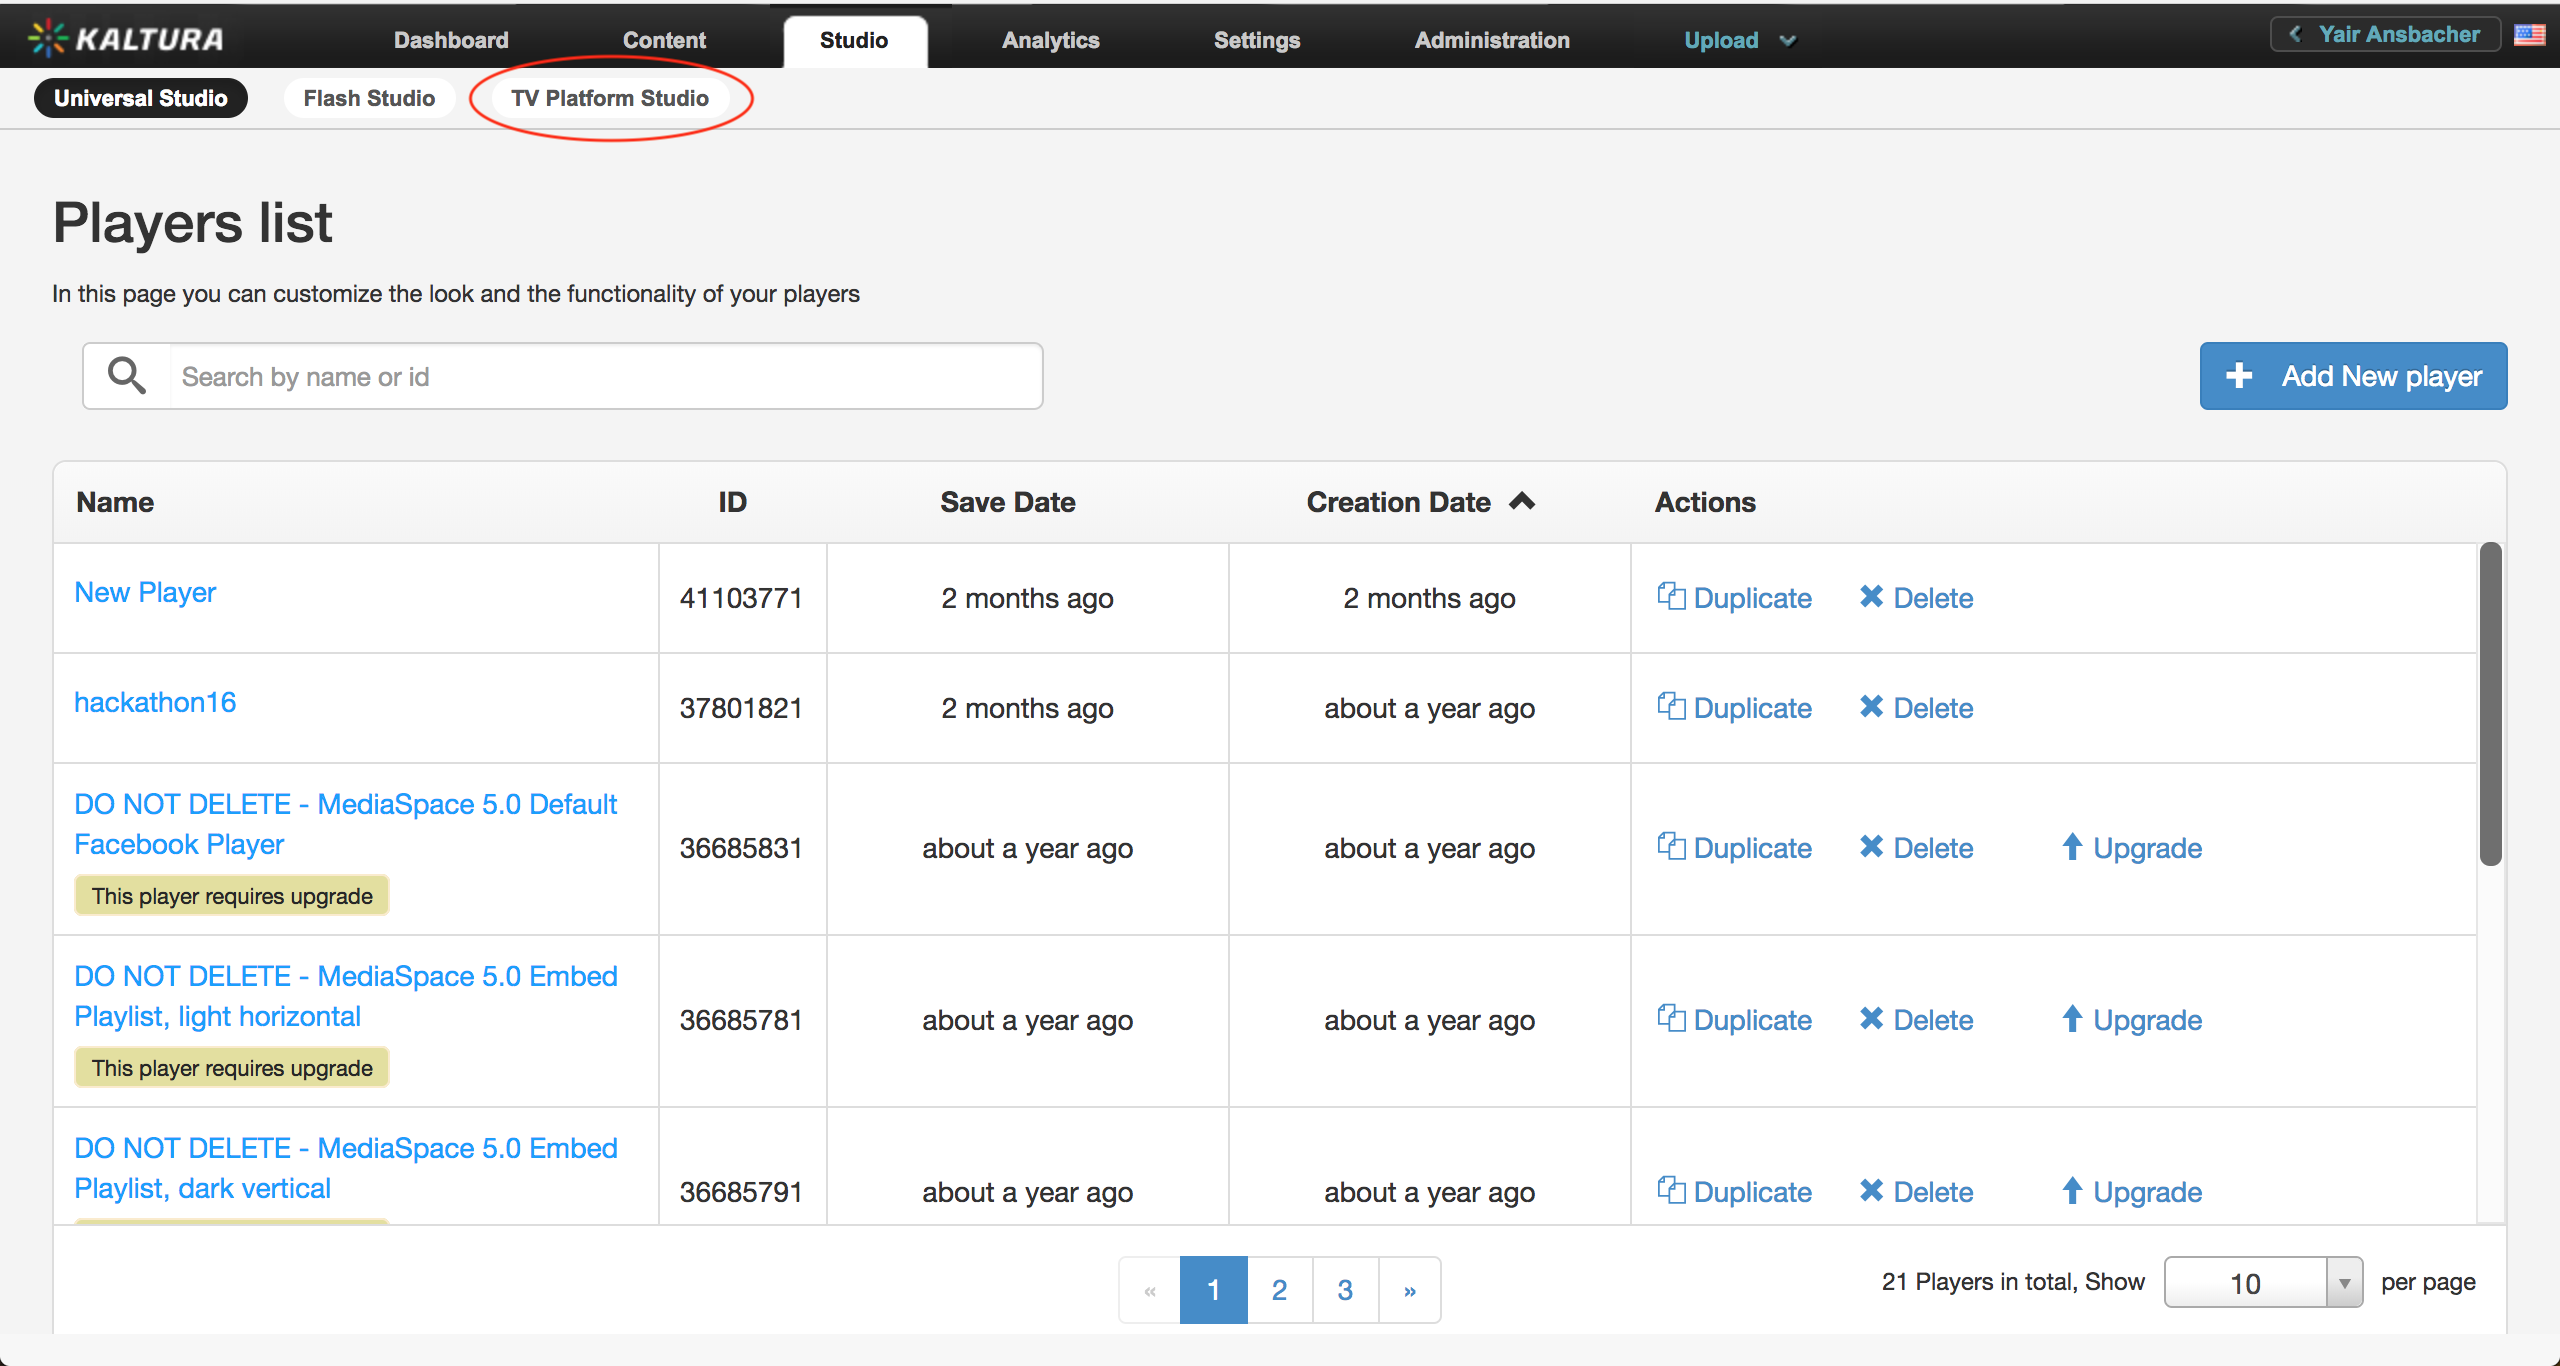
This displays a list of available players, including the players you've already created.
3. To create a new player, click **Add New Player**.

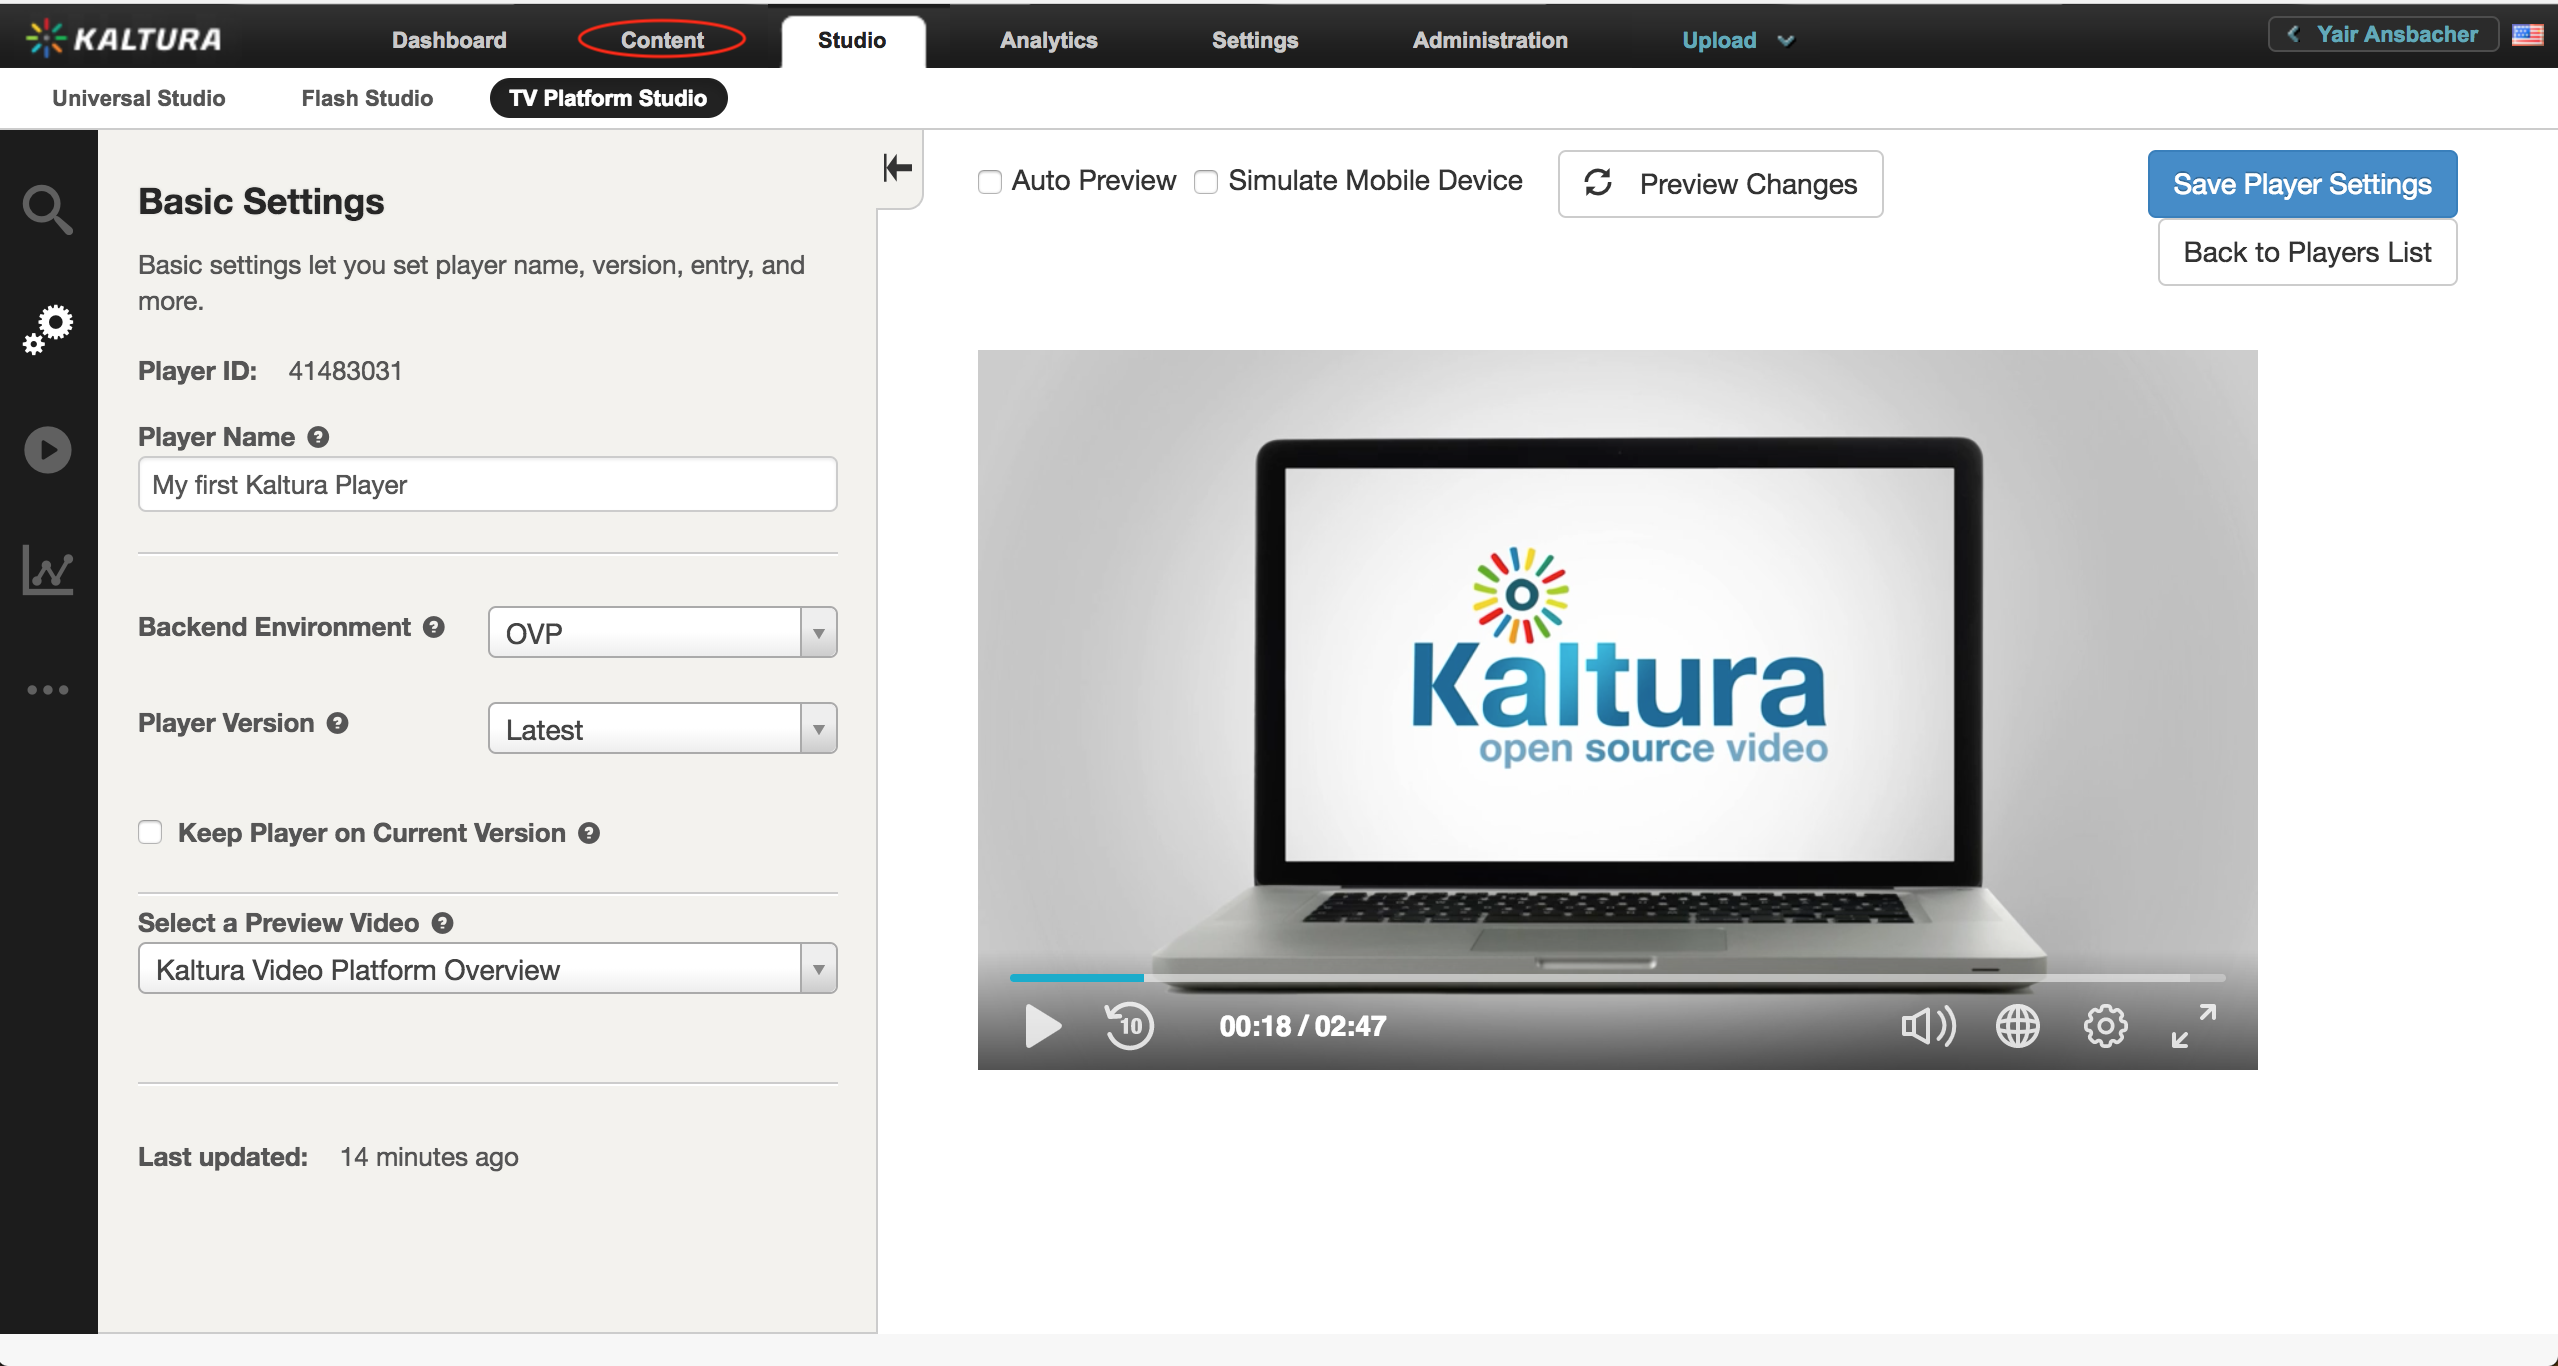
After creating the new player, you can customize it using the Studio; however, for now, creating a player with the default settings is enough.
4. Call the new player _"My first Vidiun Player"_ and click **Save Player Settings**.

That's it - you've created a new Vidiun Player.
## Generating a Vidiun Player Embed Code
1. To generate an embed code, go to the **Content** tab, where you can manage your loaded entries, playlists, etc.
2. Select the entry you wish to embed, open the _Select Action_ dropdown and select **Preview & Embed**.

Here you can choose the player you want to use in the embed code as well as the embed type - Auto, Dynamic or iframe. See [Embed Code Types](./embed-types.md) for more information.
3. From the player list, select _My first Vidiun Player_, which is the player you just created.
4. Click **Show Advanced Options > Dynamic Embed**.
5. Click **Copy** to copy the embed code to the clipboard.

## Embedding the Vidiun Player into Your Website
1. First, create a simple html file:
```html
```
2. Add a `div` element for the player (the `id` must be compatible with the `targetId` of the embed code):
```html
```
3. Paste the embed code from the clipboard to the `body`:
```html
```
**You now have an embedded player in your website.**
## Configuring the Player
After creating a player and embedding it in your site, you may want to configure it using the wide range of configuration options. To learn more, see player [configuration](./configuration.md).