# thing-it-device-enlighted
[](https://nodei.co/npm/thing-it-device-enlighted/)
[](https://nodei.co/npm/thing-it-device-enlighted/)
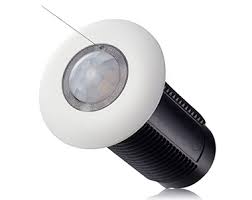
[thing-it-node] Device Plugin for [Enlighted © Sensors](http://www.enlightedinc.com).
This allows you to
* control and obtain the status of Enlighted Fixtures over the Internet and
* obtain the occupancy status of Enlighted Areas
by means of [thing-it-node](https://github.com/marcgille/thing-it-node) and [thing-it.com](http://www.thing-it.com).
## Installation
### Installation of NodeJS and [thing-it-node]
First, install [nodejs](https://nodejs.org/en/download/) on your computer (e.g. your PC or your Raspberry Pi).
Then install **[thing-it-node]** via
```
npm install -g thing-it-node
```
### Initialization and Start of [thing-it-node]
The **[thing-it-device-enlighted]** Plugin is installed with **[thing-it-node]**, hence there is no need to install it separately.
The Plugin supports Autodiscovery, hence you only have to create a directory in which you intend to run the configuration, e.g.
```
mkdir ~/enlighted-test
cd ~/enlighted-test
```
and invoke
```
tin init
```
and then start **[thing-it-node]** via
```
tin run
```
Install the **thing-it Mobile App** from the Apple Appstore or Google Play and set it up to connect to **[thing-it-node]**
locally as described [here](https://thing-it.com/thing-it/#/documentationPanel/mobileClient/connectionModes) or just connect your browser under
[http://localhost:3001](http://localhost:3001).
## Mobile UI
The following screenshot shows the Node Page of the [sample configuration]("./examples.configuration"):

## Where to go from here ...
After completing the above, you may be interested in
* Configuring additional [Devices](https://www.thing-it.com/thing-it/#/documentationPanel/mobileClient/deviceConfiguration),
[Groups](https://www.thing-it.com/thing-it/#/documentationPanel/mobileClient/groupConfiguration),
[Services](https://www.thing-it.com/thing-it/#/documentationPanel/mobileClient/serviceConfiguration),
[Event Processing](https://www.thing-it.com/thing-it/#/documentationPanel/mobileClient/eventConfiguration),
[Storyboards](https://www.thing-it.com/thing-it/#/documentationPanel/mobileClient/storyboardConfiguration) and
[Jobs](https://www.thing-it.com/thing-it/#/documentationPanel/mobileClient/jobConfiguration) via your **[thing-it] Mobile App**.
* Use [thing-it.com](https://www.thing-it.com) to safely connect your Node Box from everywhere, manage complex configurations, store and analyze historical data
and offer your configurations to others on the **[thing-it] Mesh Market**.
* Explore other Device Plugins like [Texas Instruments Sensor Tag](https://www.npmjs.com/package/thing-it-device-ti-sensortag), [Plugwise Smart Switches](https://www.npmjs.com/package/thing-it-device-plugwise) and many more. For a full set of
Device Plugins search for **thing-it-device** on [npm](https://www.npmjs.com/). Or [write your own Plugins](https://github.com/marcgille/thing-it-node/wiki/Plugin-Development-Concepts).