A local quick-command manager for the Tabby terminal.
简体中文 · English
The plugin adds a Quick Commands button to the upper-right corner of Tabby and opens a drawer from the right. It provides a central place to manage, search, and run frequently used commands, with support for shortcuts, multi-session sending, line-by-line execution, output triggers, and command-library import and export. > This project has not been tested exhaustively. I built it with AI assistance because I could not find a quick-command plugin that felt both practical and polished. There may still be bugs and unhandled cases. Feel free to open an issue, and I will improve it over time. 🫨 ## Project Links - Source code: [windyy0/tabby-windy-quick-commands](https://github.com/windyy0/tabby-windy-quick-commands) - Bug reports and suggestions: [GitHub Issues](https://github.com/windyy0/tabby-windy-quick-commands/issues) - npm package: [tabby-windy-quick-commands](https://www.npmjs.com/package/tabby-windy-quick-commands) ## Screenshot ### Overview 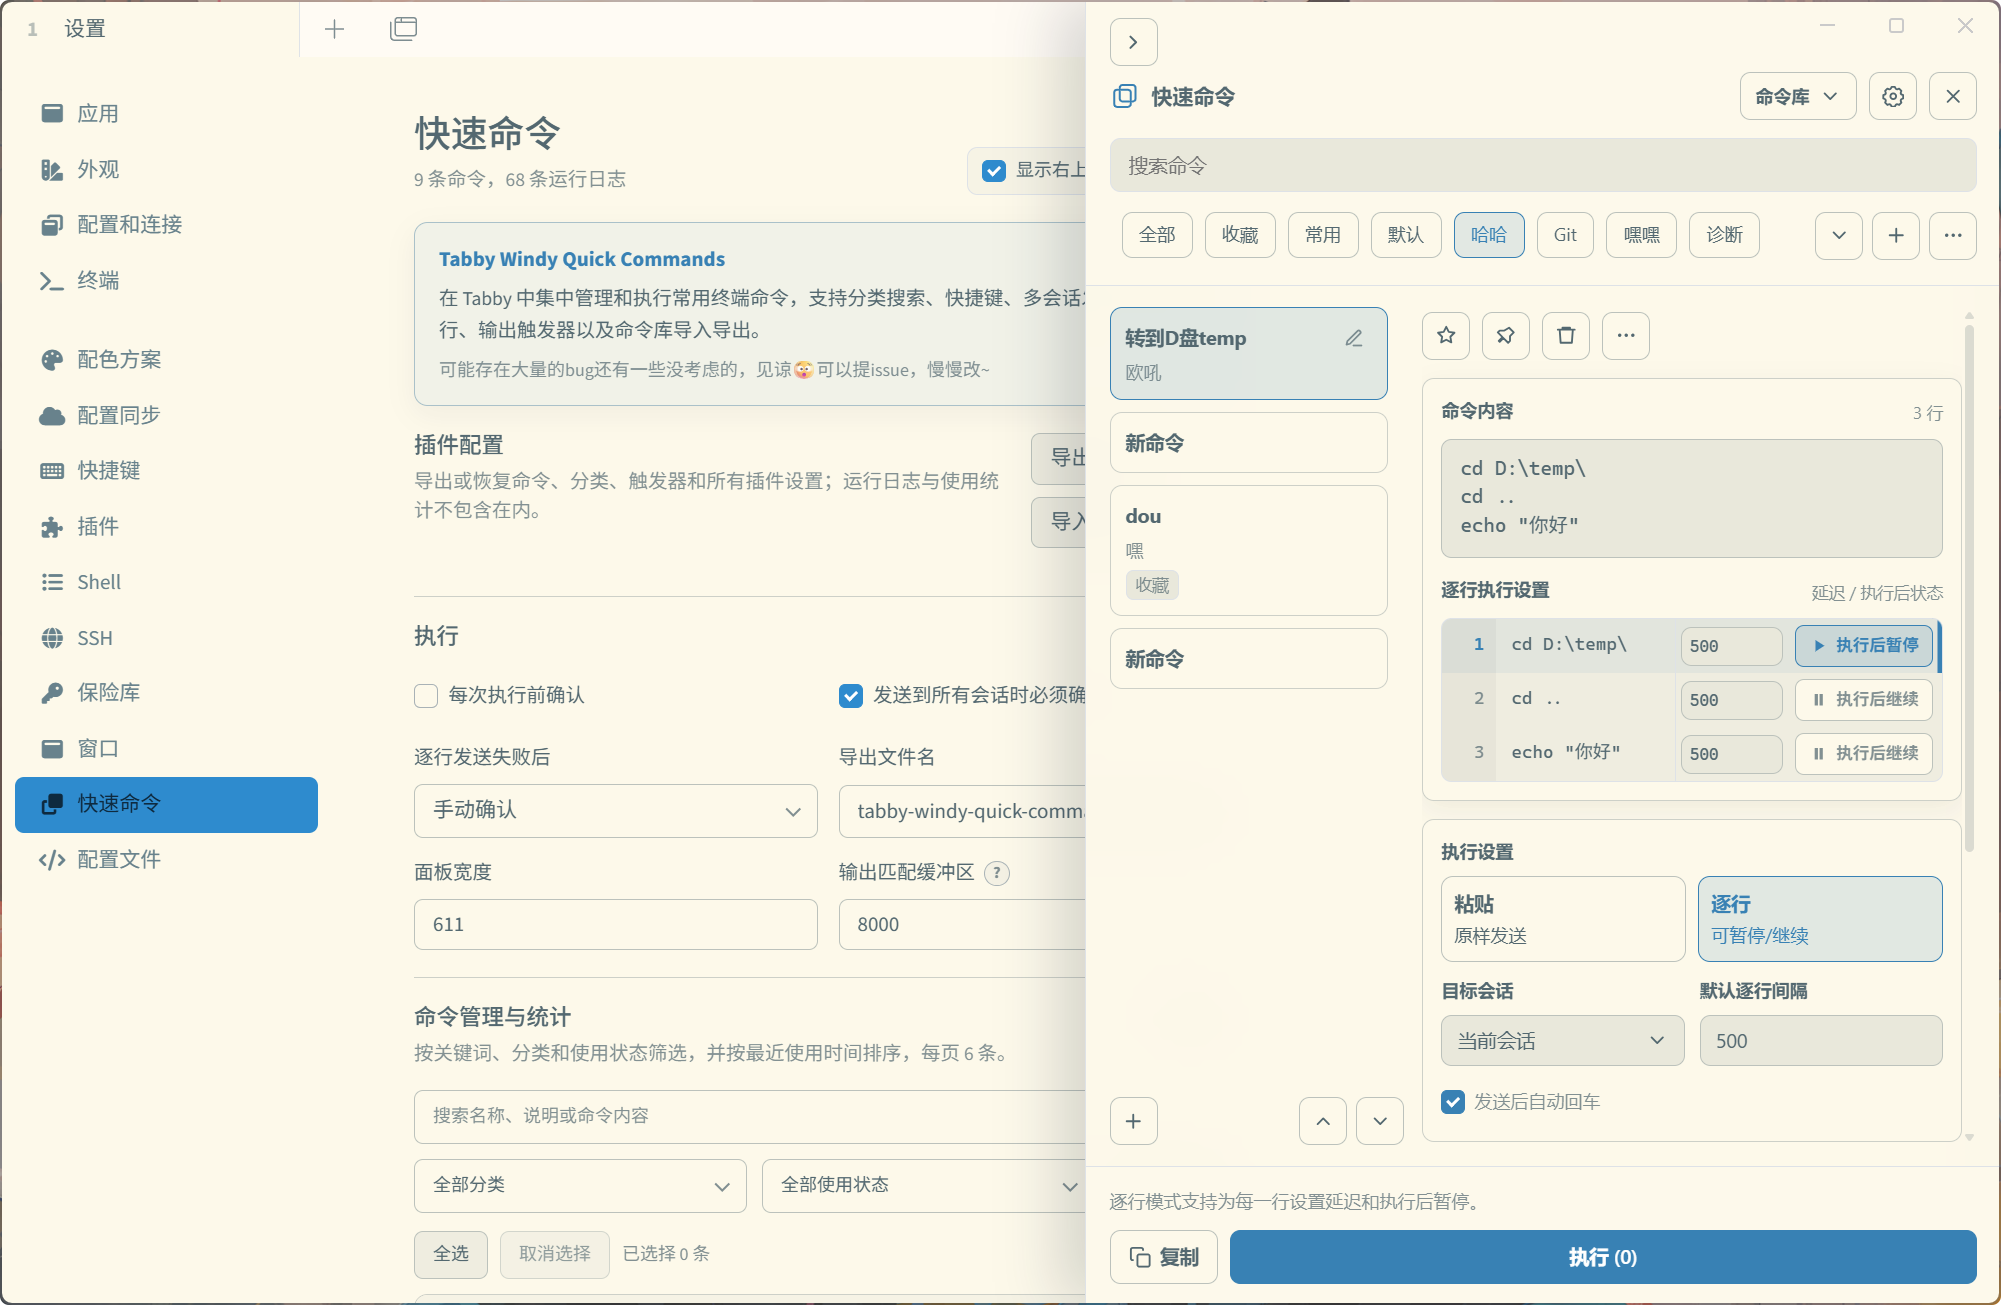 ## Features - Toggle the drawer from the toolbar or with a keyboard shortcut - Use keyboard shortcuts and switch focus between the drawer and terminal - Search, create, edit, delete, duplicate, favorite, and pin commands - Assign a keyboard shortcut to an individual command - Choose between whole-command paste and line-by-line execution - Run output triggers after the full command is sent or bind them to a specific line in line-by-line mode - Send to the current terminal or broadcast to every open terminal session - Import and export command libraries and plugin configuration - View command execution and management activity logs in a filterable table - Automatically switch between Chinese and English interfaces ## Installation ### Install from the Tabby Plugin Manager After the package has been published to npm, open `Settings -> Plugins` in Tabby and search for: ```text windy-quick-commands ``` Fully restart Tabby after installation. ### Install from Source The repository includes a local installation script for Windows. After preparing the development environment described below, run these commands in the repository directory: ```powershell npm ci npm run install:tabby:restart ``` The script builds the plugin, copies the minimal runtime files into Tabby's user plugin directory, and restarts Tabby. To install without restarting, run: ```powershell npm run install:tabby ``` ## Usage Click the Quick Commands button in the upper-right corner of Tabby to open the drawer. By default, press `Escape` to switch focus between drawer search and the active terminal, and press `Ctrl+Alt+H` to show or hide the shortcut hints on the left. > On first use, an example category and command are created in Tabby's current interface language. ### Import and Export - **Export commands** in the drawer exports commands, categories, and output triggers only. - **Export** on the Settings page exports the command library and all plugin settings, but excludes activity logs and usage statistics. - Both files use the unified v1 format and can be recognized from either the drawer or the Settings page. Importing a configuration file from the drawer extracts its commands only. Importing from Settings lets you choose between importing commands and importing the full configuration. - **Restore defaults** resets plugin settings while keeping existing commands, categories, output triggers, activity logs, and usage statistics. > The export-file `version` remains fixed at `1` and will not increase with later format changes. The new v1 format is not compatible with command-library or configuration backups created in older formats. ### Output Triggers In short: match condition -> successful match -> rule -> success action -> after-match action -> timeout action. An output trigger waits for specified terminal output before deciding how execution should continue. It is useful for workflows that must wait for terminal feedback, such as login prompts, successful builds, or deployment results. 1. Add a rule under a command's **Output triggers** section. 2. Choose when it runs: after the full command is sent, or after a specified line runs in line-by-line mode. 3. Enter a success or error match using plain text or a regular expression. 4. Configure the success or error action, the after-match flow, and the timeout. A separate timeout action runs if the wait expires. Success and error matches can independently do nothing, send a custom command, or run an existing command. After the action finishes, execution enters the shared after-match flow: - Full-command rules can continue to the next rule or stop automation for that session. - Line-specific rules can continue to the next rule, skip the remaining rules for that line and continue to the next line, or stop the remaining line-by-line execution. > Multiple rules with the same trigger timing run in order. When sending to multiple terminals, each session matches its output independently. The interface is designed to work with a wide range of color themes. ## Development ### Requirements and Tools - [Tabby website](https://tabby.sh/): install the Tabby client; the latest stable release is recommended. - [Latest Tabby release](https://github.com/Eugeny/tabby/releases/latest): download installers and review release notes. - [Node.js](https://nodejs.org/): Node.js 18 or later is required; npm is included with Node.js. - [Git](https://git-scm.com/): clone the repository and manage versions. - [PowerShell 7](https://learn.microsoft.com/powershell/): the Windows installation, restart, and cleanup scripts require `pwsh`; tests and builds do not otherwise require Windows. - Optional editor: [Visual Studio Code](https://code.visualstudio.com/) with its built-in TypeScript support. - An [npm account](https://www.npmjs.com/). > Tabby currently depends on Angular 15, so this project uses the compatible TypeScript 4.9 release. The repository configures VS Code and Cursor to use the workspace TypeScript version from `node_modules`. If your editor still reports deprecation warnings from a newer TypeScript version, reload the window or run `TypeScript: Restart TS Server`. ### Local Installation Install dependencies and install the plugin into the local Tabby plugin directory: ```powershell npm ci npm run install:tabby npm run install:tabby:dev # Dev build ``` Both `npm ci` and `npm install` install project dependencies. Run either one from this repository's root directory: | Command | Installation behavior | When to use it | | --- | --- | --- | | `npm ci` | Removes the project's existing `node_modules`, then installs strictly from `package-lock.json` without changing it. Fails if the lockfile is missing or inconsistent with `package.json`. | Reproducing the repository's fixed dependency environment and running automated tests | | `npm install` | Installs using dependency declarations and an available lockfile without first clearing the entire `node_modules` directory. Creates or updates the lockfile when needed. | Everyday local development, creating a lockfile, or changing dependencies | > You can use `npm install` directly for local development; `npm ci` is not required. Both commands install this project's dependencies, not the plugin in Tabby. Run tests and build the plugin: ```powershell npm test npm run build ``` Install into the local Tabby instance and restart it: ```powershell npm run install:tabby:restart npm run install:tabby:dev:restart # Dev build ``` **To uninstall the plugin, click Uninstall in Tabby's Plugin Manager.** --- Tabby development resources: - [Tabby source repository](https://github.com/Eugeny/tabby) - [Tabby Plugin API documentation](https://docs.tabby.sh/) - [Tabby development guide (HACKING.md)](https://github.com/Eugeny/tabby/blob/master/HACKING.md) - [Tabby Core API](https://docs.tabby.sh/classes/LocaleService.html) Common development commands: | Command | Description | | --------------------------------- | --------------------------------------------------------- | | `npm run typecheck` | Check TypeScript types | | `npm test` | Compile and run tests | | `npm run clean` | Remove `dist` and `dist-tests` | | `npm run build` | Clean and build `dist` | | `npm run build:dev` | Build Dev into `dist-dev` without installing | | `npm run watch` | Continuously rebuild when source files change | | `npm run install:tabby` | Build and install into the local Tabby instance | | `npm run install:tabby:restart` | Build, install, and restart Tabby | | `npm run install:tabby:dev` | Build and install Dev, preserving existing Dev data | | `npm run install:tabby:dev:restart` | Build and install Dev, then restart Tabby | | `npm run clean:tabby:dev` | Clear Dev data; if Tabby is running, confirm to close, clear, and restart; otherwise, only clear | | `npm run publish:check` | Run all pre-publish checks and preview the npm package | | `npm run release:validate` | Validate versions, update notes, and the latest npm version | | `npm run release` | Run all checks, confirm, and publish to npm | | `npm pack` | Create a local npm installation package | | `npm run clean:pack` | Remove local `.tgz` installation packages | The plugin entry point is `dist/index.js`. The `dist` directory is not committed to Git; it is generated before builds and npm publishing. ### Local Dev Build (Alongside Stable) | Item | Stable | Dev | | --- | --- | --- | | Local package name | `tabby-windy-quick-commands` | `tabby-windy-quick-commands-dev` | | Data directory (under Tabby's configuration directory) | `windy-quick-commands` | `windy-quick-commands-dev` | | Build directory | `dist` | `dist-dev` | | Default command library | One example command in the Default category, favorited but not pinned | Same as stable | | Default settings, execution, and shortcuts | Standard functionality | Same as stable | | Update information and history | Release information from the stable package | Reads the same stable package, with separate caches and update check preferences | | Update installation | Install the stable package online | Update the local source and reinstall Dev; does not install the stable package | | Legacy configuration migration | Stable namespace | Same logic, using the Dev namespace | The default Dev data path on Windows is `%APPDATA%\tabby\windy-quick-commands-dev`. The cleanup command deletes only this directory, including configuration, backups, logs, statistics, and update caches. For a custom Tabby configuration directory, use matching paths for installation and data operations: ```powershell # Example: change these paths as needed; the installation parameter also works for stable npm run install:tabby:dev -- -TabbyPluginsDir 'D:\TabbyProfile\plugins' npm run clean:tabby:dev -- -TabbyConfigDir 'D:\TabbyProfile' ``` Clearing Dev data and configuration: When `clean:tabby:dev` detects that Tabby is running, it prompts to close Tabby → clear Dev data → restart. Only Enter confirms. Ctrl+C or any other input cancels; noninteractive environments never confirm automatically. If Tabby is already closed, the command only clears data without prompting or starting Tabby. Open Tabby yourself afterward. The Enter confirmation prompt follows Tabby's interface language, falling back to the Windows display language if it cannot be read. This workflow has only been tested on Windows. ### Update Sources Sources are prioritized according to the current network quality. **Update checks** - Official npm registry: `registry.npmjs.org` - npmmirror: `registry.npmmirror.com` **Update history** - jsDelivr - npmmirror `/files` > To read files through npmmirror's unpkg service, the package must first be added to its allowlist. See the [npmmirror unpkg allowlist project on GitHub](https://github.com/cnpm/unpkg-white-list). ## Publishing to npm > Packages whose names begin with `tabby-` and include the `tabby-plugin` keyword can be discovered by Tabby's Plugin Manager after publication. ### Release Steps ```powershell # 1. Run this for the first release or after your login expires npm login # 2. Choose one command to update the versions in package.json and package-lock.json npm version patch --no-git-tag-version # Fixes and small changes npm version minor --no-git-tag-version # New features npm version major --no-git-tag-version # Breaking changes # 3. Edit update-notes.json, synchronize its version, and add Chinese and English notes # 4. Validate and publish npm run release ``` This command verifies the npm login, version, and update notes; runs type checking, tests, and a package preview; and publishes only after you press Enter to confirm. It does not perform any Git operations. Run `npm run publish:check` to validate without publishing. Running `npm publish` directly also validates the version and update notes automatically. ### Update Notes Maintain release notes in `update-notes.json`. Only the current release needs to be included; there is no need to accumulate notes from earlier versions. ```json { "version": "1.0.0", "zh-CN": { "title": "Update title", "sections": [ { "title": "Added", "items": ["New feature one", "New feature two"] } ], "notice": "Restart Tabby after installation." }, "en": { "title": "Update title", "sections": [ { "title": "Added", "items": ["New feature one", "New feature two"] } ], "notice": "Restart Tabby after installation." } } ``` The sample text above is shown entirely in English for readability. For an actual release, write the `zh-CN` values in Chinese and the `en` values in English. The `version` must match `package.json` and `package-lock.json`. Both languages require a `title`; short notes can contain just the title. `sections` and `notice` are optional. When provided, `sections` must contain at least one group, each with a title and at least one item. Other interface languages fall back to English. ## License This project is licensed under the [MIT License](./LICENSE).