# read-docs
Maintained by SproutSeeds. Research stewardship: Fractal Research Group ([frg.earth](https://frg.earth)).
A macOS-first, local-first speech workspace for reading documents, capturing
dictation, and keeping the resulting material organized in one local Library.
It streams `.pdf`, `.docx`, `.txt`, and `.md` files through local neural TTS,
reads highlighted text with Right Command or Command-L, captures Option-key
dictation and uploaded audio through local speech-to-text, and keeps playback
continuous by preparing later chunks in the background.
## Why this exists
- Uses Mac-local Kokoro and speech-to-text as the primary speech path.
- Keeps OpenAI speech as an explicit optional backend that loads only from your
environment, macOS Keychain, or ORP secrets when you select it.
- Supports optional private remote speech through Tailscale, with local `say`
fallback on macOS.
- Turns reading, dictation, and external app handoffs into durable Library cards.
- Tracks a local Signal Map for STT/TTS word counts, reading completion, and
batch analysis.
- Reads with understanding in `smart` mode instead of spelling every character.
- Prefetches chunks so playback remains continuous.
- Supports pause/resume, active-field dictation insertion, and selectable speech
backends.
## Platform support
The app experience is macOS-first. The menu-bar app, login agent, global selection
hotkey, and right-click Services integration are macOS features.
The document reader engine is still a Python CLI and may work on Linux or Windows
with compatible speech dependencies, but the packaged app workflow is supported on
macOS.
## Quick start: macOS app
Install the npm bootstrapper, then install the managed macOS app agent:
```bash
npm install -g read-docs
read-docs install
read-docs status
```
`read-docs install` copies the runtime into `~/.doc-reader-managed`, prepares its
Python environment, registers a LaunchAgent, starts the menu-bar app, and installs
the `Read with Doc Reader` Services item for highlighted text.
Current native-wrapper builds require Apple's Command Line Tools because the app
bundle is compiled locally during install:
```bash
xcode-select --install
```
Useful app commands:
```bash
read-docs start
read-docs open
read-docs dock
read-docs stop
read-docs restart
read-docs status
read-docs doctor
read-docs ensure
read-docs uninstall
```
Startup runs a tailnet orchestration pass: the web app is started, private
Tailscale Serve is checked or configured, and the Mac-local speech service
starts when needed. Remote speech startup is opt-in with
`DOC_READER_REMOTE_SPEECH_AUTOSTART=1`. Use `read-docs ensure` to run that pass directly, or
`read-docs doctor --json` to inspect readiness without starting dependencies.
Opening `Doc Reader.app` runs the same readiness pass after the local web app is
reachable, so closing and reopening the app also repairs stopped speech helpers.
The installer also creates `~/Applications/Doc Reader.app` with the native app
icon and registers it with Launch Services. You can launch it from Applications,
Spotlight, or the Dock. The Dock/menu-bar app opens the web page, which is the
canonical DocReader interface.
## Canonical web app
Doc Reader runs as a local web app and can be exposed to your tailnet:
```bash
read-docs tailscale
read-docs web-status
```
By default, the local service listens on `http://127.0.0.1:8766`. Tailscale
Serve can expose the same page at `https://:8766` inside the
tailnet. The web app supports document upload, audio transcription, text
reading, Library cards, play, pause, resume, stop, and voice settings.
Local-only controls:
```bash
read-docs web-start
read-docs web-stop
read-docs web
```
## Local neural text-to-speech
Doc Reader runs private neural speech sidecars as the normal app speech path.
The default app playback backend stays on your Mac:
```text
Mac Kokoro
```
The selectable private backends are:
```text
Mac Kokoro -> Remote Kokoro -> Remote Chatterbox -> macOS say
```
Doc Reader cleans Markdown/code-heavy text and splits long passages before they
reach the neural TTS sidecars. Chatterbox is still available as a selectable
voice, but the default app path favors Kokoro for steadier document playback.
Set up the optional remote speech service on a Tailscale-connected machine:
```bash
read-docs tts-umbra-install
read-docs tts-umbra-status
```
Set up the Mac-local speech service:
```bash
read-docs tts-mac-start
read-docs tts-mac-status
```
Run a benchmark and generate sample files:
```bash
read-docs tts-bench
```
Benchmark reports and sample audio are saved under
`~/.doc-reader-managed/tts-benchmarks/`.
## Local speech-to-text
Doc Reader uses Mac-local speech-to-text for dictation by default. It can also
use an optional remote speech sidecar when you configure one. Neither path calls
a hosted speech API.
Set up the Mac-local sidecar:
```bash
read-docs tts-mac-start
read-docs restart
```
Set up the optional remote sidecar:
```bash
read-docs tts-umbra-install
read-docs tts-umbra-start
read-docs restart
```
The Mac sidecar installs Kokoro plus `faster-whisper` and starts Whisper with a
CPU-friendly default model. Override it before `read-docs tts-mac-start` when
you want a larger local model:
```bash
export DOC_READER_MAC_STT_MODEL=small
```
Open the canonical web app and confirm speech-to-text is on. Add an
audio file with the Audio picker to transcribe it into a `Dictation` card. Check
`Timestamps` before choosing the file when you want phrase-level timestamp lines
saved with the transcript. Choose the microphone from the Dictation settings if
the system default is not the input you want. Put the cursor in a text field,
then hold the Option/Alt key to record from the selected Mac microphone. Doc
Reader shows a small recording HUD while the key is held, sends the audio to the
active speech-to-text sidecar when the key is released, inserts the transcription at
the cursor, and adds the transcription as a `Dictation` card in the web app.
When a Logitech headset or mic is attached, Doc Reader pins it as the preferred
dictation input instead of drifting back to macOS System Default during device
refreshes. Set `DOC_READER_DEFAULT_MICROPHONE_MATCH` to a comma-separated list
of name/id tokens to prefer a different dedicated microphone.
The web app keeps read-aloud cards, dictation cards, and external app readings
in one Library. Filter buttons narrow the Library to Readings, Dictations, or
Clawdad-origin items. Dictation cards have copy and edit icon buttons; edits
save back to the Library card text, update search snippets and word metrics,
and copy still briefly switches the button to a green checkmark.
The Read Speed slider stores a per-app WPM setting and applies it to new
read-aloud playback plus already-running readings as each next chunk is
prepared. Playback is spoken in short live segments so speed changes are picked
up after the current segment, including on the default Mac Kokoro path.
Library retention is unbounded: read-aloud cards, prepared TTS audio metadata,
STT dictation cards, and saved dictation recording files are retained until you
remove them from the managed app data.
The Library also tracks a local Signal Map. It counts words separately for STT
dictations and TTS/read-aloud material, records completion state for readings,
and writes batch semantic analysis to
`~/.doc-reader-managed/library-analysis.json` plus per-batch JSON files under
`~/.doc-reader-managed/library-analysis-batches/`. The analyzer runs
periodically while the web app is open and can be triggered from the Signal Map
button. By default it tries a configured local model endpoint through Ollama,
then falls back to deterministic local
structure if no model is reachable. Configure it with:
```bash
export DOC_READER_ANALYSIS_BACKEND=ollama
export DOC_READER_ANALYSIS_URL=http://100.72.151.28:11434
export DOC_READER_ANALYSIS_MODEL=llama3.1:8b
```
The Mac-local speech sidecar preloads its speech-to-text model when possible so
the first real dictation does not pay the model-load cost. Short warm dictations
should return quickly. macOS
may ask for microphone permission the first time the native app records audio.
The web app shows the selected input device, microphone authorization,
Accessibility, and Input Monitoring state. It also shows whether the native app
helper is online. Use the in-app `Start Helper`, `Stop Helper`, and `Reset`
controls to bring the menu-bar hotkey listener up, shut it down, or restart a
stale helper without leaving the web app. If the HUD does not appear while Doc
Reader is in the background, allow `Doc Reader.app` in macOS Privacy & Security
for Input Monitoring.
Accessibility is also required for automatic insertion into the active text
field; without it, Doc Reader copies the transcription to the clipboard.
## Quick start: source checkout
1. Create and activate a virtual environment.
2. Install dependencies.
3. Run the reader.
```bash
python3 -m venv .venv
source .venv/bin/activate
pip install -r requirements.txt
python -m doc_reader /path/to/file.pdf --mode smart --style balanced --verbose
```
## npm package
This repository is configured for the public npm package `read-docs`.
The unscoped `doc-reader` package name is already owned by another maintainer, so the
official SproutSeeds package uses the available global npm name `read-docs`.
The npm package is a bootstrapper and control surface for the managed app. Running
`read-docs` with no arguments shows the available app and CLI commands; it does not
directly run the Python tray from the package install location.
Install globally:
```bash
npm install -g read-docs
```
Pass a document path to use the command-line reader instead of the menu-bar app:
```bash
read-docs /path/to/file.pdf --mode smart --style balanced --verbose
```
## Development launch
From the repo root:
```bash
./run-doc-reader
```
This command will:
- Create `.venv` if needed
- Install/update dependencies when `requirements.txt` changes
- Launch the menu-bar app directly from the source checkout
Optional fallback TTS engine:
```bash
./.venv/bin/python -m pip install pyttsx3
```
## Optional remote text-to-speech
The default app path uses Mac-local speech. OpenAI remains available as an
explicit remote speech backend for users who choose it. When
`--speech-backend openai` is selected, the app checks `OPENAI_API_KEY`,
Doc Reader's macOS Keychain item, and ORP's local `openai-primary` Keychain
secret.
CLI with explicit backend selection:
```bash
./run-doc-reader \
--speech-backend openai \
--openai-model gpt-4o-mini-tts \
--openai-voice marin \
--openai-response-format wav
```
App usage:
- Open the panel from the menu bar icon.
- Choose a document, read clipboard text, or paste text into the reader window.
- Use the Library cards to pause, resume, copy dictation text, and switch
between saved readings.
- Choose Mac Kokoro, Remote Kokoro, Remote Chatterbox, OpenAI API, or
system speech.
- Store an OpenAI key in the macOS Keychain or ORP secrets only when using the
optional remote backend.
- Click `Stop Reading` from the menu bar item to stop active playback.
## macOS menu-bar app
The supported app path is:
```bash
read-docs install
```
For local development, you can also run the Python menu-bar module directly:
```bash
python -m doc_reader.tray
```
What it gives you:
- Native menu-bar app shell (`Doc Reader.app`) with a formal app icon that opens the canonical web page.
- Applications/Dock launcher at `~/Applications/Doc Reader.app`.
- Tailnet web app through `read-docs tailscale`.
- `Open DocReader Page` opens `http://127.0.0.1:8766`.
- `Read Clipboard in DocReader` posts clipboard text into the web Library.
- Pause/resume and stop controls call the web app.
- Persistent Library cards for documents, pasted text, clipboard text,
highlighted text, dictation, and external app handoffs.
- Option/Alt hold-to-record dictation with microphone selection, Mac speech-to-text, active-field insertion, and copyable Dictation cards.
- Highlighted-text readback through Right Command, Command-L, or the right-click Services item.
- Signal Map metrics and batch analysis for local reading and dictation material.
- Web settings for Mac-local, optional remote speech, optional OpenAI API, and system speech.
- OpenAI API keys are loaded only when OpenAI API is explicitly selected.
- Right-click Services integration sends highlighted text into the web app.
The older PySide tray module remains in the source tree as a development fallback,
but the npm app path uses the native macOS wrapper.
## Right-click menu (macOS Services)
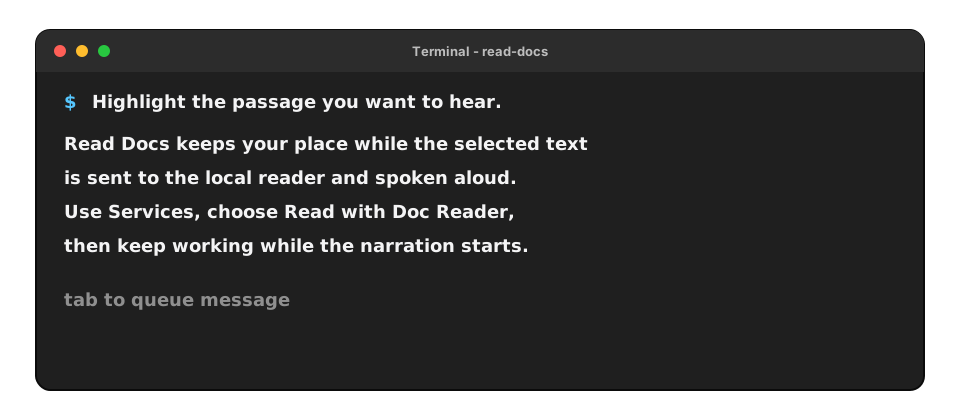
The native macOS helper can read highlighted text from the keyboard. Highlight
text in any app and tap the right Command key; Doc Reader copies the selection,
restores your clipboard, creates a reading card in the web app, and starts
playback through the selected TTS backend. `Control+Command+R` is also accepted
as a fallback.
Install a native `Services` entry as a fallback so highlighted text can also be
read from right-click menus:
```bash
read-docs install
```
If the app agent is already installed and you only need to refresh the Services
entry, run `read-docs install-service`.
Then in any app:
1. Highlight text.
2. Right click.
3. Choose `Services -> Read with Doc Reader`.
The Services flow uses macOS text input directly. If an app invokes the Service
but passes empty or partial text, the helper makes a clipboard-preserving copy
attempt and logs the selected-text handoff count to `~/Library/Logs/doc-reader-service.log`.
Remove it later with:
```bash
read-docs uninstall-service
```
## Auto-start at login (macOS)
The app agent is registered by:
```bash
read-docs install
```
This installs a managed app copy at `~/.doc-reader-managed` and registers a
LaunchAgent. Run `read-docs restart` after package updates to refresh that managed
copy and restart the app.
Disable later:
```bash
read-docs disable-startup
```
## Modes
- `--mode smart`: Speaks key ideas from each chunk (default).
- `--mode full`: Speaks cleaned source text.
## Detail styles
- `--style concise`: very short key points
- `--style balanced`: moderate detail (default)
- `--style detailed`: more context per chunk
## Continuous playback strategy
Pipeline architecture:
1. Extract text progressively from the input file.
2. Chunk text into early-small then steady-sized segments.
3. Prepare speech-ready narration for each chunk.
4. Queue prepared chunks while the current chunk is being spoken.
The first chunk target is smaller (`--first-chunk-words`) so audio starts quickly; later chunks use `--chunk-words` for steadier flow.
## Useful CLI options
```bash
python -m doc_reader file.docx \
--mode smart \
--style detailed \
--speech-backend auto \
--rate 190 \
--voice Samantha \
--first-chunk-words 95 \
--chunk-words 240 \
--queue-size 10
```
Dry-run without speaking:
```bash
python -m doc_reader notes.md --dry-run --verbose
```
## Notes
- `.doc` (legacy Word) is not supported yet; convert to `.docx` first.
- PDF quality depends on extractable text in the file (scanned PDFs need OCR first).
## Contributing
Contributions are welcome. Please see [CONTRIBUTING.md](CONTRIBUTING.md) for setup, PR guidelines, and security reporting.