# react-native-text-input-mask
Text input mask for React Native on iOS and Android.

 ## Examples


## Setup
```bash
npm install --save react-native-text-input-mask
# --- or ---
yarn add react-native-text-input-mask
```
# Installation
## Examples


## Setup
```bash
npm install --save react-native-text-input-mask
# --- or ---
yarn add react-native-text-input-mask
```
# Installation
For RN >= 0.60
#### iOS
1. Configure pods (static or dynamic linking)
Static Library ( Podfile has no use_frameworks! )
Add following lines to your target in `Podfile`. Linking is not required in React Native 0.60 and above.
```ruby
pod 'React-RCTText', :path => '../node_modules/react-native/Libraries/Text', :modular_headers => true
```
Dynamic Framework ( Podfile has use_frameworks! )
Add following lines to your target in `Podfile` if it doesnt exist. Linking is not required in React Native 0.60 and above.
```
use_frameworks!
```
2. Run `pod install` in the `ios` directory.
#### Android
No need to do anything.
For RN < 0.60
### WARNING! This is no longer officially supported, these instructions are out of date and may no longer work, we recommend upgrading to a newer version of React Native.
### Link
```bash
react-native link react-native-text-input-mask
```
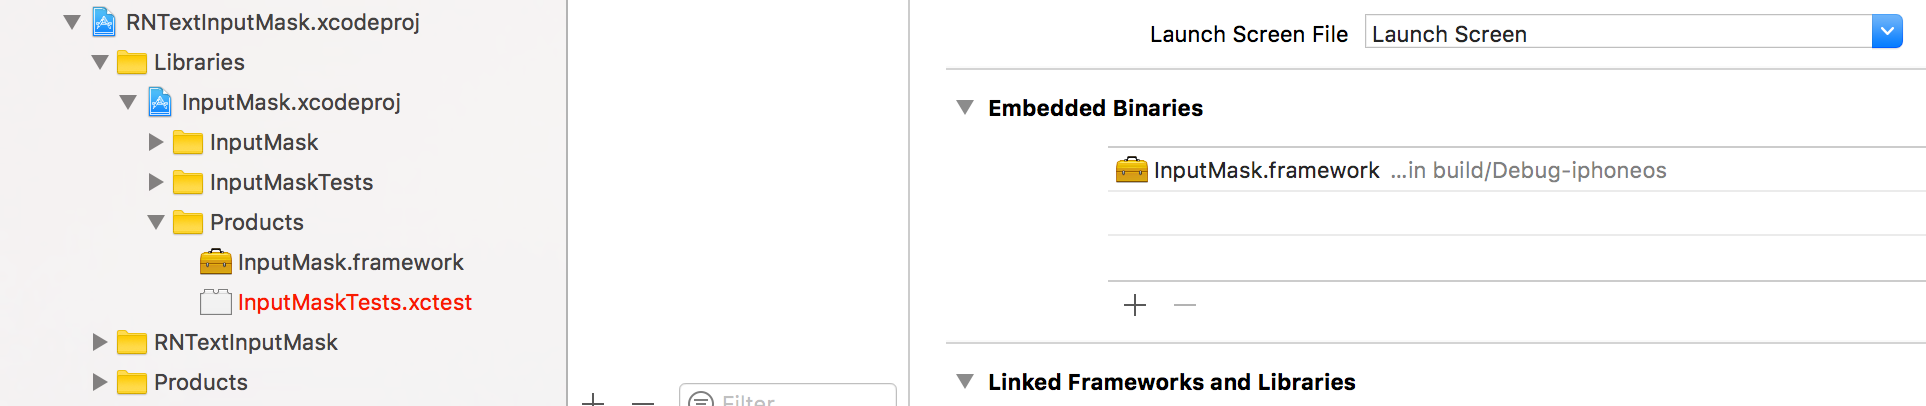
**iOS only:** you have to drag and drop `InputMask.framework` to `Embedded Binaries` in General tab of Target
### Manual installation
#### iOS
1. In XCode, in the project navigator, right click `Libraries` ➜ `Add Files to [your project's name]`
2. Go to `node_modules` ➜ `react-native-text-input-mask` and add `RNTextInputMask.xcodeproj`
3. In XCode, in the project navigator, select your project. Add `libRNTextInputMask.a` to your project's `Build Phases` ➜ `Link Binary With Libraries`
4. Run your project (`Cmd+R`)
#### Android
1. Open up `android/app/src/main/java/[...]/MainActivity.java`
- Add `import com.RNTextInputMask.RNTextInputMaskPackage;` to the imports at the top of the file
- Add `new RNTextInputMaskPackage()` to the list returned by the `getPackages()` method
2. Append the following lines to `android/settings.gradle`:
```
include ':react-native-text-input-mask'
project(':react-native-text-input-mask').projectDir = new File(rootProject.projectDir, '../node_modules/react-native-text-input-mask/android')
```
3. Insert the following lines inside the dependencies block in `android/app/build.gradle`:
```
compile project(':react-native-text-input-mask')
```