# React Native Chat.io
React Native component to integrate your application with Chat.io chat widget easily ;)
*You can start your 14 days free trial [here](https://www.chat.io/).*
### Pre requirements:
1. *License:*
To use Chat.io in your application you need **license_id**.
You get one after creating account on our [website](https://www.chat.io/).
You can check your **license_id** anytime [here](https://app.chat.io/settings/channel-website).
*If you have difficulties finding your **license_id** please take a look at this [screenshot](https://github.com/livechat/react-native-chatio/blob/master/chatio_license.png).*
2. *Client Id and Redirect URI:*
First, you need to create an application in the [Developers Console](https://accounts.chat.io) **(select the Web app (frontend, eg. JavaScript) type).**
After app is created, go to Apps -> Authorization *(There you will find your Client Id and Redirect URI)*.
*If you have difficulties finding your **Client Id** or **Redirect URI** please take a look at this [screenshot](https://github.com/livechat/react-native-chatio/blob/master/developer_console.png).*
### Installation
All you have to do:
```javascript
npm install react-native-chatio --save
```
### Usage
Usage is very simple:
*Import ChatIO component and put it in your render method:*
```javascript
import ChatIO from "react-native-chatio"
...
```
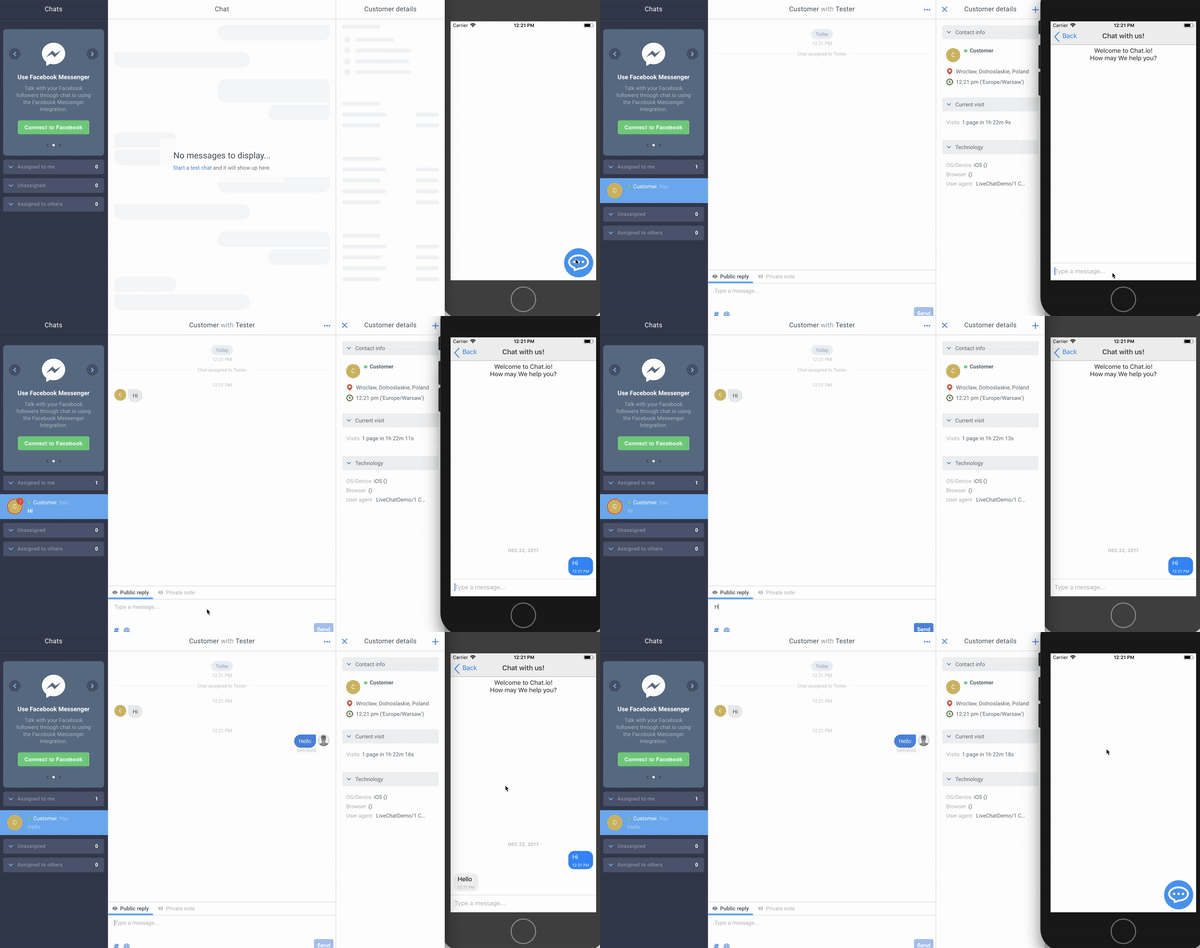
### Demo
### Chat Bubble
Chat bubble is a small view that by default is blue and is placed on bottom-right side of your screen.
1. Can can control position of bubble by simply sending **bubbleLeft** and **bubbleTop** props.
*Example:*
```javascript
```
2. By default bubble component is draggable and movable. You can disable this option by sending **movable** prop with *false* value.
*Example:*
```javascript
```
3. If would like to change color of bubble you can simply pass **bubbleColor** prop with ChatIO component.
*Example:*
```javascript
```
4. If you don't like appearance of this bubble at all, you can send **bubble** prop with your own component.
*Example:*
```javascript
}
/>
```
### Chat Appearance
This module uses [react-native-gifted-chat](https://github.com/FaridSafi/react-native-gifted-chat) for chat UI.
You can customise your chat appearance by sending props to ChatIO component like you would normally send them to GiftedChat component.
For example if you would like to control **onPressAvatar** to show info about agent, you can do it like this:
*Example:*
```javascript
console.warn(info) } />
```
*You can find information about all props here: [react-native-gifted-chat](https://github.com/FaridSafi/react-native-gifted-chat).*
### Methods
This module uses [Chat.io Customer SDK](https://www.chat.io/docs/customer-sdk).
*All methods and events described there.*
To begin with, you want to get your chat reference using **onLoaded** callback.
*Some methods need current **chat_id** to work. You can get it using **onChatStarted** callback.*
*Example:*
```javascript
this.chat = ref}
onChatStarted={ chat_id => this.chatId = chat_id}
/>
```
*Using this reference you can for example get full chat history:*
```javascript
const history = this.chat.getChatHistory(this.chatId);
```
You can find more information about handling chat history [here](https://www.chat.io/docs/customer-sdk#getchathistory).
*Table of methods:*
|Name|Note|
|---|---|
| destroy | This method clears any held resources, removes all listeners and disconnects from the network. After using this method you won’t be able to use the destroyed SDK’s instance. |
| disconnect | Disconnecting user from current chat. |
| getChatHistory | This method facilitates loading more history events. |
| sendMessage | Sending message to current chat. More info [here](https://www.chat.io/docs/customer-sdk#sendmessage). |
| setSneakPeek | Sets the internal sneak peek value. It will be sent to the server only if the target chat is active and only once per 2 seconds (it’s throttled). |
| startChat | Starting chat.|
| updateCustomer | Updates info about customer. More info [here](https://www.chat.io/docs/customer-sdk#updatecustomer).|
### Events
You can listen for emitted events by subscribing to them (*using **on** method*) with your custom JavaScript function.
*All events described [here](https://www.chat.io/docs/customer-sdk#events).*
*Table of events:*
|Name|Note|
|---|---|
|connected | Executes when user connect to Chat.io. |
|connection_lost | Executes when user lost connection. |
|connection_restored | Executes when user's connection is restored. |
|disconnected | Executes when user disconnects from Chat.io. |
|user_joined_chat | Executes when joining chat. |
|user_left_chat | Executes when user left chat. |
|user_is_typing | Executes when user is typing. |
|user_stopped_typing | Executes when user stopped typing. |
### Support
In case of any problem you can chat with us [here](https://www.chat.io/live-chat-guide/).
**I hope you will find this module useful. Happy Coding :)**