# [Integrations](integrations) / [Threejs](integrations/threejs) / Step By Step
In this tutorial, we are going to see how to use threejs and polygonjs scenes together.
This can be particularly useful if you already have a threejs scene ready, and you would like to extend it with one or several of the functionalities that Polygonjs offers.
## Start the project
We are going to need a bundler to load the javascript libraries. The bundler we are going to use is [vite](https://vitejs.dev/), which is very easy to setup. But if you are more familiar with rollup or webpack, you should also be able to follow this tutorial and adapt it to those bundlers.
So let's first create a `vite` project. Also note that I'll use `yarn` instead of `npm`, but if you are more familiar with `npm`, you should be able to switch every `yarn` command by `npm run`.
```
yarn create vite
```
You'll be presented with a few options, and here are the selection we recommend for this tutorial:
- set project name: `polygonjs-with-three`
- select a framework: `vanilla`
- select a variant: `vanilla`
Then `cd` into the project:
```
cd polygonjs-with-three
```
And run `yarn` to install the dependencies.
```
yarn
```
Then we can start the server:
```
yarn dev
```
Open your browser at `http://localhost:3000/`, and you should see this:
## Add Threejs
We are now ready to add threejs:
```
yarn add three
```
And let's add this minimal scene from [threejs documentation](https://threejs.org/docs/index.html) to the file `main.js` ([Update On Github](https://github.com/polygonjs/polygonjs-threejs-example/commit/882f9282a488f5187e5ee21e342cb5e0a2a5db89#diff-58417e0f781b6656949d37258c8b9052ed266e2eb7a5163cad7b0863e6b2916a)):
```js
import './style.css';
document.querySelector('#app').innerHTML = `
Hello Vite!
Documentation
`;
import * as THREE from 'three';
const scene = new THREE.Scene();
const camera = new THREE.PerspectiveCamera(75, window.innerWidth / window.innerHeight, 0.1, 1000);
const renderer = new THREE.WebGLRenderer();
renderer.setSize(window.innerWidth, window.innerHeight);
document.body.appendChild(renderer.domElement);
const geometry = new THREE.BoxGeometry();
const material = new THREE.MeshBasicMaterial({color: 0x00ff00});
const cube = new THREE.Mesh(geometry, material);
scene.add(cube);
camera.position.z = 5;
function animate() {
requestAnimationFrame(animate);
cube.rotation.x += 0.01;
cube.rotation.y += 0.01;
renderer.render(scene, camera);
}
animate();
```
And you should see this:
Let's make things a little nicer by having our WebGL content full screen. We just need to comment out those lines in `main.js` ([Update On Github](https://github.com/polygonjs/polygonjs-threejs-example/commit/0a620a944b56d65e68e8435c550db236862327ec)):
```js
// document.querySelector('#app').innerHTML = `
// Hello Vite!
// Documentation
// `
```
Let's also comment out the css rules in `style.css`, and add some new ones:
```css
/* #app {
font-family: Avenir, Helvetica, Arial, sans-serif;
-webkit-font-smoothing: antialiased;
-moz-osx-font-smoothing: grayscale;
text-align: center;
color: #2c3e50;
margin-top: 60px;
} */
html,
body {
margin: 0;
height: 100%;
}
```
The greeting `Hello Vite!` should now be gone:
## Add Polygonjs to Threejs
Let's now add a polygonjs scene. We start by importing the editor:
```
yarn add polygonjs-editor
```
And add the following line to `package.json`, in the `script` section ([Update On Github](https://github.com/polygonjs/polygonjs-threejs-example/commit/8ff1d8f7b561452f0d15ee488994a8e14eebb272)):
```
"polygon": "polygonjs-editor"
```
You can now start the editor with:
```
yarn polygon
```
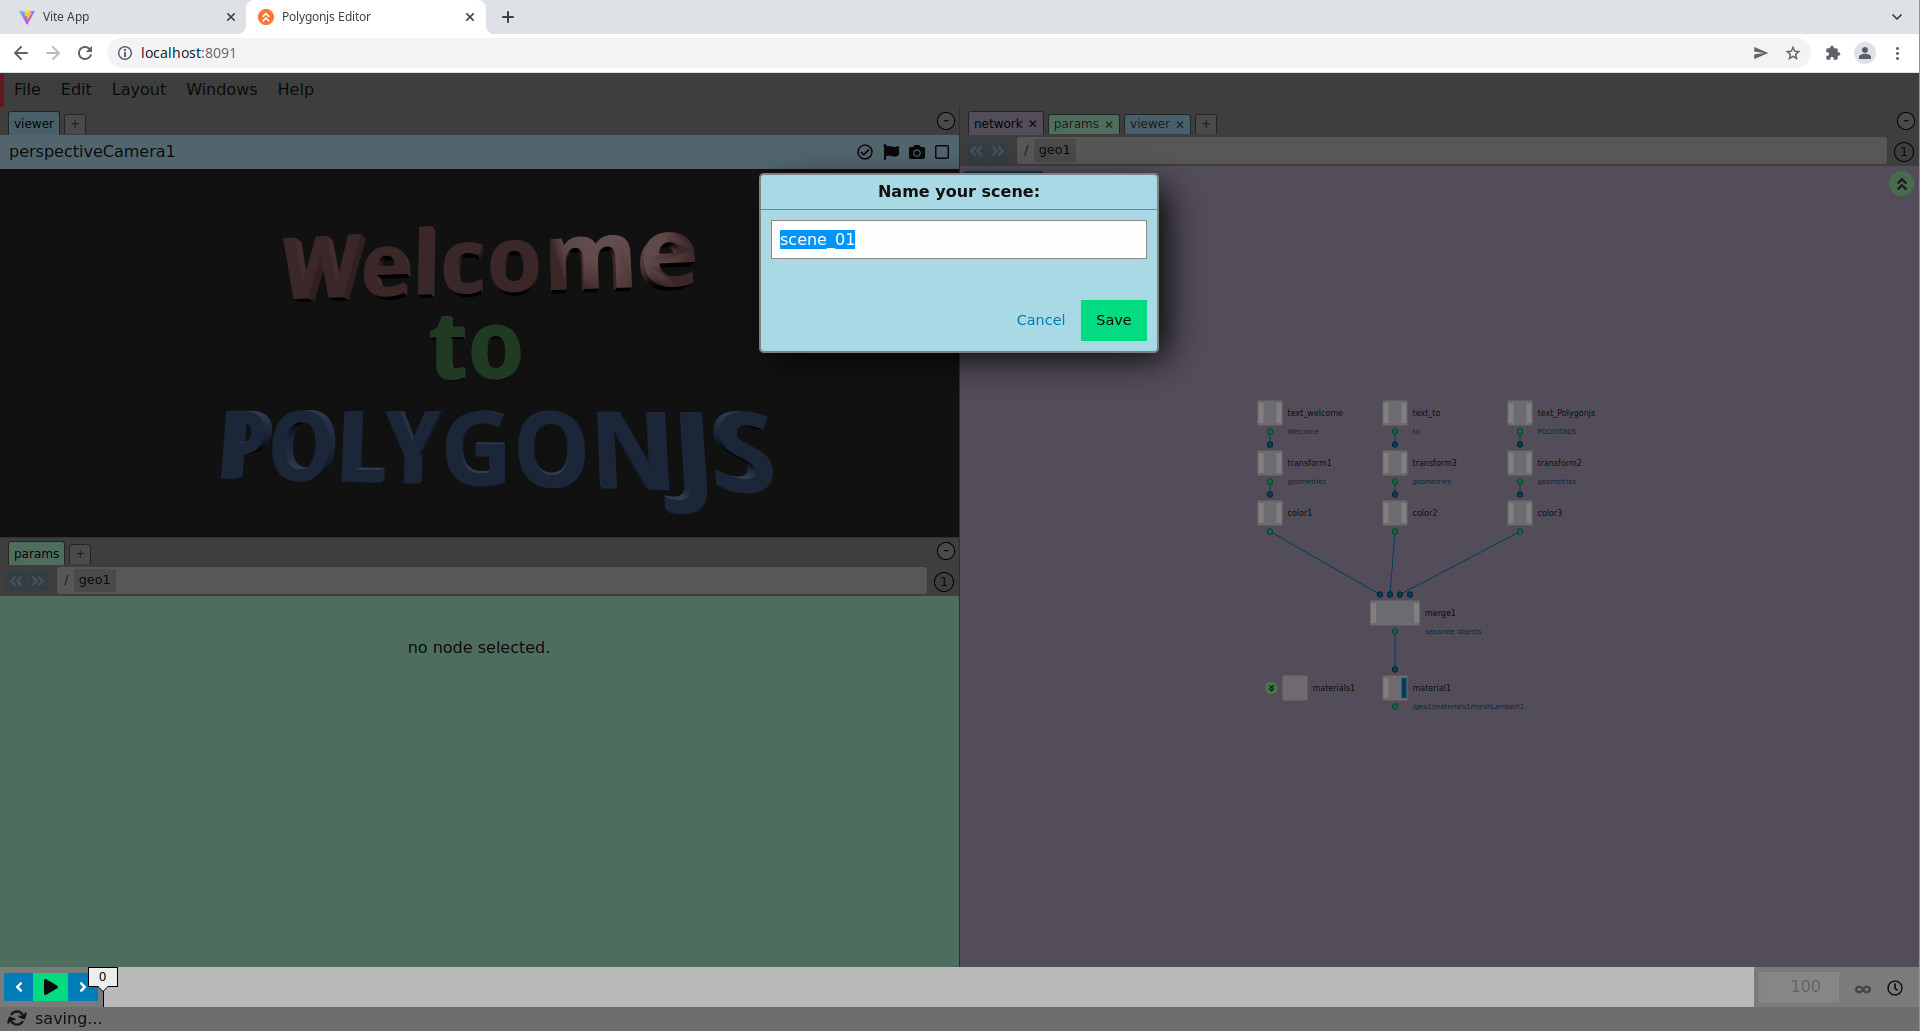
And now open your browser to `http://localhost:8091`, you will see this:
And now let's simple save the scene, with `File -> Save`. You will be prompted to give a name to your scene. Let's name it `scene_01`.
Saving your scene creates several files inside your projects. Some are json, and contain the data that makes up your scene. And some are javascript callbacks, which are used to load the scene. We are going to use those callbacks now. So let's add the following lines into `main.js`, just before the `animate` function ([Update On Github](https://github.com/polygonjs/polygonjs-threejs-example/commit/dd31e4f6f5dcee604b99ace3c2aa454619faf3ba#diff-58417e0f781b6656949d37258c8b9052ed266e2eb7a5163cad7b0863e6b2916a)):
```js
import {loadScene_scene_01} from './src/polygonjs/scenes/scene_01/autogenerated/loadScene';
const loadedData = await loadScene_scene_01();
scene.add(loadedData.scene.threejsScene());
```
And we now have both scenes merged together!
## Add Animation
Let's now add animation to our Polygonjs scene. We can simply select the `text_Polygonjs` node and change the `text` parameter to (make sure to include the single quotes):
```js
`round($T*100) / 100`;
```
`$T` is the current time, and by applying a `round`, we make sure to only have some of the many digits.
And now, as you reload the page, you will see... that the text is not moving as expected.
In order to fix this, we need to make sure that the polygonjs scene gets its time updated. You need to add the following inside the `animate` function, just after `requestAnimationFrame( animate )` ([Update On Github](https://github.com/polygonjs/polygonjs-threejs-example/commit/2b66f5e49be600578f9883c3d6868e2704ee575e#diff-58417e0f781b6656949d37258c8b9052ed266e2eb7a5163cad7b0863e6b2916a)):
```js
loadedData.scene.incrementTime();
```
And you should now see the text animated:
## Use Events
Now let's try and add more complicated things into your scenes. We can for instance add nodes that help you have your scene react to use events, such as mouse movements.
In order to make this tutorial shorter, let's simply **copy the following snippet** (in order to select it all, you can double click on it, then use **Ctrl+C**), and paste it with **Ctrl+V** in the node panel of the editor, **from the top level of the scene**. This will create a node called `arrows`.
```json
{
"obj": "var nodesByRequestedName_2 = {}\nvar hemisphereLight1 = parentNode.node('hemisphereLight1')\nvar spotLight1 = parentNode.node('spotLight1')\nvar geo1 = parentNode.node('geo1')\nvar perspectiveCamera1 = parentNode.node('perspectiveCamera1')\nvar arrows = parentNode.node('arrows')\nfunction create_arrows(parentNode){\n\tvar arrows = parentNode.createNode('geo')\n\tarrows.setName('arrows')\n\tfunction create_actor1(arrows){\n\t\tvar actor1 = arrows.createNode('actor')\n\t\tactor1.setName('actor1')\n\t\tfunction create_onTick1(actor1){\n\t\t\tvar onTick1 = actor1.createNode('onTick')\n\t\t\tonTick1.setName('onTick1')\n\t\t\tonTick1.uiData.setPosition(-100, 0)\n\t\t\tonTick1.params.postCreateSpareParams()\n\t\t\tonTick1.params.runOnSceneLoadHooks()\n\t\t\treturn onTick1\n\t\t}\n\t\tfunction create_plane1(actor1){\n\t\t\tvar plane1 = actor1.createNode('plane')\n\t\t\tplane1.setName('plane1')\n\t\t\tplane1.uiData.setPosition(-150, 400)\n\t\t\tplane1.params.get('normaly').set(0)\n\t\t\tplane1.params.get('normalz').set(1)\n\t\t\tplane1.params.get('normaly').set(0)\n\t\t\tplane1.params.get('normalz').set(1)\n\t\t\tplane1.params.postCreateSpareParams()\n\t\t\tplane1.params.runOnSceneLoadHooks()\n\t\t\treturn plane1\n\t\t}\n\t\tfunction create_rayFromCursor1(actor1){\n\t\t\tvar rayFromCursor1 = actor1.createNode('rayFromCursor')\n\t\t\trayFromCursor1.setName('rayFromCursor1')\n\t\t\trayFromCursor1.uiData.setPosition(-150, 250)\n\t\t\trayFromCursor1.params.postCreateSpareParams()\n\t\t\trayFromCursor1.params.runOnSceneLoadHooks()\n\t\t\treturn rayFromCursor1\n\t\t}\n\t\tfunction create_rayIntersectPlane1(actor1){\n\t\t\tvar rayIntersectPlane1 = actor1.createNode('rayIntersectPlane')\n\t\t\trayIntersectPlane1.setName('rayIntersectPlane1')\n\t\t\trayIntersectPlane1.uiData.setPosition(0, 300)\n\t\t\trayIntersectPlane1.params.postCreateSpareParams()\n\t\t\trayIntersectPlane1.params.runOnSceneLoadHooks()\n\t\t\treturn rayIntersectPlane1\n\t\t}\n\t\tfunction create_setObjectLookAt1(actor1){\n\t\t\tvar setObjectLookAt1 = actor1.createNode('setObjectLookAt')\n\t\t\tsetObjectLookAt1.setName('setObjectLookAt1')\n\t\t\tsetObjectLookAt1.uiData.setPosition(400, 150)\n\t\t\tsetObjectLookAt1.params.get('lerp').set(0.16)\n\t\t\tsetObjectLookAt1.params.postCreateSpareParams()\n\t\t\tsetObjectLookAt1.params.runOnSceneLoadHooks()\n\t\t\treturn setObjectLookAt1\n\t\t}\n\t\tvar onTick1 = create_onTick1(actor1)\n\t\tvar plane1 = create_plane1(actor1)\n\t\tvar rayFromCursor1 = create_rayFromCursor1(actor1)\n\t\tvar rayIntersectPlane1 = create_rayIntersectPlane1(actor1)\n\t\tvar setObjectLookAt1 = create_setObjectLookAt1(actor1)\n\t\trayIntersectPlane1.setInput('Ray', rayFromCursor1, 'ray', {\"noExceptionOnInvalidInput\":true})\n\t\trayIntersectPlane1.setInput('Plane', plane1, 'plane', {\"noExceptionOnInvalidInput\":true})\n\t\tsetObjectLookAt1.setInput('trigger', onTick1, 'trigger', {\"noExceptionOnInvalidInput\":true})\n\t\tsetObjectLookAt1.setInput('targetPosition', rayIntersectPlane1, 'position', {\"noExceptionOnInvalidInput\":true})\n\t\tactor1.uiData.setPosition(-100, 350)\n\t\tactor1.params.postCreateSpareParams()\n\t\tactor1.params.runOnSceneLoadHooks()\n\t\treturn actor1\n\t}\n\tfunction create_box1(arrows){\n\t\tvar box1 = arrows.createNode('box')\n\t\tbox1.setName('box1')\n\t\tbox1.uiData.setPosition(0, 0)\n\t\tbox1.params.postCreateSpareParams()\n\t\tbox1.params.runOnSceneLoadHooks()\n\t\treturn box1\n\t}\n\tfunction create_copy1(arrows){\n\t\tvar copy1 = arrows.createNode('copy')\n\t\tcopy1.setName('copy1')\n\t\tcopy1.uiData.setPosition(50, 550)\n\t\tcopy1.flags.display.set(true)\n\t\tcopy1.params.postCreateSpareParams()\n\t\tcopy1.params.runOnSceneLoadHooks()\n\t\treturn copy1\n\t}\n\tfunction create_merge1(arrows){\n\t\tvar merge1 = arrows.createNode('merge')\n\t\tmerge1.setName('merge1')\n\t\tmerge1.uiData.setPosition(-100, 150)\n\t\tmerge1.params.get('compact').set(true)\n\t\tmerge1.params.postCreateSpareParams()\n\t\tmerge1.params.runOnSceneLoadHooks()\n\t\treturn merge1\n\t}\n\tfunction create_plane1(arrows){\n\t\tvar plane1 = arrows.createNode('plane')\n\t\tplane1.setName('plane1')\n\t\tplane1.uiData.setPosition(300, 200)\n\t\tplane1.params.get('sizex').set(7)\n\t\tplane1.params.get('sizey').set(7)\n\t\tplane1.params.get('sizex').set(7)\n\t\tplane1.params.get('sizey').set(7)\n\t\tplane1.params.get('directiony').set(0)\n\t\tplane1.params.get('directionz').set(1)\n\t\tplane1.params.get('directiony').set(0)\n\t\tplane1.params.get('directionz').set(1)\n\t\tplane1.params.postCreateSpareParams()\n\t\tplane1.params.runOnSceneLoadHooks()\n\t\treturn plane1\n\t}\n\tfunction create_transform1(arrows){\n\t\tvar transform1 = arrows.createNode('transform')\n\t\ttransform1.setName('transform1')\n\t\ttransform1.uiData.setPosition(-100, 250)\n\t\ttransform1.params.get('rx').set(-90)\n\t\ttransform1.params.get('ry').set(90)\n\t\ttransform1.params.get('rx').set(-90)\n\t\ttransform1.params.get('ry').set(90)\n\t\ttransform1.params.get('scale').set(0.3)\n\t\ttransform1.params.postCreateSpareParams()\n\t\ttransform1.params.runOnSceneLoadHooks()\n\t\treturn transform1\n\t}\n\tfunction create_transform2(arrows){\n\t\tvar transform2 = arrows.createNode('transform')\n\t\ttransform2.setName('transform2')\n\t\ttransform2.uiData.setPosition(300, 350)\n\t\ttransform2.params.get('tz').set(-1.3)\n\t\ttransform2.params.get('tz').set(-1.3)\n\t\ttransform2.params.postCreateSpareParams()\n\t\ttransform2.params.runOnSceneLoadHooks()\n\t\treturn transform2\n\t}\n\tfunction create_tube1(arrows){\n\t\tvar tube1 = arrows.createNode('tube')\n\t\ttube1.setName('tube1')\n\t\ttube1.uiData.setPosition(-200, 0)\n\t\ttube1.params.get('segmentsRadial').set(3)\n\t\ttube1.params.get('centery').set(-0.8)\n\t\ttube1.params.get('centery').set(-0.8)\n\t\ttube1.params.postCreateSpareParams()\n\t\ttube1.params.runOnSceneLoadHooks()\n\t\treturn tube1\n\t}\n\tvar actor1 = create_actor1(arrows)\n\tvar box1 = create_box1(arrows)\n\tvar copy1 = create_copy1(arrows)\n\tvar merge1 = create_merge1(arrows)\n\tvar plane1 = create_plane1(arrows)\n\tvar transform1 = create_transform1(arrows)\n\tvar transform2 = create_transform2(arrows)\n\tvar tube1 = create_tube1(arrows)\n\tactor1.setInput(0, transform1, {\"noExceptionOnInvalidInput\":true})\n\tcopy1.setInput(0, actor1, {\"noExceptionOnInvalidInput\":true})\n\tcopy1.setInput(1, transform2, {\"noExceptionOnInvalidInput\":true})\n\tmerge1.setInput(0, tube1, {\"noExceptionOnInvalidInput\":true})\n\tmerge1.setInput(1, box1, {\"noExceptionOnInvalidInput\":true})\n\ttransform1.setInput(0, merge1, {\"noExceptionOnInvalidInput\":true})\n\ttransform2.setInput(0, plane1, {\"noExceptionOnInvalidInput\":true})\n\tarrows.uiData.setPosition(-50, -50)\n\tarrows.flags.display.set(true)\n\tarrows.params.postCreateSpareParams()\n\tarrows.params.runOnSceneLoadHooks()\n\treturn arrows\n}\nvar arrows = create_arrows(parentNode)\nnodesByRequestedName_2['arrows'] = arrows\nreturn nodesByRequestedName_2"
}
```
Press play, and you should see those arrows follow your cursor:
And now **save your scene** again.
And if you look at our threejs+polygonjs scene, the arrows are unfortunately not moving:
The reason is that in polygonjs, events are handled by a viewer. That viewer is in charge of listening to mouse or keyboard events. And while we have created a polygonjs scene, we have not create that viewer yet. So let's do that.
Let's simply add `{domElement: 'app'}` as argument to the `loadScene_scene_01` function. So those polygonjs lines should now look like this ([Update On Github](https://github.com/polygonjs/polygonjs-threejs-example/commit/d5390ec1953adb63a7daa0b435de483d269bb571)):
```js
import {loadScene_scene_01} from './src/polygonjs/scenes/scene_01/autogenerated/loadScene';
const loadedData = await loadScene_scene_01({
domElement: 'app',
});
scene.add(loadedData.scene.threejsScene());
```
Which gives us this:
And it does not quite work yet. We do get the arrows following the cursor, but we also end up with 2 different canvases where the scene is displayed.
So let's simply get rid of the threejs one, by commenting out the `animate` function.
```js
// function animate() {
// requestAnimationFrame( animate );
// loadedData.scene.incrementTime();
// cube.rotation.x += 0.01;
// cube.rotation.y += 0.01;
// renderer.render( scene, camera );
// };
// animate();
```
And we can also comment out the lines that create the renderer ([Update On Github](https://github.com/polygonjs/polygonjs-threejs-example/commit/dfaaf724953d604c0773dbf68ad994a45f1fe92f#diff-58417e0f781b6656949d37258c8b9052ed266e2eb7a5163cad7b0863e6b2916a)):
```js
// const renderer = new THREE.WebGLRenderer();
// renderer.setSize( window.innerWidth, window.innerHeight );
// document.body.appendChild( renderer.domElement );
```
And the result is now much better, just like in our polygonjs editor.
But we are missing the cube from the threejs scene. So instead of adding the polygonjs scene to the threejs one, let's now do the other way round: we add the threejs scene to the polygonjs one ([Update On Github](https://github.com/polygonjs/polygonjs-threejs-example/commit/82d8a815ca7f1d94561c0f9a24c626d999a7fbe2#diff-58417e0f781b6656949d37258c8b9052ed266e2eb7a5163cad7b0863e6b2916a)).
```js
// scene.add(loadedData.scene.threejsScene());
loadedData.scene.threejsScene().add(scene);
```
But our cube is not rotating anymore. In order to have it rotate again, we now need to do that in a scene callback ([Update On Github](https://github.com/polygonjs/polygonjs-threejs-example/commit/76982c12ed496557765dcfd0e7fb5d2ea7310b94#diff-58417e0f781b6656949d37258c8b9052ed266e2eb7a5163cad7b0863e6b2916a)):
```js
loadedData.scene.registerOnBeforeTick('rotate-cube', (delta) => {
cube.rotation.x += 0.01;
cube.rotation.y += 0.01;
});
```
And the cube is now rotating again:
## What's next?
If you've gone this far, here are some links that you may be interested:
- the [repository of this tutorial](https://github.com/polygonjs/polygonjs-threejs-example) where you can follow the changes step by step in the [commit history](https://github.com/polygonjs/polygonjs-threejs-example/commits/main).
- [A follow-up](https://github.com/polygonjs/polygonjs-threejs-example-particles) to this tutorial, showing how to add scenes which contain particles.
- [Polygonjs API](/api) which documents the methods that the Polygonjs scenes and nodes have, so that you can update them from your javascript code.
- [Other integrations](/docs/integrations) showing what other tools Polygonjs can be used with.
- [Polygonjs tutorials](/docs/tutorials).