# OpenClaw
[](https://github.com/mithun50/openclaw-termux/releases/download/v1.6.1/OpenClaw-v1.6.1-universal.apk)
[](https://github.com/mithun50/openclaw-termux/actions/workflows/flutter-build.yml)
[](https://www.npmjs.com/package/openclaw-termux)
[](https://opensource.org/licenses/MIT)
[](https://nodejs.org/)
[](https://www.android.com/)
[](https://flutter.dev/)
[](https://github.com/mithun50/openclaw-termux/pulls)
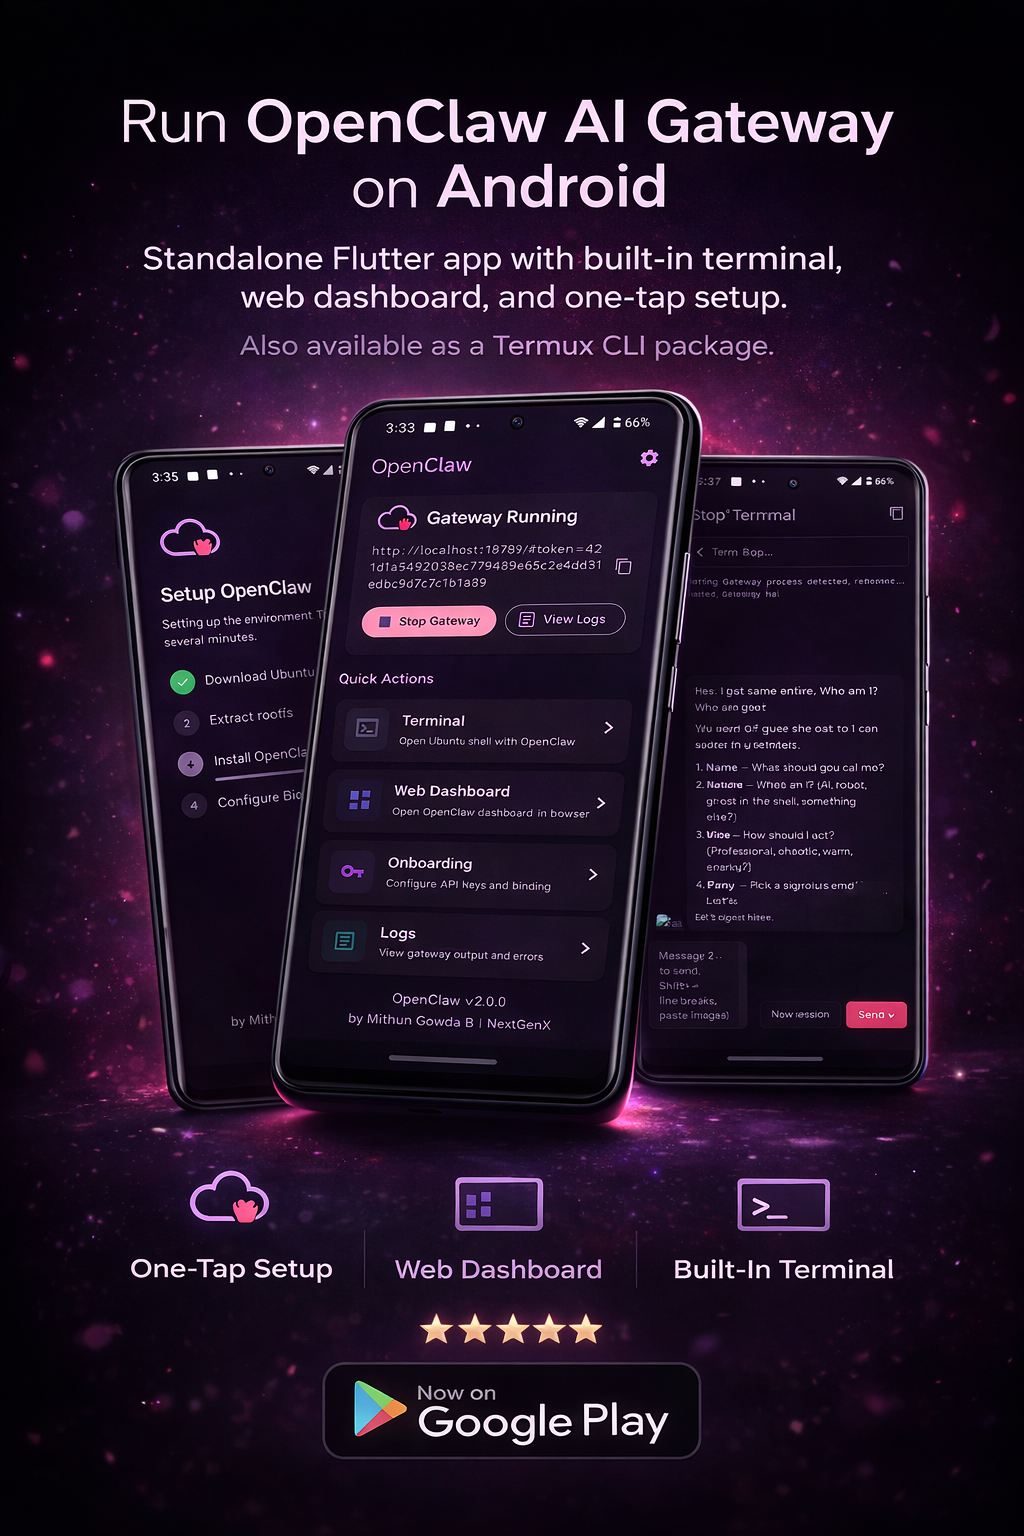
> Run **OpenClaw AI Gateway** on Android — standalone Flutter app with built-in terminal, web dashboard, optional dev tools, and one-tap setup. Also available as a Termux CLI package.
---
## Screenshots
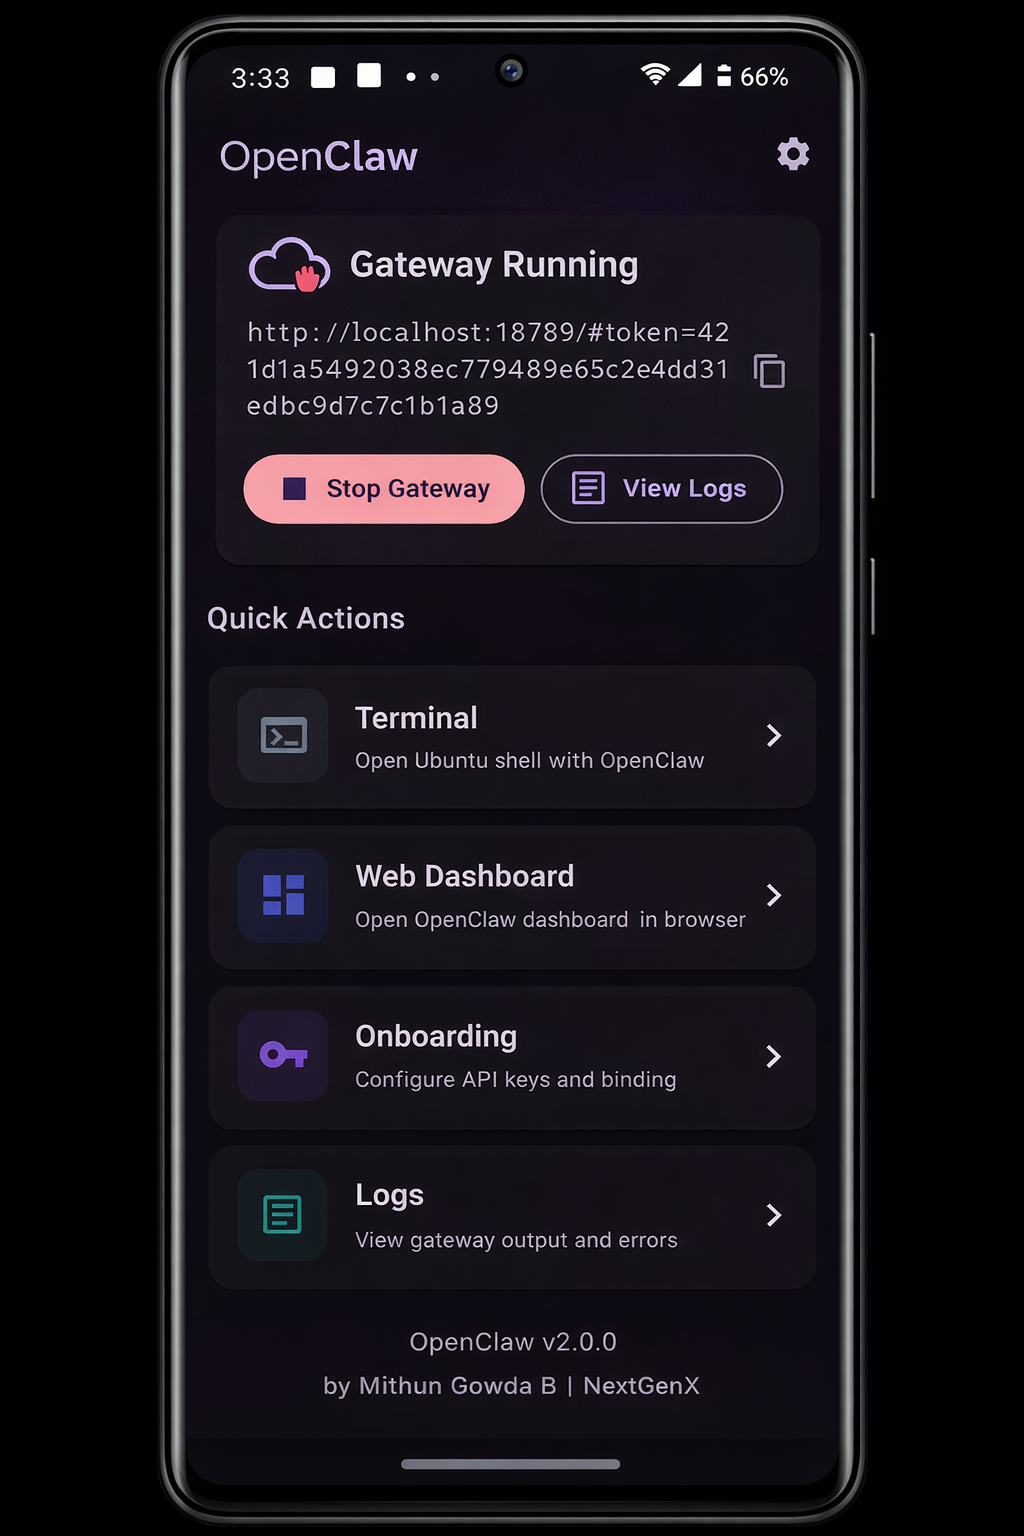
Dashboard |
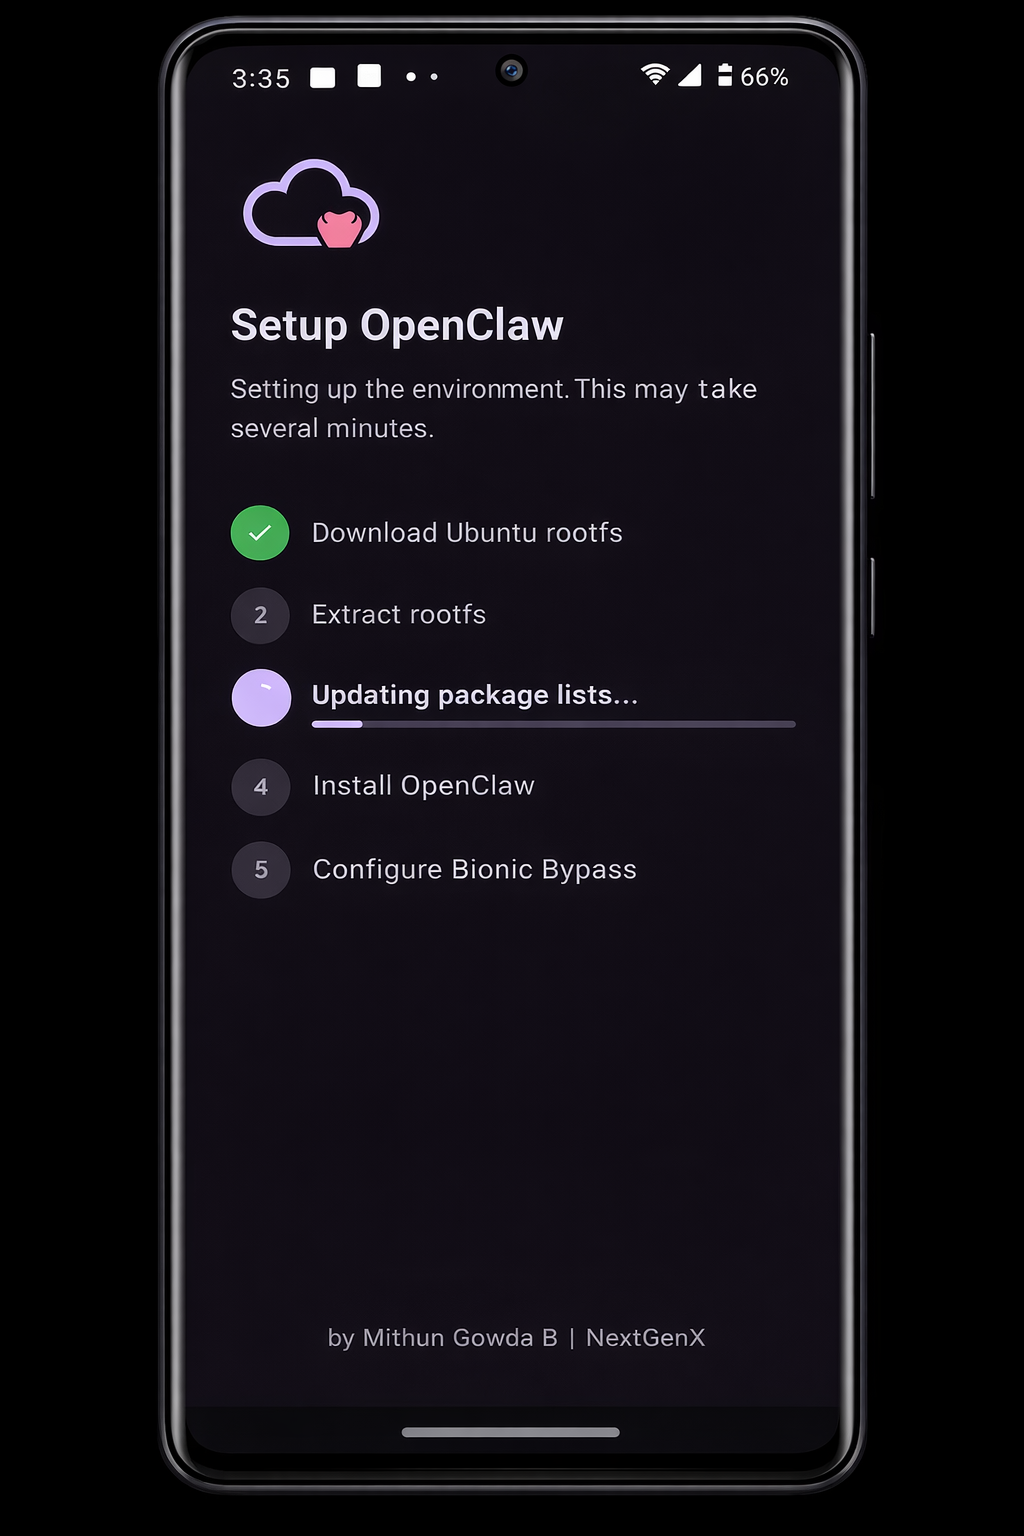
Setup Wizard |
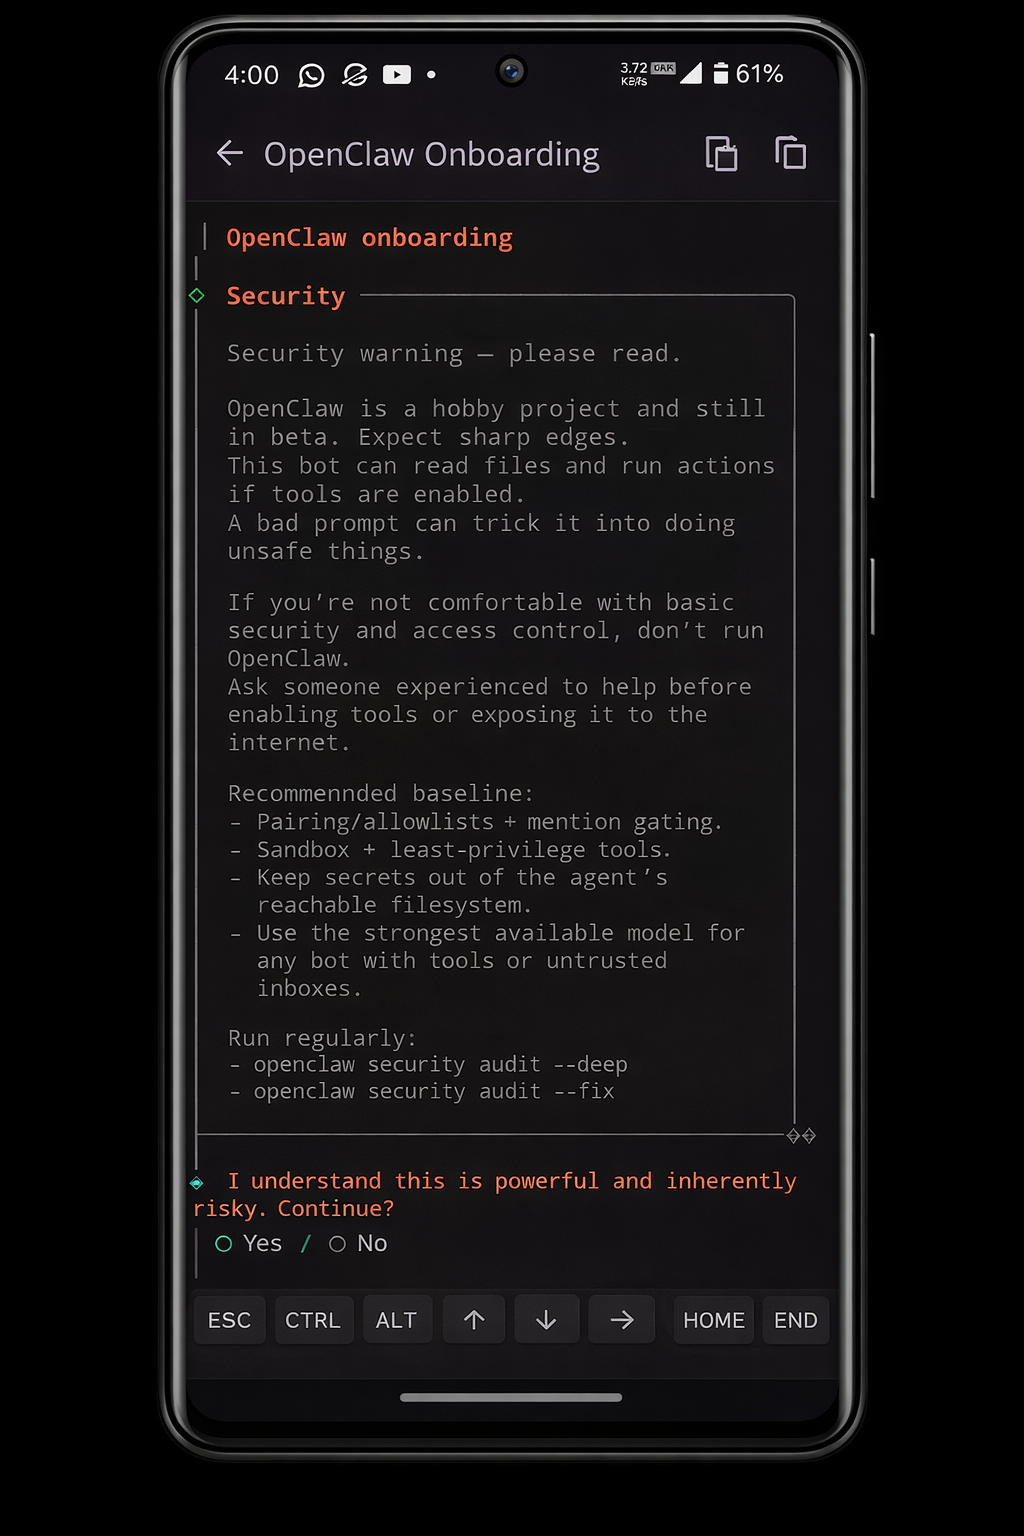
Onboarding |
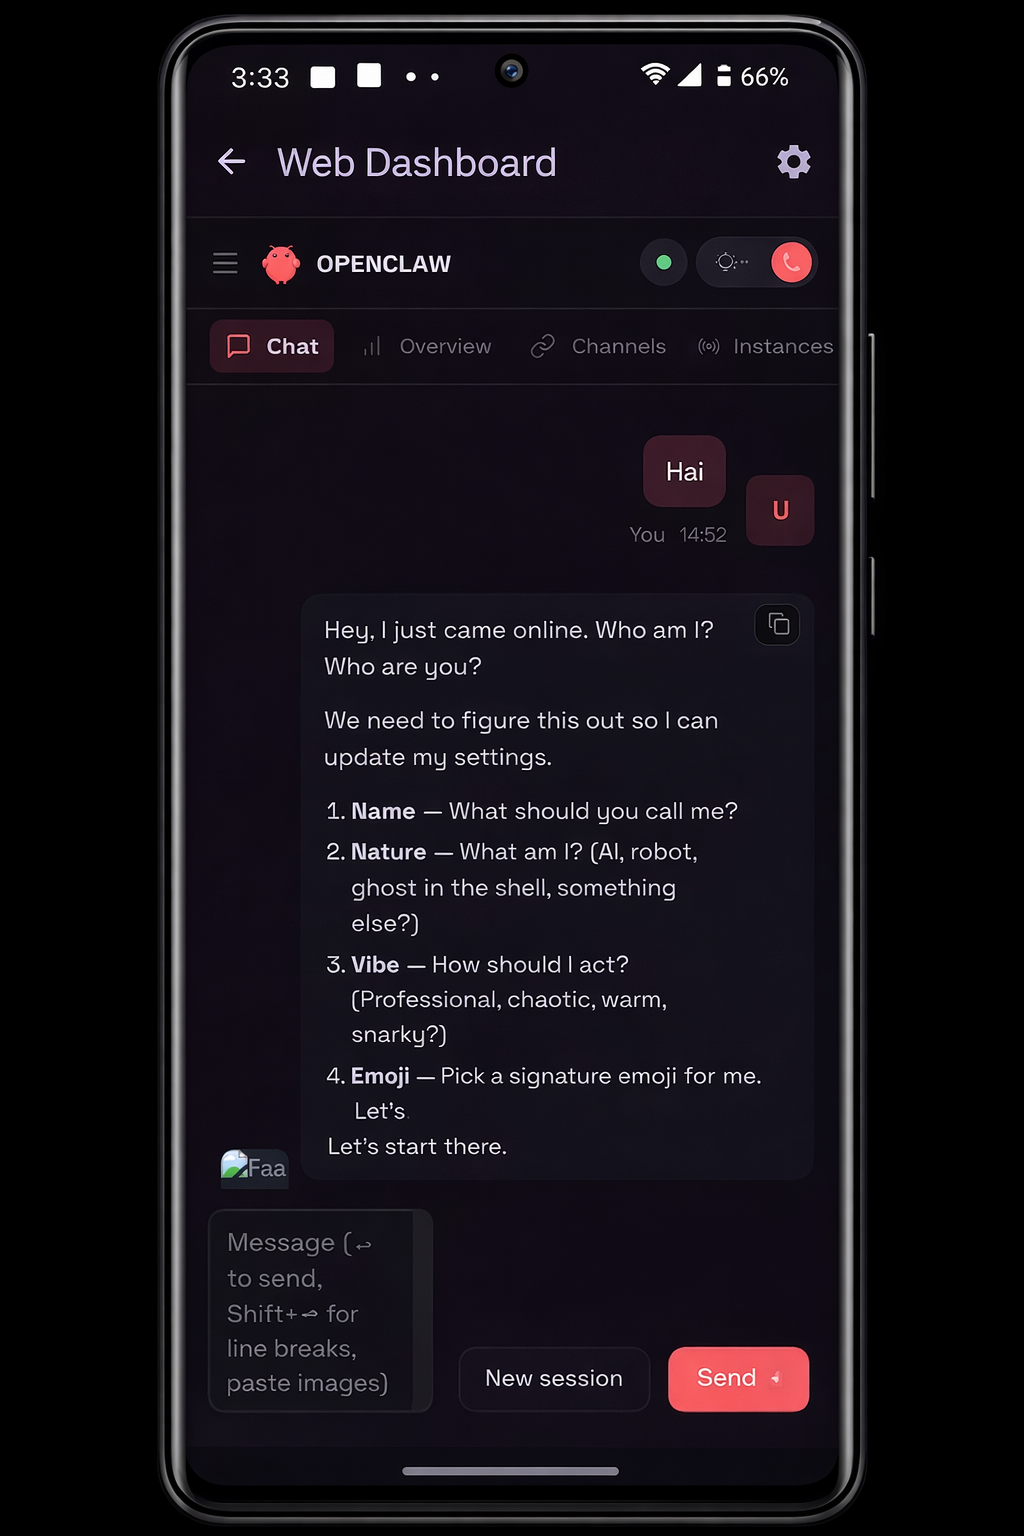
Web Dashboard |
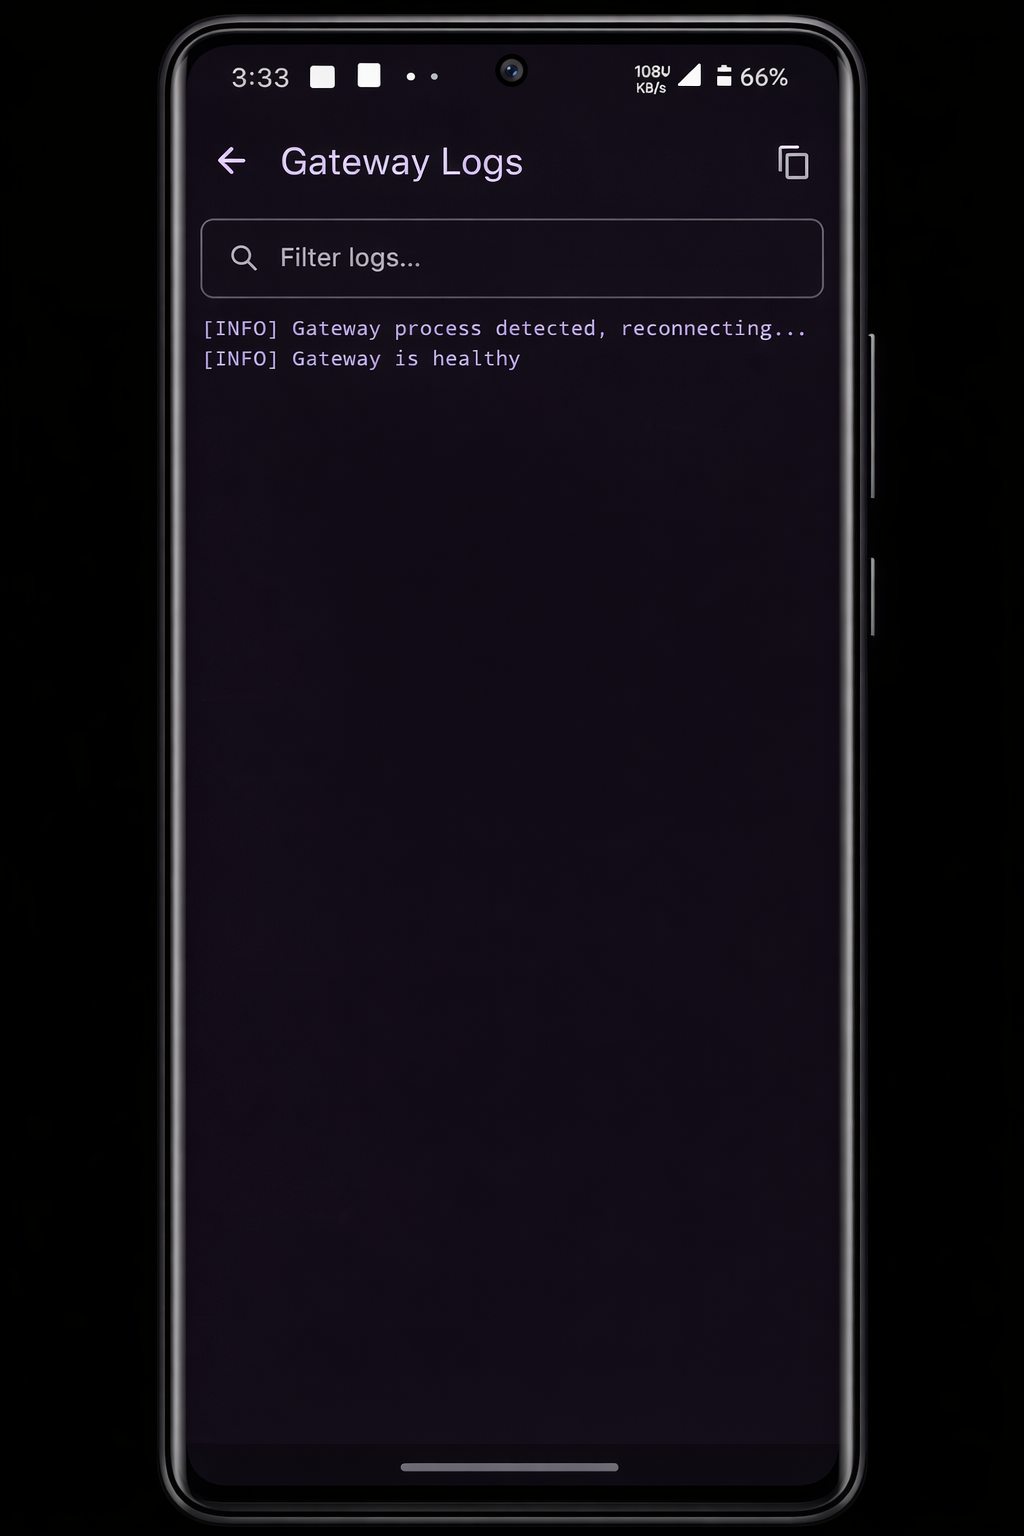
Logs |
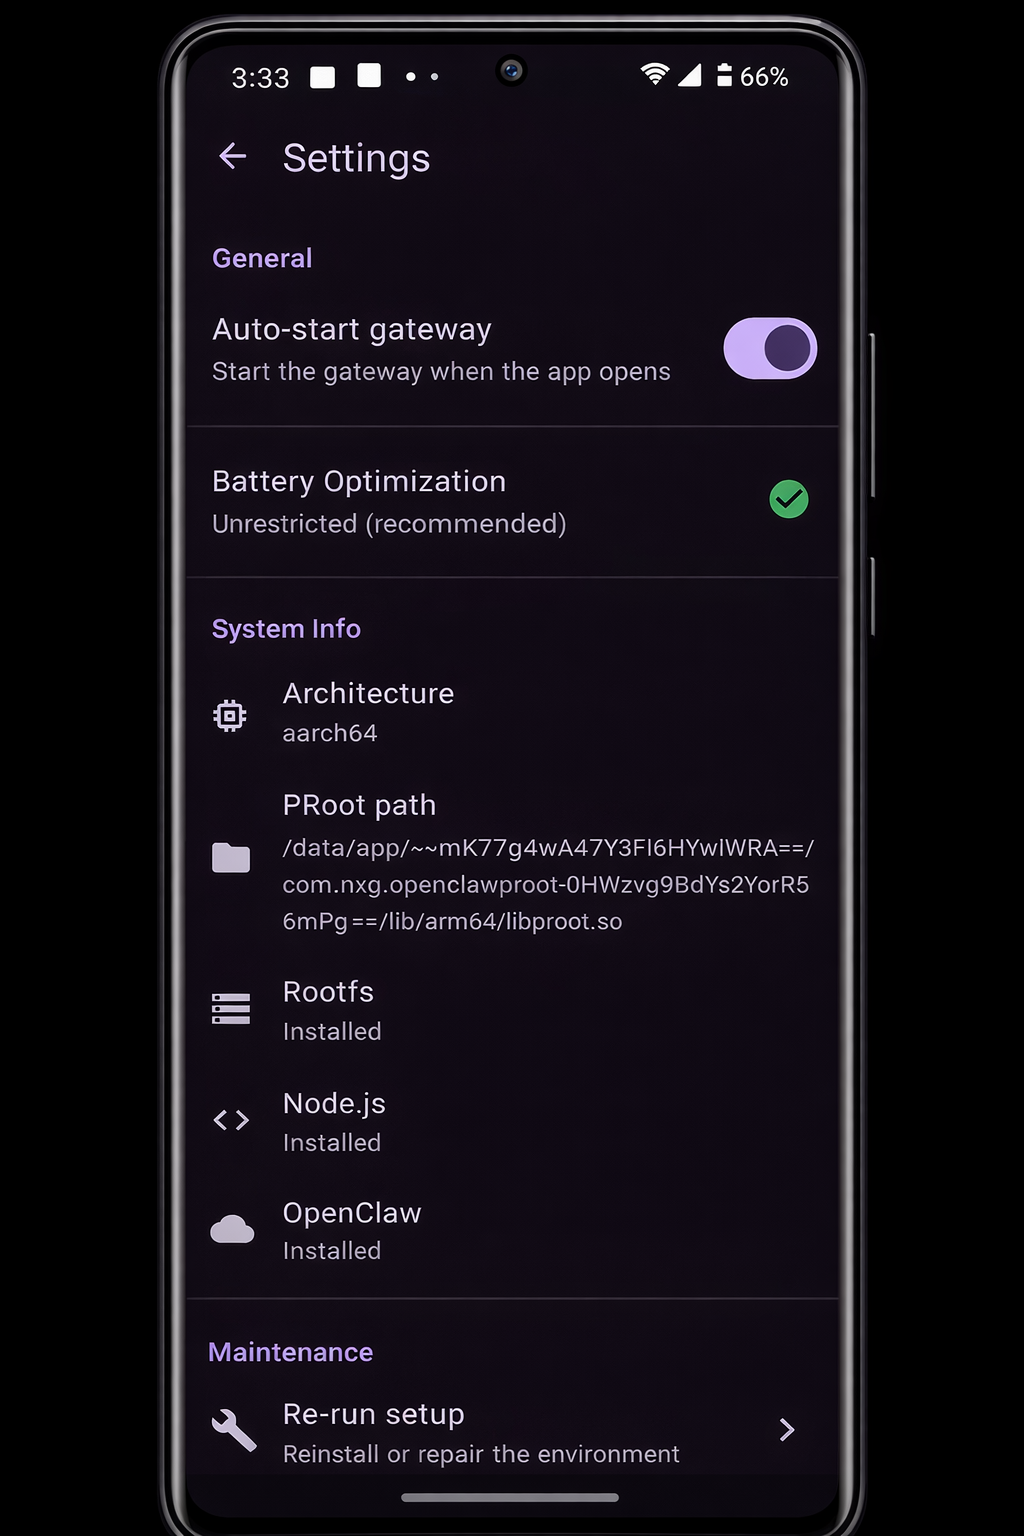
Settings |
---
## What is OpenClaw?
OpenClaw brings the [OpenClaw](https://github.com/anthropics/openclaw) AI gateway to Android. It sets up a full Ubuntu environment via proot, installs Node.js and OpenClaw, and provides a native Flutter UI to manage everything — no root required.
### Two Ways to Use
| | **Flutter App** (Standalone) | **Termux CLI** |
|---|---|---|
| Install | Build APK or download release | `npm install -g openclaw-termux` |
| Setup | Tap "Begin Setup" | `openclawx setup` |
| Gateway | Tap "Start Gateway" | `openclawx start` |
| Terminal | Built-in terminal emulator | Termux shell |
| Dashboard | Built-in WebView | Browser at `localhost:18789` |
---
## Features
### Flutter App
- **One-Tap Setup** — Downloads Ubuntu rootfs, Node.js 22, and OpenClaw automatically
- **Built-in Terminal** — Full terminal emulator with extra keys toolbar, copy/paste, clickable URLs
- **Gateway Controls** — Start/stop gateway with status indicator and health checks
- **Node Device Capabilities** — 7 capabilities (15 commands) exposed to AI via WebSocket node protocol
- **Token URL Display** — Captures auth token from onboarding, shows it with a copy button
- **Web Dashboard** — Embedded WebView loads the dashboard with authentication token
- **View Logs** — Real-time gateway log viewer with search/filter
- **Onboarding** — Configure API keys and binding directly in-app
- **Optional Packages** — Install Go (Golang) and Homebrew as optional dev tools from the setup wizard or dashboard
- **Settings** — Auto-start, battery optimization, system info, package status, re-run setup
- **Foreground Service** — Keeps the gateway alive in the background with uptime tracking
- **Setup Notifications** — Progress bar notifications during environment setup
### Optional Packages
After the initial setup completes, you can optionally install development tools directly from the app:
| Package | Install Method | Size |
|---------|---------------|------|
| **Go (Golang)** | `apt install golang` | ~150 MB |
| **Homebrew** | Official installer (with root workaround) | ~500 MB |
These are accessible from:
- **Setup Wizard** — Package cards appear after setup completes
- **Dashboard** — "Packages" card in Quick Actions
- **Settings** — Shows installation status under System Info
### Node Device Capabilities
The Flutter app connects to the gateway as a **node**, exposing Android hardware to the AI. Permissions are requested proactively when the node is enabled.
| Capability | Commands | Permission |
|------------|----------|------------|
| **Camera** | `camera.snap`, `camera.clip`, `camera.list` | Camera |
| **Canvas** | `canvas.navigate`, `canvas.eval`, `canvas.snapshot` | None (not implemented) |
| **Flash** | `flash.on`, `flash.off`, `flash.toggle`, `flash.status` | Camera (torch) |
| **Location** | `location.get` | Location |
| **Screen** | `screen.record` | MediaProjection consent |
| **Sensor** | `sensor.read`, `sensor.list` | Body Sensors |
| **Haptic** | `haptic.vibrate` | None |
The gateway's `openclaw.json` is automatically patched before startup to clear `denyCommands` and set `allowCommands` for all 15 commands.
### Termux CLI
- **One-Command Setup** — Installs proot-distro, Ubuntu, Node.js 22, and OpenClaw
- **Bionic Bypass** — Fixes `os.networkInterfaces()` crash on Android's Bionic libc
- **Smart Loading** — Shows spinner until the gateway is ready
- **Pass-through Commands** — Run any OpenClaw command via `openclawx`
---
## Quick Start
### Flutter App (Recommended)
1. Download the latest APK from [Releases](https://github.com/mithun50/openclaw-termux/releases)
2. Install the APK on your Android device
3. Open the app and tap **Begin Setup**
4. After setup completes, optionally install **Go** or **Homebrew** from the package cards
5. Configure your API keys in **Onboarding**
6. Tap **Start Gateway** on the dashboard
Or build from source:
```bash
git clone https://github.com/mithun50/openclaw-termux.git
cd openclaw-termux/flutter_app
flutter build apk --release
```
### Termux CLI
#### One-liner (recommended)
```bash
curl -fsSL https://raw.githubusercontent.com/mithun50/openclaw-termux/main/install.sh | bash
```
#### Or via npm
```bash
npm install -g openclaw-termux
openclawx setup
```
---
## Requirements
| Requirement | Details |
|-------------|---------|
| **Android** | 10 or higher (API 29) |
| **Storage** | ~500MB for Ubuntu + Node.js + OpenClaw |
| **Architectures** | arm64-v8a, armeabi-v7a, x86_64 |
| **Termux** (CLI only) | From [F-Droid](https://f-droid.org/packages/com.termux/) (NOT Play Store) |
---
## CLI Usage
```bash
# First-time setup (installs proot + Ubuntu + Node.js + OpenClaw)
openclawx setup
# Check installation status
openclawx status
# Start OpenClaw gateway
openclawx start
# Run onboarding to configure API keys
openclawx onboarding
# Enter Ubuntu shell
openclawx shell
# Any OpenClaw command works directly
openclawx doctor
openclawx gateway --verbose
```
---
## Architecture
```
┌───────────────────────────────────────────────────┐
│ Flutter App (Dart) │
│ ┌──────────┐ ┌──────────┐ ┌──────────────┐ │
│ │ Terminal │ │ Gateway │ │ Web Dashboard│ │
│ │ Emulator │ │ Controls │ │ (WebView) │ │
│ └─────┬────┘ └─────┬────┘ └──────┬───────┘ │
│ │ │ │ │
│ ┌─────┴────────────┴─────────────┴─────────────┐ │
│ │ Native Bridge (Kotlin) │ │
│ └─────────────────┬────────────────────────────┘ │
│ │ │
│ ┌─────────────────┴────────────────────────────┐ │
│ │ Node Provider (WebSocket) │ │
│ │ Camera · Flash · Location · Screen │ │
│ │ Sensor · Haptic · Canvas │ │
│ └─────────────────┬────────────────────────────┘ │
└────────────────────┼──────────────────────────────┘
│
┌────────────────────┼──────────────────────────────┐
│ proot-distro │ Ubuntu │
│ ┌─────────────────┴──────────────────────────┐ │
│ │ Node.js 22 + Bionic Bypass │ │
│ │ ┌─────────────────────────────────────┐ │ │
│ │ │ OpenClaw AI Gateway │ │ │
│ │ │ http://localhost:18789 │ │ │
│ │ │ ← Node WS: 15 device commands │ │ │
│ │ └─────────────────────────────────────┘ │ │
│ │ Optional: Go, Homebrew │ │
│ └────────────────────────────────────────────┘ │
└───────────────────────────────────────────────────┘
```
### Flutter App Structure
```
flutter_app/lib/
├── main.dart # App entry point
├── constants.dart # App constants, URLs, author info
├── models/
│ ├── gateway_state.dart # Gateway status, logs, token URL
│ ├── node_state.dart # Node connection status
│ ├── node_frame.dart # WebSocket frame model (req/res/event)
│ ├── setup_state.dart # Setup wizard progress
│ └── optional_package.dart # Optional package metadata (Go, Homebrew)
├── providers/
│ ├── gateway_provider.dart # Gateway state management
│ ├── node_provider.dart # Node capabilities + permission management
│ └── setup_provider.dart # Setup state management
├── screens/
│ ├── splash_screen.dart # Launch screen with routing
│ ├── setup_wizard_screen.dart # First-time setup + optional packages
│ ├── onboarding_screen.dart # API key configuration terminal
│ ├── dashboard_screen.dart # Main dashboard with quick actions
│ ├── terminal_screen.dart # Full terminal emulator
│ ├── web_dashboard_screen.dart # WebView for OpenClaw dashboard
│ ├── packages_screen.dart # Optional package manager
│ ├── package_install_screen.dart # Terminal-based package installer
│ ├── logs_screen.dart # Gateway log viewer
│ └── settings_screen.dart # App settings and about
├── services/
│ ├── native_bridge.dart # Kotlin platform channel bridge
│ ├── gateway_service.dart # Gateway lifecycle, health checks, config patching
│ ├── node_service.dart # Node WebSocket connection + invoke handling
│ ├── node_ws_service.dart # Raw WebSocket transport
│ ├── node_identity_service.dart # Device identity + crypto signing
│ ├── terminal_service.dart # proot shell configuration
│ ├── bootstrap_service.dart # Environment setup orchestration
│ ├── package_service.dart # Optional package status checking
│ ├── preferences_service.dart # Persistent settings (token URL, etc.)
│ └── capabilities/
│ ├── capability_handler.dart # Base class with permission handling
│ ├── camera_capability.dart # Photo/video capture
│ ├── canvas_capability.dart # WebView stub (NOT_IMPLEMENTED)
│ ├── flash_capability.dart # Torch on/off/toggle
│ ├── location_capability.dart # GPS with timeout + fallback
│ ├── screen_capability.dart # Screen recording via MediaProjection
│ ├── sensor_capability.dart # Accelerometer, gyroscope, etc.
│ └── vibration_capability.dart # Haptic feedback
└── widgets/
├── gateway_controls.dart # Start/stop, URL display, copy button
├── terminal_toolbar.dart # Extra keys (Tab, Ctrl, Esc, arrows)
├── status_card.dart # Reusable status card
└── progress_step.dart # Setup wizard step indicator
```
---
## Configuration
### Onboarding
When running onboarding (in-app or via `openclawx onboarding`):
- **Binding**: Select `Loopback (127.0.0.1)` for non-rooted devices
- **API Keys**: Add your Gemini/OpenAI/Claude keys
- **Token URL**: The app automatically captures and stores the auth token URL (e.g. `http://localhost:18789/#token=...`)
### Battery Optimization
> **Important:** Disable battery optimization for the app to keep the gateway alive in the background.
**For the Flutter app:** Settings > Battery Optimization > tap to disable
**For Termux:** Android Settings > Apps > Termux > Battery > **Unrestricted**
---
## Dashboard
Access the web dashboard at the token URL shown in the app (e.g. `http://localhost:18789/#token=...`).
The Flutter app automatically loads the dashboard with your auth token via the built-in WebView.
| Command | Description |
|---------|-------------|
| `/status` | Check gateway status |
| `/think high` | Enable high-quality thinking |
| `/reset` | Reset session |
---
## Troubleshooting
### Gateway won't start
```bash
# Check status
openclawx status
# Re-run setup if needed
openclawx setup
# Make sure onboarding is complete
openclawx onboarding
```
### "os.networkInterfaces" error
Bionic Bypass not configured. Run setup again:
```bash
openclawx setup
```
### Process killed in background
Disable battery optimization for the app in Android settings.
### Permission denied
```bash
termux-setup-storage
```
---
## Manual Setup
Click to expand manual installation steps
### 1. Install proot-distro and Ubuntu
```bash
pkg update && pkg install -y proot-distro
proot-distro install ubuntu
```
### 2. Setup Node.js in Ubuntu
```bash
proot-distro login ubuntu
apt update && apt install -y curl
curl -fsSL https://deb.nodesource.com/setup_22.x | bash -
apt install -y nodejs
npm install -g openclaw
```
### 3. Create Bionic Bypass
```bash
mkdir -p ~/.openclaw
cat > ~/.openclaw/bionic-bypass.js << 'EOF'
const os = require('os');
const originalNetworkInterfaces = os.networkInterfaces;
os.networkInterfaces = function() {
try {
const interfaces = originalNetworkInterfaces.call(os);
if (interfaces && Object.keys(interfaces).length > 0) {
return interfaces;
}
} catch (e) {}
return {
lo: [{
address: '127.0.0.1',
netmask: '255.0.0.0',
family: 'IPv4',
mac: '00:00:00:00:00:00',
internal: true,
cidr: '127.0.0.1/8'
}]
};
};
EOF
```
### 4. Add to bashrc
```bash
echo 'export NODE_OPTIONS="--require ~/.openclaw/bionic-bypass.js"' >> ~/.bashrc
source ~/.bashrc
```
### 5. Run OpenClaw
```bash
openclaw onboarding # Select "Loopback (127.0.0.1)"
openclaw gateway --verbose
```
---
## Contributing
Contributions are welcome! Please feel free to submit a Pull Request.
1. Fork the repository
2. Create your feature branch (`git checkout -b feature/amazing-feature`)
3. Commit your changes (`git commit -m 'Add amazing feature'`)
4. Push to the branch (`git push origin feature/amazing-feature`)
5. Open a Pull Request
---
## Author
**Mithun Gowda B** | [NextGenX](https://play.google.com/store/apps/dev?id=8262374975871504599)
- GitHub: [@mithun50](https://github.com/mithun50)
- Email: [mithungowda.b7411@gmail.com](mailto:mithungowda.b7411@gmail.com)
- Instagram: [@nexgenxplorer_nxg](https://www.instagram.com/nexgenxplorer_nxg)
- YouTube: [@nexgenxplorer](https://youtube.com/@nexgenxplorer?si=UG-wBC8UIyeT4bbw)
- Play Store: [NextGenX Apps](https://play.google.com/store/apps/dev?id=8262374975871504599)
- Contact: [nxgextra@gmail.com](mailto:nxgextra@gmail.com)
---
## License
MIT License - see [LICENSE](LICENSE) file for details.
---
Made with ❤️ for the Android community by Mithun Gowda B | NextGenX