# Nebula Notebook
Nebula is an agent-native notebook — built for you and your AI to work in the same cells, and a fast, polished one even if you never touch the AI.
▶ Watch the 2½-minute tour · or skim the autoplay clips below
## Highlights
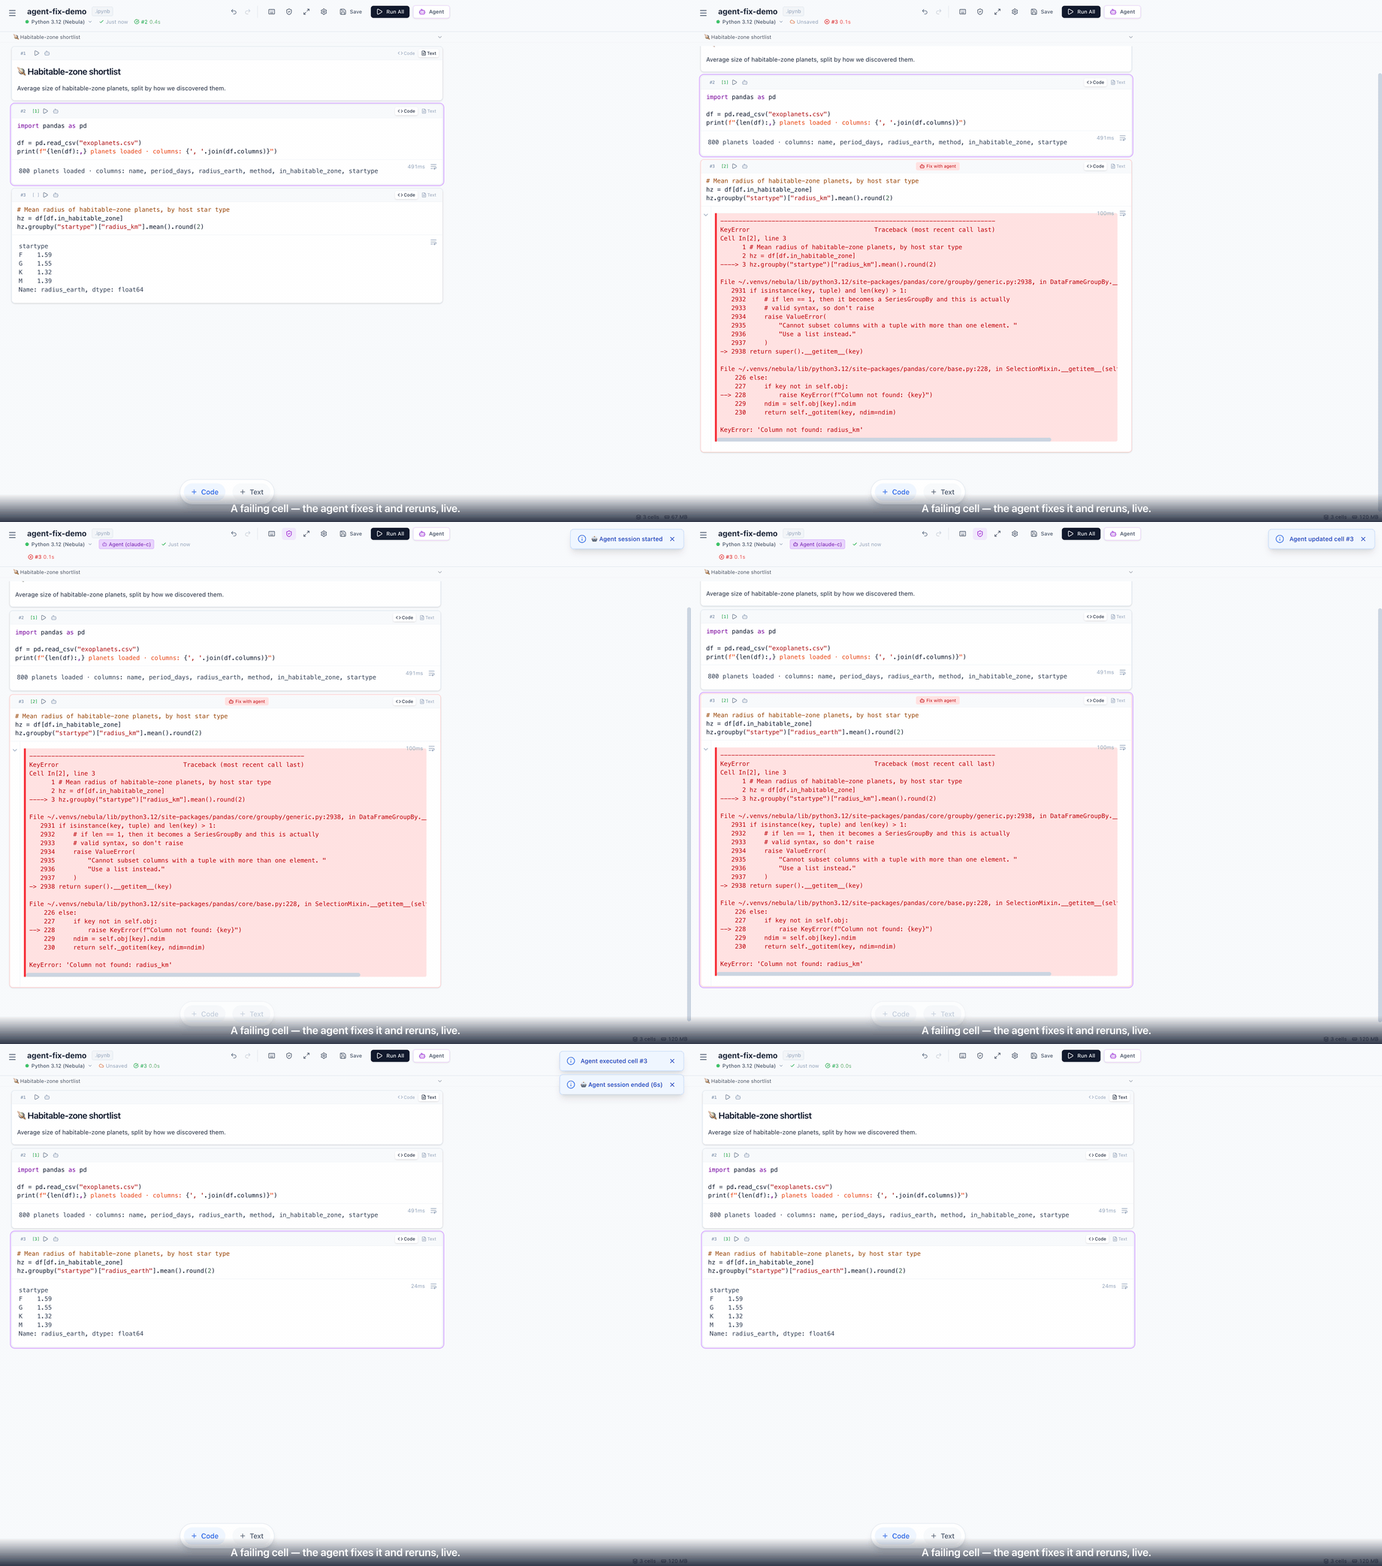
- **Your notebook and your agent, at the same time** — Claude Code, Codex, Cursor & friends drive notebooks through the **MCP** server or the **`nebula` CLI** (also installable as a Claude Code skill), and every notebook has a built-in agent terminal, one-click launched and pre-briefed. You keep editing *while* the agent edits: per-cell optimistic concurrency hands a conflicting agent your current content to retry against — nothing is silently overwritten. **"Fix with agent"** sits on every failing cell, and any cell takes a plain-English prompt
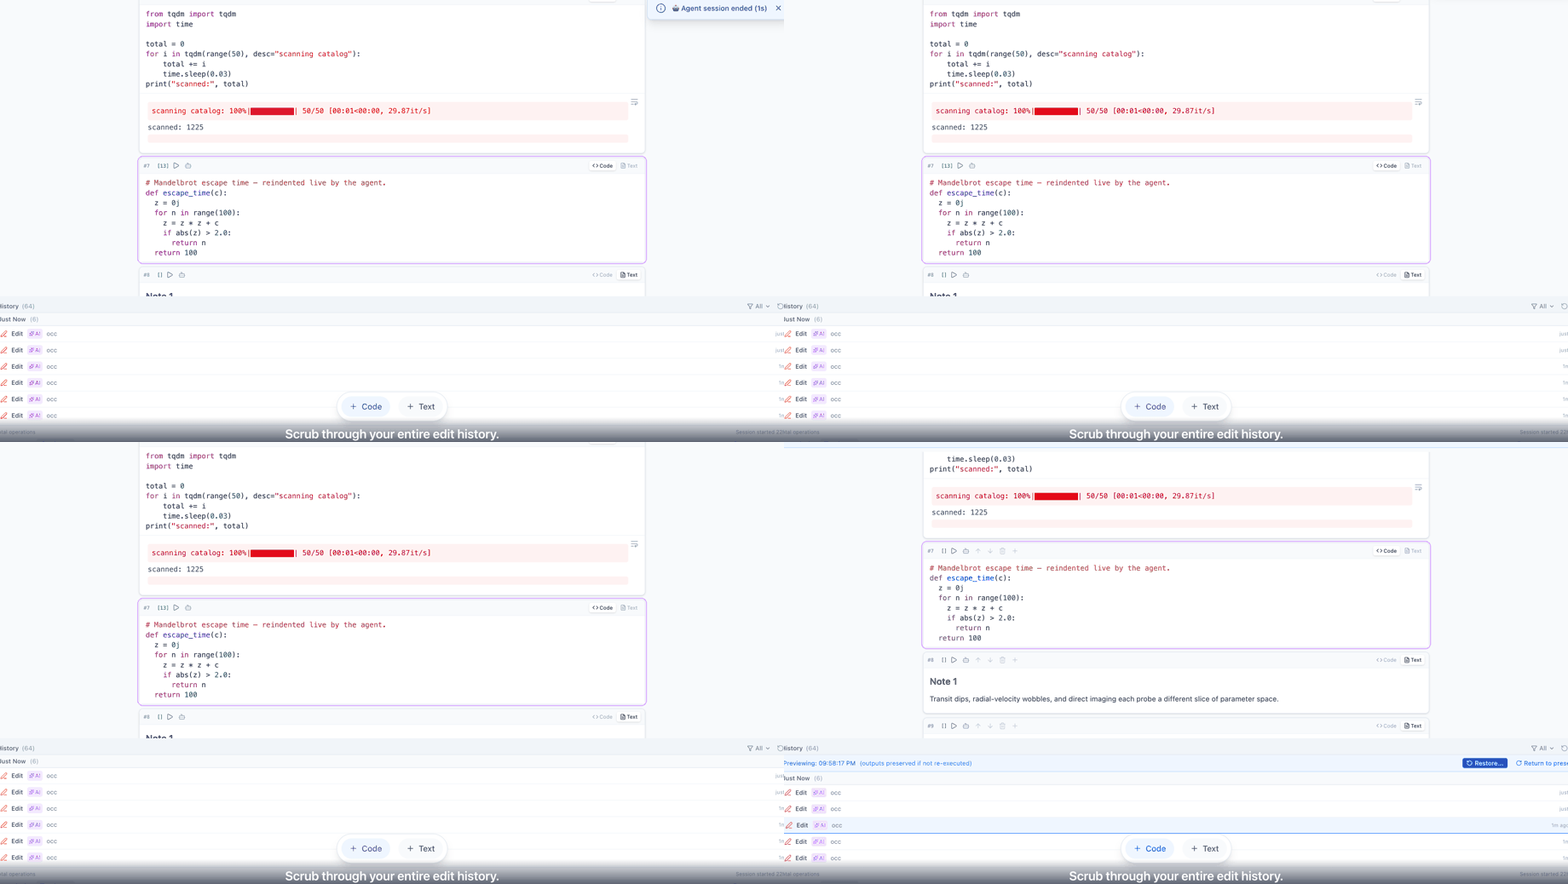
- **Never lose work** — **infinite undo/redo**, journaled to disk and surviving reloads — every edit, yours and the agent's; the History panel time-travels to any past moment with diff highlighting and one-click restore; autosave that notices when the file changed underneath you
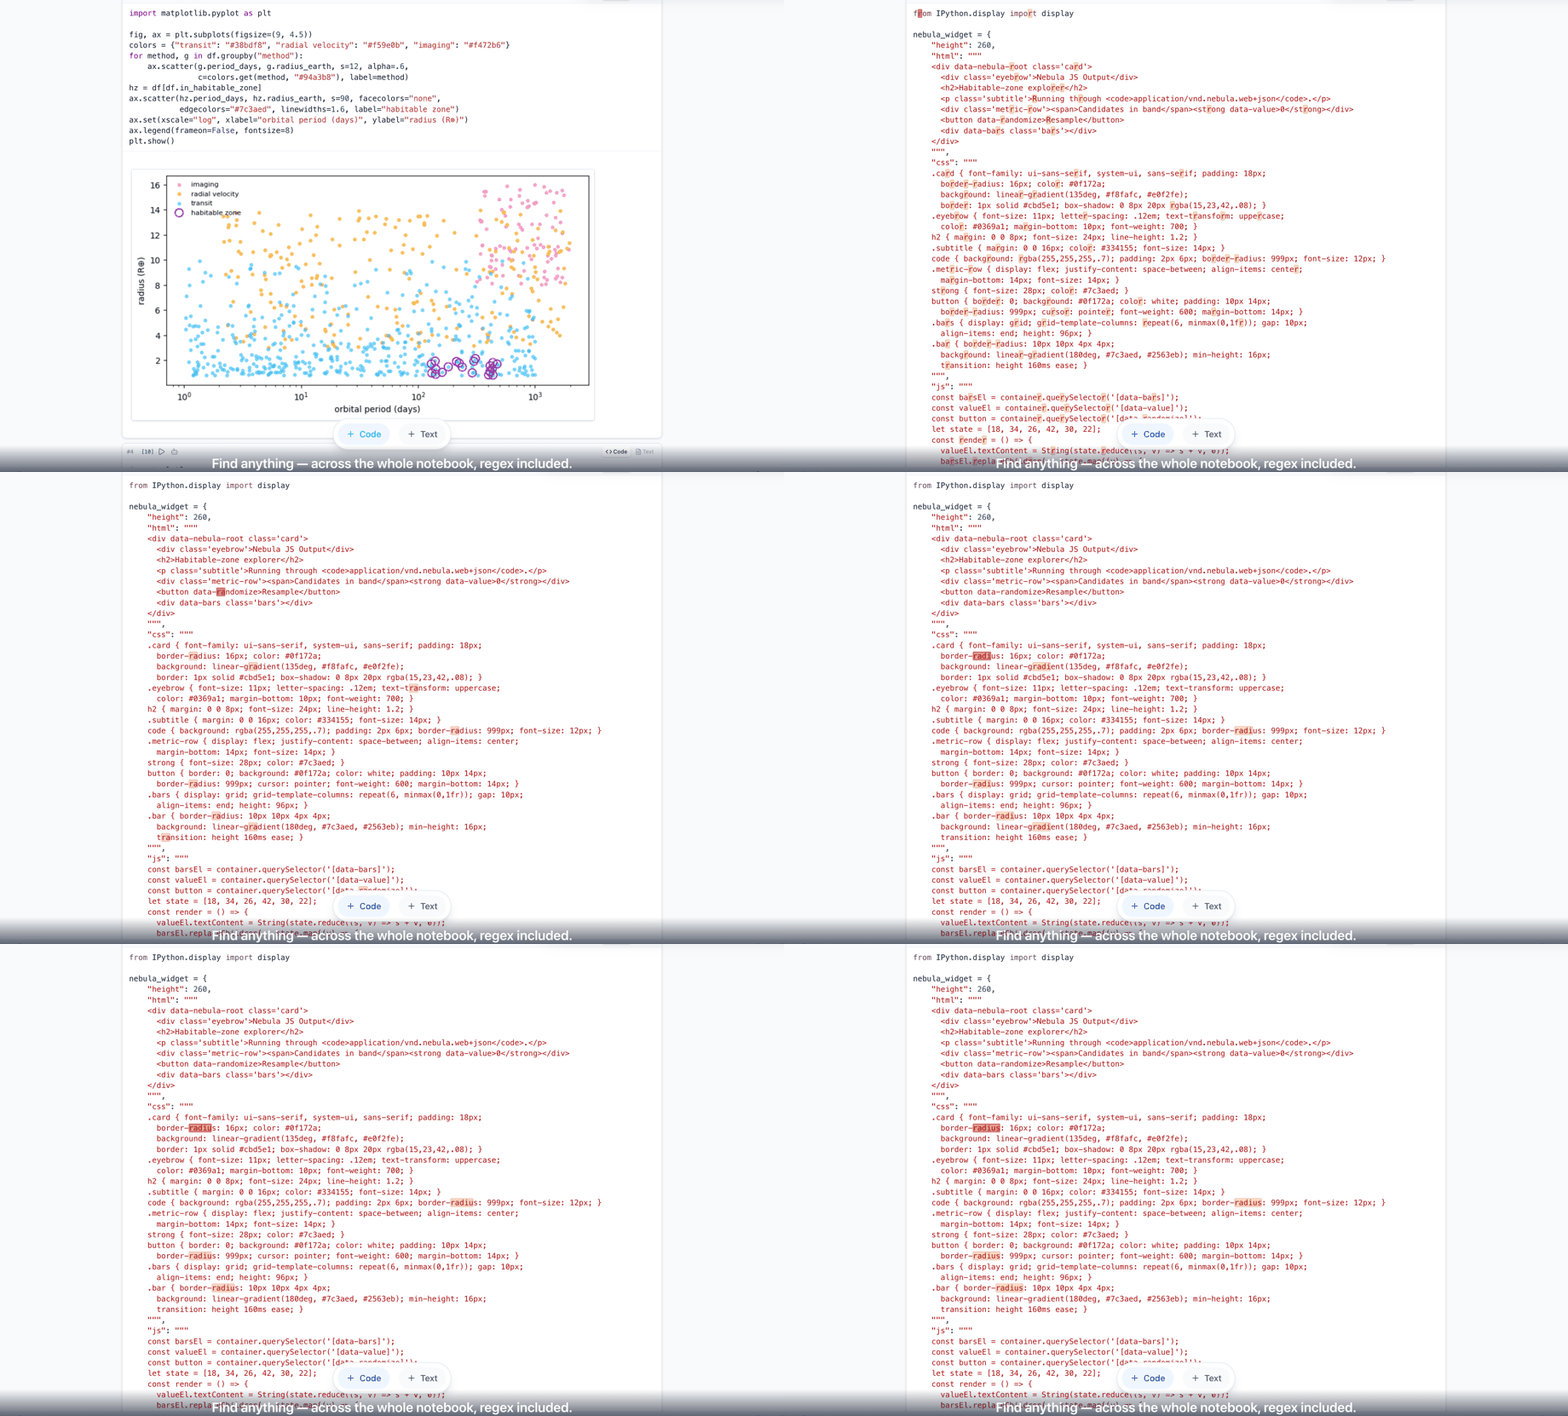
- **Everything smoother** — big notebooks open instantly (virtualized cells), Run All shows live queue positions and per-cell timings, `tqdm` renders as one clean bar, and there's real whole-notebook search & replace (regex included) plus a keyboard-first cell navigator
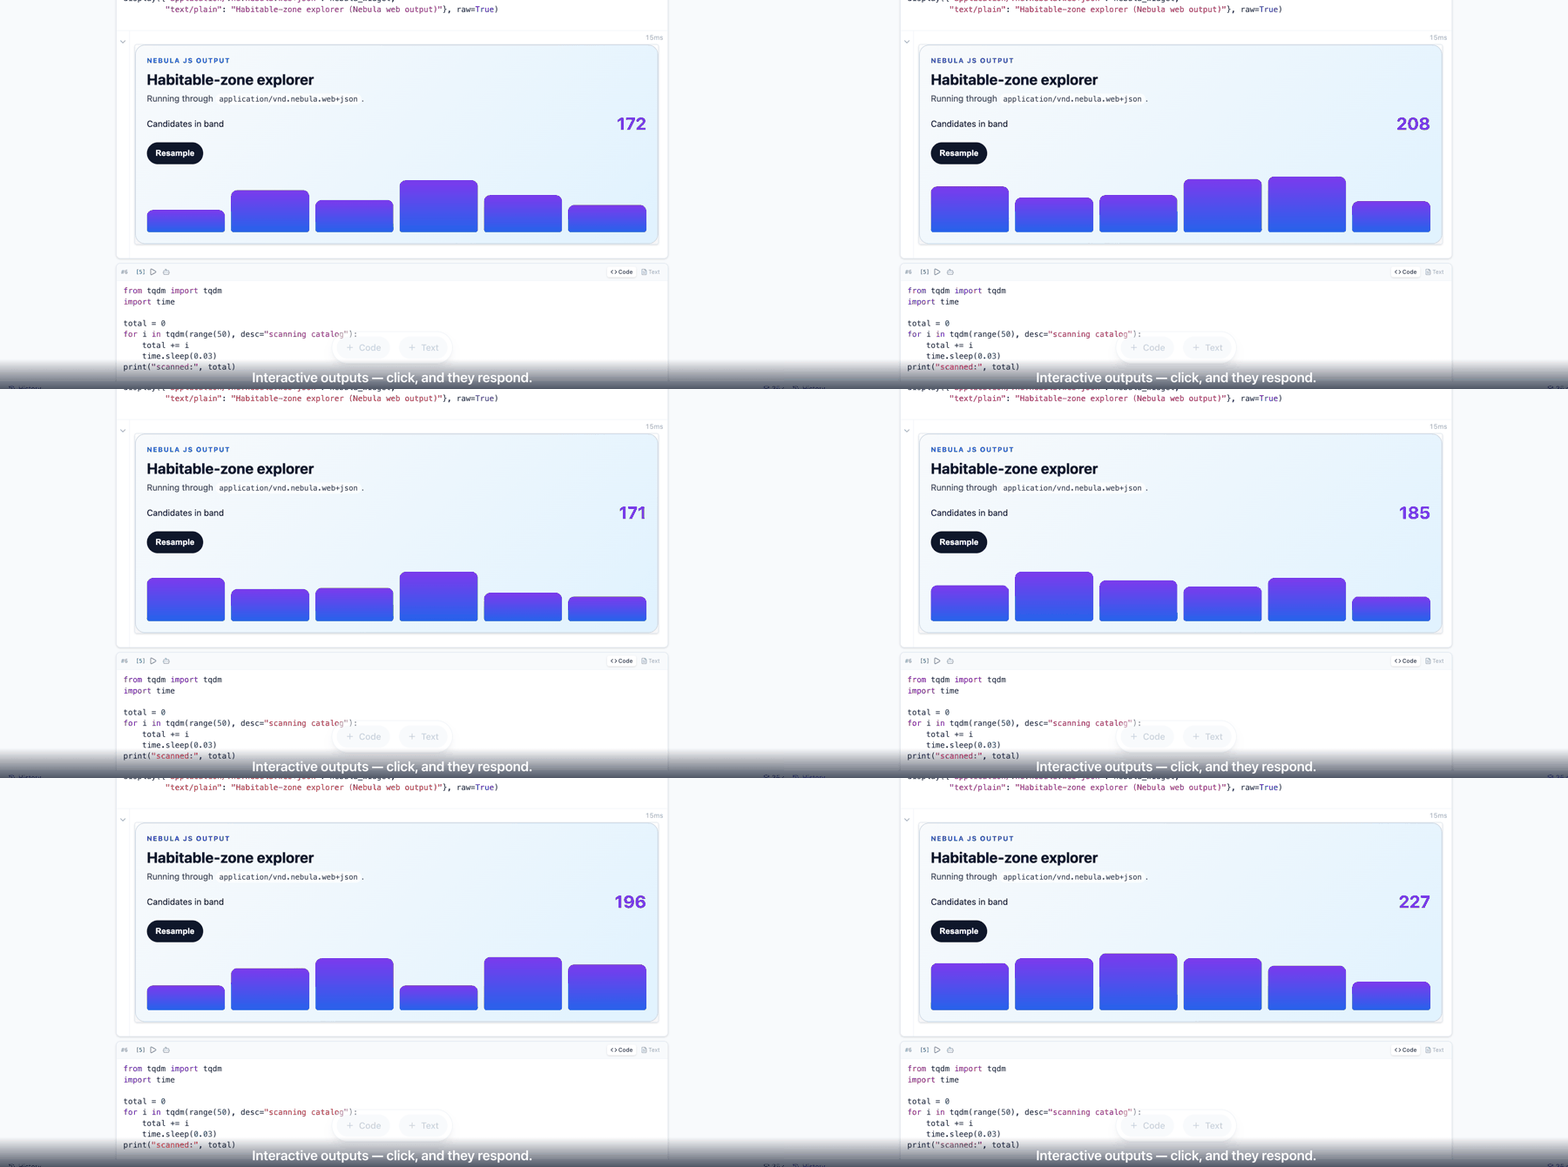
- **Rich outputs, no widget plumbing** — Plotly MIME rendering and Nebula-native interactive JS outputs that respond to clicks
- **Notebooks your git history will thank you for** — first-class **`.qmd` and `.py` (percent)** notebooks: clean text diffs, outputs never serialized
- **Meets your environment where it is** — detects conda / venv / uv / pixi / system Pythons with one-click kernel registration (and exact guidance when `ipykernel` is missing); Jupyter kernels over ZeroMQ (Python, Julia, R, …) survive server restarts and reattach
- **Runs anywhere — including where your compute lives** — `npx nebula-notebook`, TOTP 2FA, multi-server clusters behind one UI; on an HPC login node, allocate a scheduler job right from the kernel menu (partition/QoS/GPU, live queue-load monitor) and your kernel runs on the compute node — no sbatch script, no SSH tunnel, invisible off-cluster
## See it in action
**A failing cell, fixed by the agent live** — the cell errors, the agent rewrites it (presence ring on the cell it's touching) and reruns it clean:
**Interactive outputs, no widget plumbing** — `application/vnd.nebula.web+json` widgets respond to clicks:
**Time-travel through your edit history** — preview any past moment with diff highlighting, then restore:
**Find across the whole notebook** — regex search with live match counts:
All clips captured headlessly from the running app — regenerate with python scripts/demo-shoot.py all.
## Quick Start
### On your machine
```bash
npx nebula-notebook
```
On first start a QR code appears in the terminal — scan it with an authenticator app (Google Authenticator, Authy, …), then open http://localhost:3000 and enter the 6-digit code. A startup banner shows the URLs and what was detected.
Nebula itself is pure Node — but running notebooks needs a Python (3.10+) with `ipykernel` on the server machine. If none is found, the kernel menu detects your Python environments (venv, conda, uv, pixi, system) and shows the exact setup command for each; environments that already have `ipykernel` register with one click.
### On a cluster / remote server
Run the server where your files and compute live; browse it through one SSH tunnel:
```bash
# on the cluster login node (inside tmux so it outlives your session)
tmux new -s nebula
npx nebula-notebook
# from your laptop
ssh -L 3000:localhost:3000 # then open http://localhost:3000
```
If a SLURM scheduler is present, the kernel menu gains **New compute allocation** — your kernels run on compute nodes, no sbatch script, no extra tunnels. Full guide (bastions, persistent runs, agent placements, troubleshooting): [docs/CLUSTER_SETUP.md](docs/CLUSTER_SETUP.md).
### Let agents in
To let agents (Claude Code, Codex, Cursor, Gemini CLI, …) operate your notebooks, register the Nebula MCP on the machine where your agent runs:
```bash
npx nebula-notebook-mcp setup-mcp
```
Then open a notebook, click **Agent**, and launch Claude Code or Codex right in the notebook's terminal. Prefer a command line? The same package ships the shell-first `nebula` CLI (`npx -p nebula-notebook-mcp nebula --help`); run `nebula setup-skill` to install it as a **Claude Code skill** so agents outside a Nebula terminal know how to drive it.
**Prerequisite when the agent runs on your own machine** (Agent tab → *on: my machine*, or any terminal outside Nebula): that machine needs the `nebula` CLI available. Node.js ≥ 20 is enough — the agent is briefed to fall back to `npx -p nebula-notebook-mcp nebula …` when `nebula` isn't on PATH; installing `npm i -g nebula-notebook-mcp` skips the npx download. Agents launched in a Nebula terminal on the server need nothing extra — the CLI is pre-wired there.
### From source (latest)
npm releases are point-in-time snapshots — to get the latest changes, install from source:
```bash
git clone https://github.com/jzhoulab/nebula-notebook.git
cd nebula-notebook
npm install # dependencies only (root + subpackages) — no build yet
```
> Building from source needs devDependencies. If your shell sets `NODE_ENV=production`
> (common on servers), use `npm install --include=dev` — otherwise the build tools
> (`tsc`, `vite`) are skipped and the build steps below fail with "command not found".
To run the same production server `npx nebula-notebook` gives you (UI + API on :3000), build both halves once, then start it:
```bash
npm run build # frontend → dist/
npm run node-server:build # backend → node-server/dist/
node bin/nebula-notebook.js # accepts the same flags, e.g. --workdir
```
For hacking on Nebula itself there's also a dev mode with hot reload (`npm run start` — Vite on :3000, API on :8000); rebuild with the two build commands above after `git pull` to refresh a production install.
## Root Directory
Set the server root directory (default is your home directory):
```bash
npm run start --workdir /path/to/projects
```
This root is used for the file browser and terminals. You can also change it from the file browser UI and it will be remembered by the server.
## Features
**Core**
- Jupyter kernel execution (Python, Julia, R, etc.)
- Built-in file browser — open notebooks anywhere on disk
- Autosave with crash recovery
- Infinite undo/redo, journaled to disk (survives reloads) — time-travel to any past state with diff preview and one-click restore
**Navigation**
- Table of Contents breadcrumb - auto-generated from markdown headers
- Search & replace across all cells (Cmd/Ctrl+F)
- Keyboard shortcuts (Shift+Enter to run, Cmd+S to save, etc.)
**Agents**
- Agent terminal built into every notebook — one click launches Claude Code or Codex, pre-briefed with the server URL and notebook path
- "Fix with agent" on any failing cell, and per-cell prompts, injected straight into the agent's terminal
- Two ways for agents to plug in, same operations under the hood — **MCP** ([`nebula-notebook-mcp`](https://www.npmjs.com/package/nebula-notebook-mcp)) for tool-calling agents, and the shell-first **`nebula` CLI** (`nb read/edit/run`, `kernel`, `session`, `compute`) for scripting; the CLI also installs as a **Claude Code skill** (`nebula setup-skill`) for agents running outside a Nebula terminal
- Full toolset on both: read/edit/execute cells, manage kernels and files, and allocate cluster compute — from any agent on any machine
- Agent sessions lock the notebook during edits and sync live into the UI
**Editor**
- Syntax highlighting with CodeMirror
- Tab autocomplete for variables
- Auto-indent detection
- Execution queue with status indicators
**UI/UX**
- Virtualized cell list for large notebooks
- Collapsible/resizable outputs
- Rich interactive outputs, including Plotly MIME rendering and Nebula-native JS outputs
- Sound & browser notifications for long-running cells
- Dark-mode friendly error display
## Rich Outputs
Nebula supports structured rich notebook outputs instead of flattening everything to plain text.
- Jupyter-compatible Plotly rendering via `application/vnd.plotly.v1+json`
- Nebula-native interactive outputs via `application/vnd.nebula.web+json`
See [docs/RICH_OUTPUTS.md](docs/RICH_OUTPUTS.md) for examples, payload format, shared library loading, and current compatibility limits.
## Prerequisites
- Node.js 20+
- Python 3.10+ with `ipykernel`, on the machine running the server (other Jupyter kernels — Julia, R, … — work too)
No ipykernel yet? Open the kernel menu in the UI: it detects your Python environments (venv, conda, uv, pixi, Homebrew, system), registers ready ones with one click, and shows the exact install command for the rest — including the PEP 668 "externally managed" cases (uv/Homebrew/system Python) where `pip install` is blocked and an isolated env is the right move.
Using **R** (or another non-Python kernel)? See [docs/R_KERNEL.md](docs/R_KERNEL.md) — registering IRkernel and the one-line fix for the common headless-server plotting error.
## Project Structure
```
nebula-notebook/
├── components/ # React components
├── hooks/ # Custom React hooks
├── lib/ # Core utilities (diff, operations)
├── services/ # Frontend API clients
├── node-server/ # Node.js Express backend
│ └── src/
│ ├── index.ts # Server entry point
│ ├── kernel/ # Jupyter kernel management (ZeroMQ)
│ ├── cluster/ # Multi-server cluster support
│ ├── auth/ # 2FA authentication
│ └── routes/ # API routes
├── packages/
│ └── mcp/ # Separately installable MCP adapter package
└── types.ts
```
## MCP Adapter
The MCP adapter is published as [`nebula-notebook-mcp`](https://www.npmjs.com/package/nebula-notebook-mcp)
and lives in this repository under `packages/mcp`. It is a separate package so it
can be installed on a local agent/client machine even when the Nebula Notebook
server is running elsewhere.
```bash
# Register the MCP with your installed agent CLIs (Claude Code, Codex, …)
npx nebula-notebook-mcp setup-mcp
# Agents must call connect_server(base_url) once per session —
# the base_url is the URL you open Nebula at, e.g. http://localhost:3000
# From a repo checkout instead: build or run the MCP server
npm run mcp:build
npm run mcp
```
## Authentication
Nebula uses TOTP-based two-factor authentication, with passkeys as an optional faster way in:
1. **First Start**: QR code printed to terminal - scan with authenticator app
2. **Login**: Enter 6-digit code in browser (or use a passkey once you have enrolled one)
3. **Session**: 30 days by default ("Keep me signed in on this device" is pre-checked); untick it for a 24-hour session
Config stored in `~/.nebula/auth.json`. Multiple servers sharing the same home directory share the same 2FA.
### Passkeys / biometrics
After signing in with a code once, open **Settings → Security → Add this device** to enroll a passkey
(Touch ID, Face ID, Windows Hello, or a security key). The login screen then offers **Sign in with
passkey**; the code stays available as the fallback. Passkey logins always get the 30-day session.
- Passkeys are stored in `~/.nebula/passkeys.json` (mode 0600, public keys only — nothing secret).
- A passkey is bound to the **hostname** you enroll it at (the WebAuthn rpID). Through an ssh tunnel that is
`localhost`, so a passkey enrolled from one laptop's tunnel works from another laptop's tunnel to the same
server when the platform syncs it (iCloud Keychain, Google Password Manager). A passkey enrolled at a
domain name is only offered at that domain.
- Open Nebula as **`http://localhost:PORT`, not `http://127.0.0.1:PORT`** — WebAuthn does not allow an IP
address as the rpID, and the server refuses to enroll or offer passkeys there (with that hint).
`localhost` counts as a secure context, so no TLS is needed for the tunnel case.
To print the QR code again later (for re-enroll/recovery), run:
```bash
npm run auth:qr
```
### Disable 2FA (local/dev)
Run the server with auth disabled:
```bash
npm run start --noauth
```
You can also use an env var if preferred:
```bash
NO_AUTH=true npm run start
```
### Preserve + Reattach Kernels (dev)
To keep kernels running across dev server restarts and reattach on startup:
```bash
NEBULA_PRESERVE_KERNELS=true NEBULA_REATTACH_KERNELS=true npm run start
```
CLI flags are also supported when running the node server directly:
```bash
cd node-server
npm run dev -- --preserve-kernels --reattach-kernels
```
## Multi-Server Cluster
Run kernels on multiple machines while accessing them from a single UI. Useful for:
- Offloading compute to more powerful servers
- Using different Python environments on different machines
- Distributed team setups with shared filesystem
### Setup
**Main Server** (the one you access in the browser):
```bash
npm run start
```
**Client Server** (additional compute nodes):
```bash
export NEBULA_MAIN_SERVER=http://main-server-hostname:3000
export NEBULA_SERVER_NAME="GPU Server" # optional display name
npm run start -- --client
```
The client will automatically register with the main server and appear in the kernel menu.
### Usage
1. Click the kernel indicator in the toolbar
2. If multiple servers are registered, a **Server** section appears at the top
3. Select a server to run your kernels on that machine
4. Kernels, interrupt, and restart all work transparently across servers
### Security
For production deployments, set a shared secret on all servers:
```bash
export NEBULA_CLUSTER_SECRET="your-secret-key"
```
If your clients share the same filesystem as the main server, you can also copy `~/.nebula/cluster.json` from the main server instead of setting the env var.
Servers without the correct secret will be rejected during registration.
### Requirements
- All servers must have network access to each other
- Client servers need access to the same filesystem paths as the main server (for notebook files)
- Each server runs its own Jupyter kernels locally
### Scheduler-backed compute (HPC)
On an HPC login node you don't launch client servers by hand — the scheduler does it for you. When Nebula detects a scheduler (SLURM first — `sbatch`/`squeue` on `PATH`), the kernel menu's **Server** section grows a **+ New compute allocation** entry:
- **Allocate from the notebook.** Pick a partition + QoS (only the ones your account may actually submit to), CPUs, memory, GPUs, and walltime. A **live cluster-load panel** sits beside the form — idle CPUs, idle GPUs *by type*, and per-queue backlog with your own jobs highlighted — and recommends the queue you'll land on soonest. Choosing a GPU queue narrows the GPU-type list to the models that queue actually has, so you can't request one it doesn't offer.
- **It just becomes a server.** Nebula submits the job; the allocation shows up in the Server list as *"Queued · waiting…"*, then flips to a normal online server the moment the job starts. Select it and your kernels run on the compute node — proxied over the same WebSocket path as any remote kernel, so ZeroMQ never crosses the network. One allocation hosts **many** kernels: queue once, run several notebooks in it. When the walltime ends (or you cancel), the server drops out of the list and its kernels are marked done.
- **Nothing changes off-cluster.** The whole feature is detection-gated — no scheduler on the machine, no compute UI. Design and internals in [docs/SLURM_COMPUTE.md](docs/SLURM_COMPUTE.md).
## Tips
**Persistent Terminals**: Access standalone terminals via URL:
```
http://localhost:3000/?terminal=dev
http://localhost:3000/?terminal=logs
```
Terminals persist as long as the server runs. Bookmark different terminals for quick access.
## Tech Stack
- **Frontend**: React 19, TypeScript, Vite, Tailwind CSS, CodeMirror
- **Backend**: Node.js, Fastify, ZeroMQ (Jupyter kernel protocol)
- **Auth**: TOTP (otplib), JWT (jsonwebtoken)
- **Agents**: MCP and the `nebula` CLI (also installable as a Claude Code skill), both in [`nebula-notebook-mcp`](https://www.npmjs.com/package/nebula-notebook-mcp), used by Claude Code, Codex, and other agent CLIs
## License
MIT