# MeiQia SDK for React Native
[](https://github.com/996icu/996.ICU/blob/master/LICENSE)
[](https://github.com/Kennytian/meiqia-react-native/pulls)
[](https://www.npmjs.com/package/meiqia-react-native)
[](https://www.npmjs.com/package/meiqia-react-native)
[](https://github.com/Kennytian/meiqia-react-native/graphs/contributors)
[](https://github.com/Kennytian/meiqia-react-native/commits/master)

[](http://hits.dwyl.io/Kennytian/meiqia-react-native)
## Getting started
`$ npm install meiqia-react-native --save`
or
`$ yarn add meiqia-react-native`
### Mostly automatic installation
`$ react-native link meiqia-react-native`
#### iOS
1. Select you app target on XCode and click the `Build Settings` tab. Go to the `Framework Search Paths` section and `add` this new entry
```
$(SRCROOT)/../node_modules/meiqia-react-native/ios
```
and make sure it is set to `recursive`
2. Select you app target on XCode and click the `Build Phases` tab. Go to the `Copy Bundle Resources` section and `add` this new entry
```
node_modules/meiqia-react-native/ios/MeiQiaSDK/MQChatViewController/Assets/MQChatViewAsset.bundle
```
### Manual installation
#### iOS
1. In XCode, in the project navigator, right click `Libraries` ➜ `Add Files to [your project's name]`
2. Go to `node_modules` ➜ `meiqia-react-native` and add `RNMeiqia.xcodeproj`
3. In XCode, in the project navigator, select your project. Add `libRNMeiqia.a` to your project's `Build Phases` ➜ `Link Binary With Libraries`
4. Select you app target on XCode and click the `Build Settings` tab. Go to the `Framework Search Paths` section and add this new entry
```
$(SRCROOT)/../node_modules/meiqia-react-native/ios
```
and make sure it is set to `recursive`
5. Select you app target on XCode and click the `Build Phases` tab. Go to the `Copy Bundle Resources` section and `add` this new entry
```
node_modules/meiqia-react-native/ios/MeiQiaSDK/MQChatViewController/Assets/MQChatViewAsset.bundle
```
6. Run your project (`Cmd+R`)<
#### Android
1. Open up `android/app/src/main/java/[...]/MainActivity.java`
- Add `import com.reactlibrary.RNMeiqiaPackage;` to the imports at the top of the file
- Add `new RNMeiqiaPackage()` to the list returned by the `getPackages()` method
2. Append the following lines to `android/settings.gradle`:
```
include ':meiqia-react-native'
project(':meiqia-react-native').projectDir = new File(rootProject.projectDir, '../node_modules/meiqia-react-native/android')
```
3. Insert the following lines inside the dependencies block in `android/app/build.gradle`:
```
compile project(':meiqia-react-native')
```
## Usage
#### import
```javascript
import { MeiqiaInit, MeiqiaShow } from 'meiqia-react-native';
```
#### init appKey
```javascript
MeiqiaInit({ appKey:'xxx' }).then((config)=>{
console.log('config info:', config);
// {"code:": 0, "clientId": "xxxxx", "message": 'success'}
});
```
#### launch chat window
```javascript
MeiqiaShow({});
```
or, if you known
```javascript
MeiqiaShow({
titleColor: '',
titleBarColor: '',
naviColor: '',
clientInfo: {
name: 'Kenny锅',
gender: '男',
age: '20',
tel: '13800138000',
weixin: 'wechat007',
weibo: 'weibo007',
address: '湖北省武汉市xxx',
email: 'kenny@china.com',
avator: 'https://s3.cn-north-1.amazonaws.com.cn/pics.meiqia.bucket/1dee88eabfbd7bd4',
source: '朋友推荐',
comment: '全栈,就是了不起,备注也没问题'
},
customId:{id:''},
clientId:{id:''},
scheduledInfo:{agentId:'', agentGroup:'', scheduleRule: 'none|group|enterprise', },
});
```
> Now, we can see the default chat window
## APIs
### MeiqiaInit
`MeiqiaInit({param1, param2, ...});`
| param name | param type | default value | platform
| :------: | :------ | :------ | :------: |
| appKey | string | required | all
### MeiqiaShow
`MeiqiaShow({param1, param2, ...});`
| param name | param type | default value | platform
| :------: | :------ | :------ | :------: |
| titleColor | string | '#000000' | iOS
| titleBarColor | string | '' | iOS
| naviColor | string | '' | iOS
| clientInfo | Object | {} | all
| customId | Object | {} | all
| clientId | Object | {} | all
| scheduledInfo | Object | {} | all
### MeiqiaStartService
`MeiqiaStartService();`
### MeiqiaStopService
`MeiqiaStopService();`
### MeiqiaRegisterDeviceToken
`MeiqiaRegisterDeviceToken('xxxx-xxx-xxx');`
> NOTICE: This function only for iOS
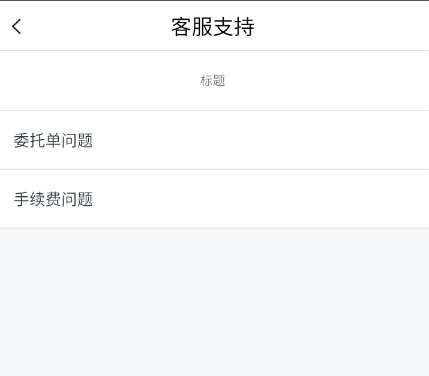
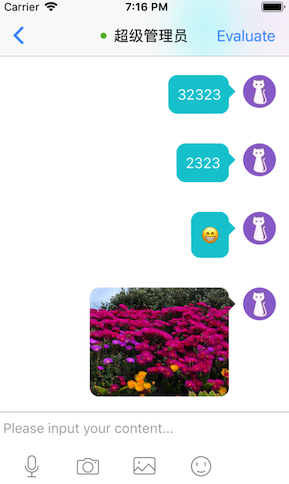
## Screenshot
### Android

### iOS
## Debugging
#### iOS
>Q: Why debugging on real device, the UI language is English?
In order to properly recognize the App's system language, you need to add a Localizations configuration. If you need to support English, Simplified Chinese, and Traditional Chinese, you need the following configuration in the Source Code of `info.plist`:
```xml
CFBundleLocalizations
zh_CN
zh_TW
en
```
or you also can run npm script: `node ./node_modules/meiqia-react-native/ios-configuration.js YOUR_APP_NAME`