KissML
======
KissML is a little markup language that compiles into HTML and XML. You can also extend it to compile into templating languages such as RactiveJS.
The goal of KissML is to focus on making well structured, readable documents.
Installation
------------
npm install -g kissml
Getting started
---------------
With KissML, instead of writing tags, you write words and indent them properly, i.e.
html
head
title : My First KissML document
body
h1 : KissML
p
: This is my first KissML document
: It's nicely formatted and well
: structured!
You can then use the kissml utility to turn this document into HTML:
kissml mydoc.kis > mydoc.html
Which produces the following file:
My First KissML document
KissML
This is my first KissML document
It's nicely formatted and well structured!
You can also do this programmatically, by importing kissml and using the smack() function.
#!/usr/bin/env coffee
kissml = require 'kissml'
string = myKissMLString()
html = kissml.smack string
syntax rules
------------
**text**
Each line of text must start with colon then space, i.e.
p : I am some text
Or
p
: I am some
: multiline
: text
**tags**
Tags are simply written by writing the tag name and indenting properly.
html
body
ul
li
p : first item
li
p : second item
**self closing tags**
Self closing tags are written fairly simply, by appending / to the tag name, so:
br/
Will output
**void element tags**
Void elements are tags which don't need to be closed, for example HTML5 link tags. These are written by appending an exclamation mark to the tag, i.e.
meta!
+content width=device-width,initial-scale=1.0
+name viewport
Will output something like:
**attributes**
Attributes are written using +attribute expression syntax, i.e.
a +id myID +class foo bar +href http://example.com +title "example"
: An example link
If you have many attributes and the line is getting too long, you can stick them on the next line provided they are indented to show that they "belong" to the parent element:
a
+id myID
+class foo bar
+href http://example.com
+title Example
: An example link
For commonly used "id", "class", and "href", you can use "#", "." and "@" respectively, so this is equivalent as above:
a #id .foo .bar @http://example.com +title Example : An example link
Boolean attributes can also be written using an exclamation mark, thus:
option +value foo +selected! : Value
Will result in
Modding
========
KissML is comprised of:
* A tokenizer / lexer, which splits the string into tokens which can be either spaces, words, or newlines. Tokens are returned as a double chained linked list.
* A parser which is fed with the list of tokens and produces a parse tree, i.e. a tree like structure, each node having access to its children and parent nodes.
* A printer which constructs the resulting string by walking the tree.
You can mod KissML by using a different tokenizer, parser or printer, or extending existing ones.
See ./src/kissml_ractive.coffee to see a sample implementation of IF / ELSE, and FOR type structure towards RactiveJS / Handlebars syntax, which allows you to write:
body
IF results && results.length
dl
FOR results
dt : {{key}}
dd : {{val}}
ELSE
div .alert .alert-info
: No results for your search.
Run this through ./bin/kiss-ractive and you'll get:
{{#if results && results.length}}
{{#each results}}
{{key}}
{{val}}
{{/each}}
{{else}}
No results for your search.
{{/if}}
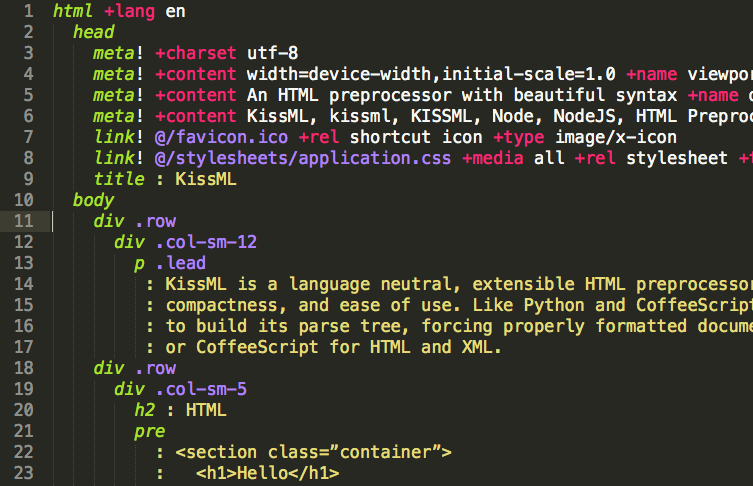
Syntax highlighter
===============
To keep your eyes sane and your mind relaxed, you will find syntax highlighting files for sublime text under the sublime directory of the repository.