# @zilliz/code-context-mcp

Model Context Protocol (MCP) integration for Code Context - A powerful MCP server that enables AI assistants and agents to index and search codebases using semantic search.
[](https://www.npmjs.com/package/@zilliz/code-context-mcp)
[](https://www.npmjs.com/package/@zilliz/code-context-mcp)
> 📖 **New to Code Context?** Check out the [main project README](../../README.md) for an overview and setup instructions.
## 🚀 Use Code Context as MCP in Claude Code and others
Model Context Protocol (MCP) allows you to integrate Code Context with your favorite AI coding assistants, e.g. Claude Code.
## Quick Start
### Prerequisites
Before using the MCP server, make sure you have:
- API key for your chosen embedding provider (OpenAI, VoyageAI, Gemini, or Ollama setup)
- Milvus vector database (local or cloud)
> 💡 **Setup Help:** See the [main project setup guide](../../README.md#-quick-start) for detailed installation instructions.
### Prepare Environment Variables
#### Embedding Provider Configuration
Code Context MCP supports multiple embedding providers. Choose the one that best fits your needs:
> 💡 **Tip**: You can also use [global environment variables](../../docs/getting-started/environment-variables.md) for easier configuration management across different MCP clients.
```bash
# Supported providers: OpenAI, VoyageAI, Gemini, Ollama
EMBEDDING_PROVIDER=OpenAI
```
1. OpenAI Configuration (Default)
OpenAI provides high-quality embeddings with excellent performance for code understanding.
```bash
# Required: Your OpenAI API key
OPENAI_API_KEY=sk-your-openai-api-key
# Optional: Specify embedding model (default: text-embedding-3-small)
EMBEDDING_MODEL=text-embedding-3-small
# Optional: Custom API base URL (for Azure OpenAI or other compatible services)
OPENAI_BASE_URL=https://api.openai.com/v1
```
**Available Models:**
- `text-embedding-3-small` (1536 dimensions, faster, lower cost)
- `text-embedding-3-large` (3072 dimensions, higher quality)
- `text-embedding-ada-002` (1536 dimensions, legacy model)
**Getting API Key:**
1. Visit [OpenAI Platform](https://platform.openai.com/api-keys)
2. Sign in or create an account
3. Generate a new API key
4. Set up billing if needed
2. VoyageAI Configuration
VoyageAI offers specialized code embeddings optimized for programming languages.
```bash
# Required: Your VoyageAI API key
VOYAGEAI_API_KEY=pa-your-voyageai-api-key
# Optional: Specify embedding model (default: voyage-code-3)
EMBEDDING_MODEL=voyage-code-3
```
**Available Models:**
- `voyage-code-3` (1024 dimensions, optimized for code)
- `voyage-3` (1024 dimensions, general purpose)
- `voyage-3-lite` (512 dimensions, faster inference)
**Getting API Key:**
1. Visit [VoyageAI Console](https://dash.voyageai.com/)
2. Sign up for an account
3. Navigate to API Keys section
4. Create a new API key
3. Gemini Configuration
Google's Gemini provides competitive embeddings with good multilingual support.
```bash
# Required: Your Gemini API key
GEMINI_API_KEY=your-gemini-api-key
# Optional: Specify embedding model (default: gemini-embedding-001)
EMBEDDING_MODEL=gemini-embedding-001
```
**Available Models:**
- `gemini-embedding-001` (3072 dimensions, latest model)
**Getting API Key:**
1. Visit [Google AI Studio](https://aistudio.google.com/)
2. Sign in with your Google account
3. Go to "Get API key" section
4. Create a new API key
4. Ollama Configuration (Local/Self-hosted)
Ollama allows you to run embeddings locally without sending data to external services.
```bash
# Required: Specify which Ollama model to use
EMBEDDING_MODEL=nomic-embed-text
# Optional: Specify Ollama host (default: http://127.0.0.1:11434)
OLLAMA_HOST=http://127.0.0.1:11434
```
**Available Models:**
- `nomic-embed-text` (768 dimensions, recommended for code)
- `mxbai-embed-large` (1024 dimensions, higher quality)
- `all-minilm` (384 dimensions, lightweight)
**Setup Instructions:**
1. Install Ollama from [ollama.ai](https://ollama.ai/)
2. Pull the embedding model:
```bash
ollama pull nomic-embed-text
```
3. Ensure Ollama is running:
```bash
ollama serve
```
#### Get a free vector database on Zilliz Cloud
Code Context needs a vector database. You can [sign up](https://cloud.zilliz.com/signup?utm_source=github&utm_medium=referral&utm_campaign=2507-codecontext-readme) on Zilliz Cloud to get an API key.

Copy your Personal Key to replace `your-zilliz-cloud-api-key` in the configuration examples.
```bash
MILVUS_TOKEN=your-zilliz-cloud-api-key
```
#### Embedding Batch Size
You can set the embedding batch size to optimize the performance of the MCP server, depending on your embedding model throughput. The default value is 100.
```bash
EMBEDDING_BATCH_SIZE=512
```
#### Custom File Processing (Optional)
You can configure custom file extensions and ignore patterns globally via environment variables:
```bash
# Additional file extensions to include beyond defaults
CUSTOM_EXTENSIONS=.vue,.svelte,.astro,.twig
# Additional ignore patterns to exclude files/directories
CUSTOM_IGNORE_PATTERNS=temp/**,*.backup,private/**,uploads/**
```
These settings work in combination with tool parameters - patterns from both sources will be merged together.
## Usage with MCP Clients
Qwen Code
Create or edit the `~/.qwen/settings.json` file and add the following configuration:
```json
{
"mcpServers": {
"code-context": {
"command": "npx",
"args": ["@zilliz/code-context-mcp@latest"],
"env": {
"OPENAI_API_KEY": "your-openai-api-key",
"MILVUS_TOKEN": "your-zilliz-cloud-api-key"
}
}
}
}
```
Cursor
Go to: `Settings` -> `Cursor Settings` -> `MCP` -> `Add new global MCP server`
Pasting the following configuration into your Cursor `~/.cursor/mcp.json` file is the recommended approach. You may also install in a specific project by creating `.cursor/mcp.json` in your project folder. See [Cursor MCP docs](https://docs.cursor.com/context/model-context-protocol) for more info.
**OpenAI Configuration (Default):**
```json
{
"mcpServers": {
"code-context": {
"command": "npx",
"args": ["-y", "@zilliz/code-context-mcp@latest"],
"env": {
"EMBEDDING_PROVIDER": "OpenAI",
"OPENAI_API_KEY": "your-openai-api-key",
"MILVUS_TOKEN": "your-zilliz-cloud-api-key"
}
}
}
}
```
**VoyageAI Configuration:**
```json
{
"mcpServers": {
"code-context": {
"command": "npx",
"args": ["-y", "@zilliz/code-context-mcp@latest"],
"env": {
"EMBEDDING_PROVIDER": "VoyageAI",
"VOYAGEAI_API_KEY": "your-voyageai-api-key",
"EMBEDDING_MODEL": "voyage-code-3",
"MILVUS_TOKEN": "your-zilliz-cloud-api-key"
}
}
}
}
```
**Gemini Configuration:**
```json
{
"mcpServers": {
"code-context": {
"command": "npx",
"args": ["-y", "@zilliz/code-context-mcp@latest"],
"env": {
"EMBEDDING_PROVIDER": "Gemini",
"GEMINI_API_KEY": "your-gemini-api-key",
"MILVUS_TOKEN": "your-zilliz-cloud-api-key"
}
}
}
}
```
**Ollama Configuration:**
```json
{
"mcpServers": {
"code-context": {
"command": "npx",
"args": ["-y", "@zilliz/code-context-mcp@latest"],
"env": {
"EMBEDDING_PROVIDER": "Ollama",
"EMBEDDING_MODEL": "nomic-embed-text",
"OLLAMA_HOST": "http://127.0.0.1:11434",
"MILVUS_TOKEN": "your-zilliz-cloud-api-key"
}
}
}
}
```
Claude Desktop
Add to your Claude Desktop configuration:
```json
{
"mcpServers": {
"code-context": {
"command": "npx",
"args": ["@zilliz/code-context-mcp@latest"],
"env": {
"OPENAI_API_KEY": "your-openai-api-key",
"MILVUS_TOKEN": "your-zilliz-cloud-api-key"
}
}
}
}
```
Claude Code
Use the command line interface to add the CodeContext MCP server:
```bash
# Add the CodeContext MCP server
claude mcp add code-context -e OPENAI_API_KEY=your-openai-api-key -e MILVUS_TOKEN=your-zilliz-cloud-api-key -- npx @zilliz/code-context-mcp@latest
```
See the [Claude Code MCP documentation](https://docs.anthropic.com/en/docs/claude-code/mcp) for more details about MCP server management.
Windsurf
Windsurf supports MCP configuration through a JSON file. Add the following configuration to your Windsurf MCP settings:
```json
{
"mcpServers": {
"code-context": {
"command": "npx",
"args": ["-y", "@zilliz/code-context-mcp@latest"],
"env": {
"OPENAI_API_KEY": "your-openai-api-key",
"MILVUS_TOKEN": "your-zilliz-cloud-api-key"
}
}
}
}
```
VS Code
The CodeContext MCP server can be used with VS Code through MCP-compatible extensions. Add the following configuration to your VS Code MCP settings:
```json
{
"mcpServers": {
"code-context": {
"command": "npx",
"args": ["-y", "@zilliz/code-context-mcp@latest"],
"env": {
"OPENAI_API_KEY": "your-openai-api-key",
"MILVUS_TOKEN": "your-zilliz-cloud-api-key"
}
}
}
}
```
Cherry Studio
Cherry Studio allows for visual MCP server configuration through its settings interface. While it doesn't directly support manual JSON configuration, you can add a new server via the GUI:
1. Navigate to **Settings → MCP Servers → Add Server**.
2. Fill in the server details:
- **Name**: `code-context`
- **Type**: `STDIO`
- **Command**: `npx`
- **Arguments**: `["@zilliz/code-context-mcp@latest"]`
- **Environment Variables**:
- `OPENAI_API_KEY`: `your-openai-api-key`
- `MILVUS_TOKEN`: `your-zilliz-cloud-api-key`
3. Save the configuration to activate the server.
Cline
Cline uses a JSON configuration file to manage MCP servers. To integrate the provided MCP server configuration:
1. Open Cline and click on the **MCP Servers** icon in the top navigation bar.
2. Select the **Installed** tab, then click **Advanced MCP Settings**.
3. In the `cline_mcp_settings.json` file, add the following configuration:
```json
{
"mcpServers": {
"code-context": {
"command": "npx",
"args": ["@zilliz/code-context-mcp@latest"],
"env": {
"OPENAI_API_KEY": "your-openai-api-key",
"MILVUS_TOKEN": "your-zilliz-cloud-api-key"
}
}
}
}
```
4. Save the file.
Augment
To configure Code Context MCP in Augment Code, you can use either the graphical interface or manual configuration.
#### **A. Using the Augment Code UI**
1. Click the hamburger menu.
2. Select **Settings**.
3. Navigate to the **Tools** section.
4. Click the **+ Add MCP** button.
5. Enter the following command:
```
npx @zilliz/code-context-mcp@latest
```
6. Name the MCP: **Code Context**.
7. Click the **Add** button.
------
#### **B. Manual Configuration**
1. Press Cmd/Ctrl Shift P or go to the hamburger menu in the Augment panel
2. Select Edit Settings
3. Under Advanced, click Edit in settings.json
4. Add the server configuration to the `mcpServers` array in the `augment.advanced` object
```json
"augment.advanced": {
"mcpServers": [
{
"name": "code-context",
"command": "npx",
"args": ["-y", "@zilliz/code-context-mcp@latest"]
}
]
}
```
Gemini CLI
Gemini CLI requires manual configuration through a JSON file:
1. Create or edit the `~/.gemini/settings.json` file.
2. Add the following configuration:
```json
{
"mcpServers": {
"code-context": {
"command": "npx",
"args": ["@zilliz/code-context-mcp@latest"],
"env": {
"OPENAI_API_KEY": "your-openai-api-key",
"MILVUS_TOKEN": "your-zilliz-cloud-api-key"
}
}
}
}
```
3. Save the file and restart Gemini CLI to apply the changes.
Roo Code
Roo Code utilizes a JSON configuration file for MCP servers:
1. Open Roo Code and navigate to **Settings → MCP Servers → Edit Global Config**.
2. In the `mcp_settings.json` file, add the following configuration:
```json
{
"mcpServers": {
"code-context": {
"command": "npx",
"args": ["@zilliz/code-context-mcp@latest"],
"env": {
"OPENAI_API_KEY": "your-openai-api-key",
"MILVUS_TOKEN": "your-zilliz-cloud-api-key"
}
}
}
}
```
3. Save the file to activate the server.
Other MCP Clients
The server uses stdio transport and follows the standard MCP protocol. It can be integrated with any MCP-compatible client by running:
```bash
npx @zilliz/code-context-mcp@latest
```
## Features
- 🔌 MCP Protocol Compliance: Full compatibility with MCP-enabled AI assistants and agents
- 🔍 Semantic Code Search: Natural language queries to find relevant code snippets
- 📁 Codebase Indexing: Index entire codebases for fast semantic search
- 🔄 Auto-Sync: Automatically detects and synchronizes file changes to keep index up-to-date
- 🧠 AI-Powered: Uses OpenAI embeddings and Milvus vector database
- ⚡ Real-time: Interactive indexing and searching with progress feedback
- 🛠️ Tool-based: Exposes three main tools via MCP protocol
## Available Tools
### 1. `index_codebase`
Index a codebase directory for semantic search.
**Parameters:**
- `path` (required): Absolute path to the codebase directory to index
- `force` (optional): Force re-indexing even if already indexed (default: false)
- `splitter` (optional): Code splitter to use - 'ast' for syntax-aware splitting with automatic fallback, 'langchain' for character-based splitting (default: "ast")
- `customExtensions` (optional): Additional file extensions to include beyond defaults (e.g., ['.vue', '.svelte', '.astro']). Extensions should include the dot prefix or will be automatically added (default: [])
- `ignorePatterns` (optional): Additional ignore patterns to exclude specific files/directories beyond defaults (e.g., ['static/**', '*.tmp', 'private/**']) (default: [])
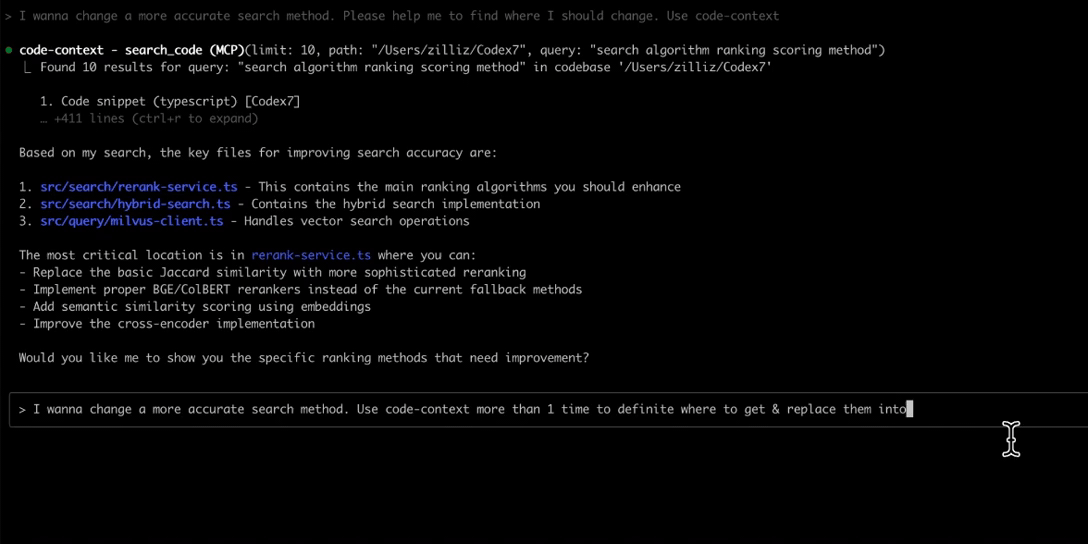
### 2. `search_code`
Search the indexed codebase using natural language queries.
**Parameters:**
- `path` (required): Absolute path to the codebase directory to search in
- `query` (required): Natural language query to search for in the codebase
- `limit` (optional): Maximum number of results to return (default: 10, max: 50)
### 3. `clear_index`
Clear the search index for a specific codebase.
**Parameters:**
- `path` (required): Absolute path to the codebase directory to clear index for
## Contributing
This package is part of the CodeContext monorepo. Please see:
- [Main Contributing Guide](../../CONTRIBUTING.md) - General contribution guidelines
- [MCP Package Contributing](CONTRIBUTING.md) - Specific development guide for this package
## Related Projects
- **[@zilliz/code-context-core](../core)** - Core indexing engine used by this MCP server
- **[VSCode Extension](../vscode-extension)** - Alternative VSCode integration
- [Model Context Protocol](https://modelcontextprotocol.io/) - Official MCP documentation
## License
MIT - See [LICENSE](../../LICENSE) for details