---
title: Magic Link
description: >-
The fastest way to securely enable authentication – passwordless sign-in via
email in a couple lines of code.
showNextPage: true
originalPath: .tmp-workos-clone/packages/docs/content/magic-link/index.mdx
---
> **Deprecated:** Magic Link is not recommended due to issues with email clients or other security software visiting the links and invalidating them. Instead, use [Magic Auth](/authkit/magic-auth), which provides a more secure passwordless authentication method.
## Introduction
Managing password authentication entails significant overhead for engineering teams and opens up many risks for breaches. Magic Link from WorkOS gives you the ability to build a secure passwordless authentication flow utilizing email. Send users a one-time-use link and let them sign in with a single click.
> Magic Link sets you up to handle Single Sign-On via the [WorkOS SSO API](/sso). The redirect URI / profile retrieval process is identical between Magic Link and SSO.
[border=false]
Magic Link is not a session management solution – instead it is an authentication solution. You as the developer have the ability to manage user sessions as you see fit. This means you determine how long a session is valid for, as well as how to store and invalidate a session.
Magic Links are single use, meaning that they will immediately expire after they are first clicked. If end users have security checks included with their email provider that test all embedded URLs, it can cause the Magic Links to expire before they reach the user’s inbox. To work around this, we recommend that end users add these Magic Link emails to an allowlist in order to bypass these security checks.
## What you’ll build
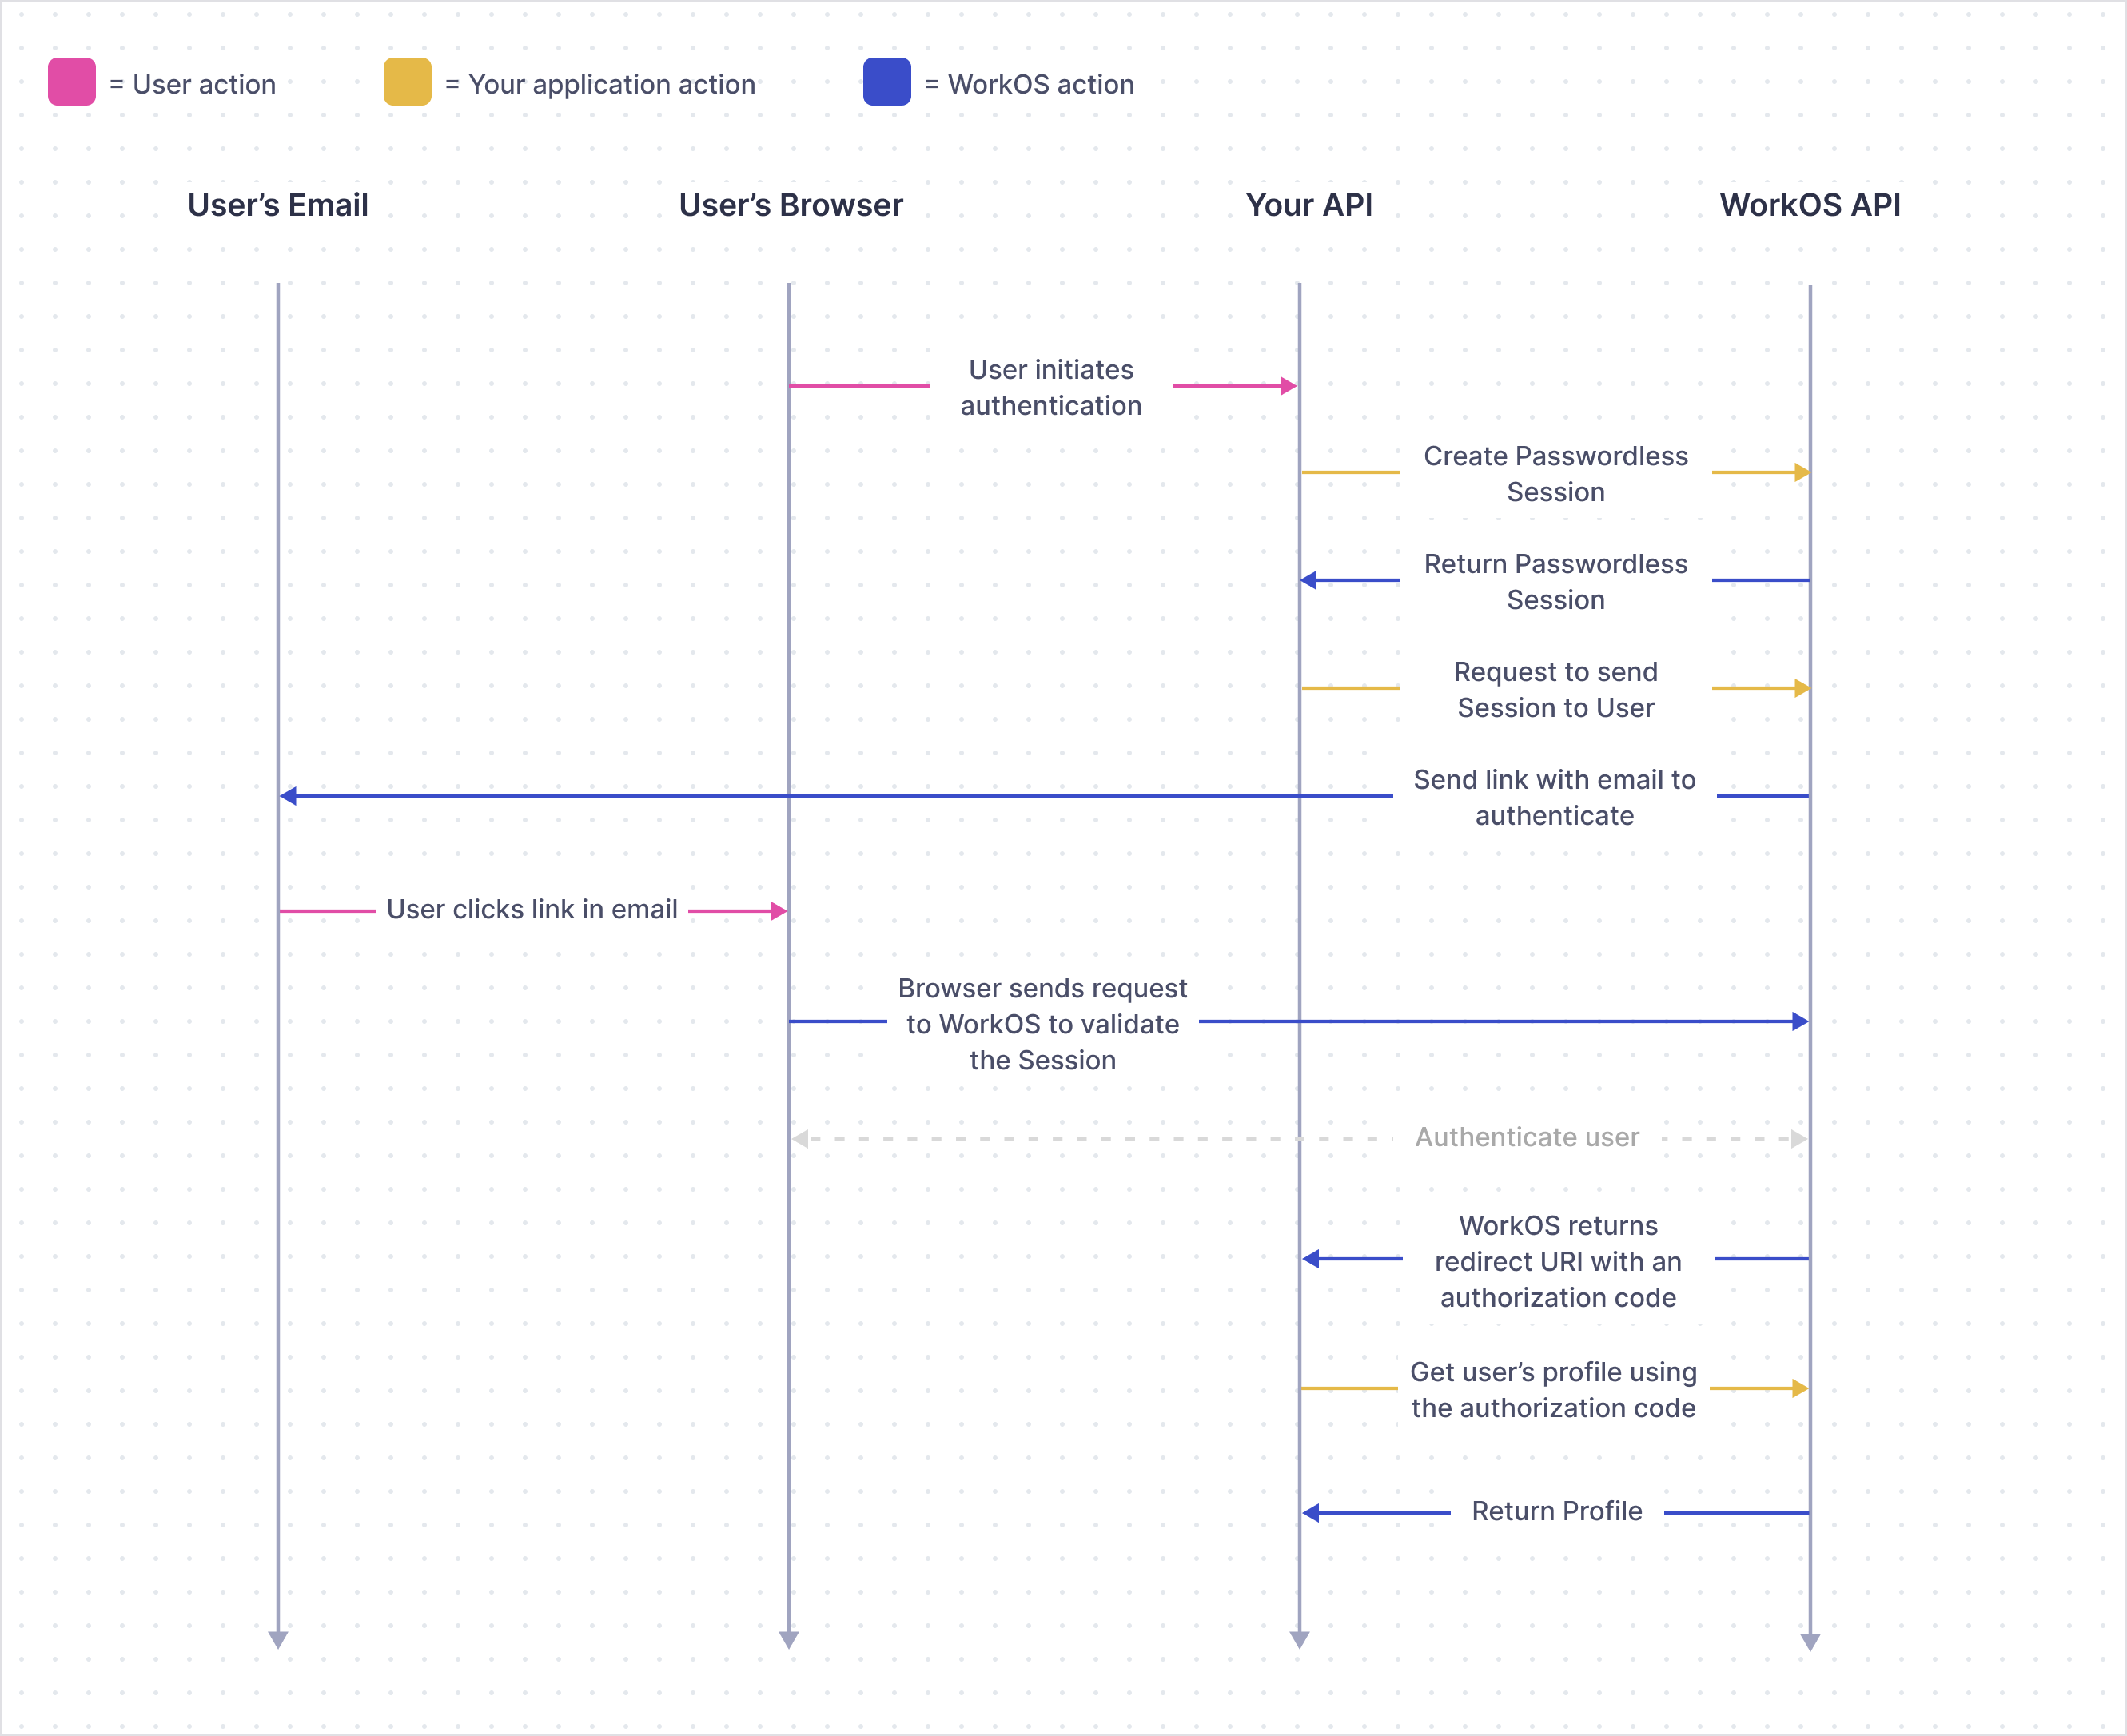
In this guide, we’ll take you from learning about passwordless authentication all the way through to building production-ready passwordless authentication flows with the WorkOS Magic Link API.
This guide will show you how to:
1. Add Magic Link to your app
2. Configure a redirect URI
3. Create a new Magic Link Connection
## Before getting started
To get the most out of this guide, you’ll need:
- A [WorkOS account](https://dashboard.workos.com/)
## API object definitions
[Passwordless Session](/reference/magic-link/passwordless-session)
: Represents a passwordless authentication session.
[Profile](/reference/sso/profile)
: Represents an authenticated user. The Profile object contains information relevant to a user in the form of normalized and raw attributes.
## (1) Add Magic Link to your app
### Install the WorkOS SDK
WorkOS offers native SDKs in several popular programming languages. Choose a language below to see instructions in your application’s language.
Install the SDK using the command below.
### Set secrets
To make calls to WorkOS, provide the API key and, in some cases, the client ID. Store these values as managed secrets, such as `WORKOS_API_KEY` and `WORKOS_CLIENT_ID`, and pass them to the SDKs either as environment variables or directly in your app's configuration based on your preferences.
```plain title="Environment variables"
WORKOS_API_KEY='sk_example_123456789'
WORKOS_CLIENT_ID='client_123456789'
```
### Add a callback endpoint
Let’s first add the redirect endpoint which will handle the callback from WorkOS after a user has authenticated via a magic link. This endpoint should exchange the authorization code (valid for 10 minutes) returned by WorkOS with the authenticated user’s Profile.
### Create a Passwordless Session and email the user
Create a Passwordless Session to generate an authentication link for a user. An authentication link is valid for 15 minutes and can be sent via the WorkOS API or using your own email service.
You can use the optional `state` parameter to encode arbitrary information to help restore application state between redirects.
You can use the optional `redirect_uri` parameter to override the default [Redirect URI](/glossary/redirect-uri) set in the dashboard.
> A Magic Link Connection will be automatically created if there isn’t already one for the domain specified when creating a new Passwordless Session.
- | WorkOS email
Use the WorkOS API to send the authentication link to the user. The email sent will be WorkOS branded.
- | Custom email
Use your own email service and custom branded email template to send the authentication link to the user.
---
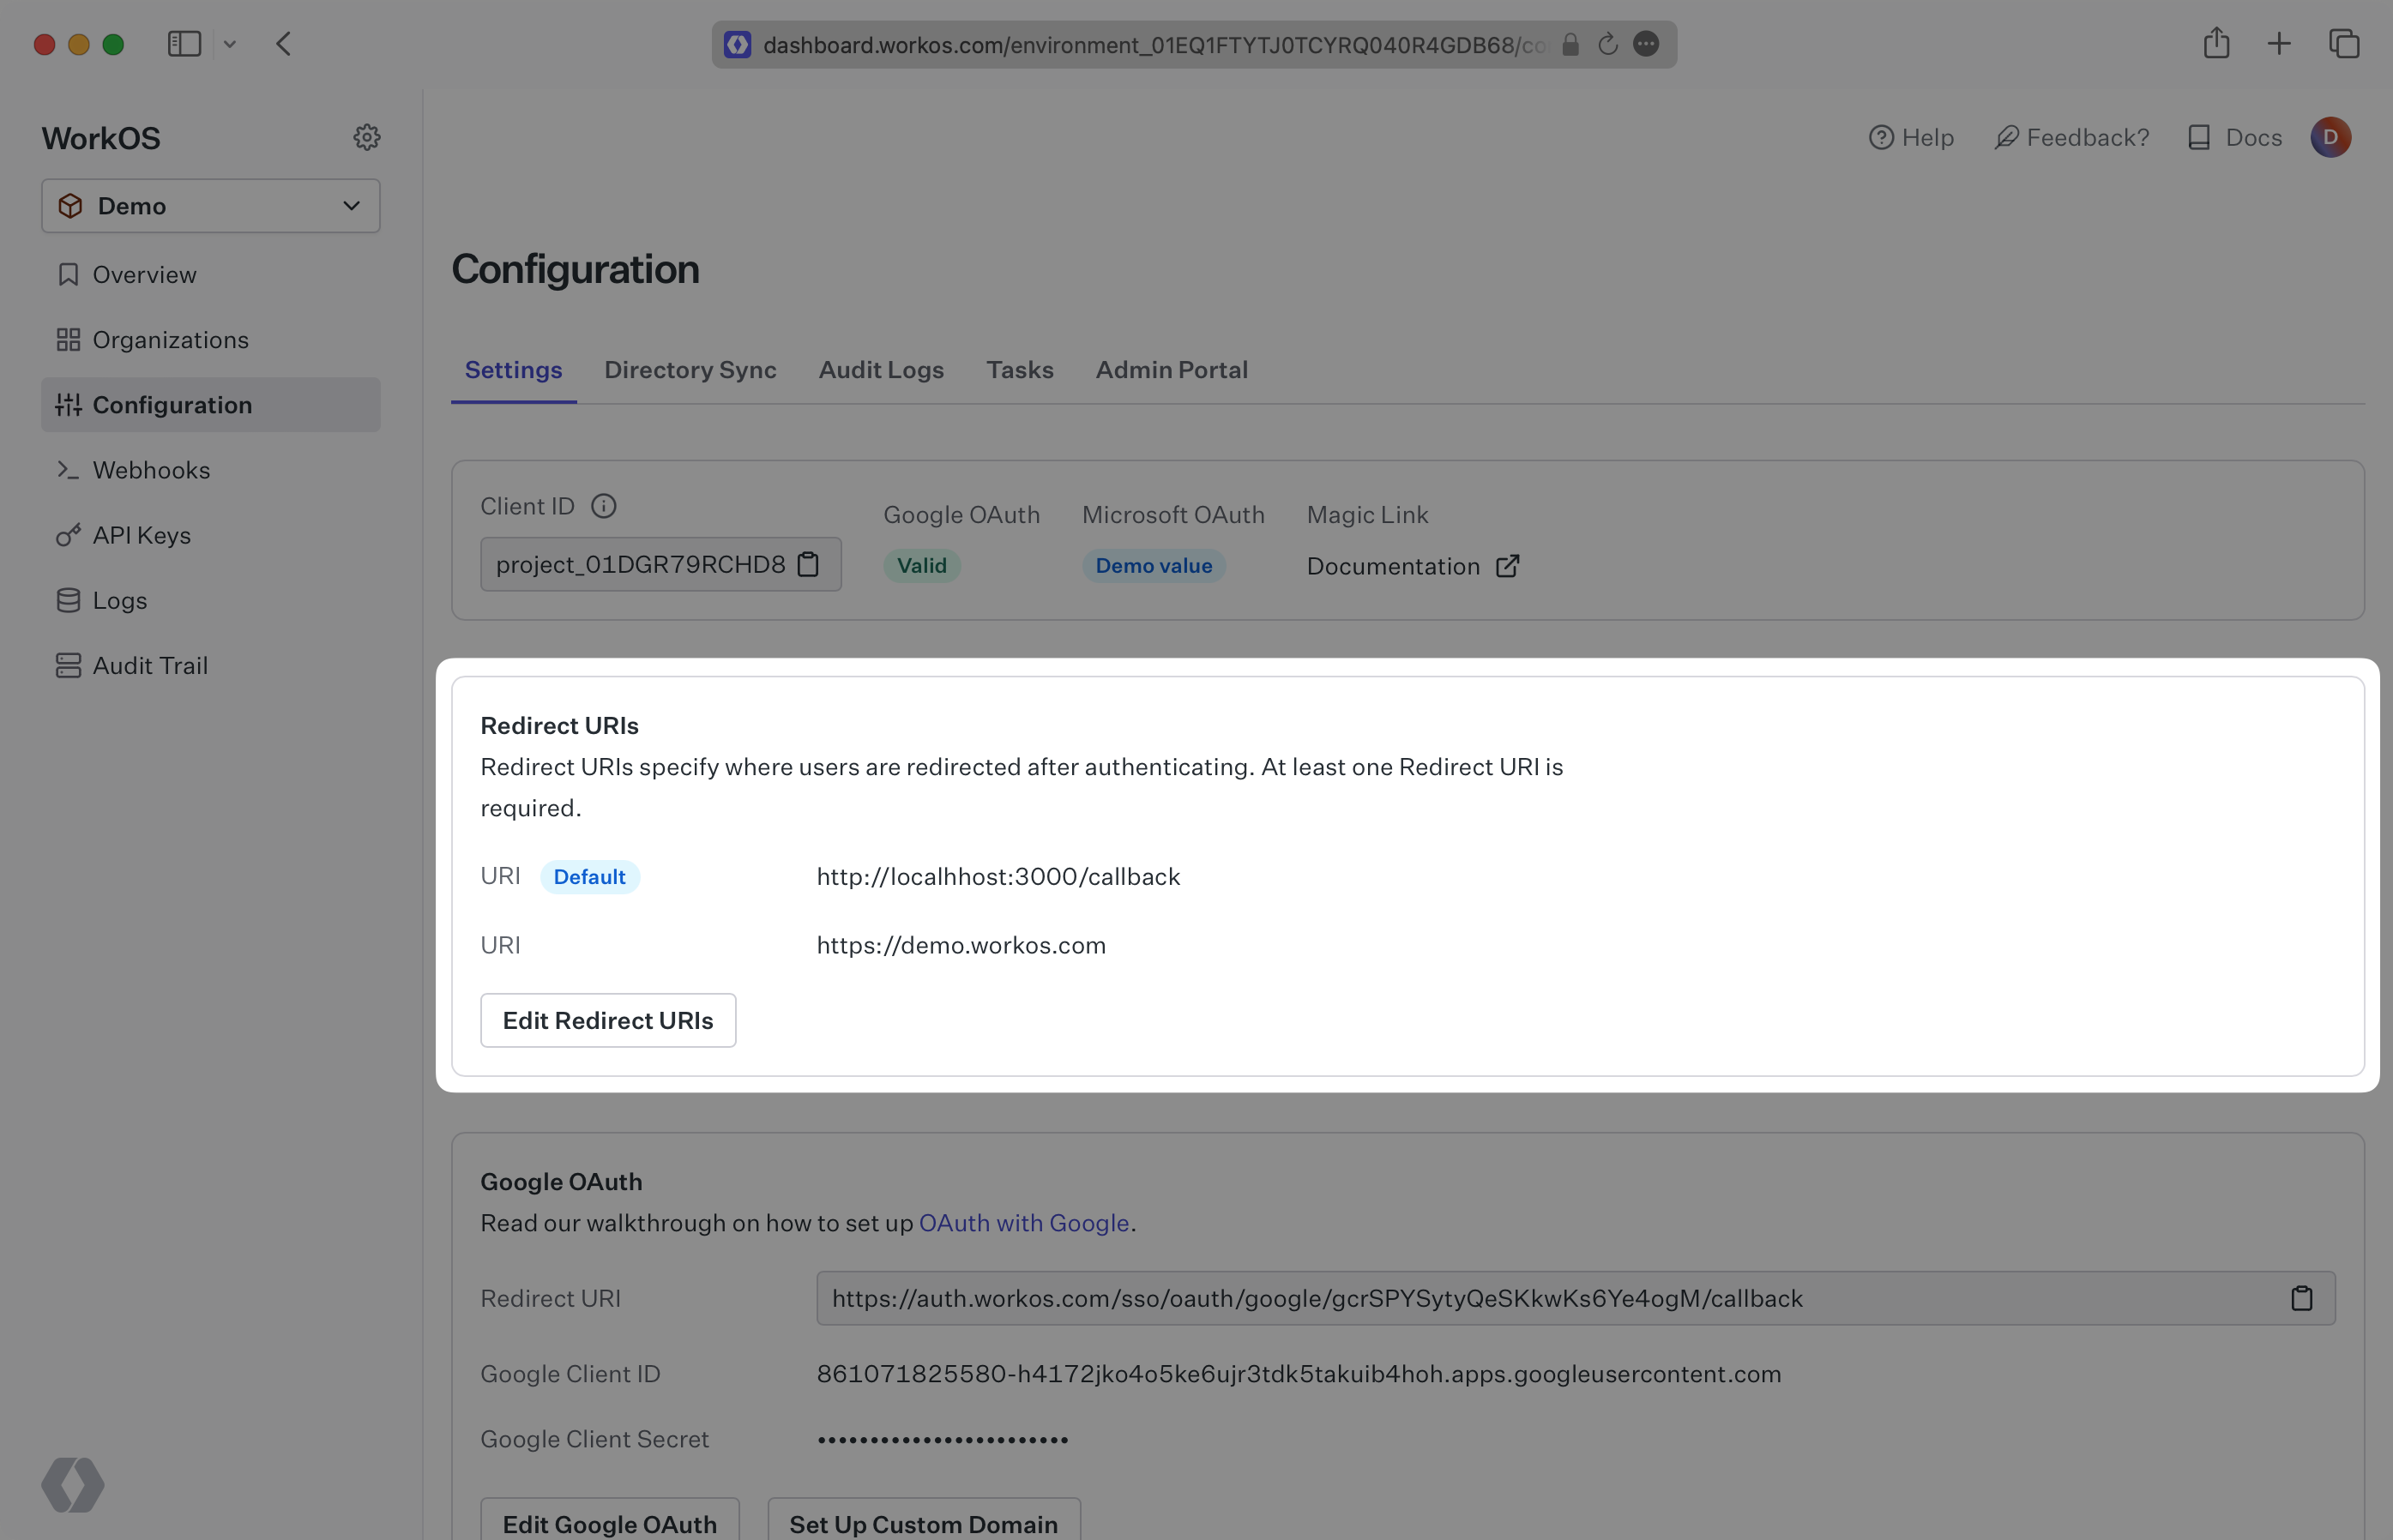
## (2) Configure a redirect URI
You should set a redirect URI (i.e. the callback endpoint from [Add a callback endpoint](/magic-link/1-add-magic-link-to-your-app/add-a-callback-endpoint)) via the Configuration page in the WorkOS Dashboard – be sure not to include wildcard subdomains or query parameters.