---
title: NextAuth.js
description: Create a Next.js application with WorkOS SSO and NextAuth.js.
icon: next-auth
breadcrumb:
title: Integrations
url: /integrations
originalPath: .tmp-workos-clone/packages/docs/content/integrations/next-auth.mdx
---
## Introduction
In this guide, you’ll learn how to use WorkOS to add Single Sign-On (SSO) to a Next.js app that uses [NextAuth.js](https://next-auth.js.org/) for handling authentication. You can check out the [complete source code](https://github.com/workos/workos-next-auth) of this guide on GitHub.
## Before getting started
To get the most out of this guide, you’ll need:
- A [WorkOS account](https://dashboard.workos.com/)
- An IdP (e.g. Okta) account
## (1) Install sample application
In your a terminal, browse to the directory of your choice and run the following command to clone the starter project:
```bash title="Clone the Sample App"
git clone -b start-branch https://github.com/workos-inc/workos-next-auth
```
And install the dependencies
```bash title="Install the Dependencies"
npm install
```
This is a basic Next.js app built using TypeScript and styled using TailwindCSS.
## (2) Configuring the environment variables
In the project’s root folder, rename the `.env.example` file to `.env`. You can find down below the values for the WorkOS client ID and API key.
```plain title=".env"
WORKOS_API_KEY='sk_example_123456789'
WORKOS_CLIENT_ID='client_123456789'
```
As a best practice, your WorkOS API key should be kept secret and set as an environment variable on process start. The SDK is able to read the key automatically if you store it in an environment variable named `WORKOS_API_KEY`; otherwise, you will need to set it manually. The [Client ID](/glossary/client-id) should also be set dynamically based on the release environment.
## (3) SSO Setup with WorkOS
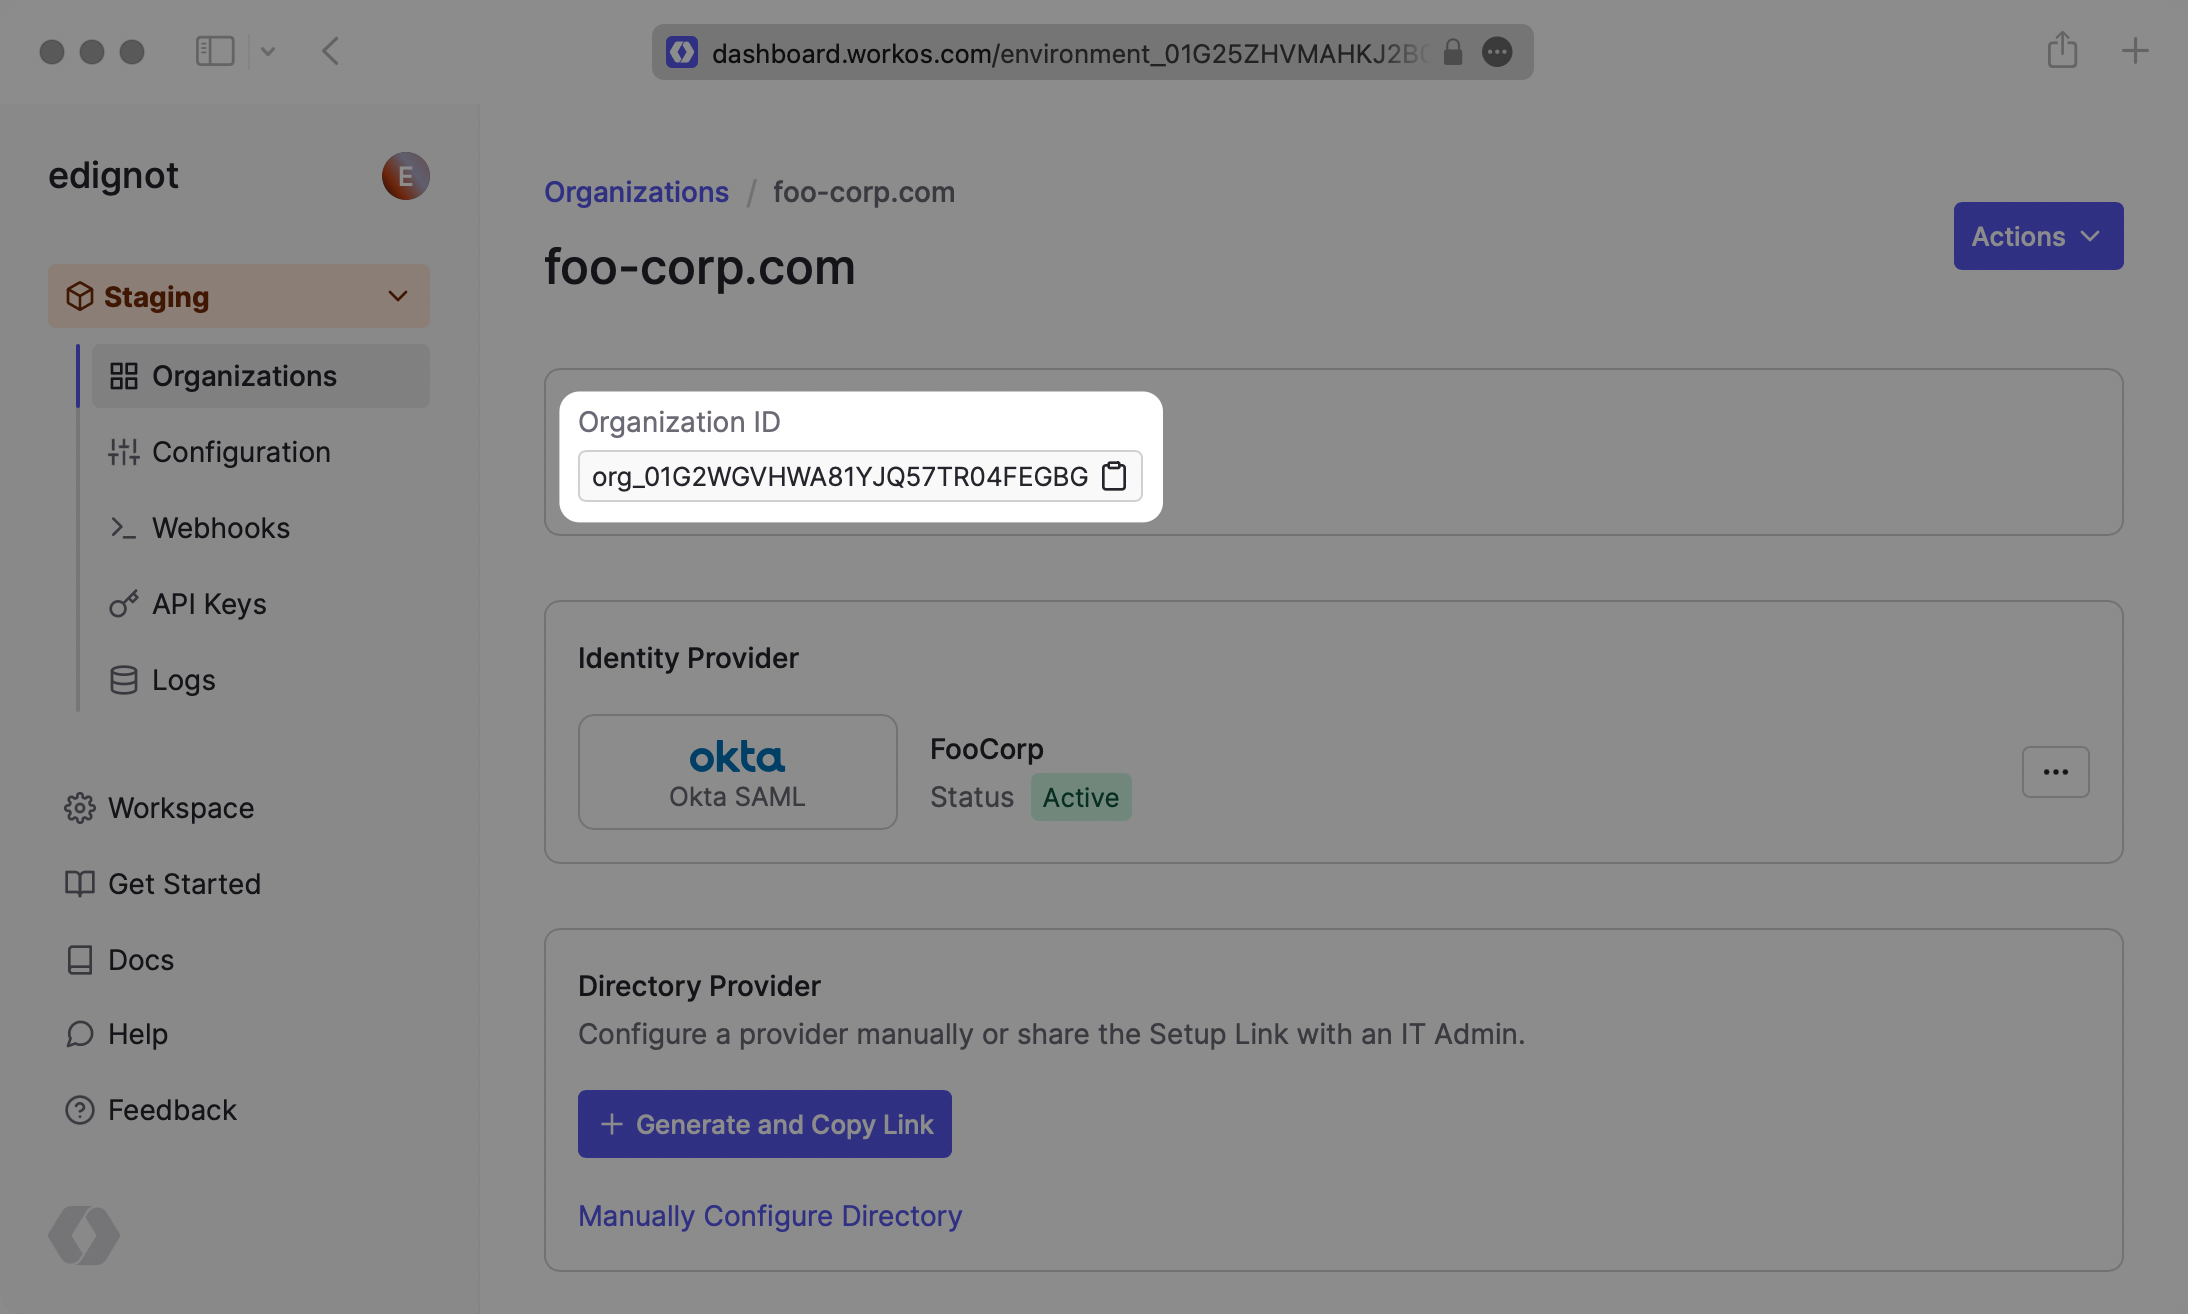
The first step is to create an organization, which can be done using the dashboard or [via the API](/reference/organization/create). By default, WorkOS creates a demo organization called “foo-corp.com” which you can use for testing purposes.
Take note of the “Organization ID” which can be found in the organization’s detailed view. You’re going to need it to make SSO work.
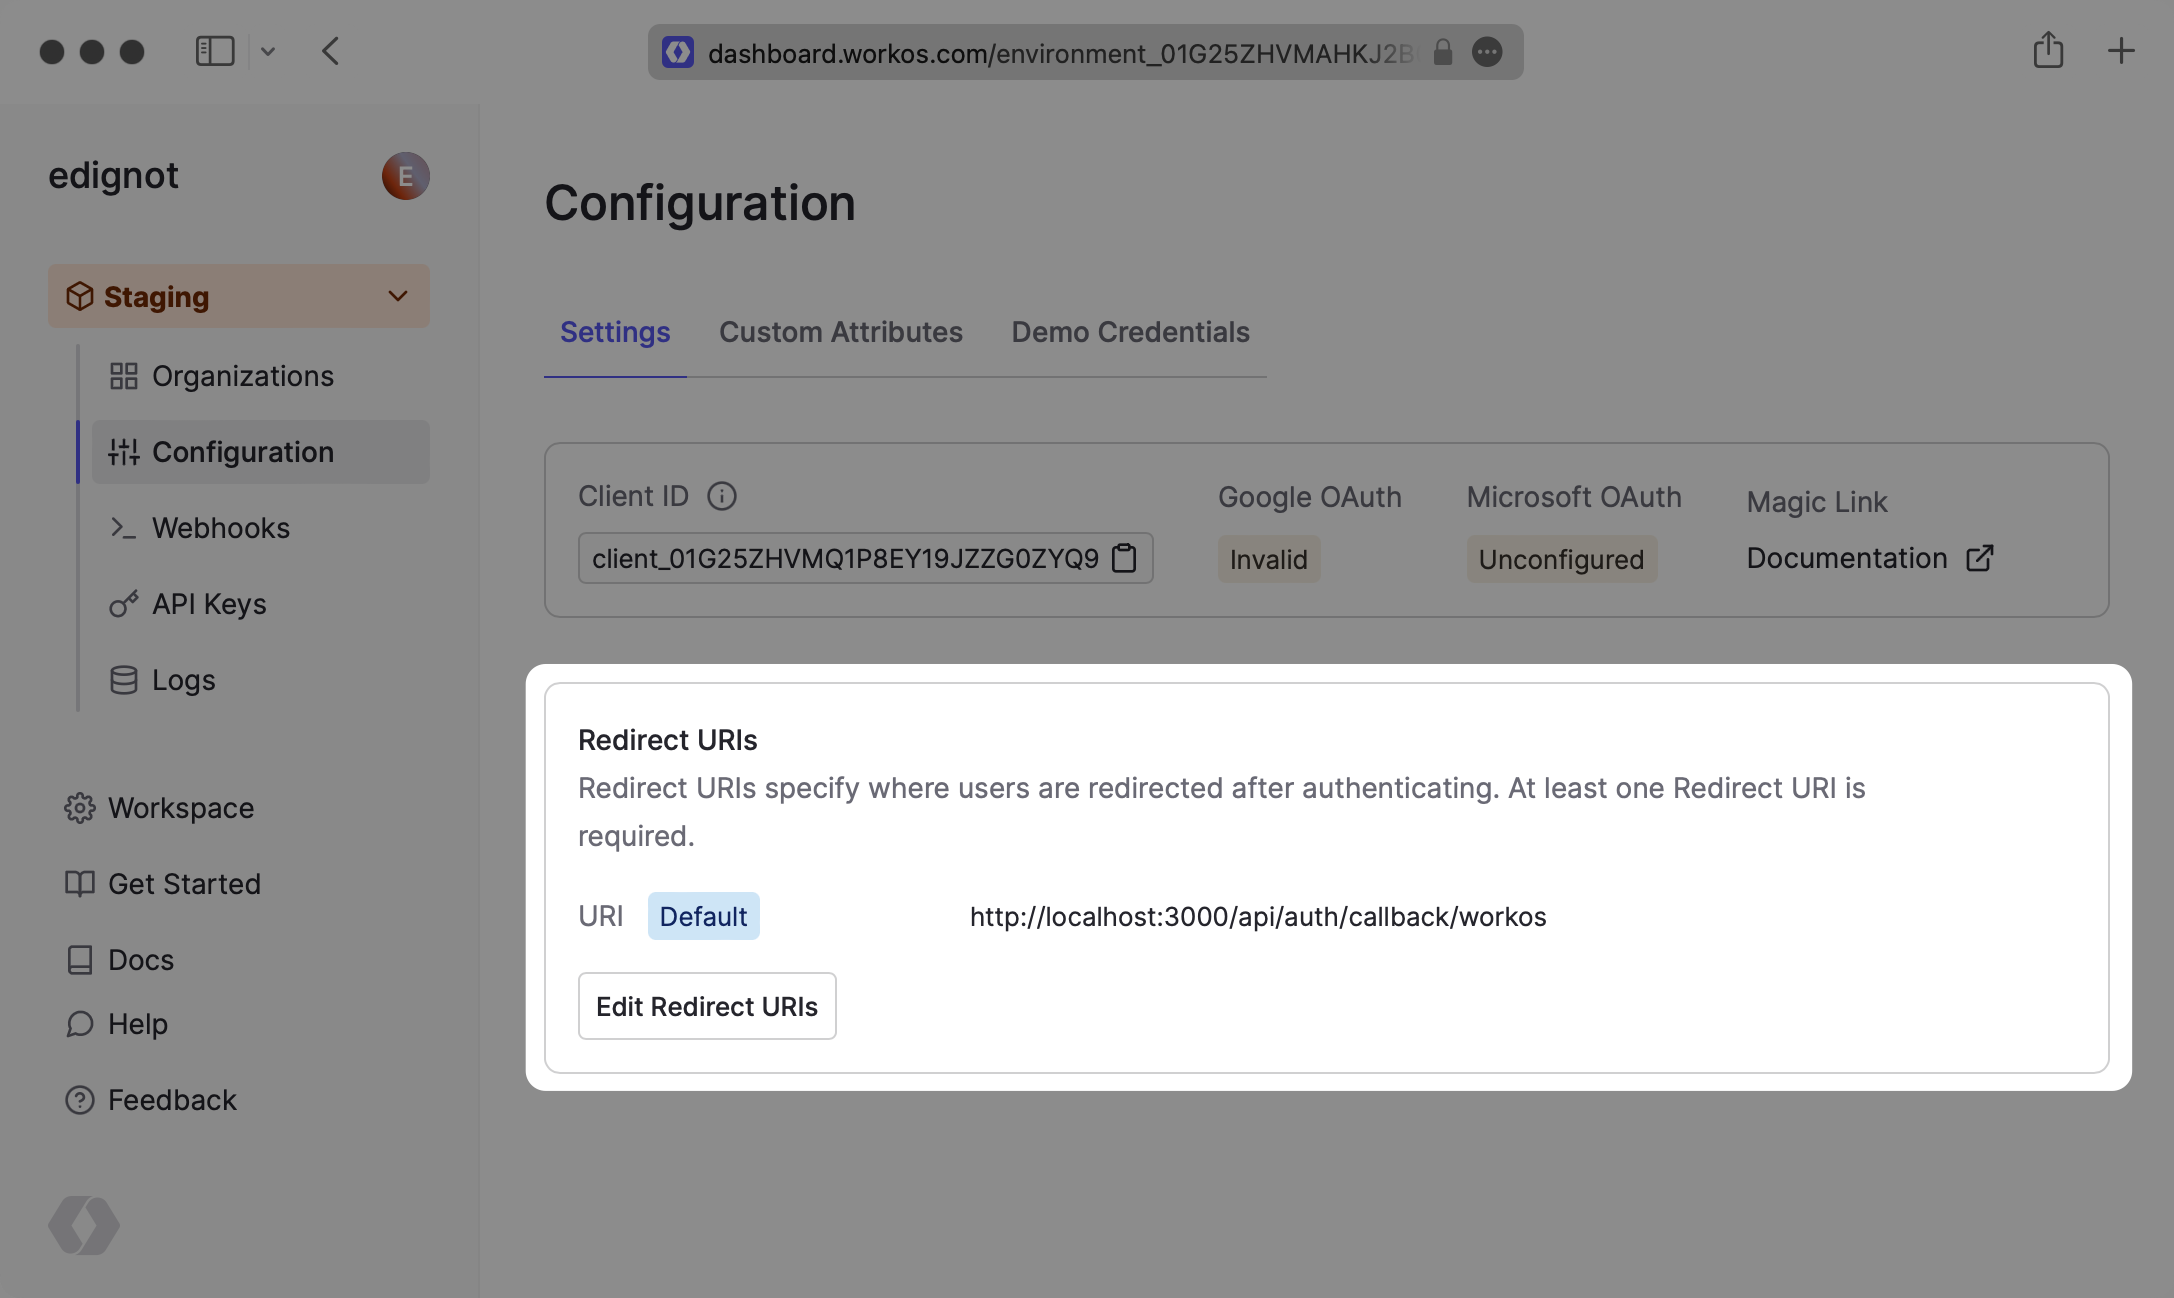
## (4) Configure redirect URIs
In the “Configuration” tab in the dashboard, add `http://localhost:3000/api/auth/callback/workos` to the list of redirect URIs to test the SSO login flow locally. You’ll also need to add the domain of your application when deploying to production.
## (5) Create an API endpoint
The next step is to create a `pages/api/auth/[...nextauth].ts` file which will contain all of your NextAuth.js configurations:
```js title="pages/api/auth/[...nextAuth].ts"
import NextAuth from 'next-auth';
import WorkOSProvider from 'next-auth/providers/workos';
export default NextAuth({
providers: [
WorkOSProvider({
clientId: process.env.WORKOS_CLIENT_ID,
clientSecret: process.env.WORKOS_API_KEY,
client: {
token_endpoint_auth_method: 'client_secret_post',
},
}),
],
pages: {
signIn: '/login',
},
debug: true,
secret: process.env.SECRET,
});
```
You’re first configuring WorkOS by passing the necessary options to the `WorkOSProvider()` function. You’re then defining a custom login page using the pages option which will be located at `/login`.
You then need to wrap the global `App` component with `SessionProvider` from `NextAuth.js`. Add the following code to the `pages/_app.tsx` file:
```js title="pages/_app.tsx"
import '../styles/index.css';
import type { AppProps } from 'next/app';
import { SessionProvider } from 'next-auth/react';
export default function App({
Component,
pageProps: { session, ...pageProps },
}: AppProps) {
return (
);
}
```
## (6) Creating a custom login page
In this step, you’ll create a custom login page. To do that, create a new file located at `pages/login.tsx` and add the following code to it:
```js title="pages/login.tsx"
import React from 'react';
import { useForm } from 'react-hook-form';
import Head from 'next/head';
import { signIn, signOut, useSession } from 'next-auth/react';
const Login = () => {
const {
register,
handleSubmit,
formState: { errors },
} = useForm();
const { data: session } = useSession();
const onSubmit = async ({ team }) => {
// TODO: send a request to the get-organization endpoint and return the
// organizationId from your database
const organization = 'ORGANIZATION_ID';
signIn('workos', undefined, {
organization,
});
};
return (
<>
Next Enterprise | Login
{session && (
Signed in as {session.user.email}
)}
{!session && (
Continue using enterprise SSO
)}
);
};
export default Login;
```
Next, start the development server by running the following command:
```bash title="Start Server"
npm run dev
```
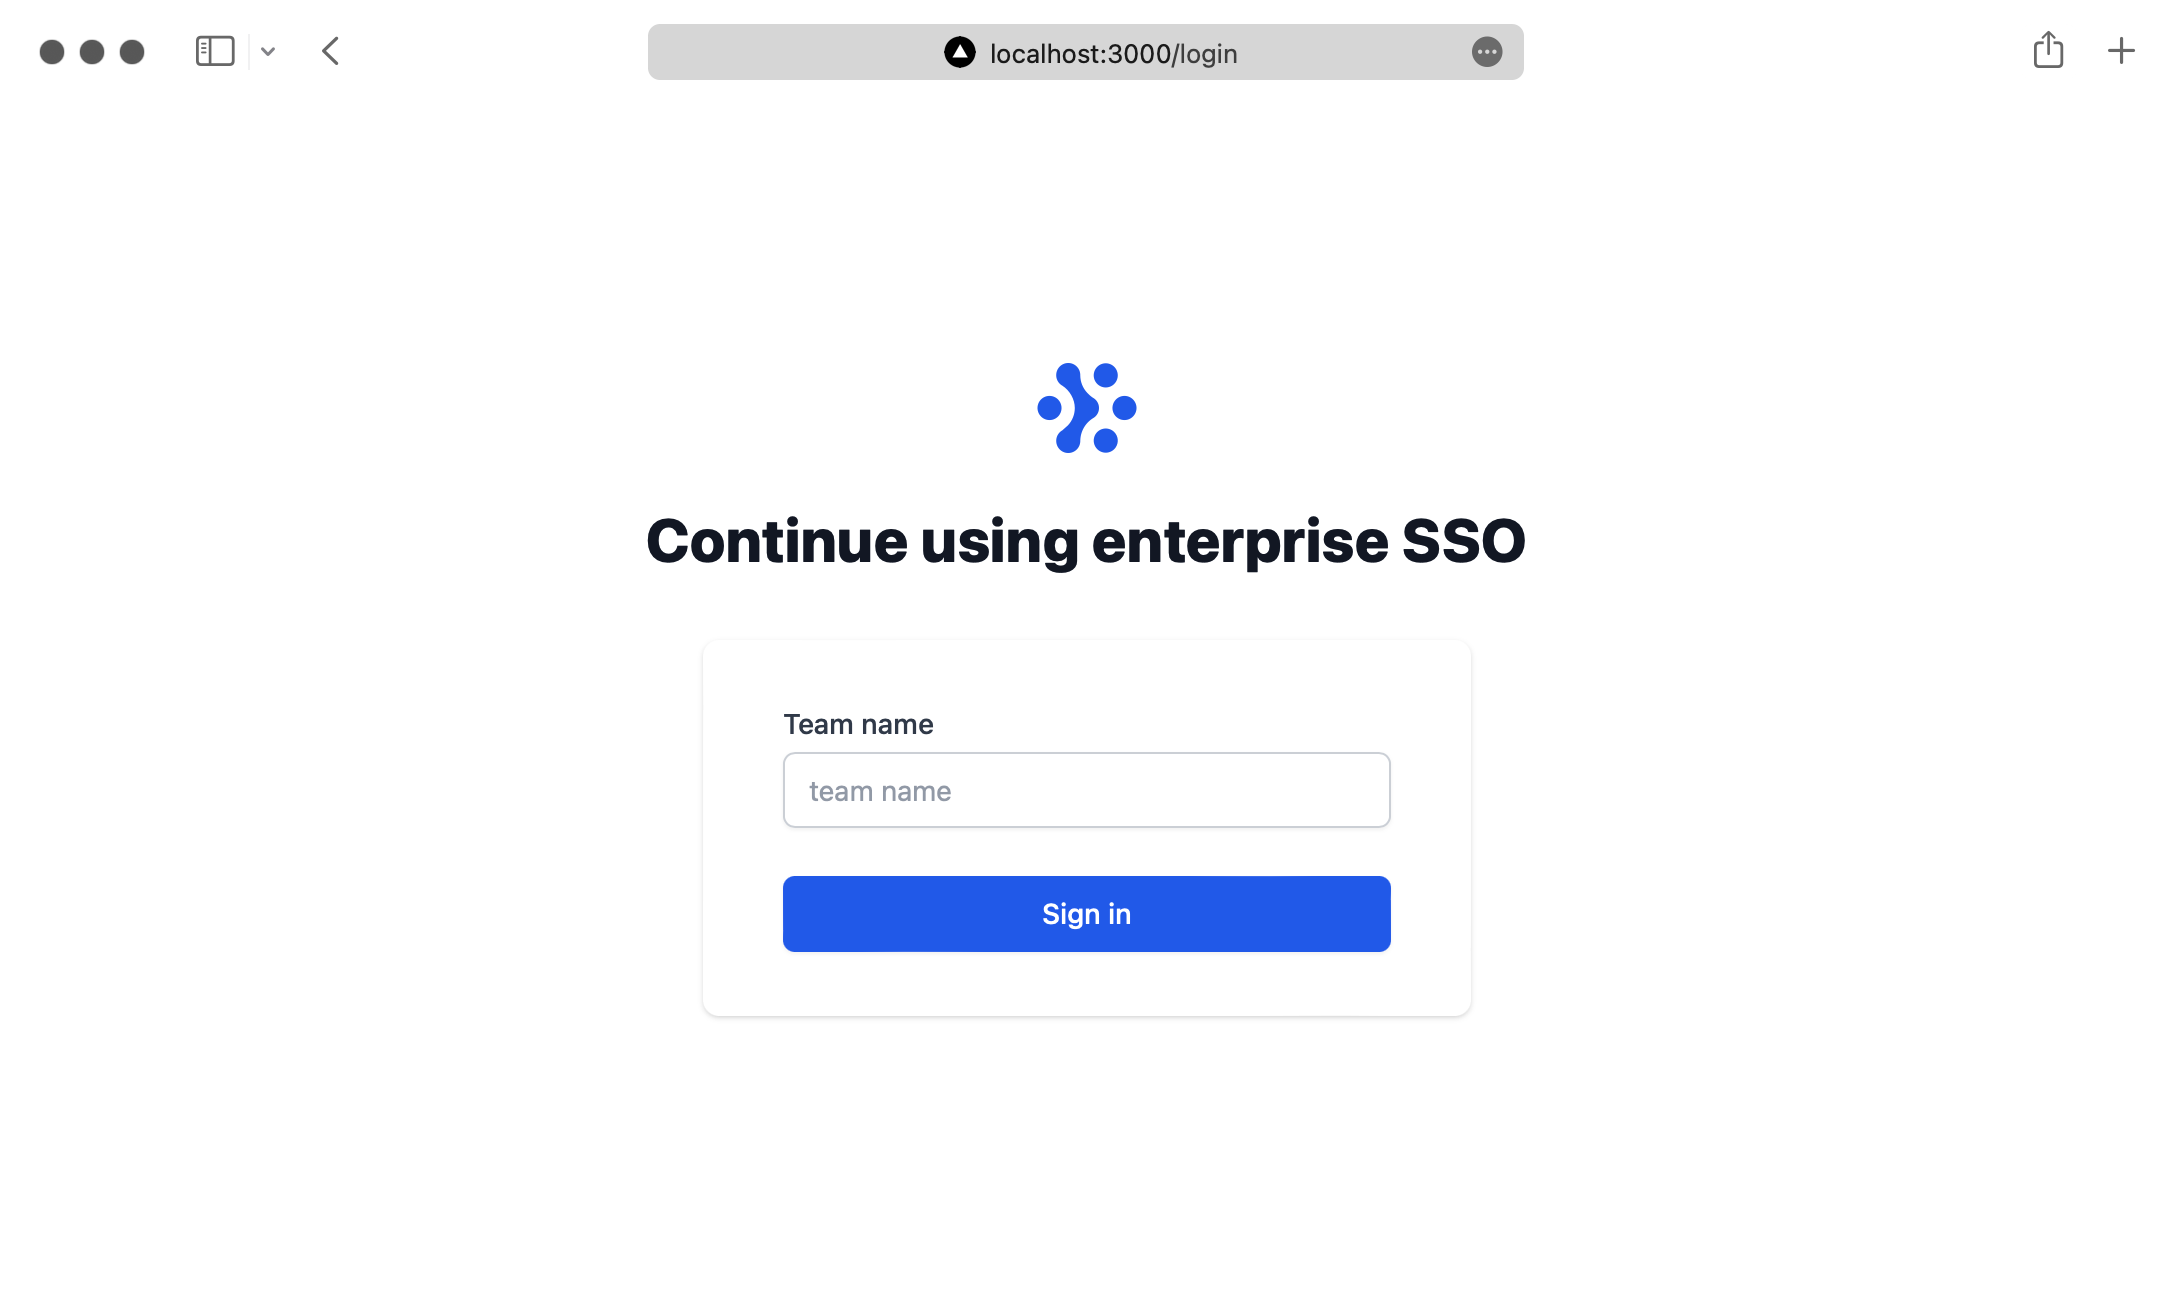
The application will be running at `http://localhost:3000/login` and you’ll be able to see the following page:
## (7) Testing the Single Sign-On flow
You should persist The Organization ID in your application’s database and associate it with your enterprise customer. Then when a user tries to log in, you first check if they’re an enterprise customer and then use the `signIn()` function from NextAuth.js to start the login flow.
To test the login flow, hardcode the Organization ID in the form submission handler.
```js title="pages/login.tsx"
// code above unchanged
const onSubmit = async ({ team }) => {
// TODO: create an endpoint that returns the
// organizationId from your database
/* +diff-start */
const organization = 'ORGANIZATION_ID';
/* +diff-end */
signIn('workos', undefined, {
organization,
});
};
// code below unchanged
```
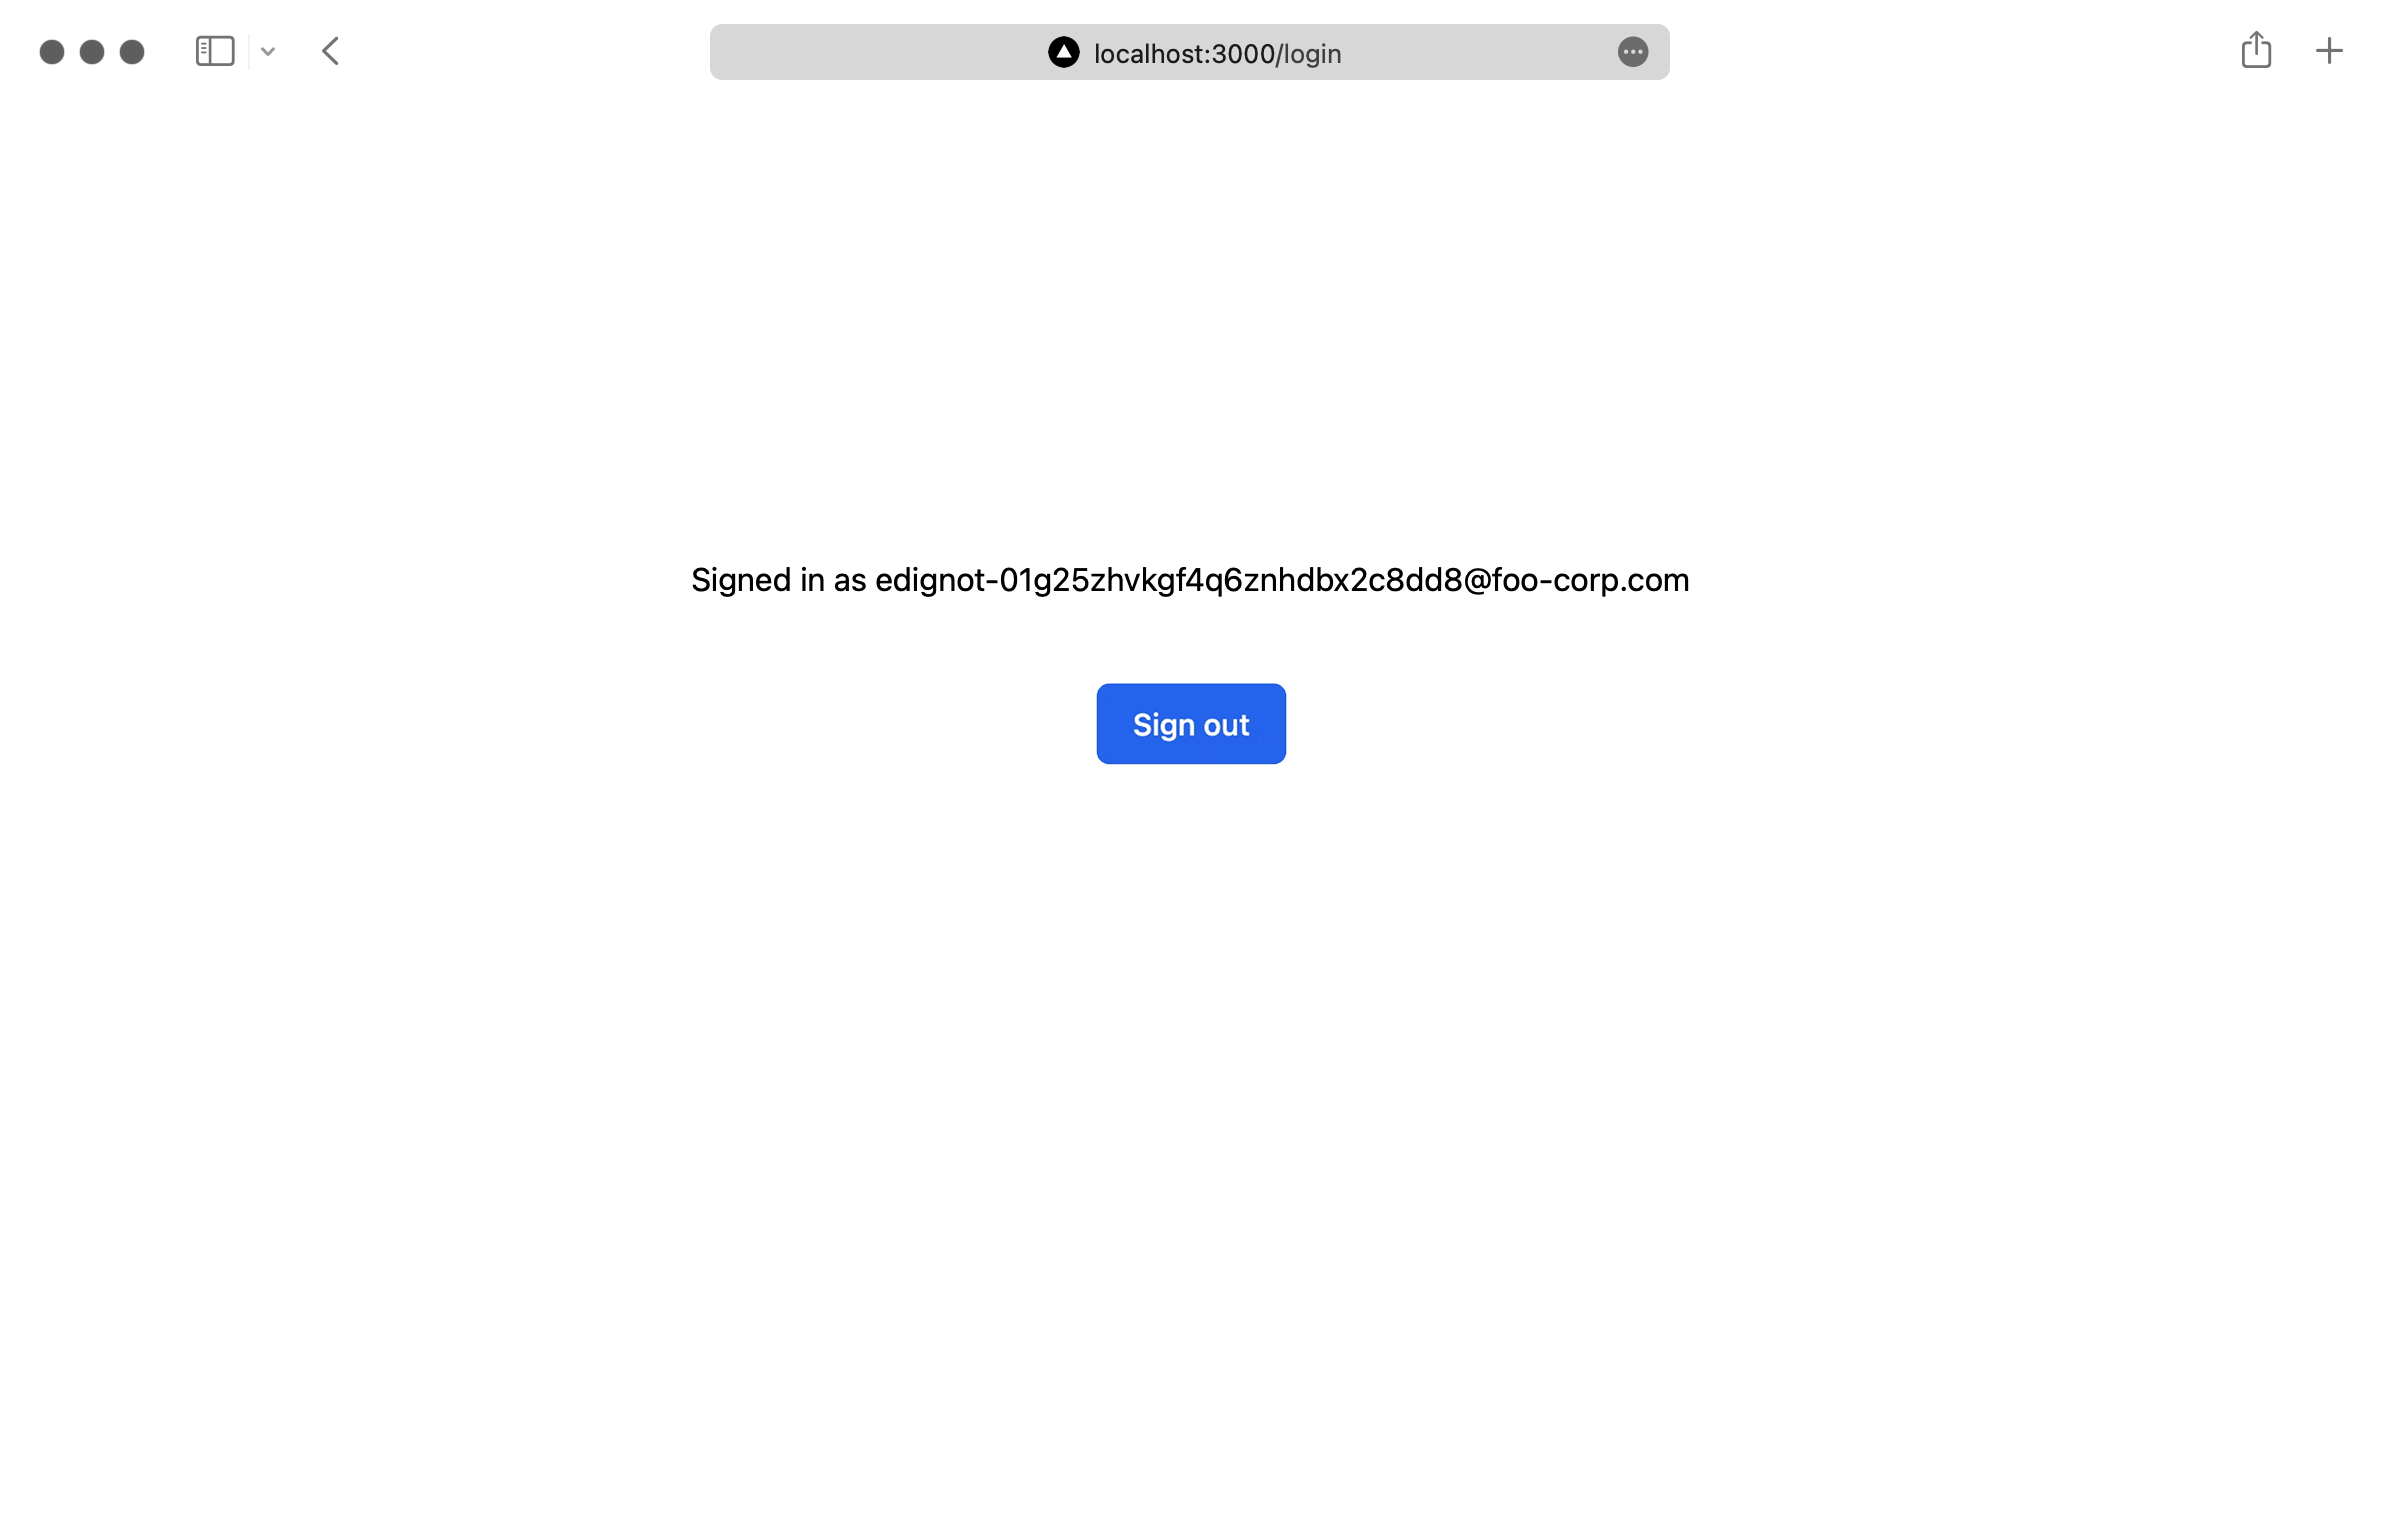
If you type anything in the login form and click submit, you’ll be redirected to Okta. You’ll then need to use your IdP login credentials.
After you complete the login process you’ll see the logged-in user’s email and a “Sign out” button
If you’re interested in setting up a different Identity Provider, check out the [full list of tutorials](/sso) for setting up an SSO connection.