---
title: AuthKit
description: >-
Easy to use authentication platform designed to provide a flexible, secure,
and fast integration.
showNextPage: true
originalPath: .tmp-workos-clone/packages/docs/content/authkit/index.mdx
---
## Introduction {{ "visibility": "no-quick-nav" }}
Integrating AuthKit into your app can be done in less than ten minutes. In this guide, we'll walk you through adding a hosted authentication flow to your application using AuthKit.
> **Want to skip the manual setup?** The [CLI Installer](/authkit/cli-installer) detects your framework, installs the SDK, configures your dashboard, and writes the integration code — all with a single command.
In addition to this guide, there are a variety of [example apps](/authkit/example-apps) available to help with your integration.
## Before getting started {{ "visibility": "no-quick-nav" }}
To get the most out of this guide, you'll need:
- A [WorkOS account](https://dashboard.workos.com/)
- Your WorkOS [API Key](/glossary/api-key) and [Client ID](/glossary/client-id)
---
## (1) Configure your project
Let's add the necessary dependencies and configuration in your WorkOS Dashboard.
### Install dependencies
- $ frontend="client-only"
For a client-only approach, use the `authkit-react` library to integrate AuthKit directly into your React application. Start by installing the library to your project via `npm`.
```bash title="Install React SDK"
npm install @workos-inc/authkit-react
```
- $ frontend="nextjs"
For a Next.js integration, use the `authkit-nextjs` library. Start by installing it in your Next.js project via `npm`.
```bash title="Install Next.js SDK"
npm install @workos-inc/authkit-nextjs
```
- $ frontend="remix"
To use AuthKit with a Remix application, use the `authkit-remix` library. Start by installing it in your Remix project via `npm`.
```bash title="Install Remix SDK"
npm install @workos-inc/authkit-remix
```
- $ backend="nodejs"
First, install the required Node SDK via `npm`.
```bash title="Install Node SDK"
npm install @workos-inc/node
```
For CSRF protection on state-changing routes like logout, also install `csrf-csrf`:
```bash title="Install CSRF protection"
npm install csrf-csrf cookie-parser
```
- $ backend="ruby"
First, install the WorkOS gem.
```bash title="Install Ruby SDK"
gem install workos
```
For CSRF protection on state-changing routes like logout, also install `rack-csrf`:
```bash title="Install CSRF protection"
gem install rack_csrf
```
- $ backend="python"
First, install the Python SDK.
```bash title="Install Python SDK"
pip install workos
```
For CSRF protection on state-changing routes like logout, also install `Flask-WTF`:
```bash title="Install CSRF protection"
pip install Flask-WTF
```
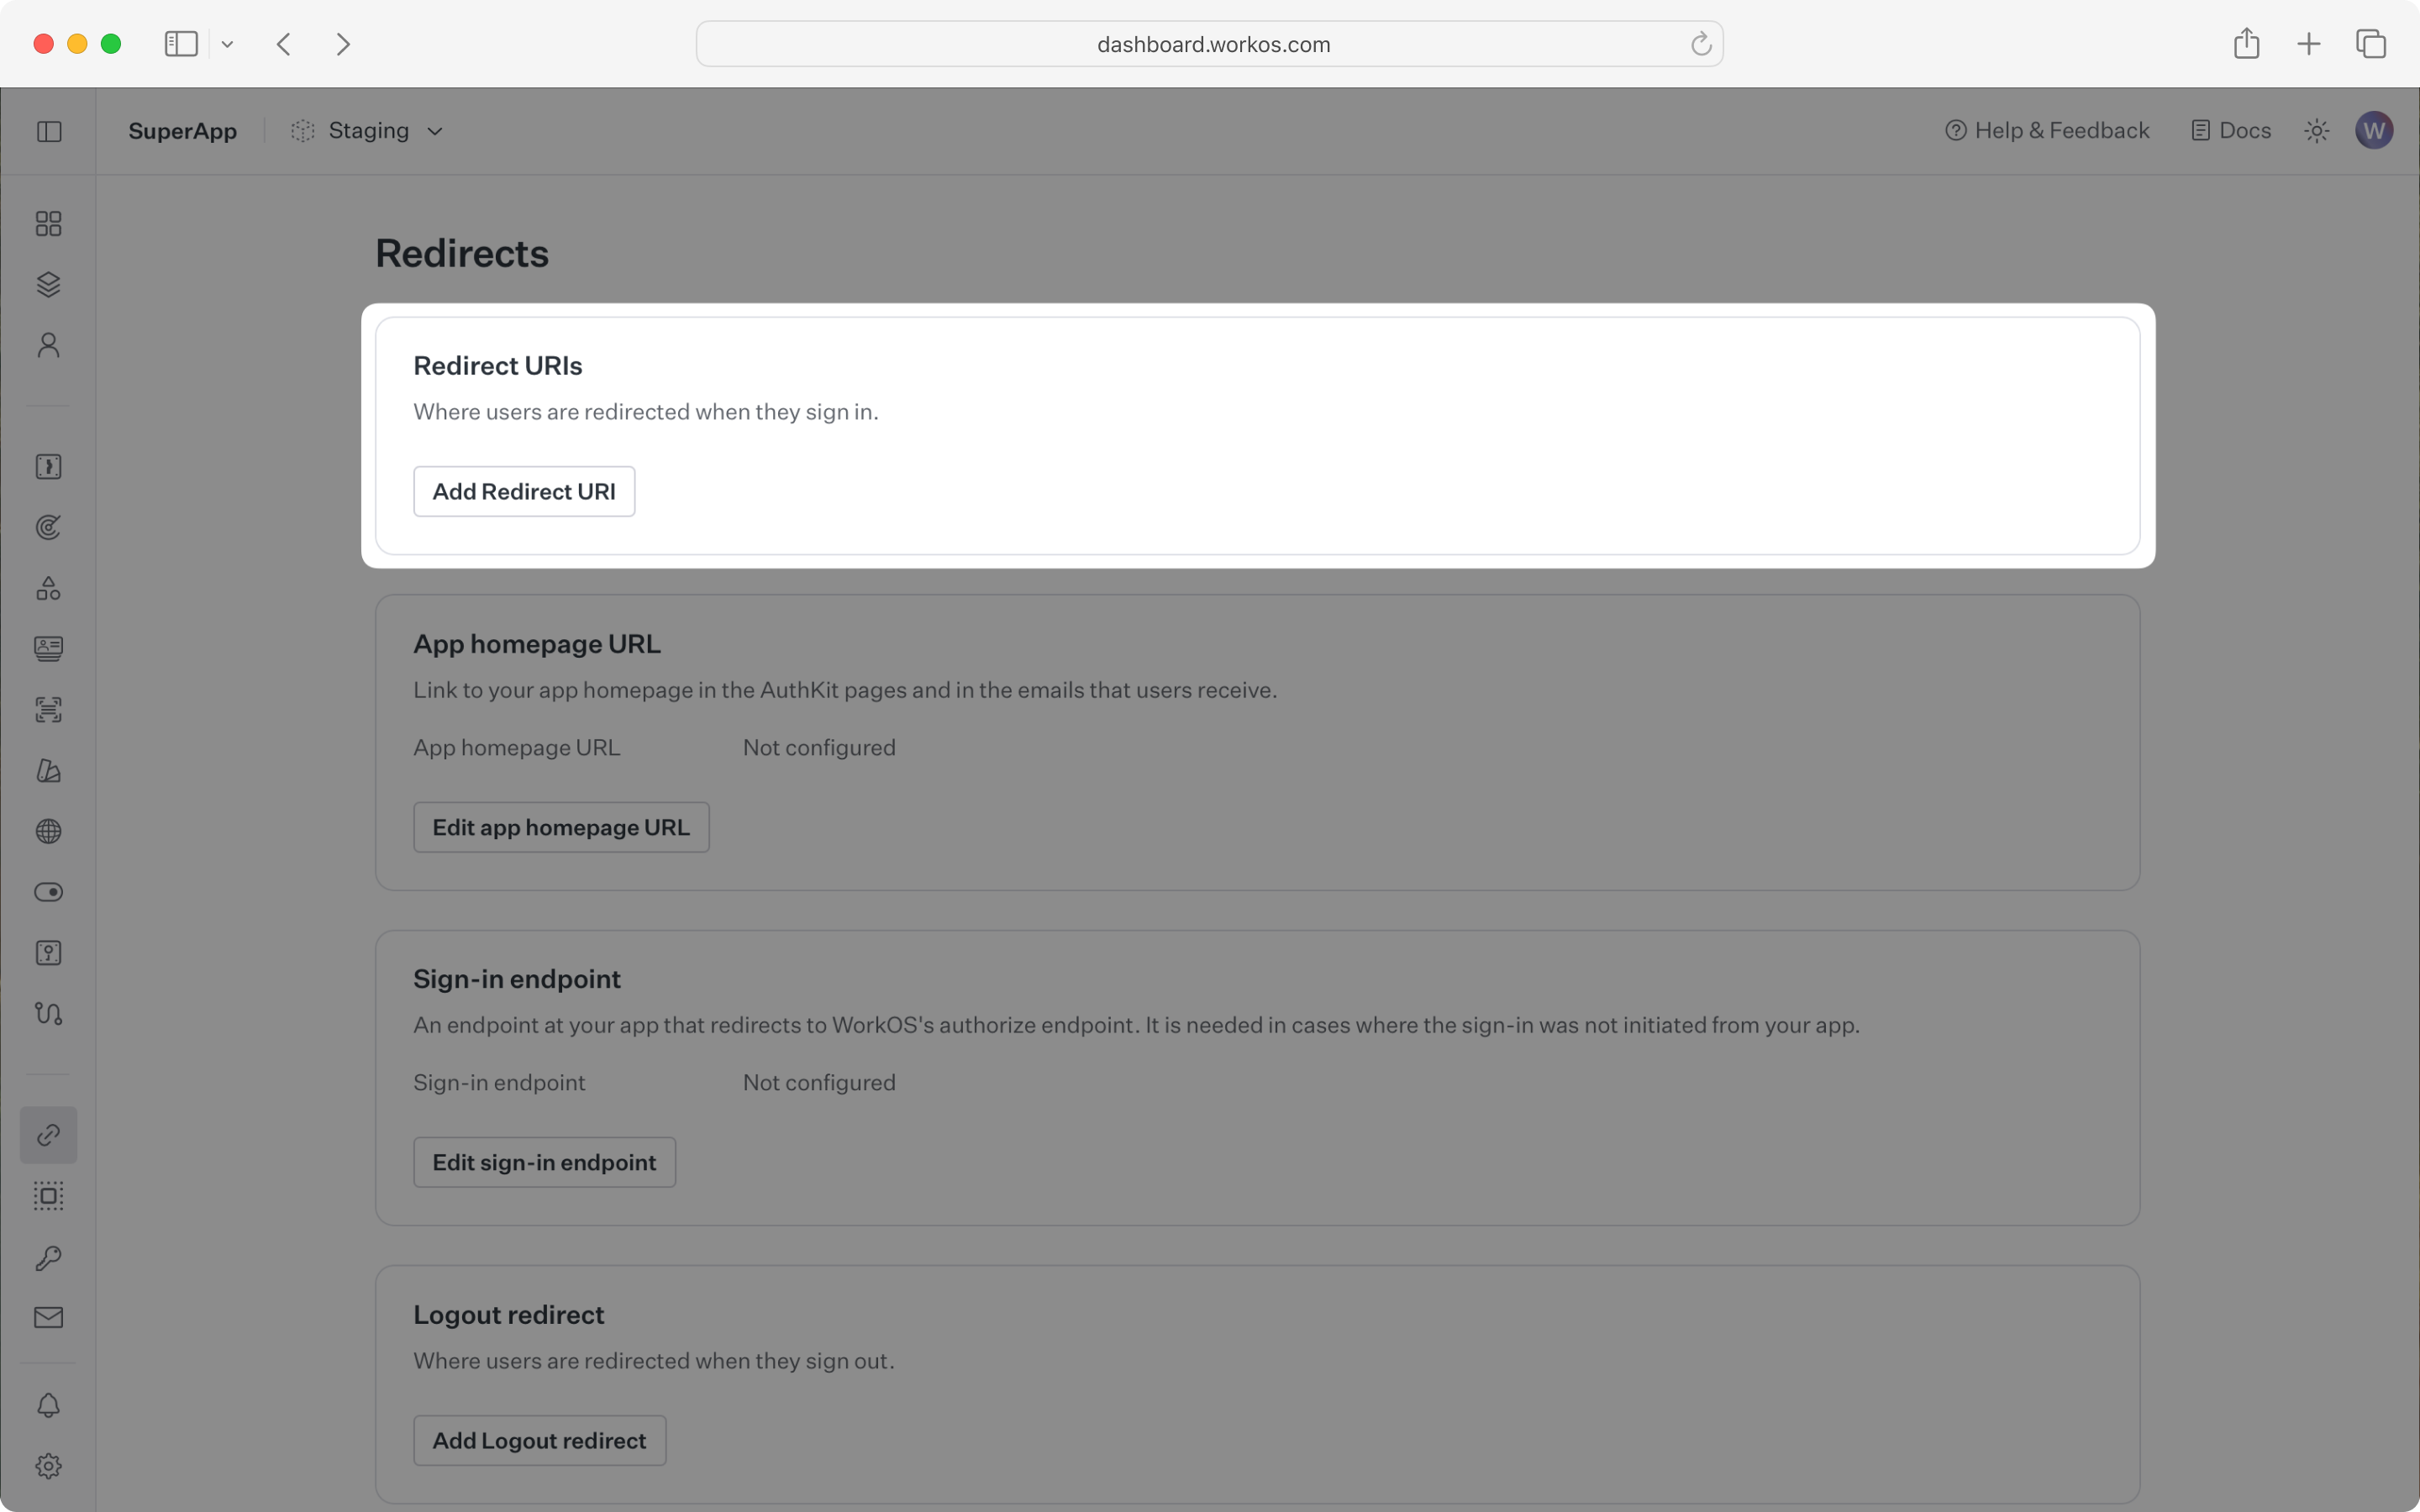
### Configure a redirect URI
A redirect URI is a callback endpoint that WorkOS will redirect to after a user has authenticated. This endpoint will exchange the authorization code returned by WorkOS for an authenticated [User object](/reference/authkit/user). We'll create this endpoint in the next step.
You can set a redirect URI in the **Redirects** section of the [WorkOS Dashboard](https://dashboard.workos.com). We recommend using `http://localhost:3000/callback` as the default here.
WorkOS supports using wildcard characters in Redirect URIs, but not for the default Redirect URI. More information about wildcard characters support can be found in the [Redirect URIs](/sso/redirect-uris/wildcard-characters) guide.
- $ frontend="client-only"
> For the client-only integration, make sure to set the callback URI as the same route where you require auth.
- $ frontend="nextjs, remix, vanilla, react"

When users sign out of their application, they will be redirected to your app's [Sign-out redirect](/authkit/sessions/configuring-sessions/sign-out-redirect) location which is configured in the same dashboard area.
### Configure sign-in endpoint
- $ frontend="client-only"
All sign-in requests must originate at your application for the [PKCE](/reference/authkit/authentication/get-authorization-url/pkce) code exchange to work properly. In some instances, requests may not begin at your app. For example, some users might bookmark the hosted sign-in page or they might be led directly to the hosted sign-in page when clicking on a password reset link in an email.
- $ frontend="nextjs, remix, vanilla, react"
Sign-in requests should originate from your application. In some instances, requests may not begin at your app. For example, some users might bookmark the hosted sign-in page or they might be led directly to the hosted sign-in page when clicking on a password reset link in an email.
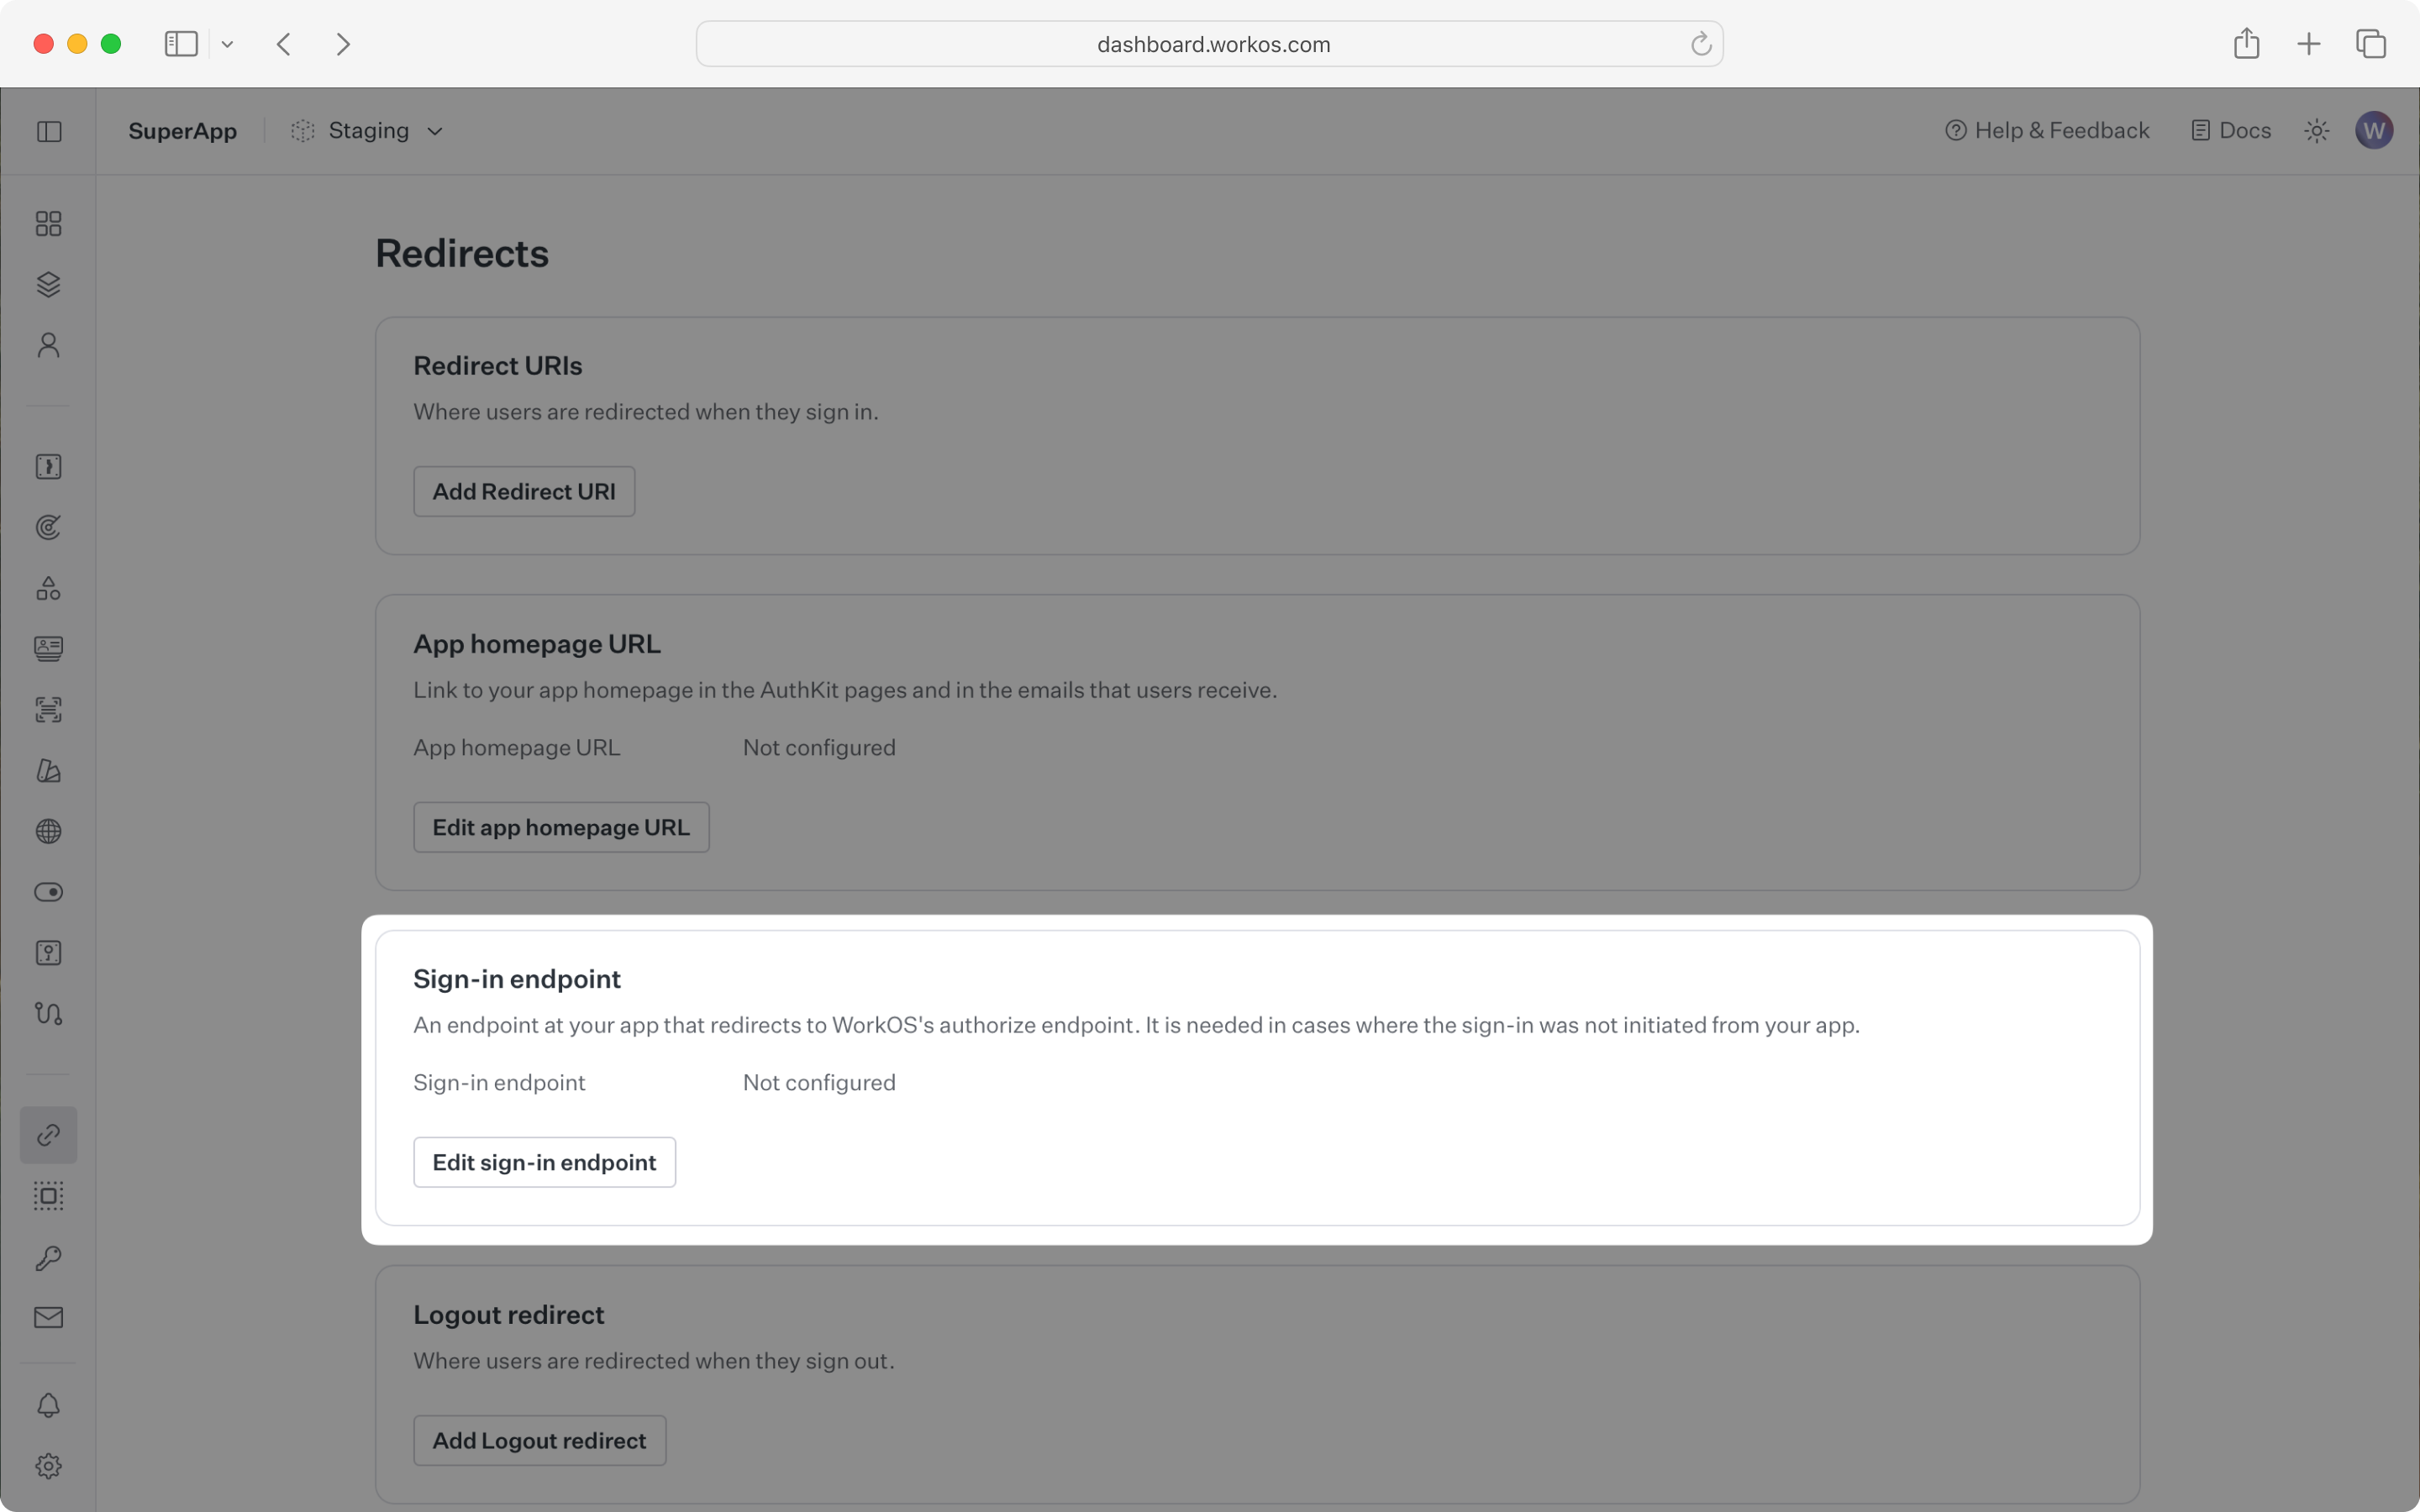
In these cases, AuthKit will detect when a sign-in request did not originate at your application and redirect to your application's sign-in endpoint. This is an endpoint that you define at your application that redirects users to sign in using AuthKit. We'll create this endpoint in the next step.
You can configure the sign-in endpoint from the **Redirects** section of the WorkOS dashboard.
- $ frontend="client-only"
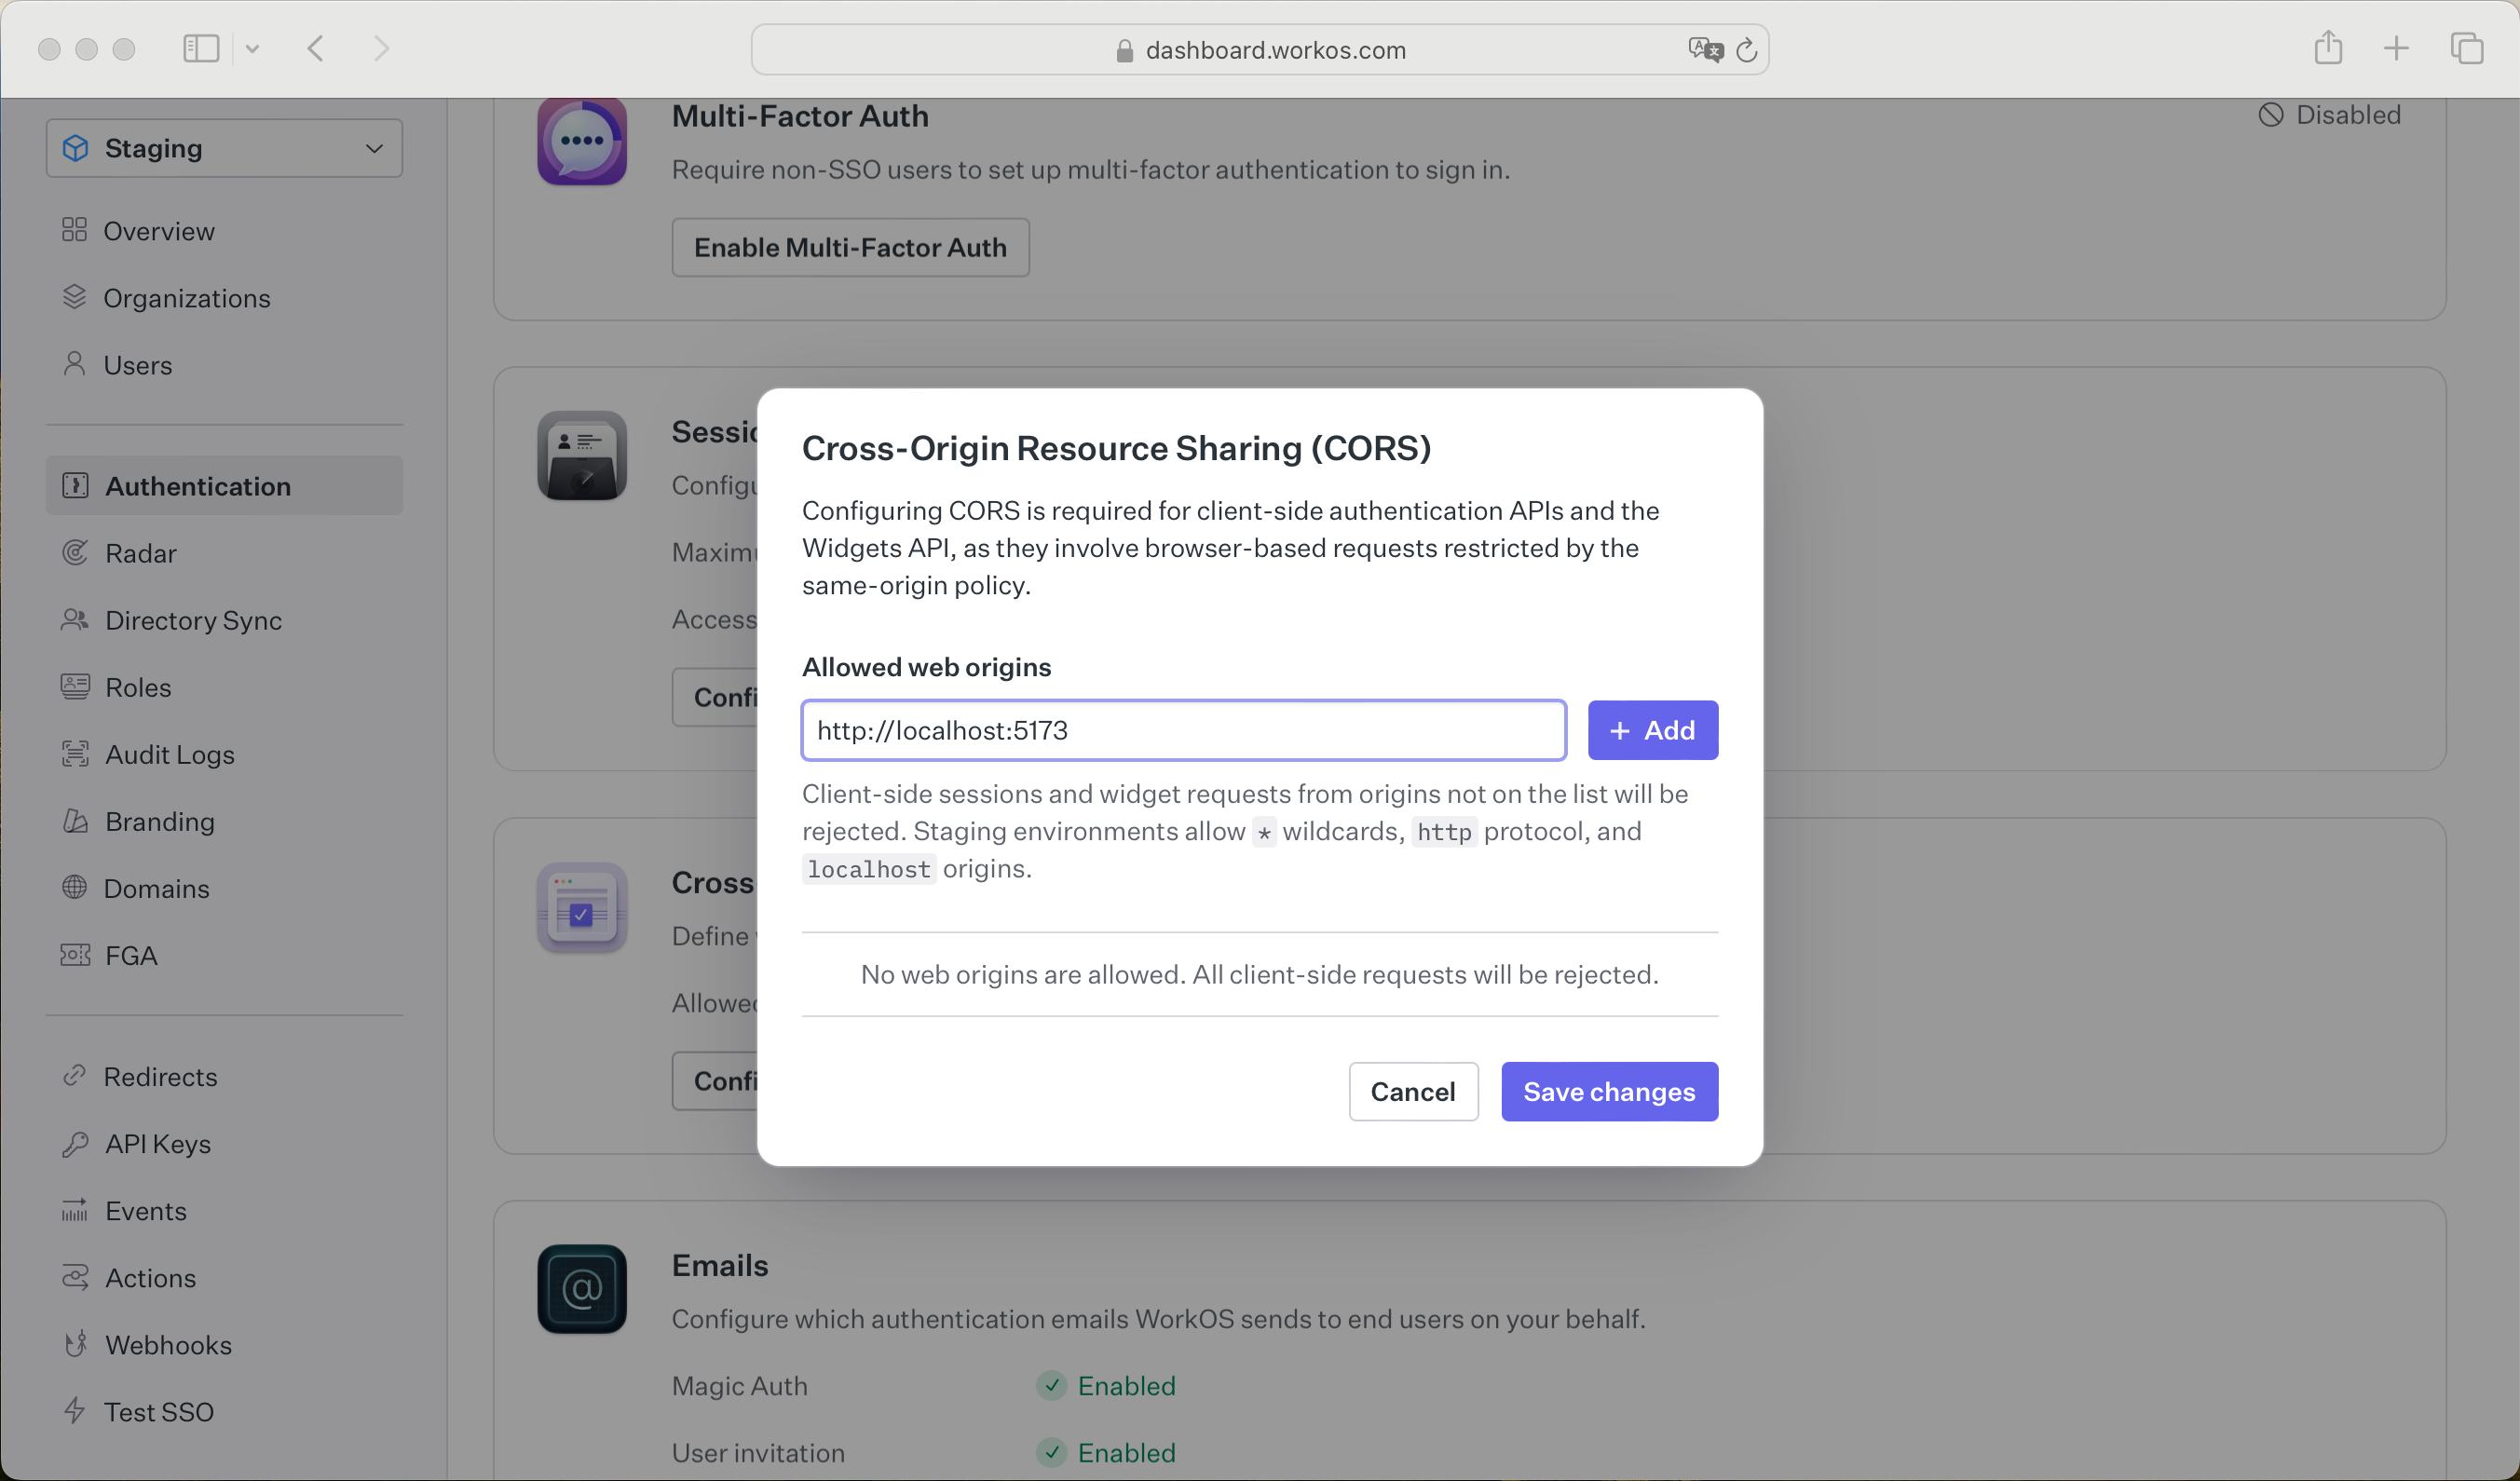
### Configure CORS
Since your user's browser will be making calls to the WorkOS API directly, it is necessary to add your domain to the allow list in your WorkOS Settings. This can be configured in the **Configure CORS** dialog on the **Authentication** page of the WorkOS dashboard.
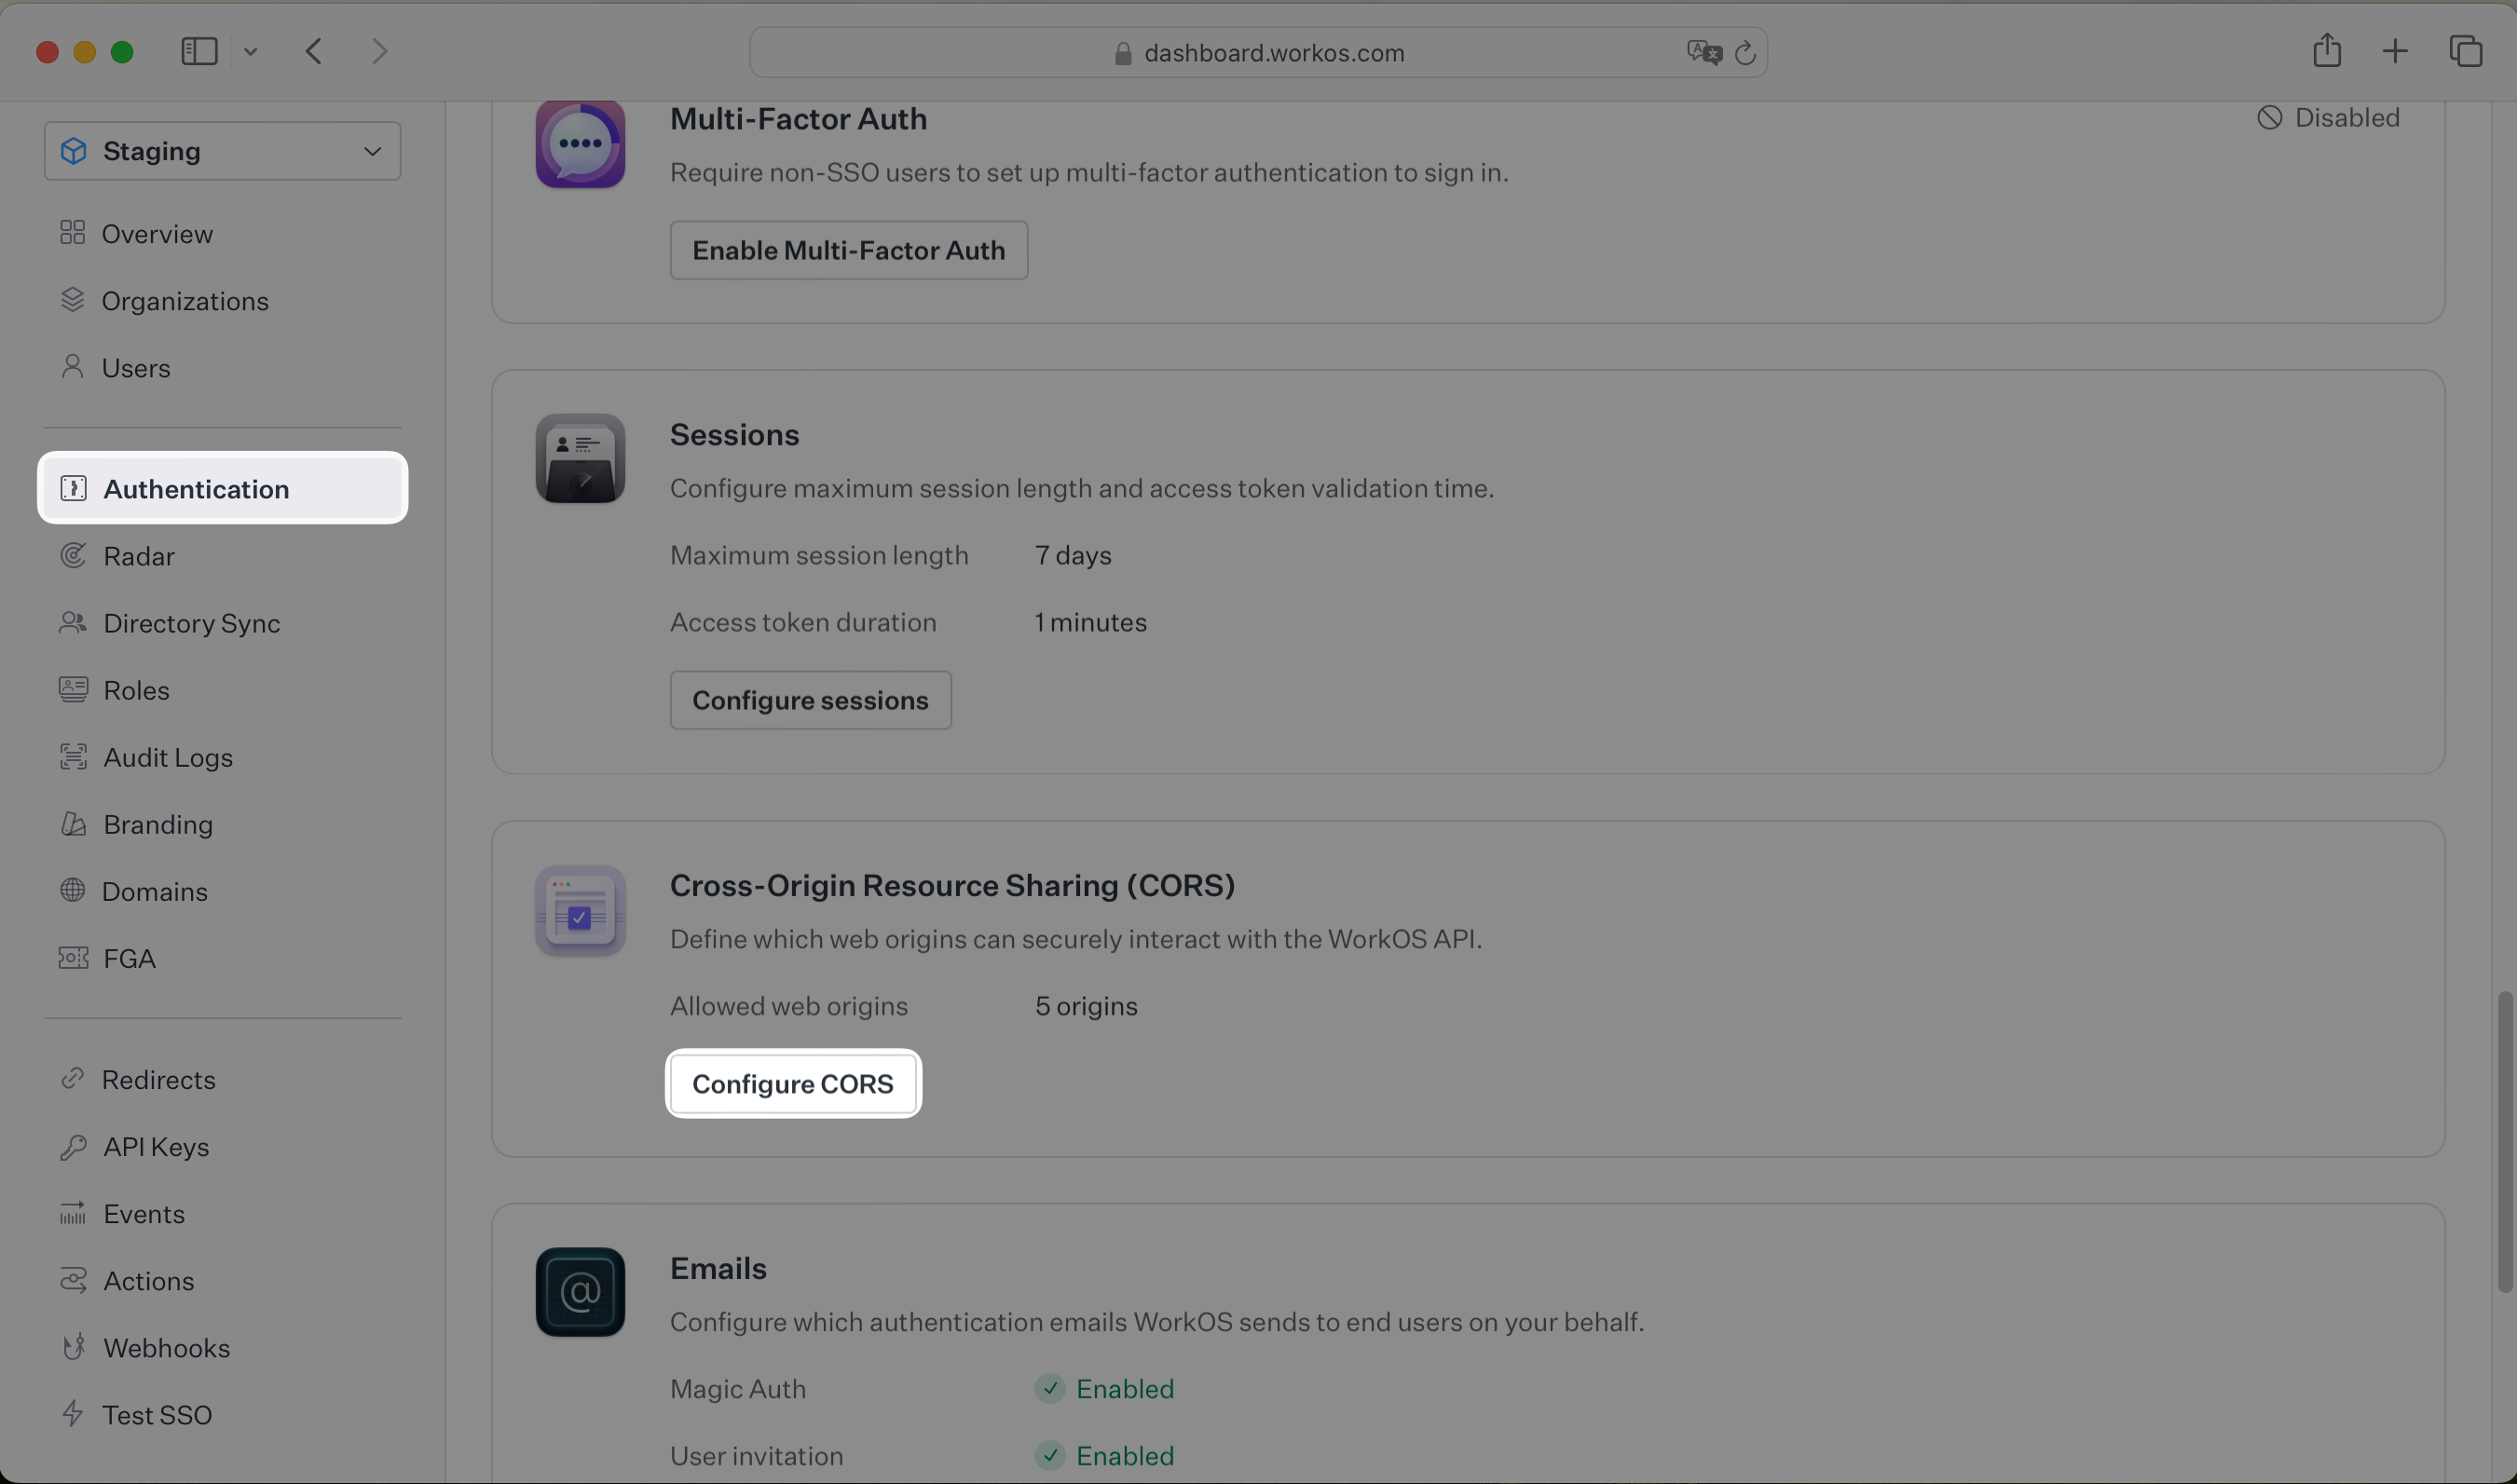
While building your integration in the Staging environment you should add your local development URL here. In the example below we're adding `http://localhost:5173` to the list of allowed web origins.
- $ frontend="nextjs, remix"
### Set secrets
To make calls to WorkOS, provide the API key and the client ID. Store these values as managed secrets and pass them to the SDKs either as environment variables or directly in your app's configuration depending on your preferences.
- $ frontend="nextjs"
```plain title="Environment variables"
WORKOS_API_KEY='sk_example_123456789'
WORKOS_CLIENT_ID='client_123456789'
WORKOS_COOKIE_PASSWORD="" # generate a secure password here
# configured in the WorkOS dashboard
NEXT_PUBLIC_WORKOS_REDIRECT_URI="http://localhost:3000/callback"
```
The `NEXT_PUBLIC_WORKOS_REDIRECT_URI` uses the `NEXT_PUBLIC` prefix so the variable is accessible in edge functions and proxy configurations. This is useful for configuring operations like Vercel preview deployments.
- $ frontend="remix"
```plain title="Environment variables"
WORKOS_API_KEY='sk_example_123456789'
WORKOS_CLIENT_ID='client_123456789'
WORKOS_REDIRECT_URI="http://localhost:3000/callback" # configured in the WorkOS dashboard
WORKOS_COOKIE_PASSWORD="" # generate a secure password here
```
- $ frontend="nextjs, remix"
The SDK requires you to set a strong password to encrypt cookies. This password must be at least 32 characters long. You can generate a secure password by using the [1Password generator](https://1password.com/password-generator/) or the `openssl` library via the command line:
```bash title="Generate a strong password"
openssl rand -base64 32
```
- $ backend="nodejs, ruby, python"
### Set secrets
To make calls to WorkOS, provide the API key and the client ID. Store these values as managed secrets and pass them to the SDKs either as environment variables or directly in your app's configuration depending on your preferences.
```plain title="Environment variables"
WORKOS_API_KEY='sk_example_123456789'
WORKOS_CLIENT_ID='client_123456789'
```
> The code examples use your staging API keys when [signed in](https://dashboard.workos.com)
---
## (2) Add AuthKit to your app
Let's integrate the hosted authentication flow into your app.
- $ frontend="client-only"
### Wrap your app with the AuthKit provider
The `AuthKitProvider` component will handle the redirect from Hosted AuthKit, refresh the session when needed and provide context for hooks used in the components of your app. Initialize it with your client ID, which you can find in the WorkOS dashboard. You should also specify your custom authentication API domain.
> If you have not set up a custom authentication domain in WorkOS, set `devMode={true}` on ``. This will keep the refresh token in local storage instead of a secure, HTTP-only cookie.
> For security reasons, the client-only integration cannot be nested inside an `iframe`.
### Use the auth hook in your components
The `useAuth` hook will return user information and loading status. It also provides functions to retrieve the access token and sign in and sign out the user.
### Protect routes with custom hooks
If you have routes that you wish to only be accessible to logged in users, you can use a custom React hook.
Then use that hook to protect your mandatory sign in routes.
- $ frontend="nextjs"
### Provider
The `AuthKitProvider` component adds protections for auth edge cases and is required to wrap your app layout.
### Proxy
[Next.js proxy](https://nextjs.org/docs/app/api-reference/file-conventions/proxy) is required to determine which routes require authentication.
#### Implementing the proxy
When implementing the proxy, which [was called middleware before Next 16](https://nextjs.org/docs/messages/middleware-to-proxy), you can opt to use either the complete `authkitMiddleware` solution or the composable `authkit` method. You'd use the former in cases where your proxy is only used for authentication. The latter is used for more complex apps where you want to have your proxy perform tasks in addition to auth.
- | Complete
The proxy can be implemented in the `proxy.ts` file. This is a full proxy solution that handles all the auth logic including session management and redirects for you.
With the complete proxy solution, you can choose between page based auth and middleware auth.
#### Page based auth
Protected routes are determined via the use of the `withAuth` method, specifically whether the `ensureSignedIn` option is used. Usage of `withAuth` is covered further down in the _Access authentication data_ section.
#### Middleware auth
In this mode the proxy is used to protect all routes by default, redirecting users to AuthKit if no session is available. Exceptions can be configured via an allow list.
In the above example, the home page `/` can be viewed by unauthenticated users. The `/account` page and its children can only be viewed by authenticated users.
- | Composable
The proxy can be implemented in the `proxy.ts` file. This is a composable proxy solution that handles the session management part for you but leaves the redirect and route protection logic to you.
### Callback route
When a user has authenticated via AuthKit, they will be redirected to your app's callback route. Make sure this route matches the `WORKOS_REDIRECT_URI` environment variable and the configured redirect URI in your WorkOS dashboard.
### Sign-in endpoint
We'll need a sign-in endpoint to direct users to sign in using AuthKit before redirecting them back to your application. We'll do this by generating an AuthKit authorization URL server side and redirecting the user to it.
### Access authentication data
AuthKit can be used in both server and client components.
- | Server component
The `withAuth` method is used to retrieve the current logged in user and their details.
- | Client component
The `useAuth` hook is used to retrieve the current logged in user and their details.
### Protected routes
For routes where a signed in user is mandatory, you can use the `ensureSignedIn` option.
- | Server component
- | Client component
### Ending the session
Finally, ensure the user can end their session by redirecting them to the logout URL. After successfully signing out, the user will be redirected to your app's [Sign-out redirect](/authkit/sessions/configuring-sessions/sign-out-redirect) location, which is configured in the WorkOS dashboard.
- $ frontend="remix"
### Callback route
When a user has authenticated via AuthKit, they will be redirected to your app's callback route. In your Remix app, [create a new route](https://remix.run/docs/en/main/discussion/routes) and add the following:
### Sign-in endpoint
We'll need a sign-in endpoint to direct users to sign in using AuthKit before redirecting them back to your application. We'll do this by generating an AuthKit authorization URL server side and redirecting the user to it.
### Access authentication data in your Remix application
We'll need to direct users to sign in (or sign up) using AuthKit before redirecting them back to your application. We'll do this by generating an AuthKit authorization URL server side and redirecting the user to it.
Use `authkitLoader` to configure AuthKit for your Remix application routes. You can choose to return custom data from your loader, like for instance the sign in and sign out URLs.
### Protected routes
For routes where a signed in user is mandatory, you can use the `ensureSignedIn` option in your loader.
### Ending the session
Finally, ensure the user can end their session by redirecting them to the logout URL. After successfully signing out, the user will be redirected to your app's [Sign-out redirect](/authkit/sessions/configuring-sessions/sign-out-redirect) location, which is configured in the WorkOS dashboard.
- $ backend="nodejs, ruby, python"
### Set up the frontend
To demonstrate AuthKit, we only need a simple page with links to logging in and out.
Clicking the "Sign in" and "Sign out" links should invoke actions on our server, which we'll set up next.
- $ backend="nodejs, ruby, php, go, python, java"
### Add a sign-in endpoint
We'll need a sign-in endpoint to direct users to sign in (or sign up) using AuthKit before redirecting them back to your application. This endpoint should generate an AuthKit authorization URL server side and redirect the user to it.
You can use the optional state parameter to encode arbitrary information to help restore application `state` between redirects.
- $ backend="nodejs"
For this guide we'll be using the `express` web server for Node. This guide won't cover how to set up an Express app, but you can find more information in the [Express documentation](https://expressjs.com/en/starter/installing.html).
- $ backend="ruby"
For this guide we'll be using the `sinatra` web server for Ruby. This guide won't cover how to set up a Sinatra app, but you can find more information in the [Sinatra documentation](https://sinatrarb.com/intro.html).
- $ backend="python"
For this guide we'll be using the `flask` web server for Python. This guide won't cover how to set up a Flask app, but you can find more information in the [Flask documentation](https://flask.palletsprojects.com/en/stable/).
- $ backend="nodejs, ruby, python"
> WorkOS will redirect to your [Redirect URI](/glossary/redirect-uri) if there is an issue generating an authorization URL. Read our [API Reference](/reference) for more details.
### Add a callback endpoint
Next, let's add the callback endpoint (referenced in [Configure a redirect URI](/authkit/1-configure-your-project/configure-a-redirect-uri)) which will exchange the authorization code (valid for 10 minutes) for an authenticated User object.
- $ backend="nodejs"
- $ backend="ruby"
- $ backend="python"
- $ backend="nodejs, ruby, python"
## (3) Handle the user session
Session management helper methods are included in our SDKs to make integration easy. For security reasons, sessions are automatically "sealed", meaning they are encrypted with a strong password.
### Create a session password
The SDK requires you to set a strong password to encrypt cookies. This password must be 32 characters long. You can generate a secure password by using the [1Password generator](https://1password.com/password-generator/) or the `openssl` library via the command line:
```bash title="Generate a strong password"
openssl rand -base64 32
```
Then add it to the environment variables file.
```plain title=".env"
WORKOS_API_KEY='sk_example_123456789'
WORKOS_CLIENT_ID='client_123456789'
# +diff-start
WORKOS_COOKIE_PASSWORD=''
# +diff-end
```
### Save the encrypted session
Next, use the SDK to authenticate the user and return a password protected session. The refresh token is considered sensitive as it can be used to re-authenticate, hence why the session is encrypted before storing it in a session cookie.
- $ backend="nodejs"
We should also present some of the user information on our frontend. Let's update the default route to read the session cookie and display user information:
And, we should make sure to update the index page to present this info.
### Protected routes
Then, use middleware to specify which routes should be protected. If the session has expired, use the SDK to attempt to generate a new one.
Add the middleware to the route that should only be accessible to logged in users.
### Ending the session
Finally, ensure the user can end their session by redirecting them to the logout URL. After successfully signing out, the user will be redirected to your app's [Sign-out redirect](/authkit/sessions/configuring-sessions/sign-out-redirect) location, which is configured in the WorkOS dashboard.
- $ backend="nodejs"
CSRF Protection: The logout endpoint uses POST to prevent
unintended logouts from browser prefetching. CSRF protection with{' '}
csrf-csrf prevents cross-site request forgery attacks. The
frontend fetches a CSRF token from /csrf-token and includes it
in the logout form submission.
- $ backend="ruby"
We should also present some of the user information on our frontend. Let's update the default route to read the session cookie and display user information:
And, we should make sure to update the index page to present this info.
### Protected routes
Then, use a helper method to specify which routes should be protected. If the session has expired, use the SDK to attempt to generate a new one.
Call the helper method in the route that should only be accessible to logged in users.
### Ending the session
Finally, ensure the user can end their session by redirecting them to the logout URL. After successfully signing out, the user will be redirected to your app's [Sign-out redirect](/authkit/sessions/configuring-sessions/sign-out-redirect) location, which is configured in the WorkOS dashboard.
CSRF Protection: The logout endpoint uses POST to prevent
unintended logouts from browser prefetching. CSRF protection with{' '}
Rack::Csrf prevents cross-site request forgery attacks. The{' '}
csrf_tag helper method generates a hidden form field with the
CSRF token.
- $ backend="python"
We should also present some of the user information on our frontend. Let's update the default route to read the session cookie and display user information:
And, we should make sure to update the index page to present this info.
### Protected routes
Then, use a decorator to specify which routes should be protected. If the session has expired, use the SDK to attempt to generate a new one.
Use the decorator in the route that should only be accessible to logged in users.
### Ending the session
Finally, ensure the user can end their session by redirecting them to the logout URL. After successfully signing out, the user will be redirected to your app's Sign-out redirect location, which is configured in the WorkOS dashboard.
CSRF Protection: The logout endpoint uses POST to prevent
unintended logouts from browser prefetching. CSRF protection with{' '}
Flask-WTF prevents cross-site request forgery attacks.
Flask-WTF automatically validates CSRF tokens on POST requests when
configured with CSRFProtect.
> If you haven't configured a [Sign-out redirect](/authkit/sessions/configuring-sessions/sign-out-redirect) in the WorkOS dashboard, users will see an error when logging out.
## Validate the authentication flow
- $ frontend="nextjs, remix"
To test all of this out, call `npm run dev`, navigate to `localhost:3000`, and sign up for an account.
- $ backend="nodejs"
To test all of this out, start your server with `node server.js`, navigate to `localhost:3000`, and sign up for an account.
- $ backend="ruby"
To test all of this out, start your server with `ruby server.rb`, navigate to `localhost:3000`, and sign up for an account.
- $ backend="python"
To test all of this out, start your server with `python server.py`, navigate to `localhost:3000`, and sign up for an account.
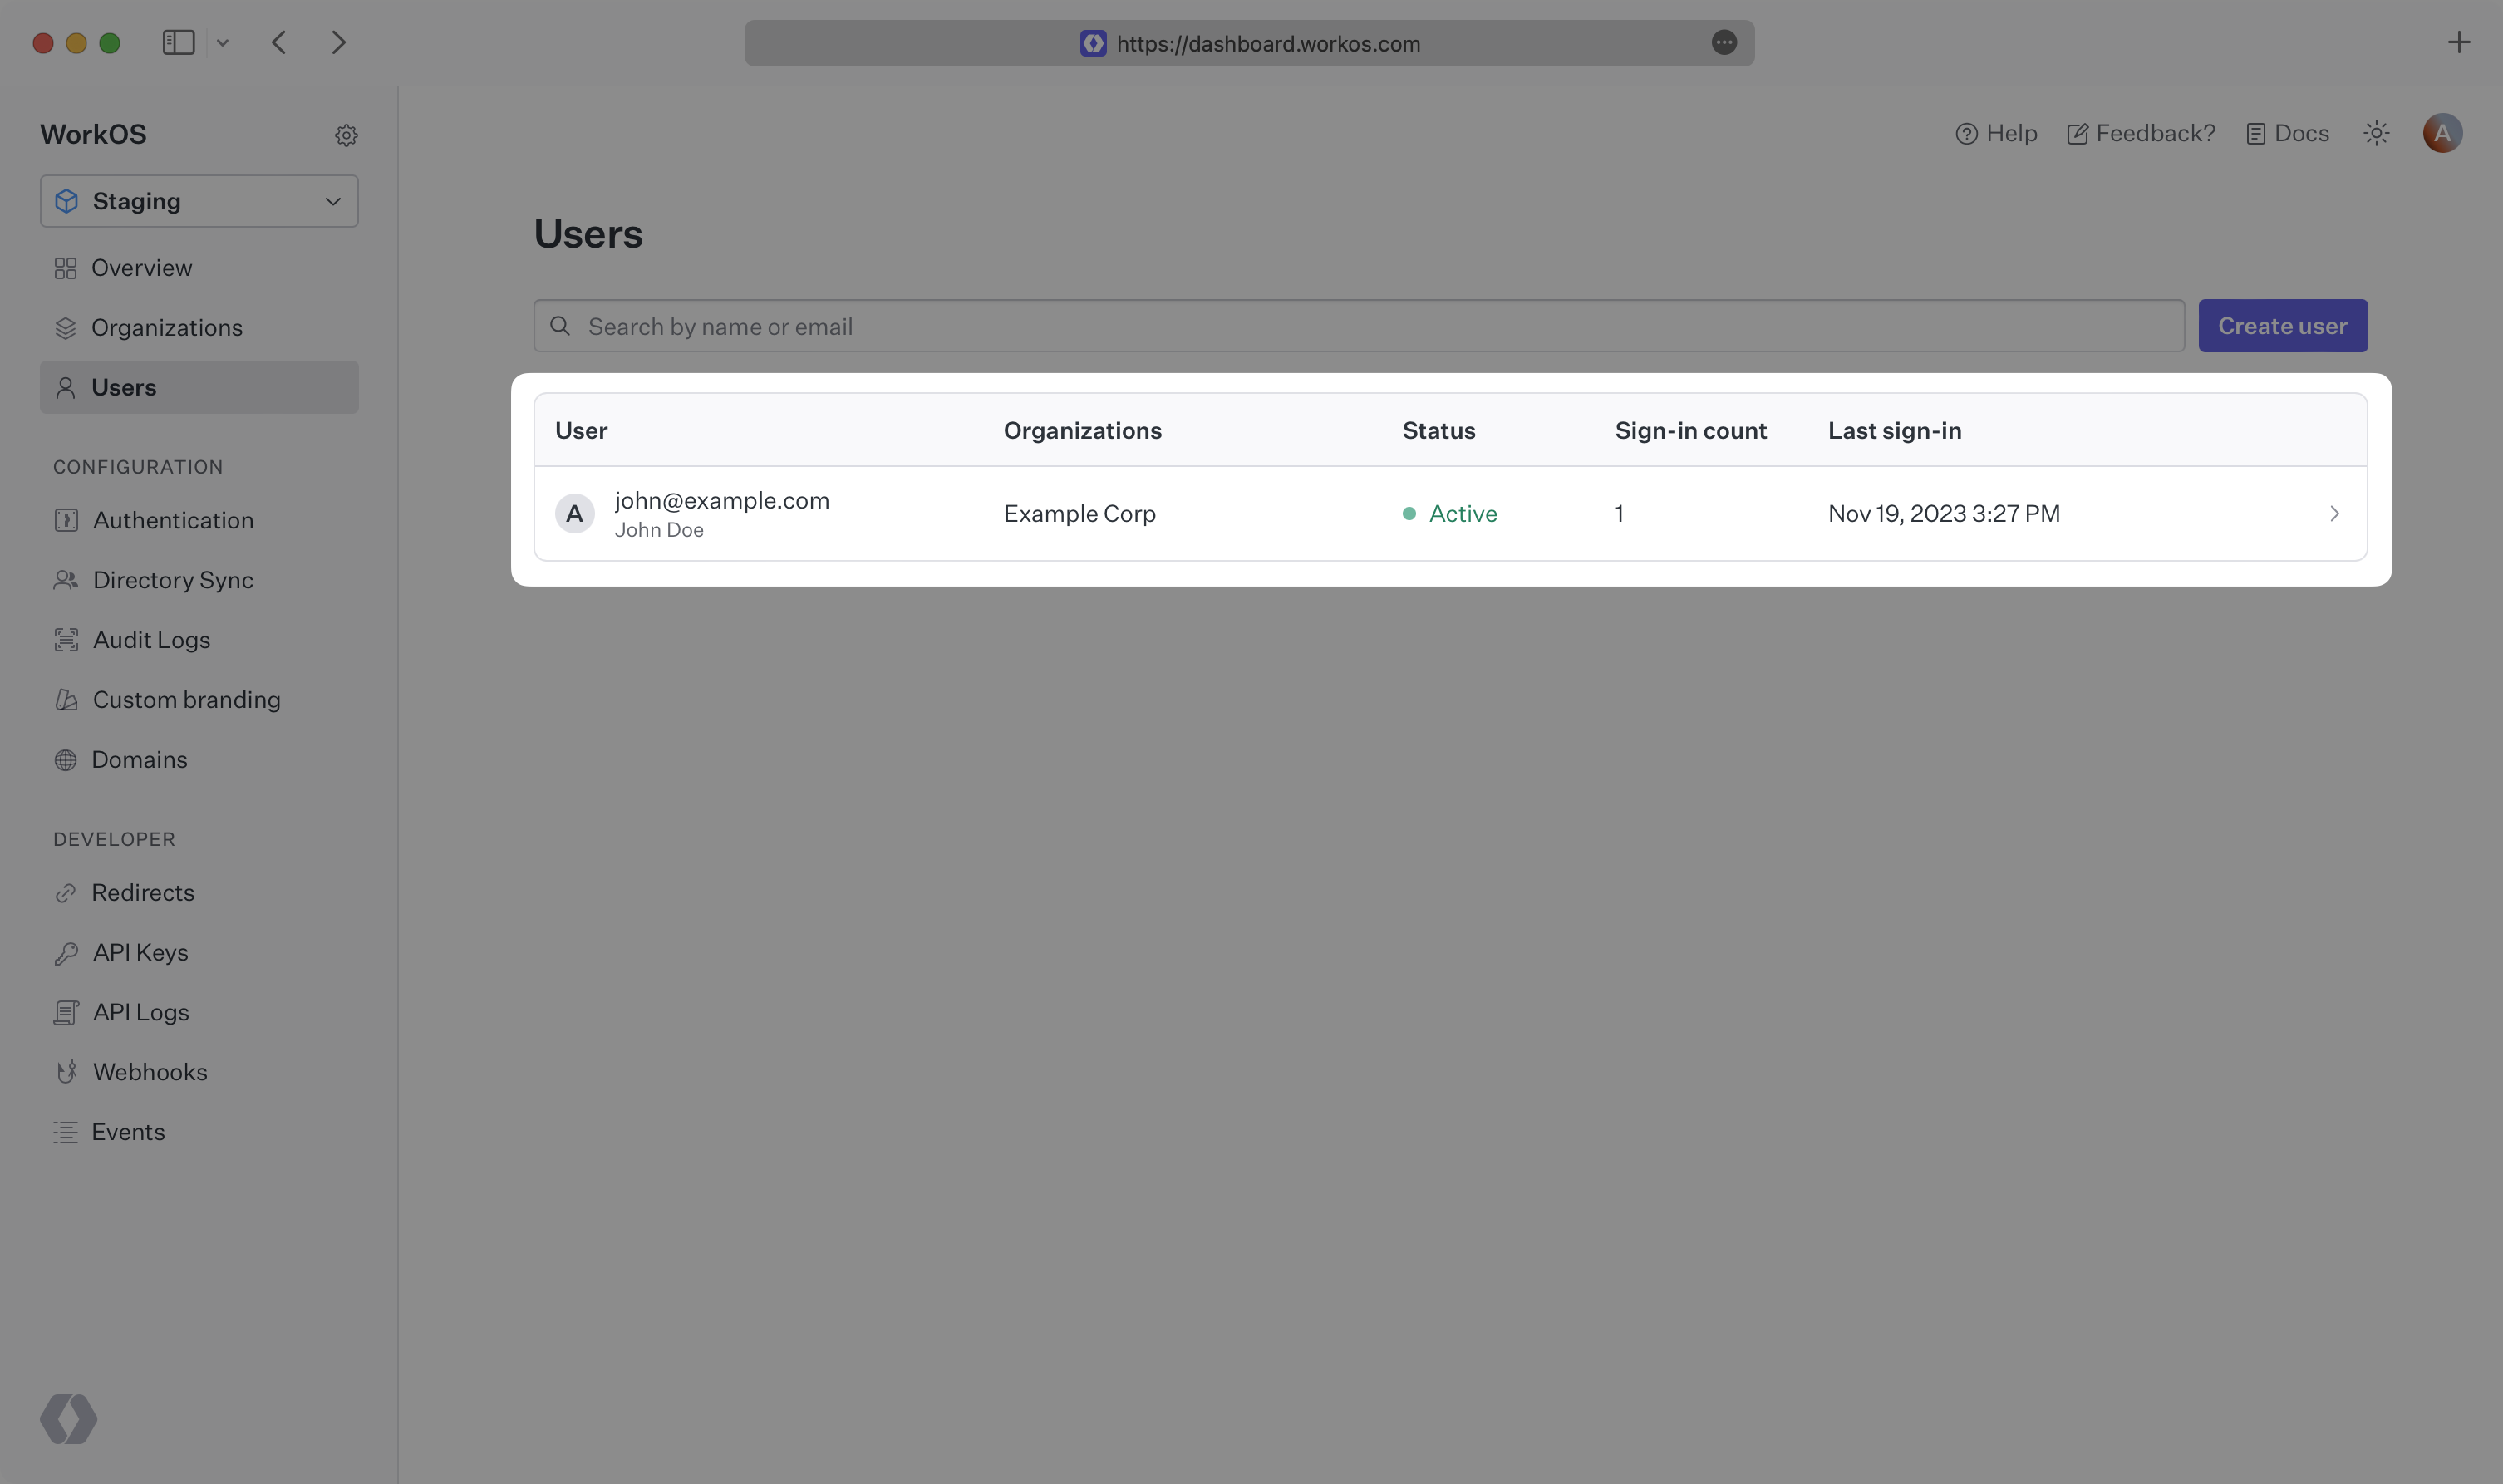
You can then sign in with the newly created credentials and see the user listed in the **Users** section of the [WorkOS Dashboard](https://dashboard.workos.com).