---
title: Admin Portal
description: >-
A first-class Single Sign-On and Directory Sync onboarding experience for
organization admins.
showNextPage: true
originalPath: .tmp-workos-clone/packages/docs/content/admin-portal/index.mdx
---
## Introduction
The Admin Portal provides an out-of-the-box UI for IT admins to verify domains, configure SSO and Directory Sync connections, and more. Designed to remove friction, custom walk-through documentation for each identity provider means that organization admins can onboard their organizations without high-touch support from your team. Easy to integrate and fully maintained and hosted by WorkOS, the Admin Portal makes Domain Verification, SSO, and Directory Sync setup simple, fast, and secure.
## Workflow Options
There are two main workflows for initiating an Admin Portal session for IT admins. You can either share a link to the Admin Portal from the WorkOS dashboard, or you can seamlessly integrate Admin Portal into your application through WorkOS SDKs or APIs.
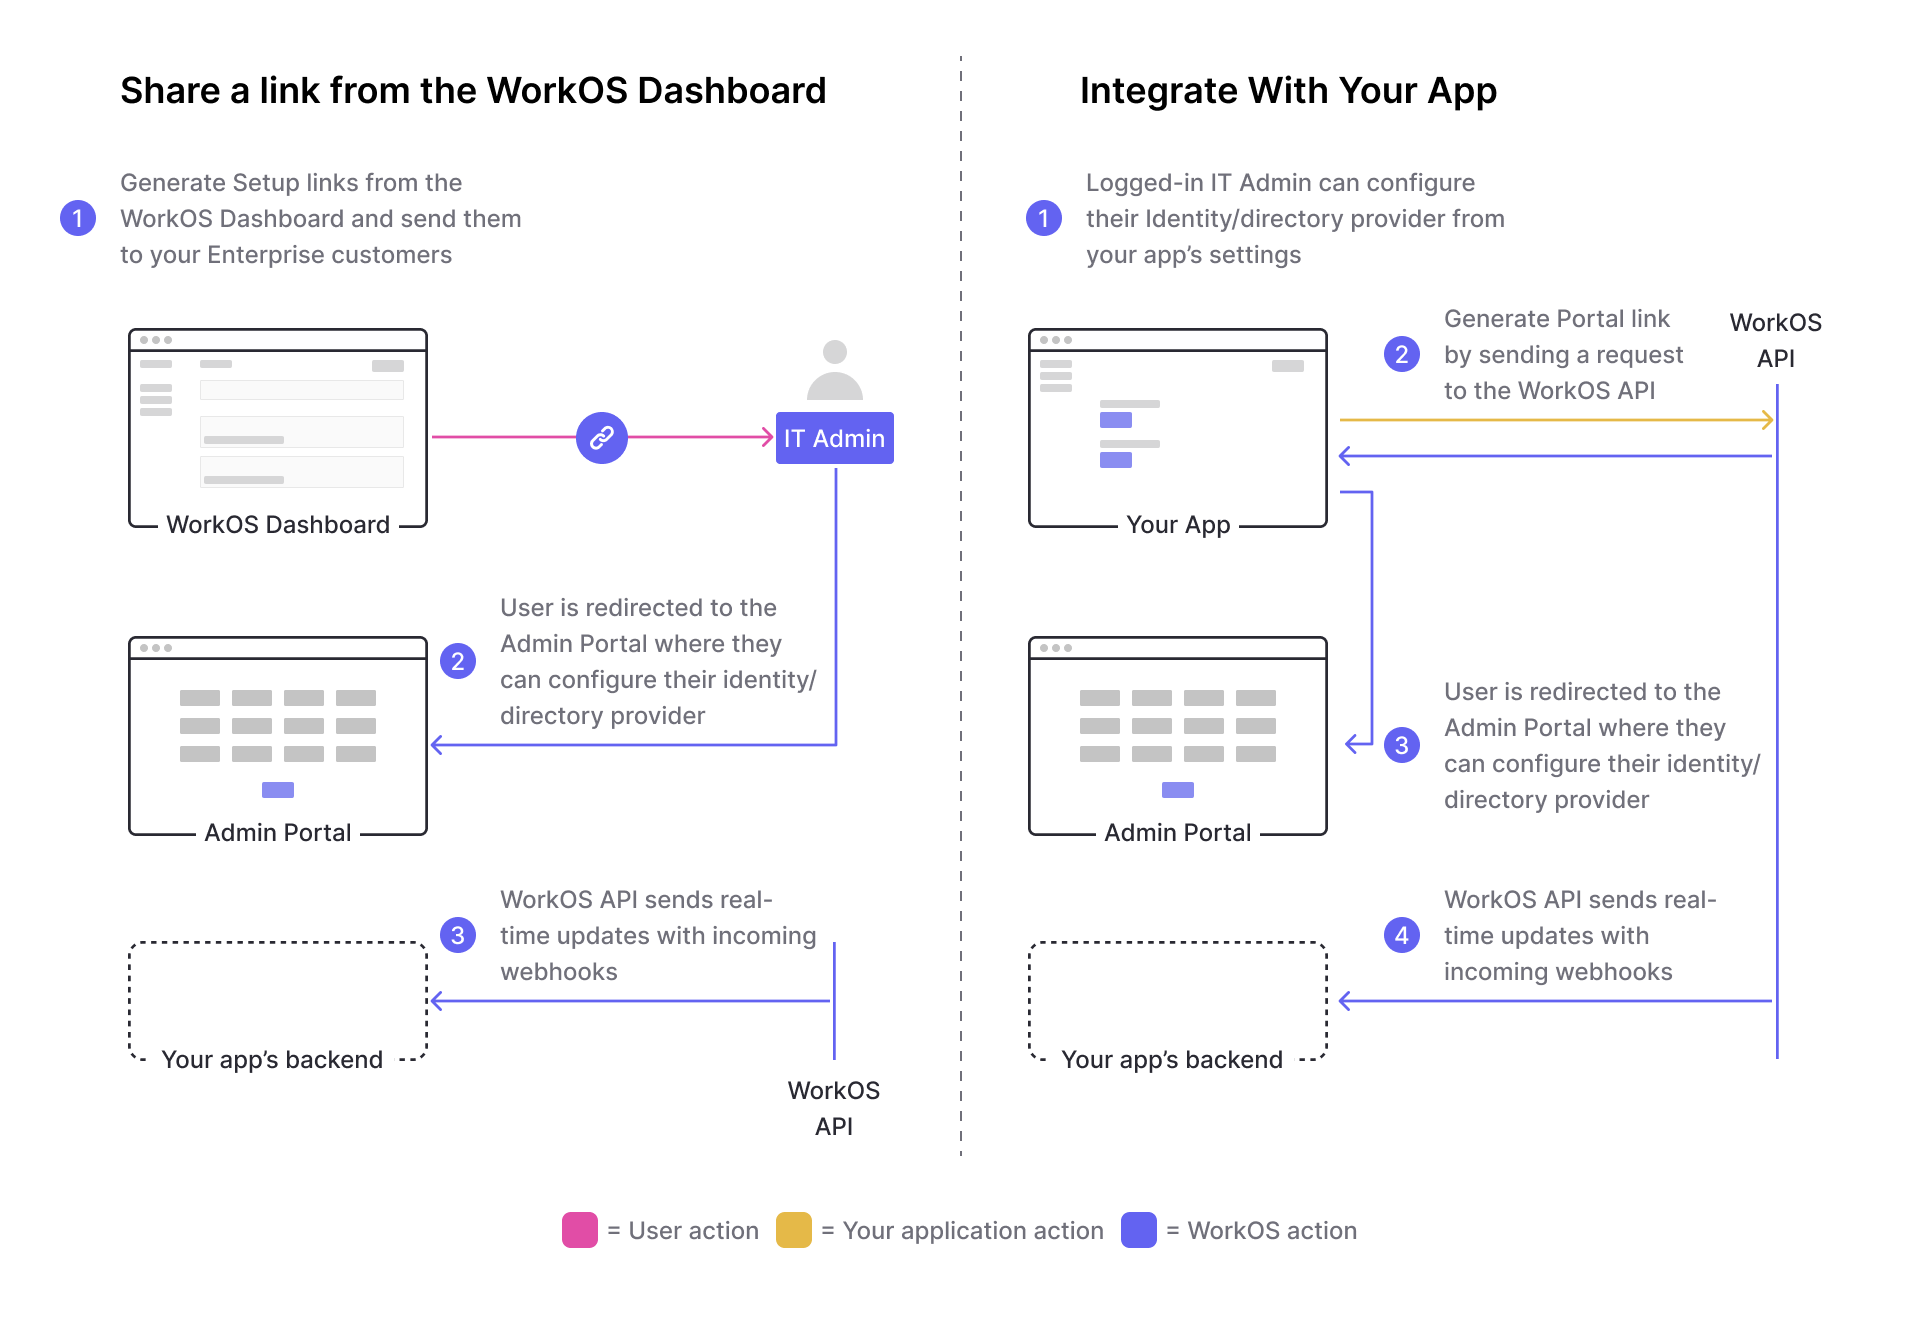
If you want to provide an IT admin with a link to the Admin Portal, in a email for example, then you would need to create that link in the WorkOS dashboard.
However, if you are adding a button to open the Admin Portal from within your application, then you would need to use the API.
| Workflow | Use cases | Security | Return URL and Success URLs |
| ------------------------------- | :--------------------------- | :------------------------------------------------------------------------------- | :----------------------------------------------------------------------------------------------------------------------------------------- |
| Share a link from the dashboard | Setup only | Can be revoked; Automatically revoked on setup completion; Expires after 30 days | Not applicable |
| Generate a link via the API | Setup and post-configuration | Cannot be revoked; Expires after 5 minutes | Can be configured on the [Redirects](https://dashboard.workos.com/redirects) page in the dashboard or specified as a parameter for the API |
---
## Before getting started
To get the most out of these guides, you’ll need:
- A [WorkOS account](https://dashboard.workos.com/)
## API object definitions
[Connection](/reference/sso/connection)
: Represents the method by which users of an organization sign in to your application.
[Organization](/reference/organization)
: Describes an organization whose users sign in with an SSO connection, or whose users are synced with a Directory Sync connection.
[Portal link](/reference/admin-portal/portal-link)
: A temporary link to initiate an Admin Portal session.
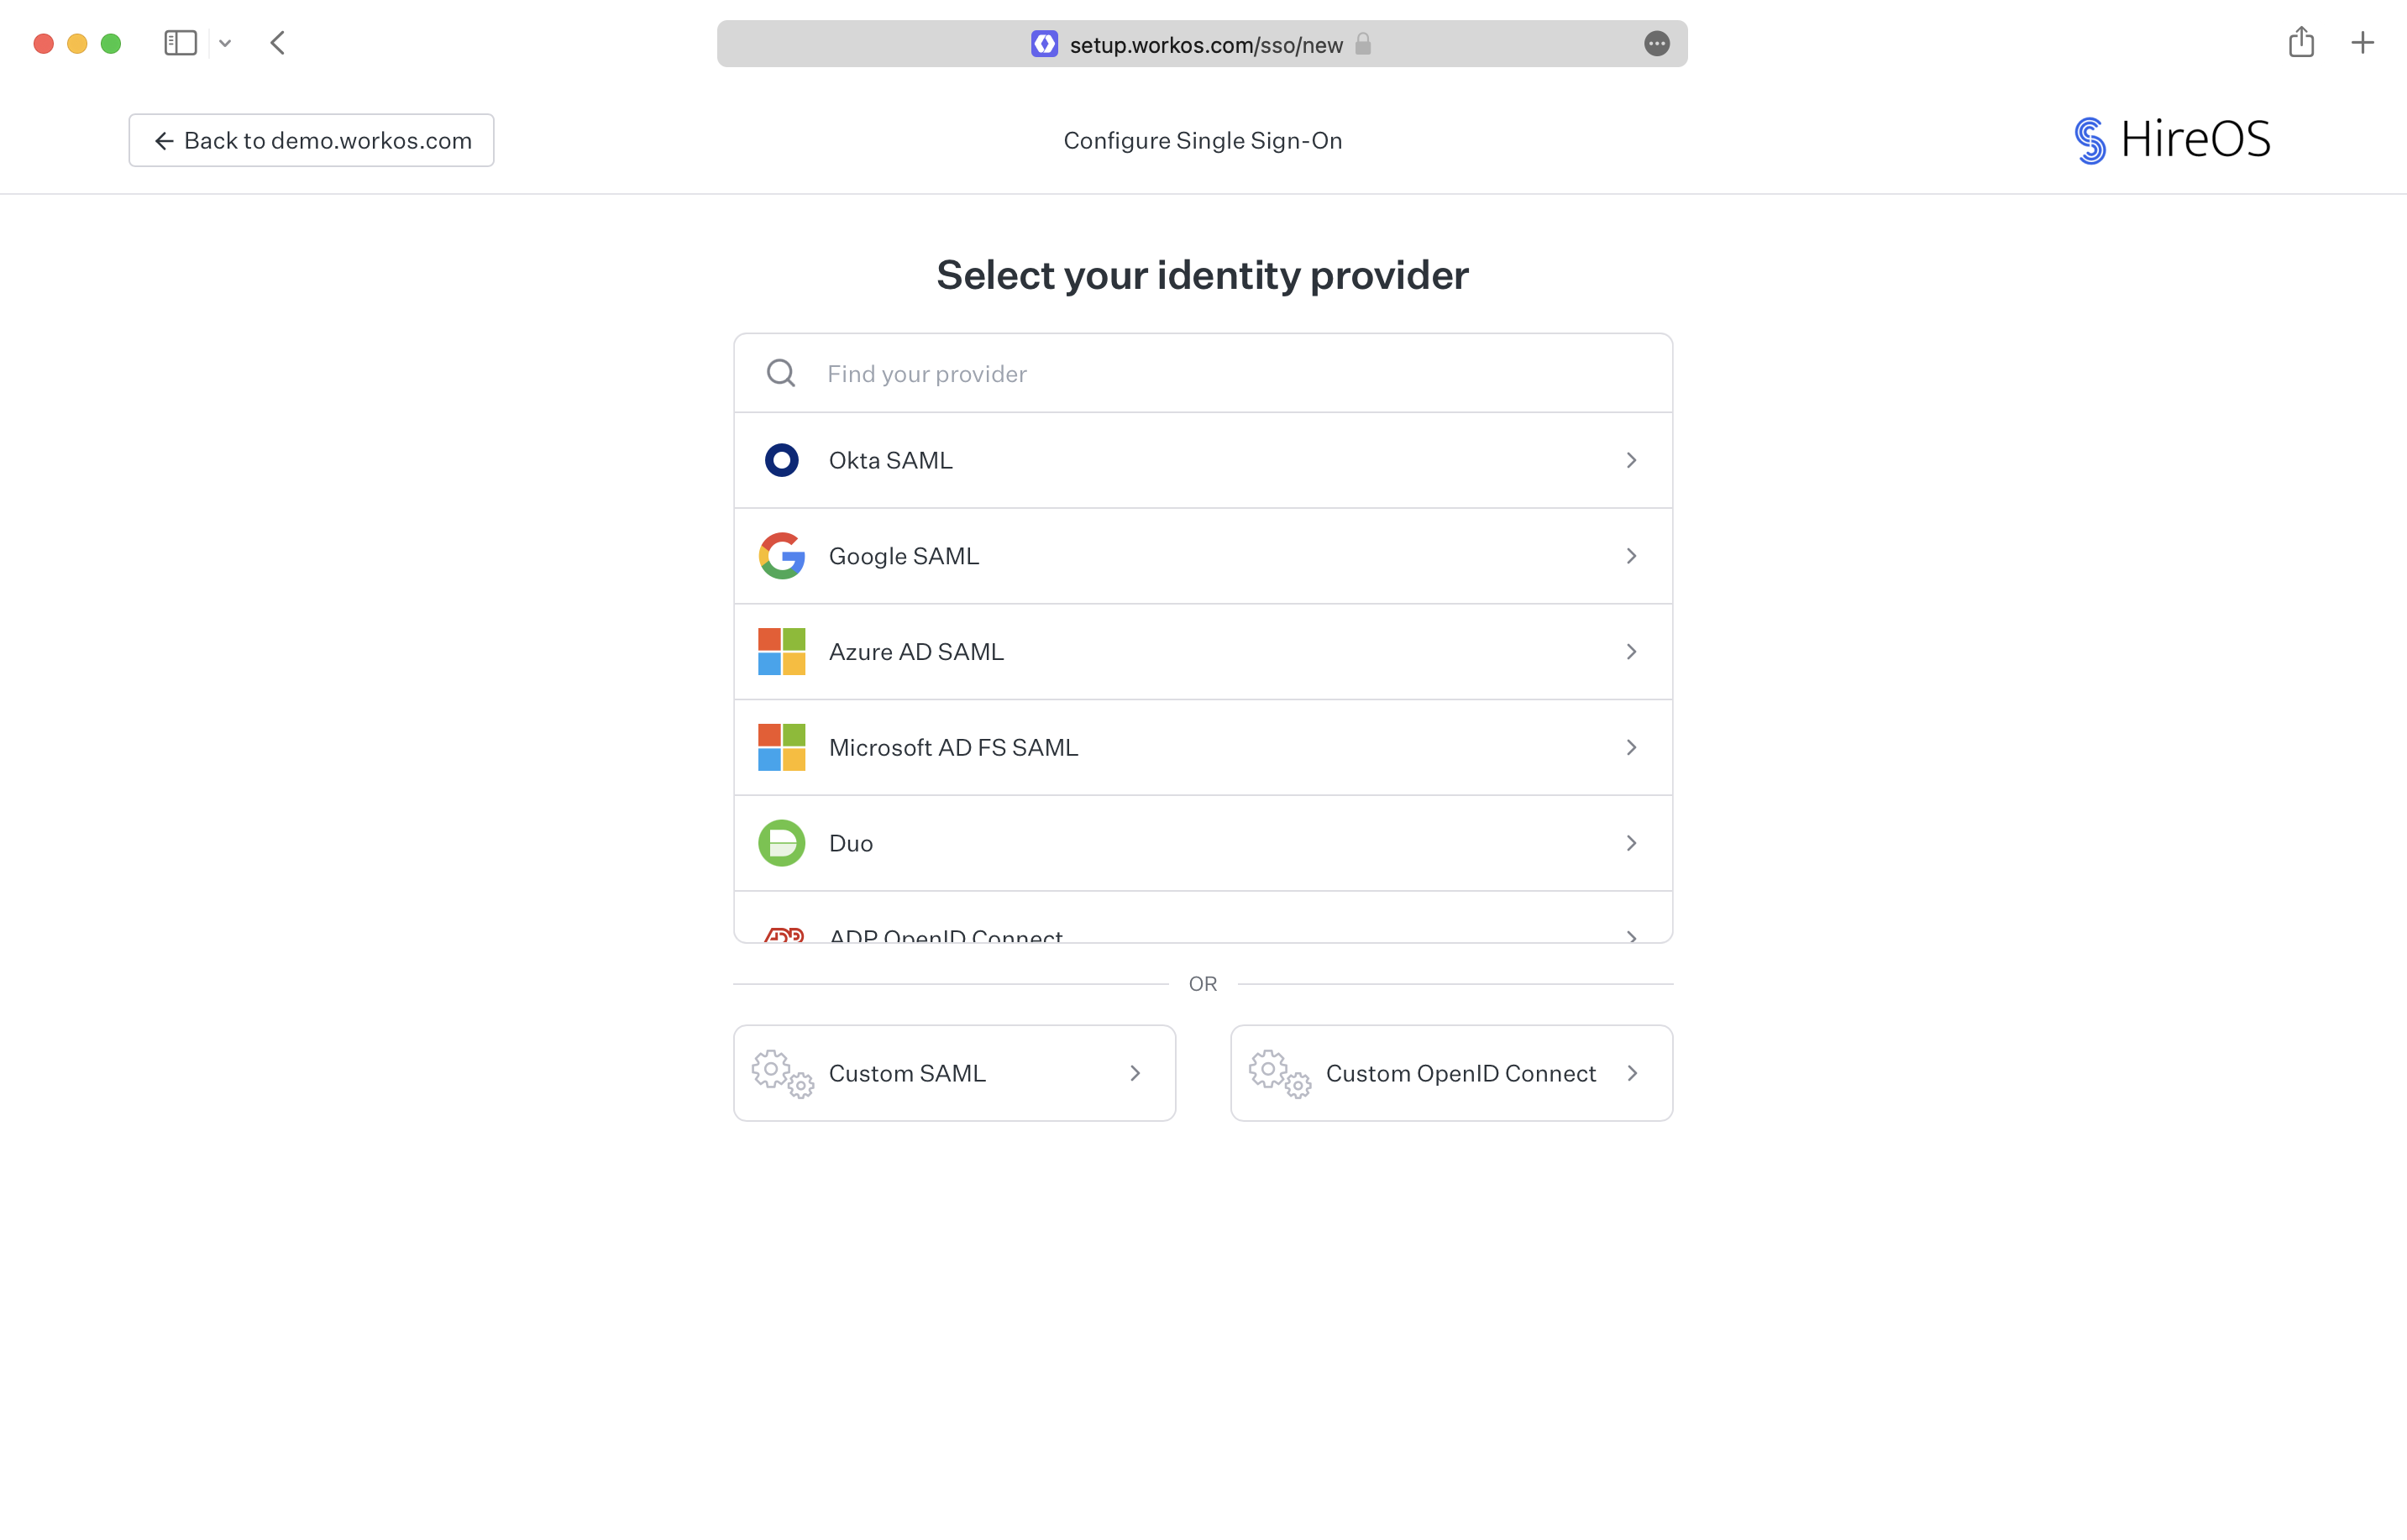
## (A) Setup link from WorkOS dashboard
The Admin Portal setup link gives your customer access to a guided configuration experience through our Admin Portal. It instructs them how to verify a domain, configure their identity or directory provider, and more. If successfully configured, no other action is required and you’ll see verified domains and/or active connections appear under the organization.
First decide whether your customer will be configuring Domain Verification, Single Sign-On, Directory Sync, Log Streams, or all of the above. Once you generate a link, the customer will have access for 30 days or until configured.
You’ll need a [WorkOS dashboard account](https://dashboard.workos.com/) to create an organization that will represent the enterprise you are onboarding.
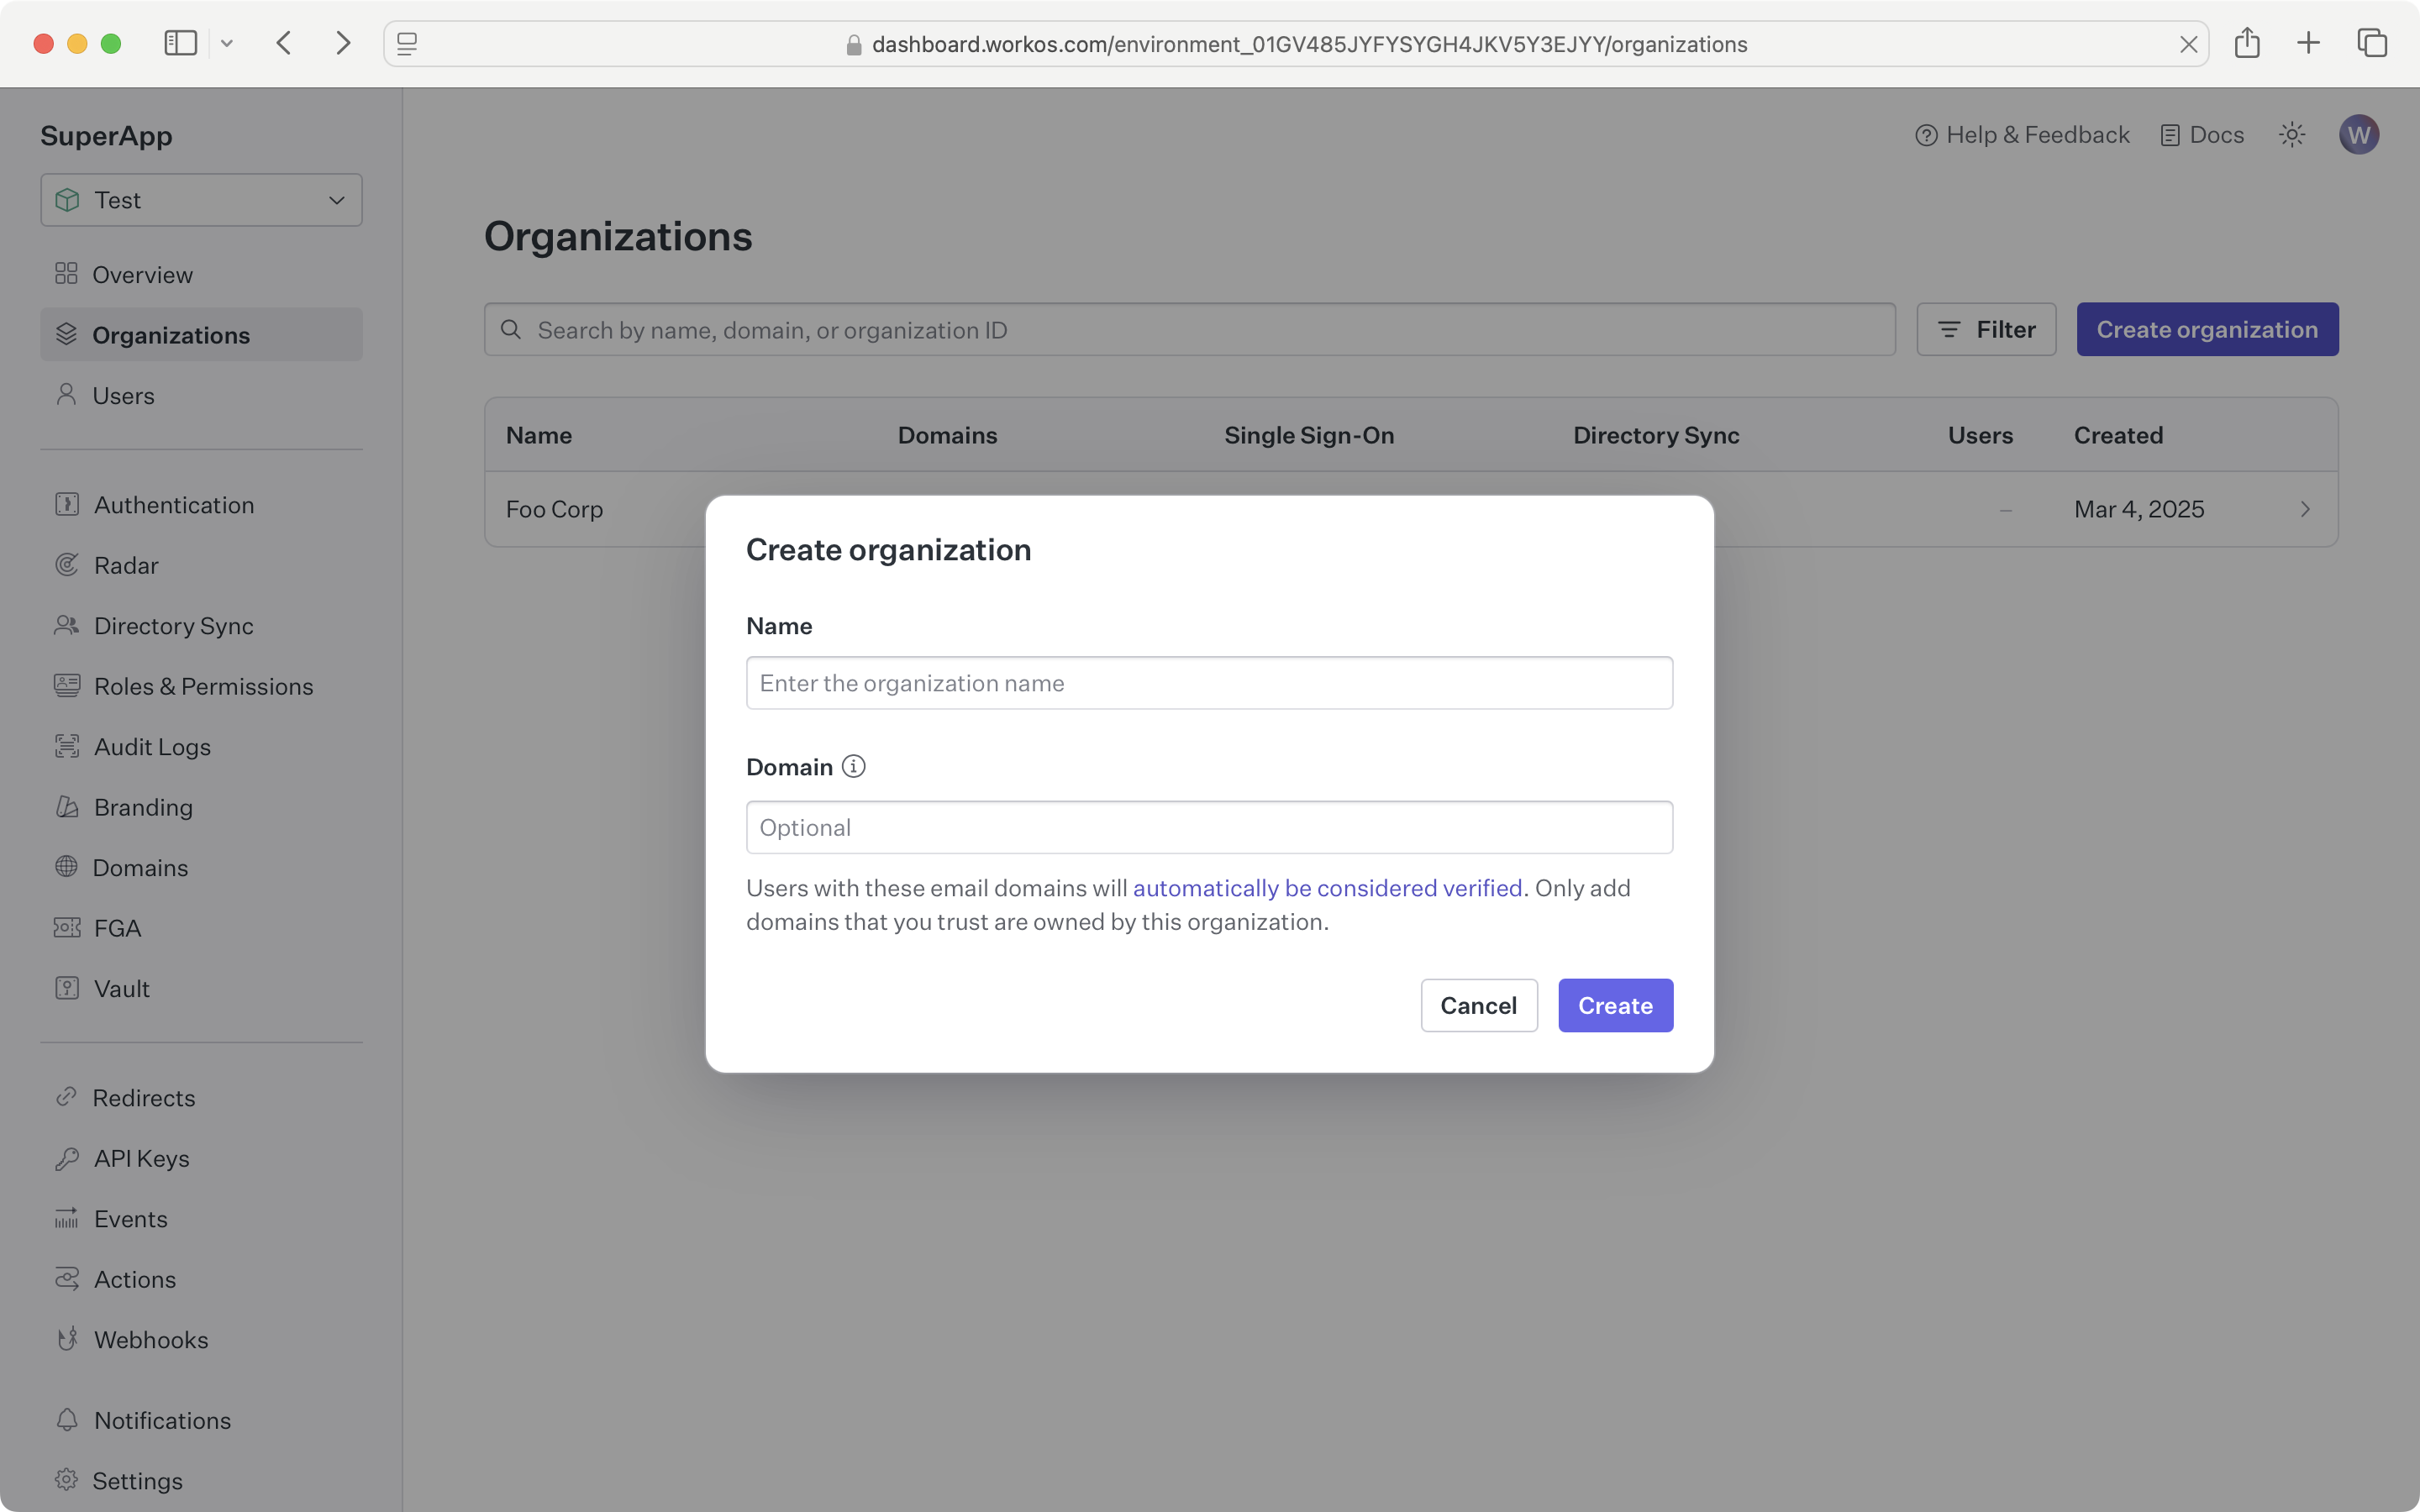
### Create organization
Sign in to your WorkOS dashboard account and create a new organization.
### Generate a setup link
Click the “Invite admin” button, select the features to include and then click “Next." Enter the email of the IT admin for the organization to automatically send them a setup link, or click "Copy setup link." Only one link can be active at a time. After creating the initial link, you can click the “Manage” button to revoke the existing link before creating a new one.
### Sharing a setup link
If you chose to copy the setup link you can share it over email, Slack or direct message. We also recommend including details on what the link does and how long the link is active.
## (B) Integrate with your app
In this guide, we’ll walk you through the full end-to-end integration of the Admin Portal into your application.
> [Sign in](https://dashboard.workos.com/) to your WorkOS dashboard account to see code examples pre-filled with your test API keys and resource IDs.
### Configure Admin Portal redirect links
In order to integrate, you must configure your app's default return URI in the production environment. A button in the Admin Portal will use this value to allow users to return to your app unless otherwise specified when generating the Admin Portal link.
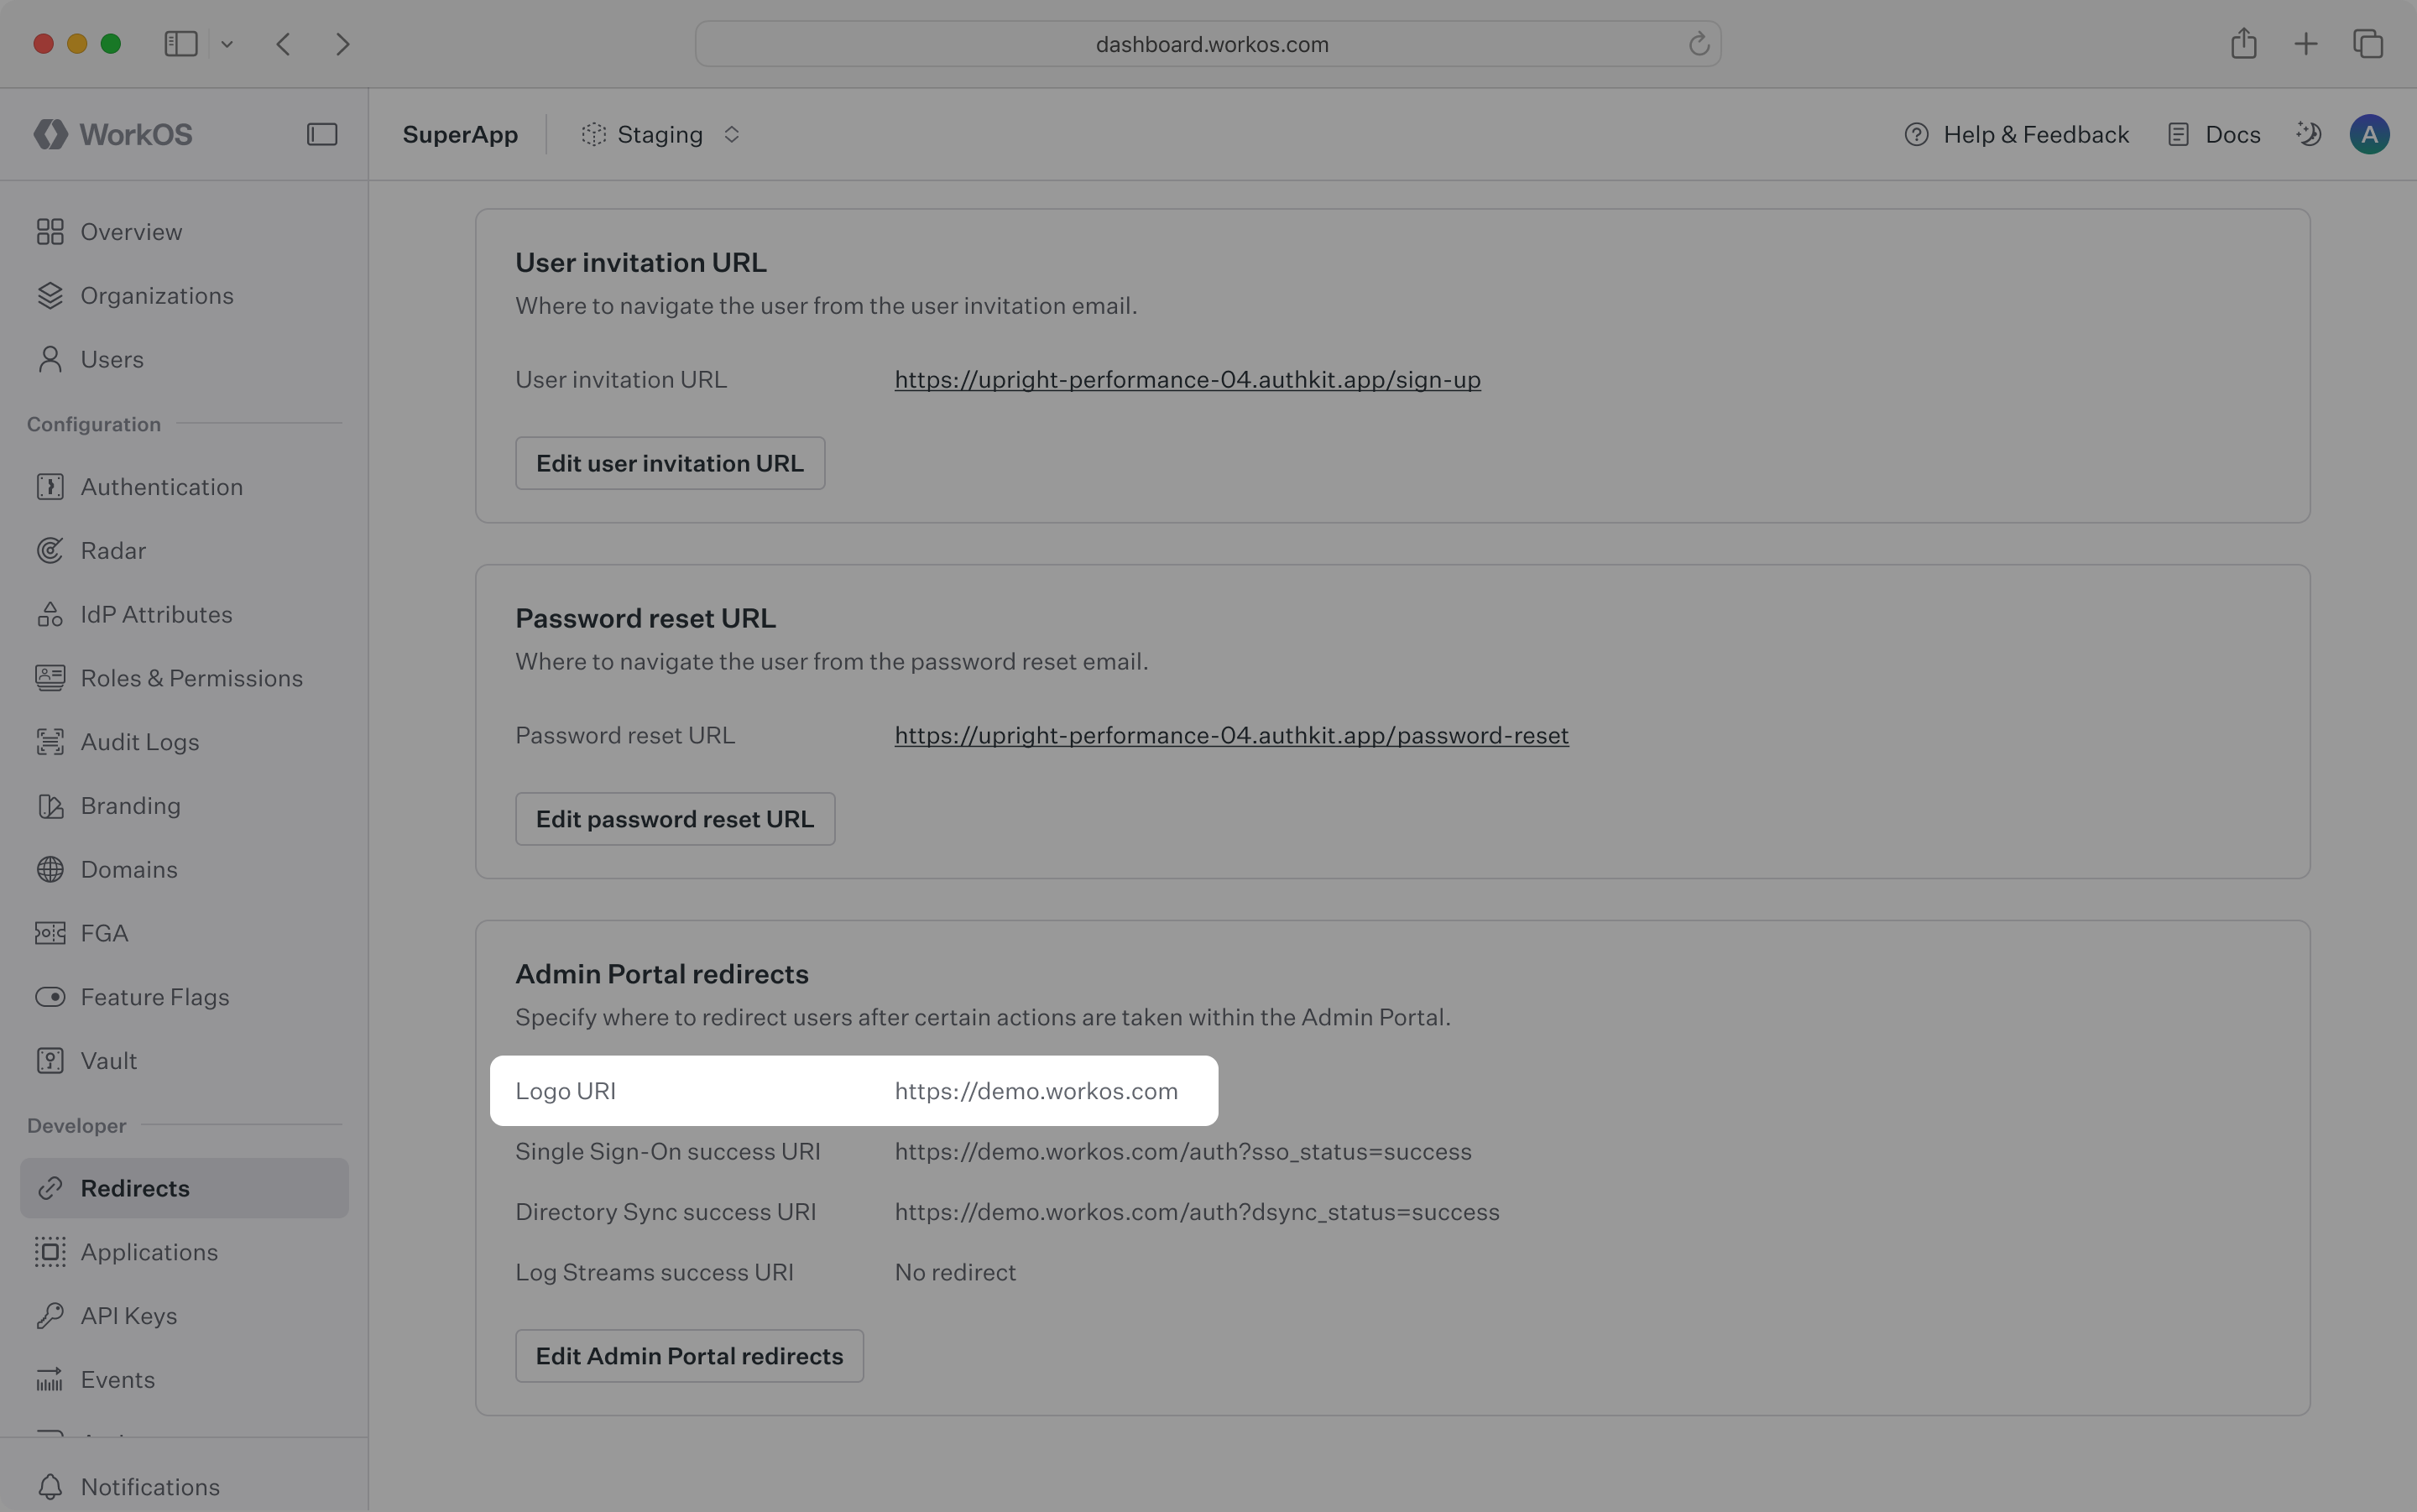
Additionally, you can configure success URIs to redirect users upon successfully setting up Single Sign-On, Directory Sync, or Log Streams.
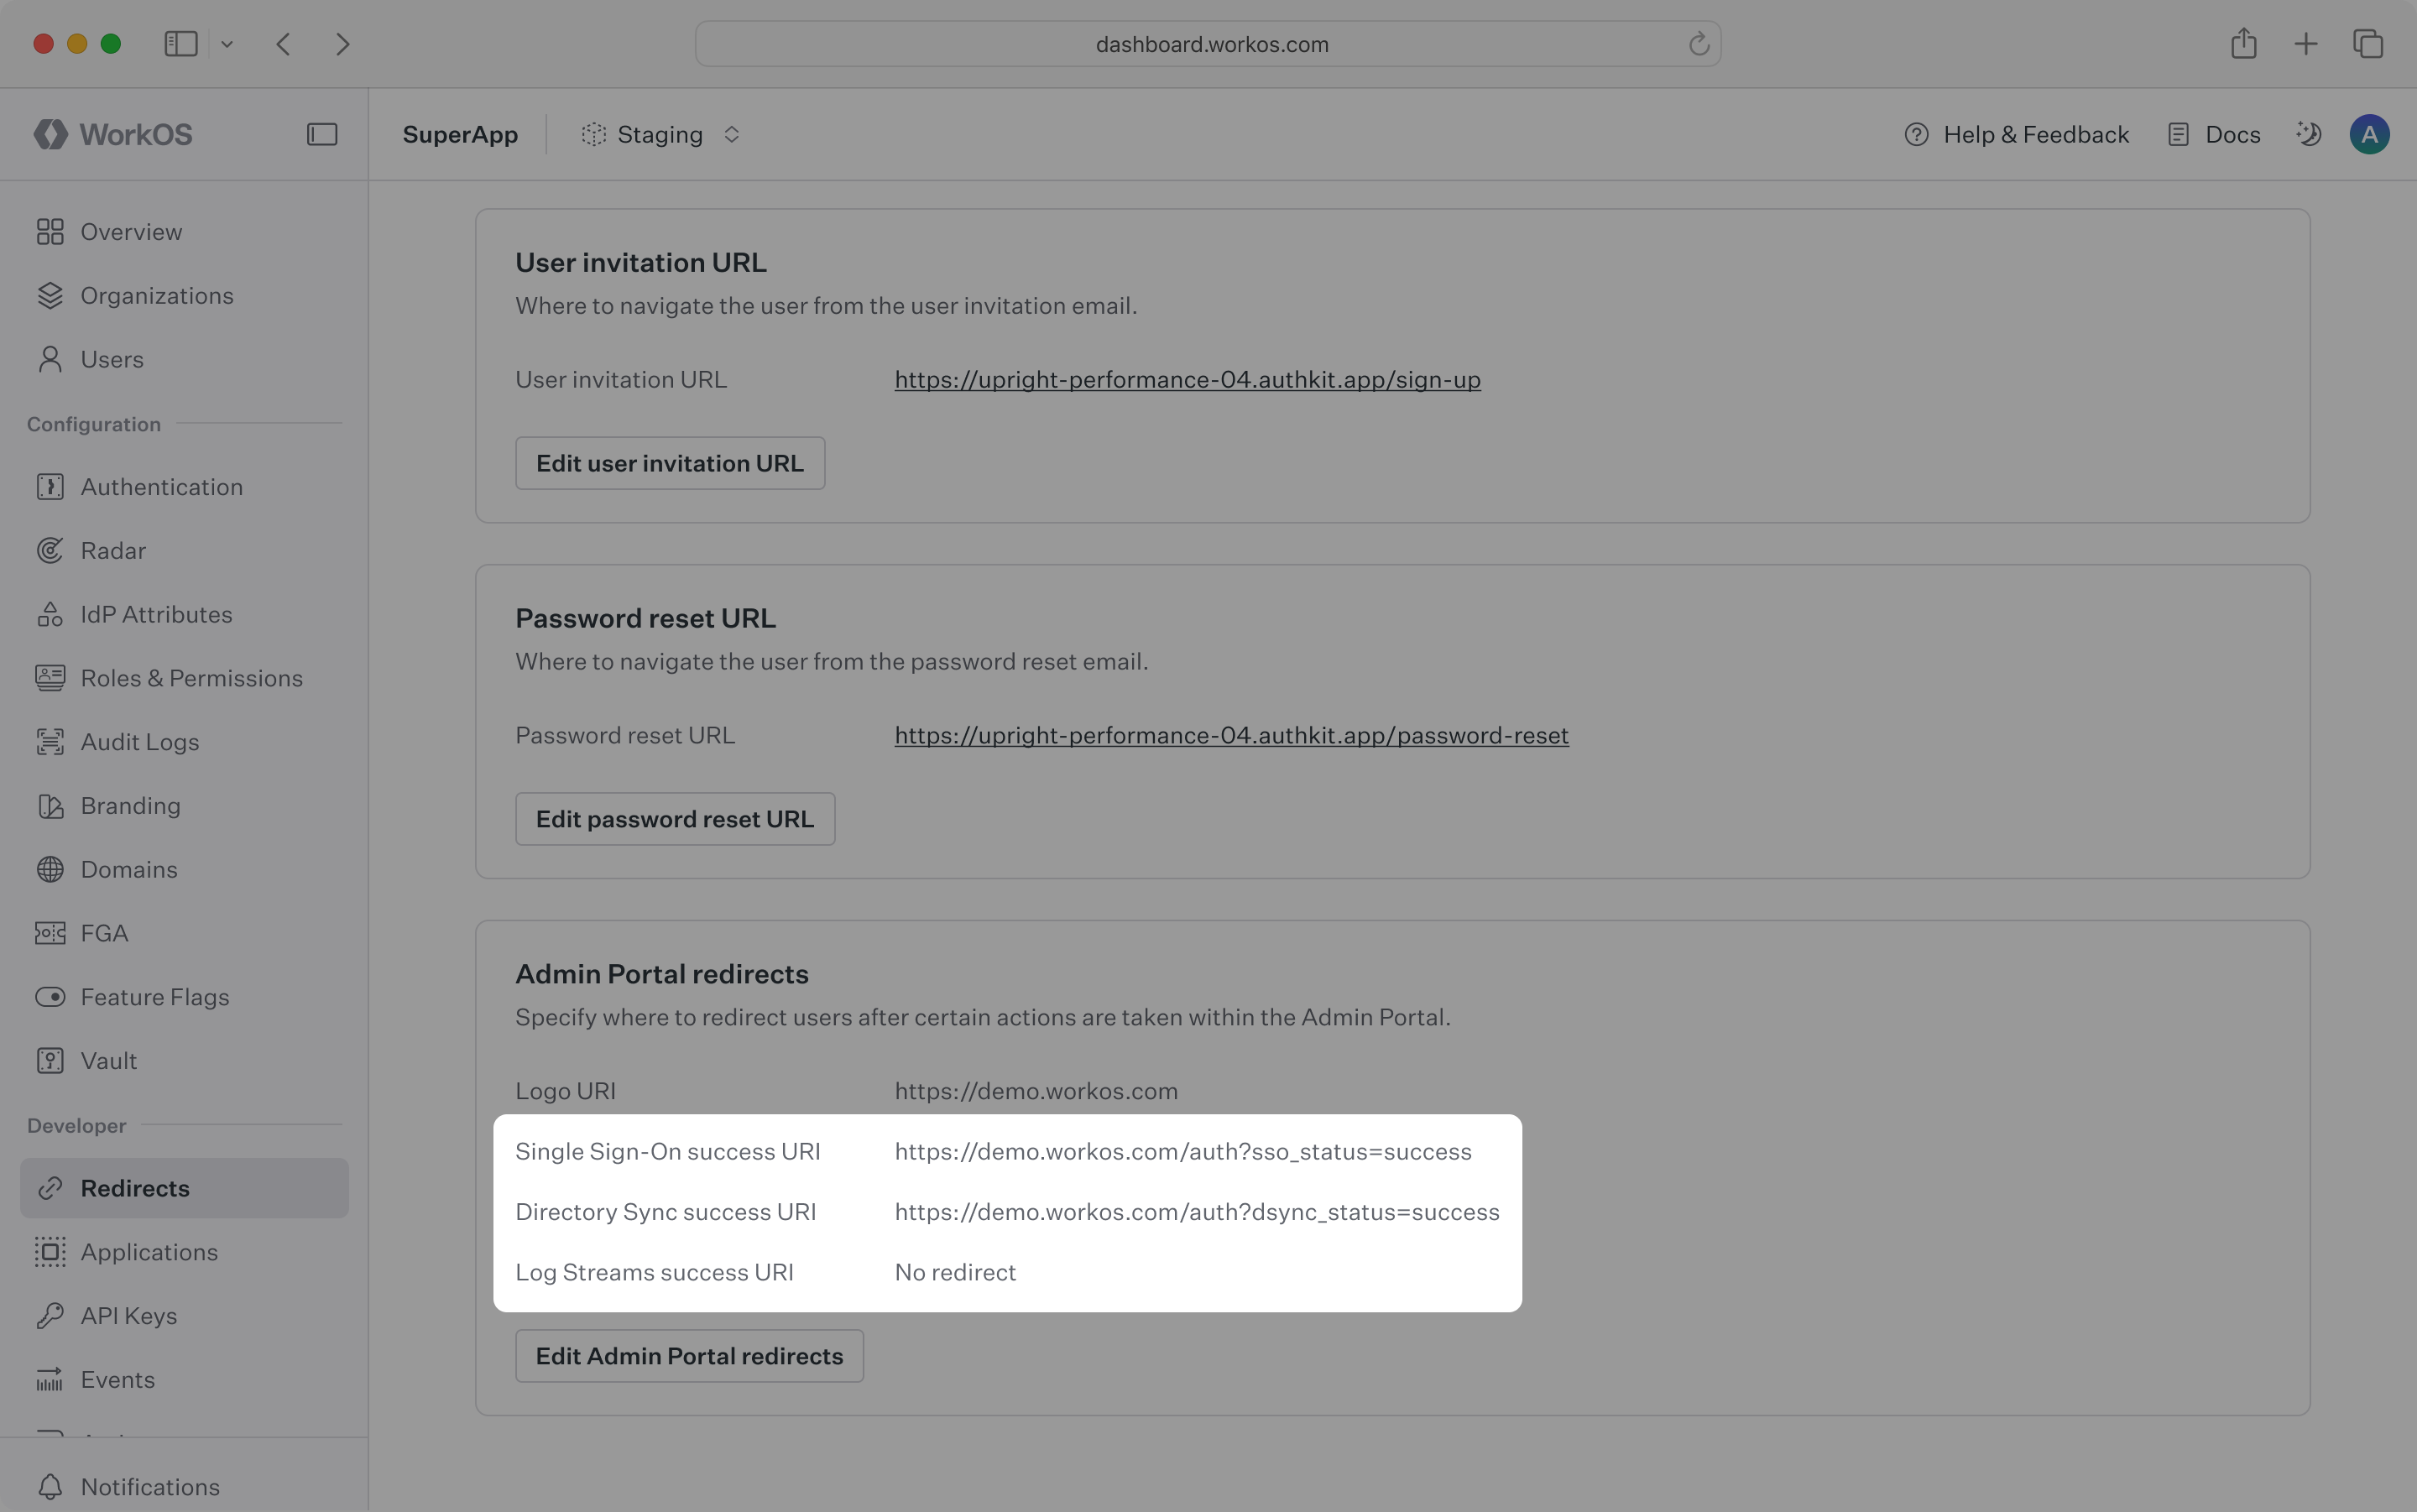
> All redirect links must use HTTPS.
You can configure these links in the [dashboard](https://dashboard.workos.com/).
### Install the WorkOS SDK
WorkOS offers native SDKs in several popular programming languages. Choose a language below to see instructions in your application’s language.
Install the SDK using the command below.
### Set secrets
To make calls to WorkOS, provide the API key and, in some cases, the client ID. Store these values as managed secrets, such as `WORKOS_API_KEY` and `WORKOS_CLIENT_ID`, and pass them to the SDKs either as environment variables or directly in your app's configuration based on your preferences.
```plain title="Environment variables"
WORKOS_API_KEY='sk_example_123456789'
WORKOS_CLIENT_ID='client_123456789'
```
### Create a new organization
Each Admin Portal session is scoped to a specific organization resource, meaning a session is only capable of managing a connection that belongs to its associated organization. Organizations may only have one connection.
For every customer in your application that would like access to the Admin Portal, you must create an organization and maintain a reference to its ID.
> Create an organization when onboarding a new customer.
### Redirect an IT admin to the Admin Portal
A Portal link is your enterprise user's gateway to accessing the Admin Portal, where they can set up and manage resources scoped to their organization. To generate a Portal link using the API, you must provide the organization ID and specify one of the following intents: [`sso`](/admin-portal/c-using-admin-portal/managing-sso-connections), [`dsync`](/admin-portal/c-using-admin-portal/managing-directories), [`audit_logs`](/audit-logs/admin-portal/creating-admin-portal-link), [`log_streams`](/audit-logs/log-streams/admin-portal), [`domain_verification`](/domain-verification/admin-portal-domain-verification), or [`certificate_renewal`](/sso/signing-certificates/saml-response-signing-certificate/renewing-certificates).
For security reasons, Portal links expire 5 minutes after they’re created, so we recommend redirecting users immediately (i.e. don’t email the user Portal links).
> The endpoint that redirects a user to the Admin Portal should be guarded by auth in your application and only available to IT admins.
An [optional return_url parameter](/reference/admin-portal/portal-link/generate) can be used to describe exactly where a user should be sent when they are finished in the Admin Portal. If one is not provided, the success URL configured on the [Redirects](https://dashboard.workos.com/redirects) page of the dashboard will be used.
## (C) Using Admin Portal
In this guide, we’ll review some of the features of Admin Portal from an IT admin's perspective.
### Verifying a domain
In the Admin Portal [Domain Verification](/domain-verification/admin-portal-domain-verification) flow, you can view instructions on adding a DNS TXT record to prove ownership of your organization's domain(s).
> Unless an organization [allows any domain](/sso/domains/allowing-any-domain), a verified domain is required in order to activate SSO. Domains can also be [manually verified](/authkit/domain-verification/self-serve-domain-verification) outside of the self-serve Admin Portal flow if the IT admin has already proven domain ownership in another context.
### Managing SSO connections
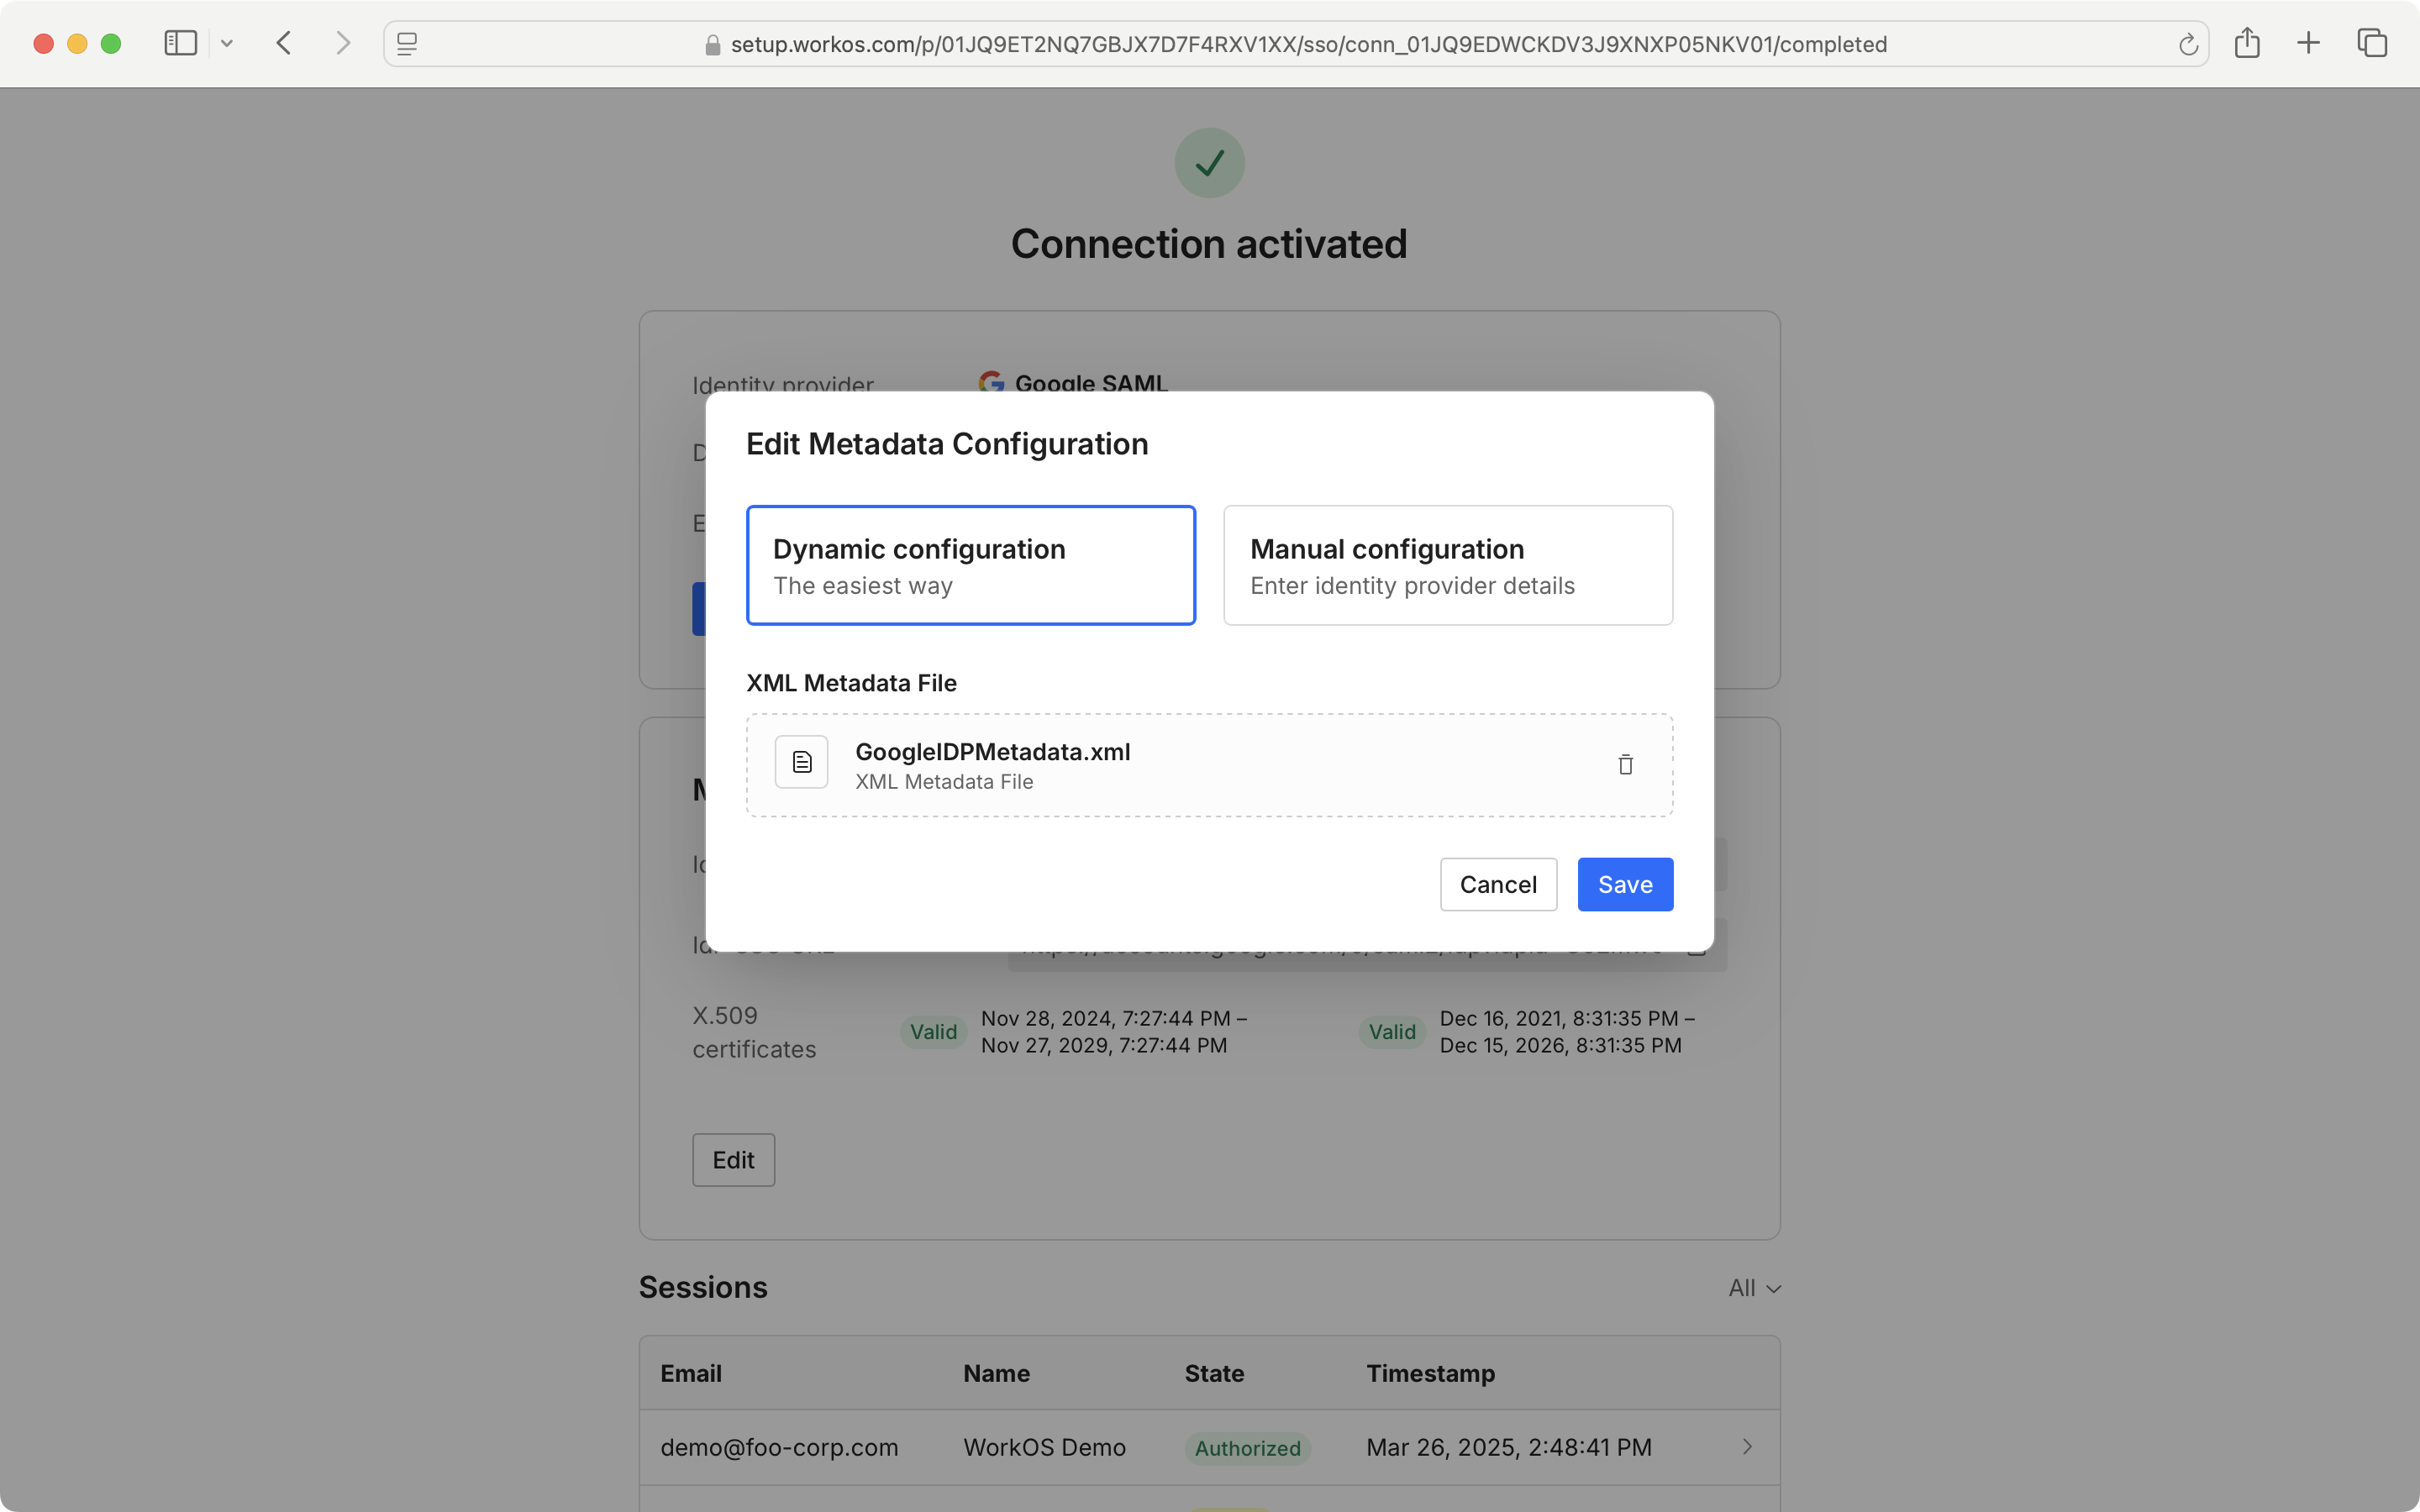
On the Admin Portal SSO screen, you can view the identity provider details and connection status, metadata configuration details, and a list of recent connection sessions. You may test your SSO connection from the Admin Portal by using the “Test sign-in” button.
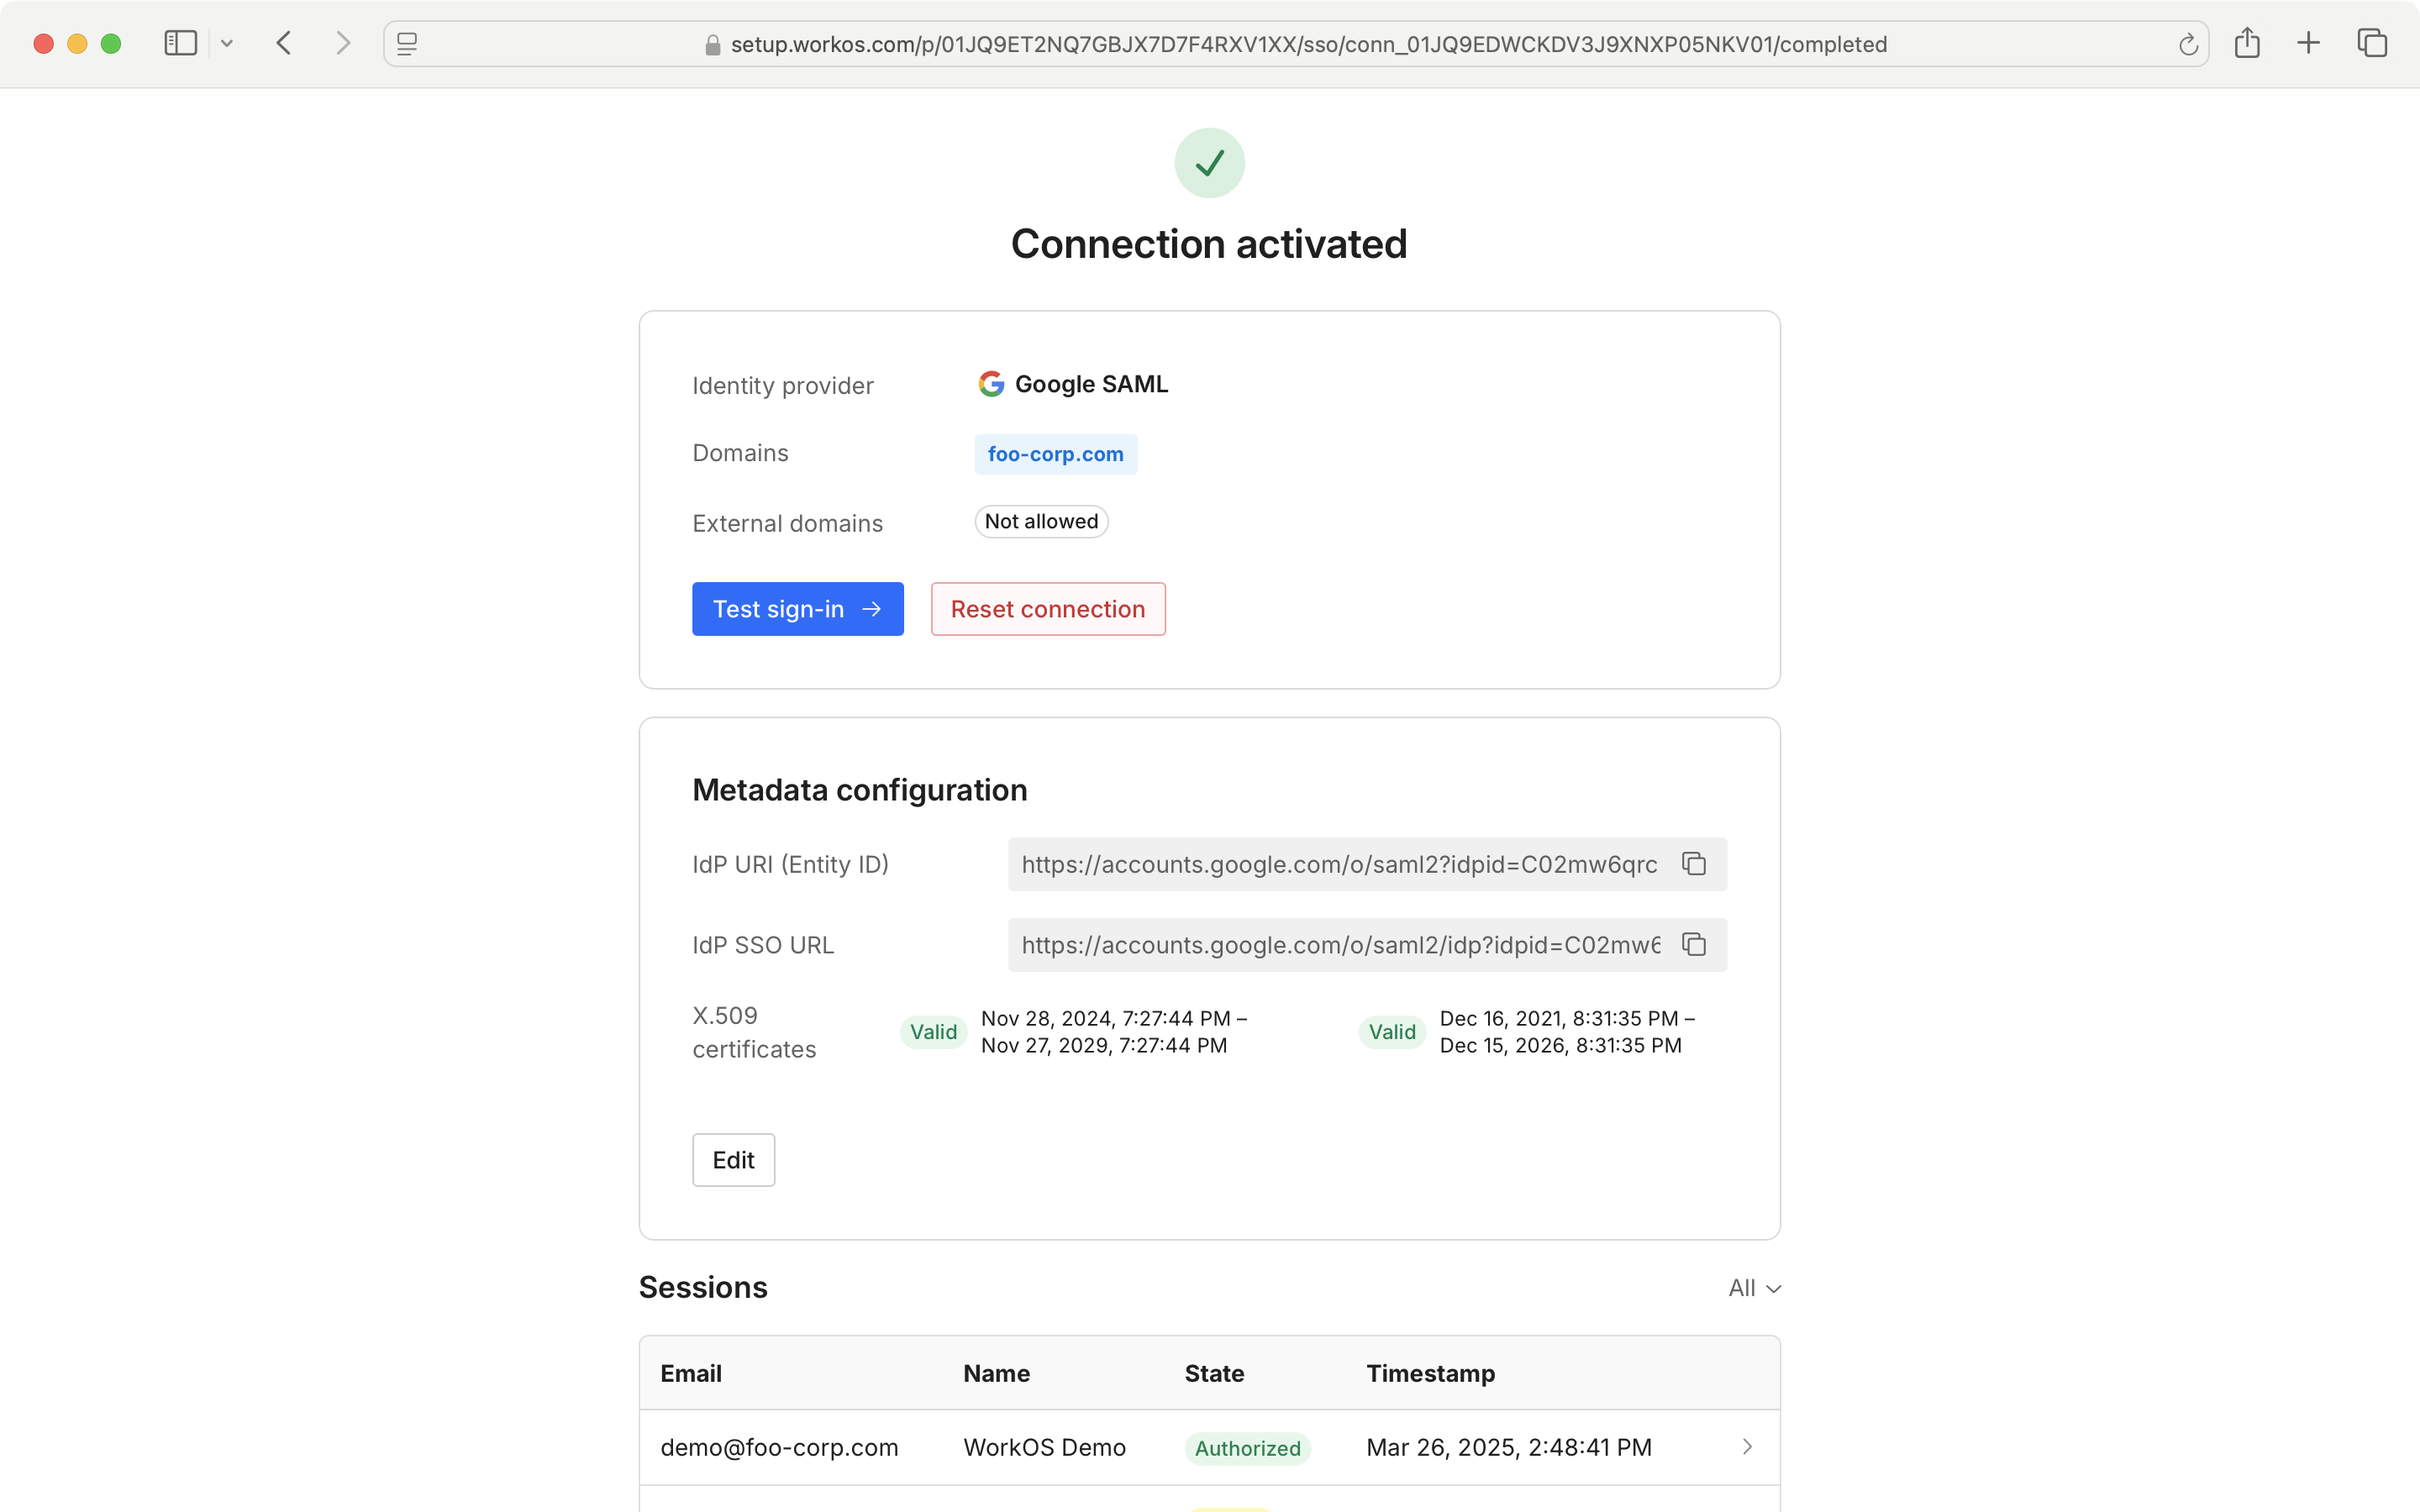
You may also edit your metadata configuration from the Admin Portal.
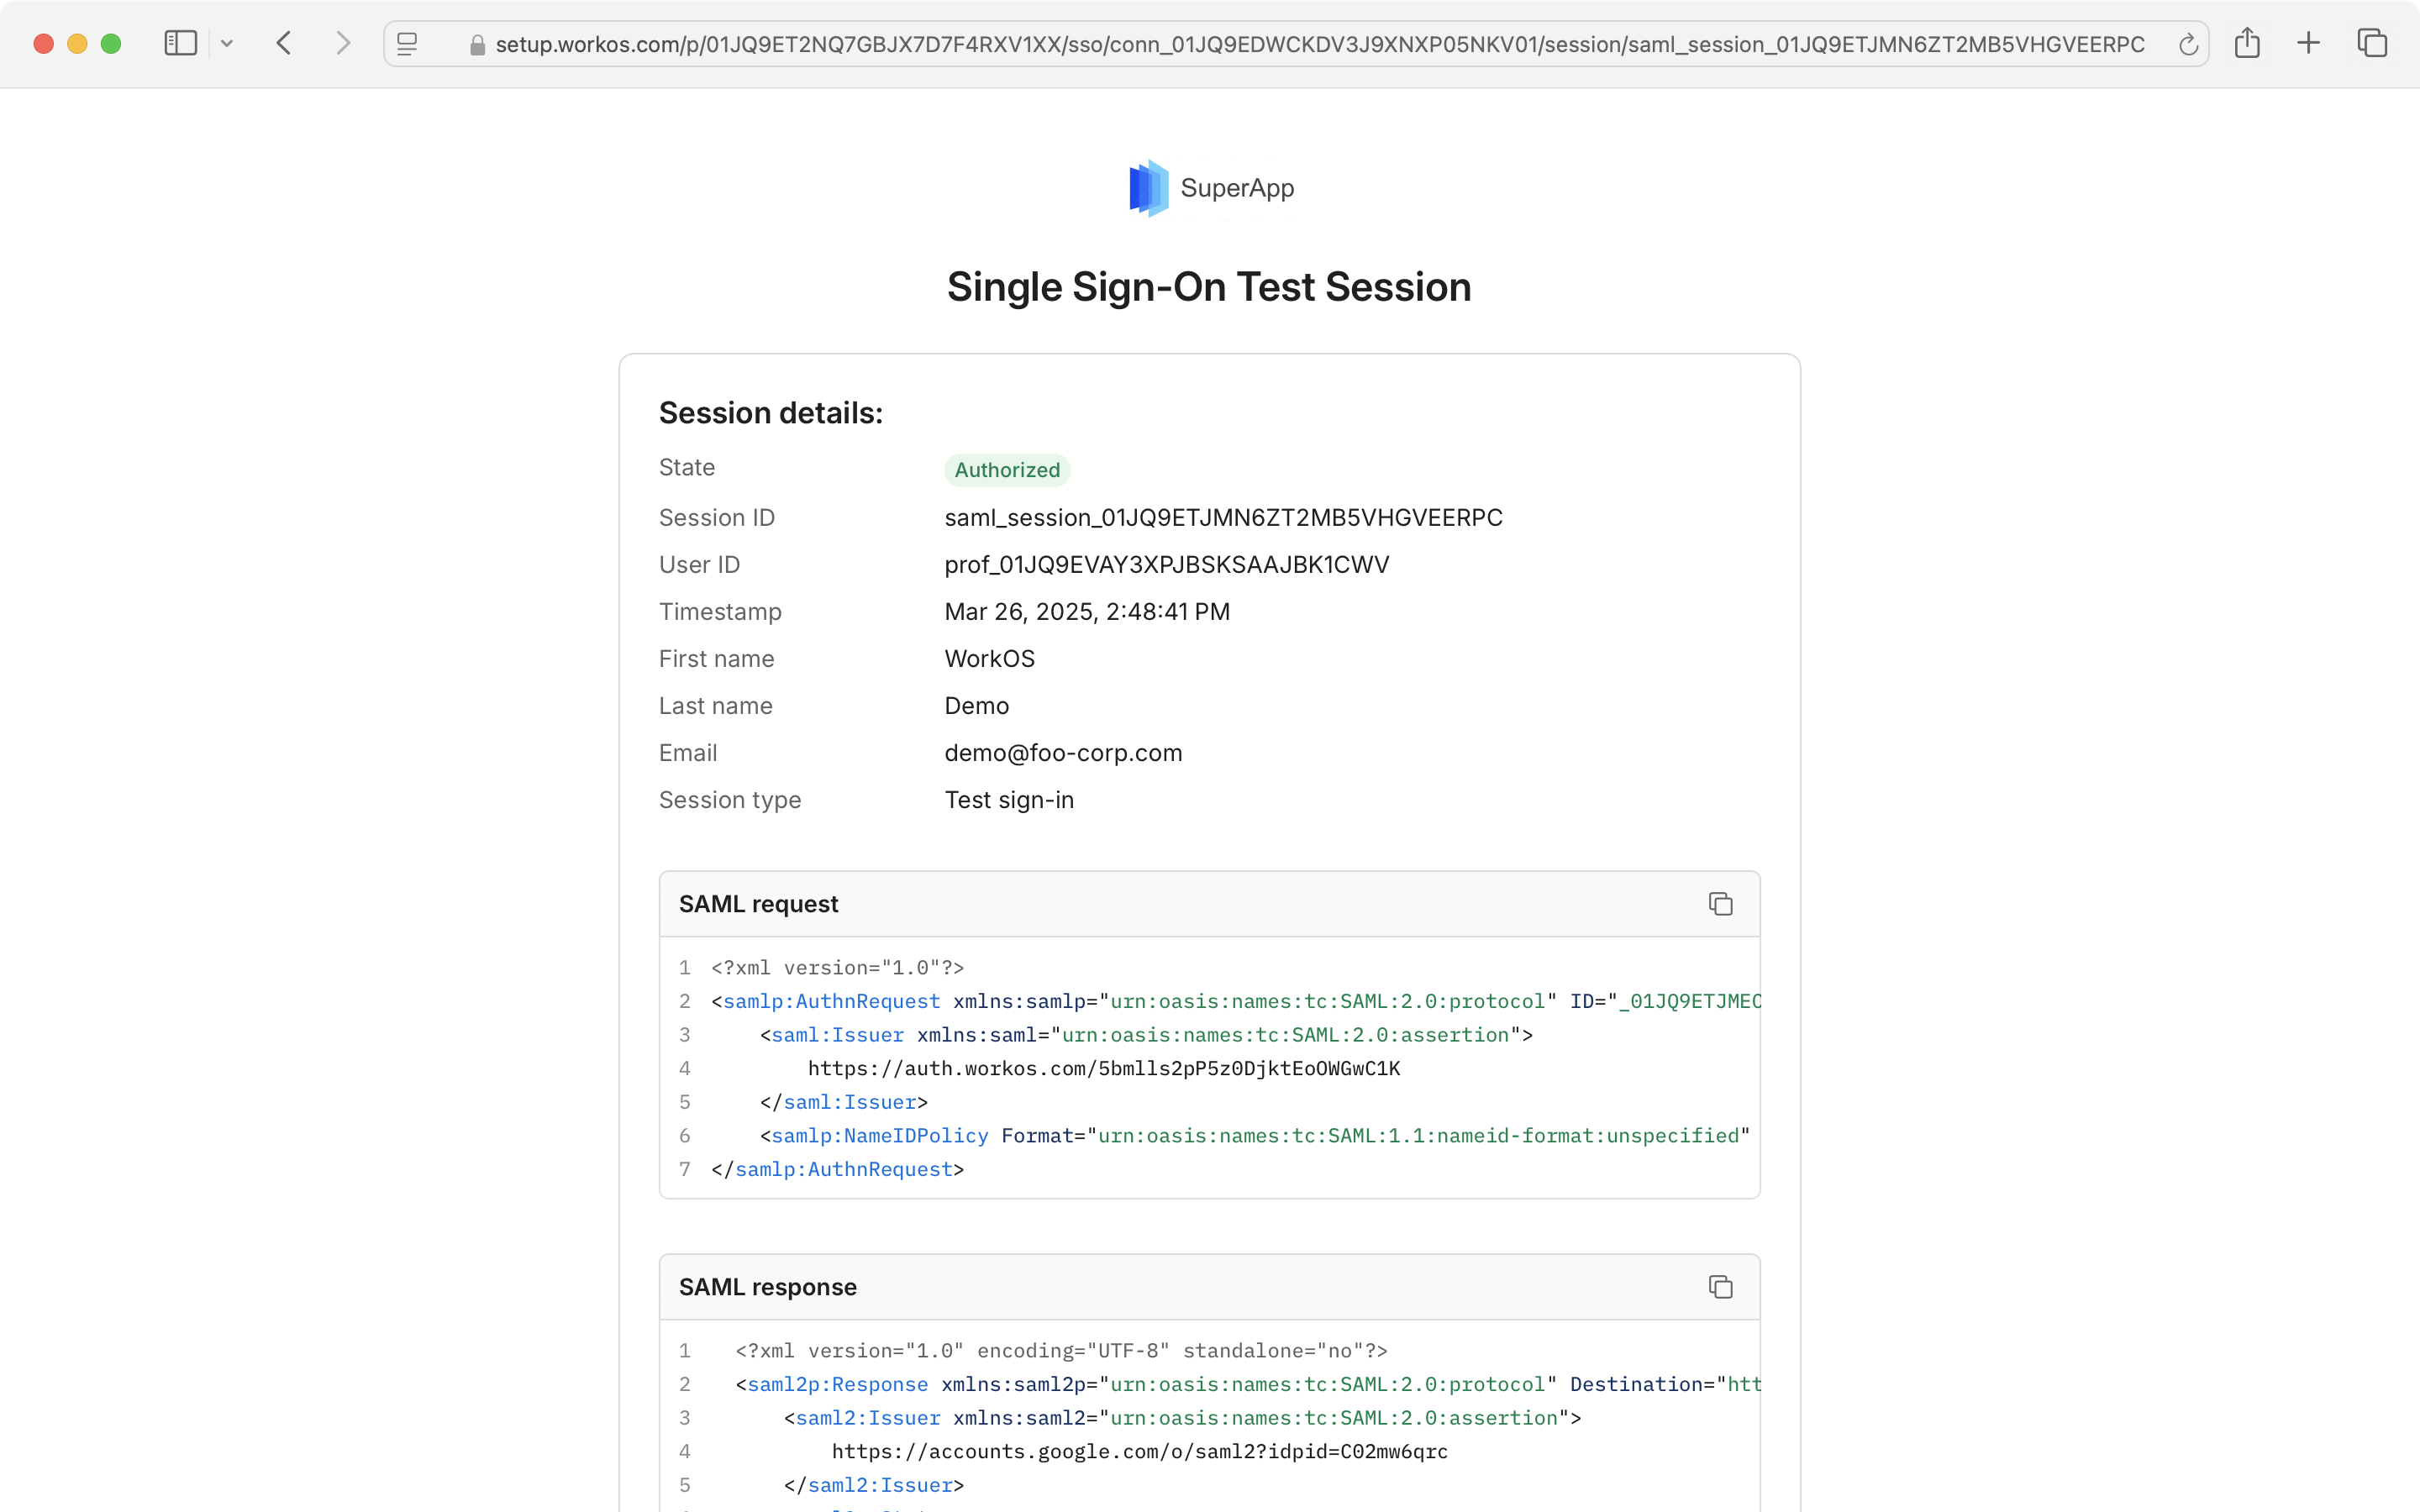
The Sessions section displays a list of recent sessions by timestamp, and can be sorted by `state`.
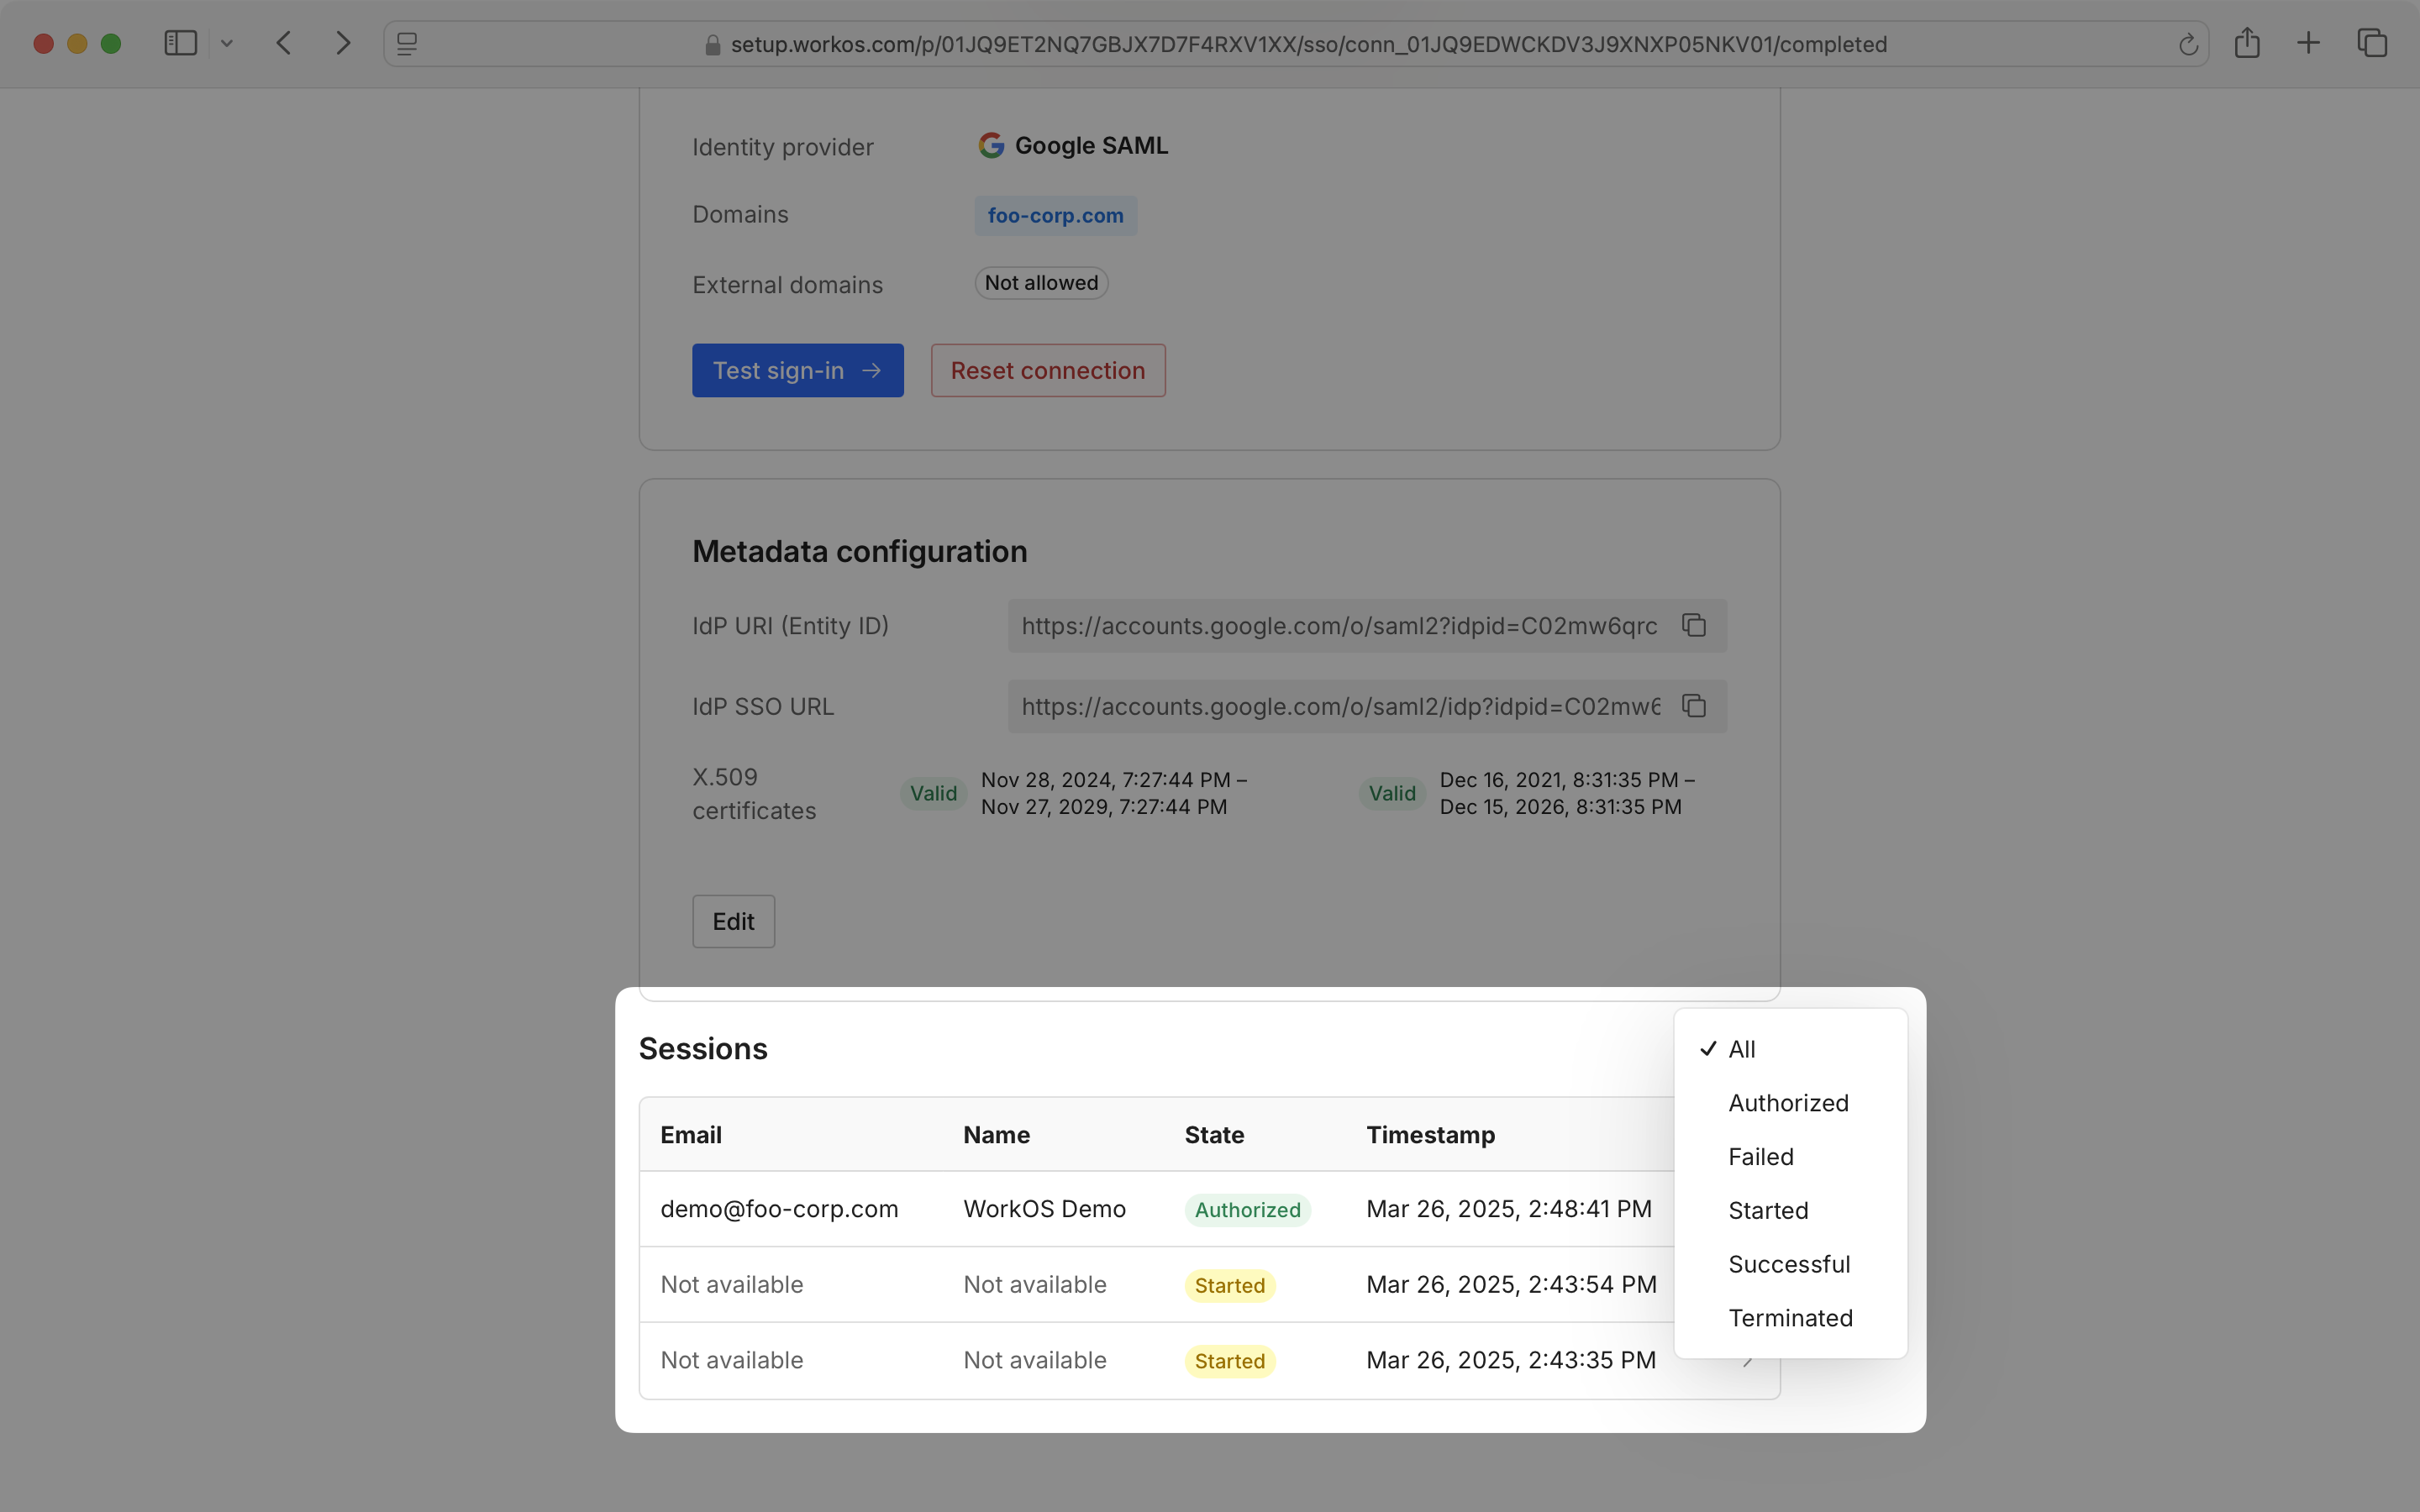
Click on a session in the list to see session details, such as the request made to the IdP, and the response.
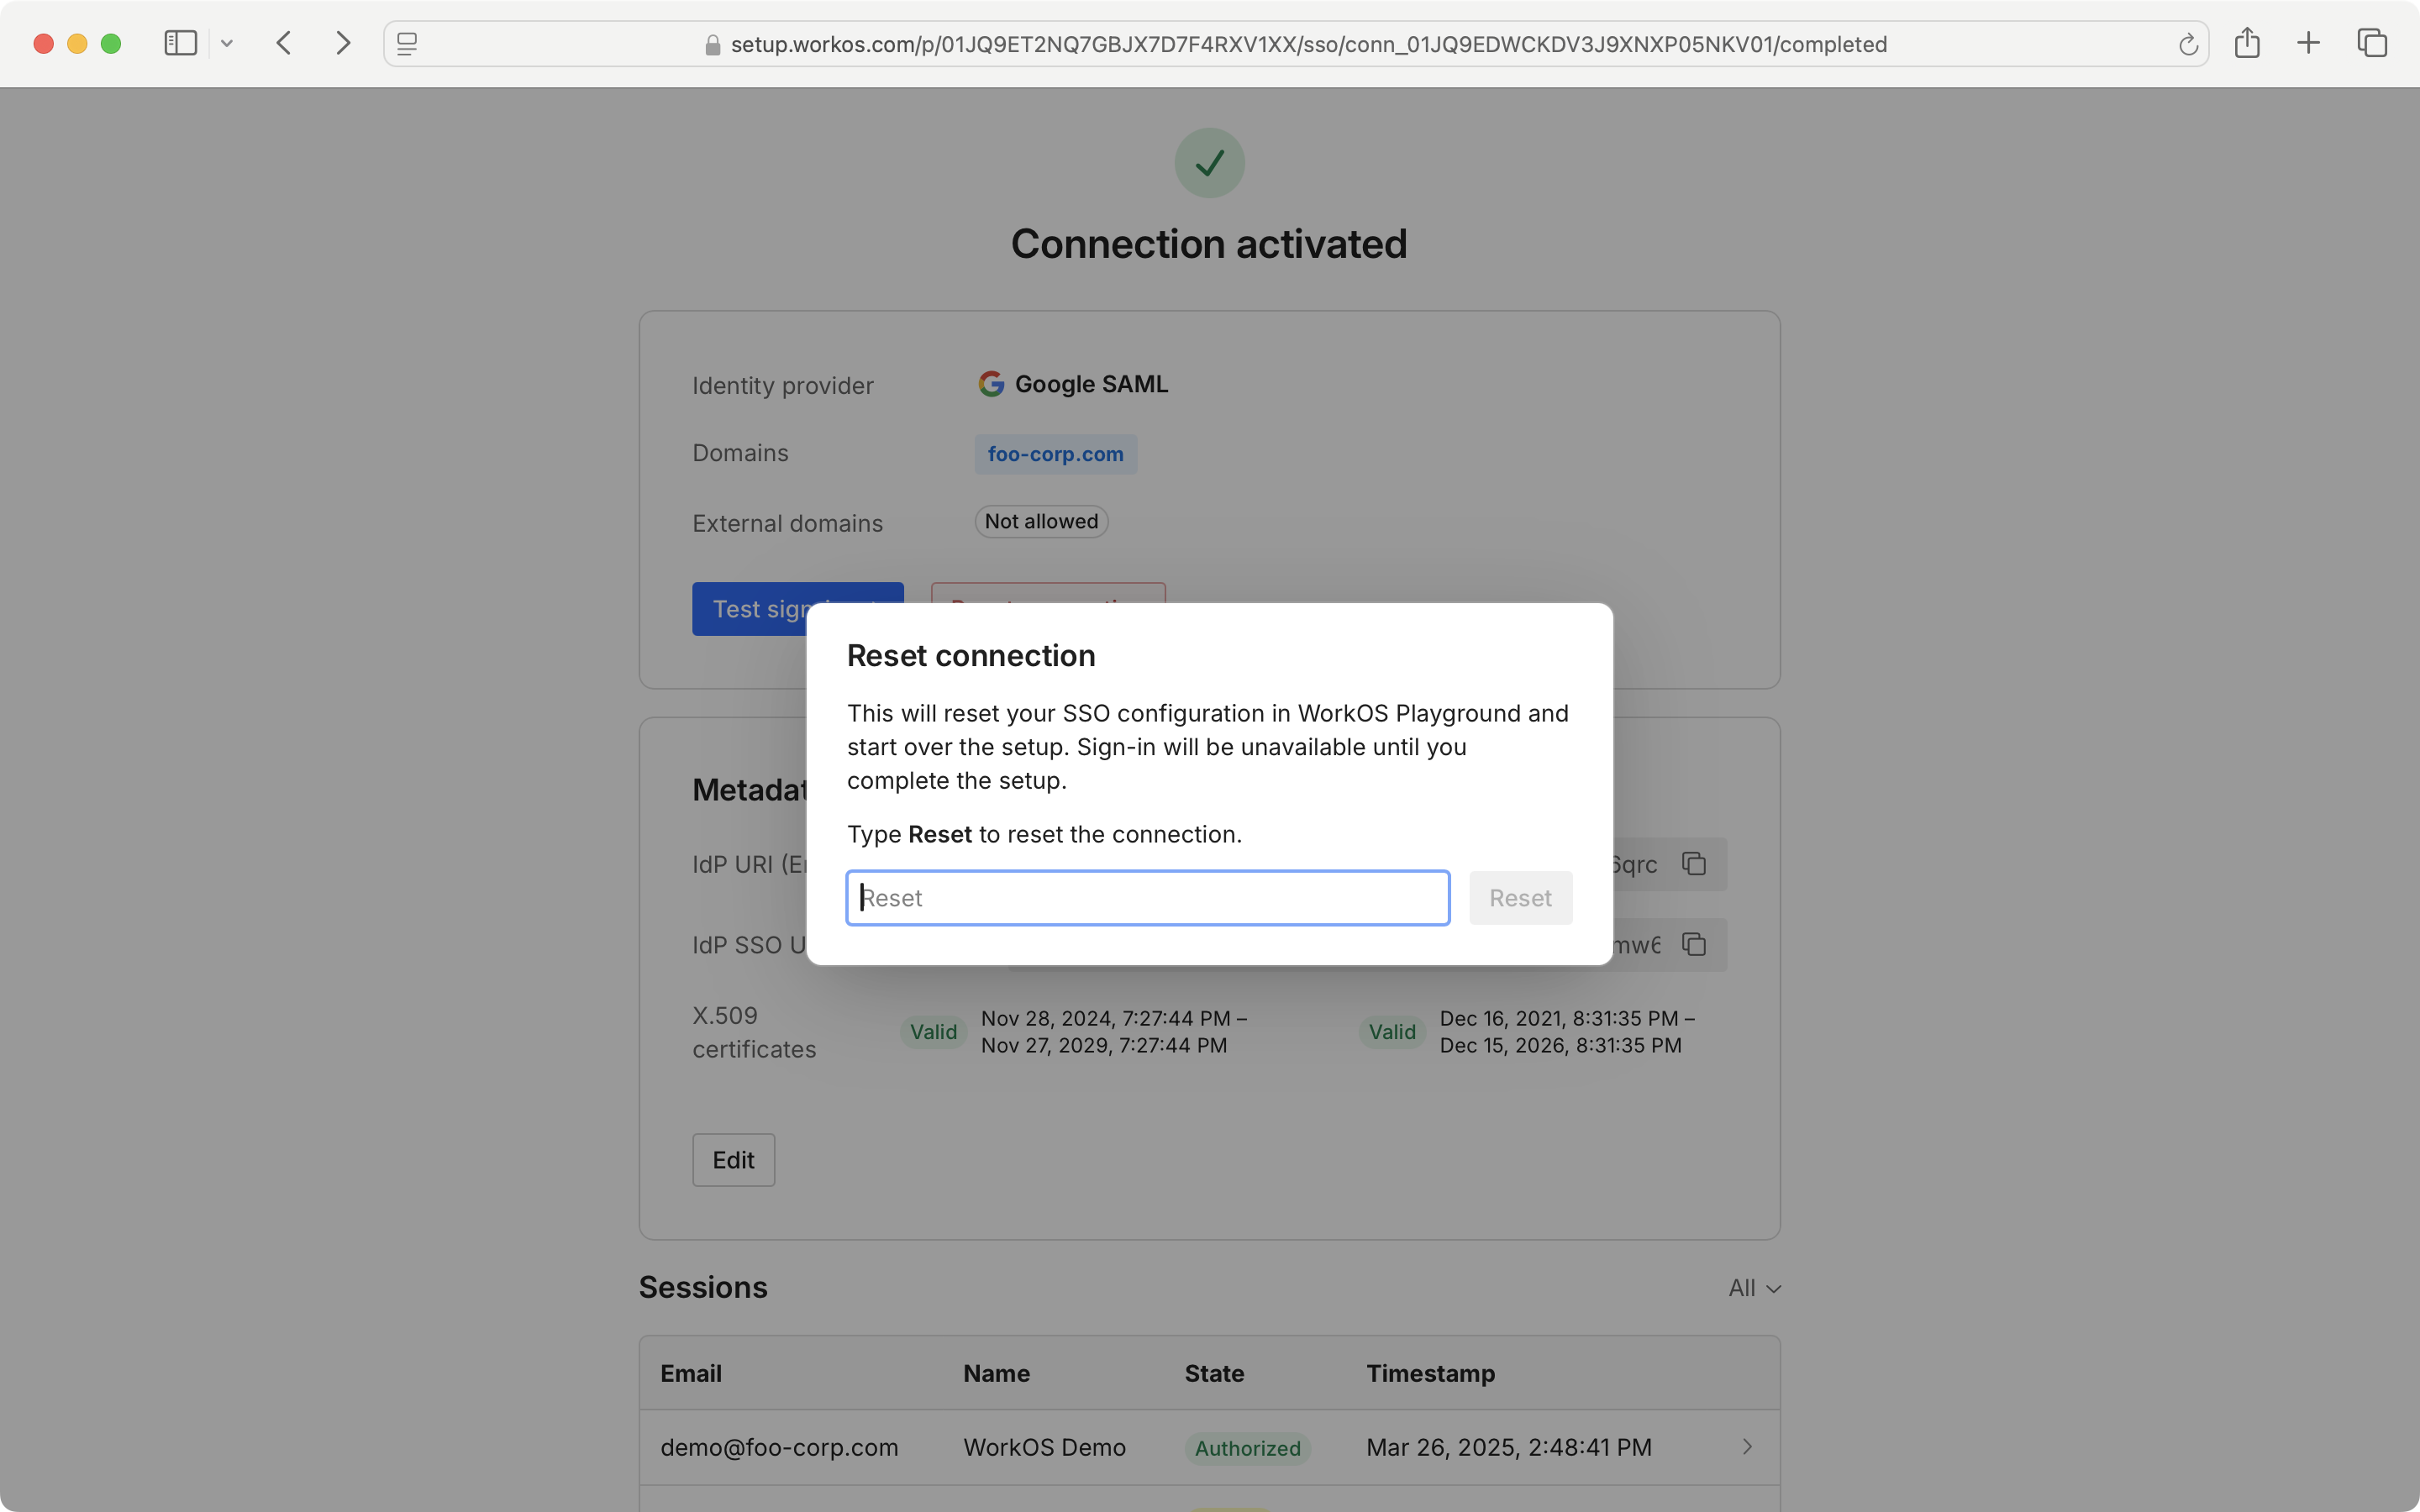
If you wish to reset your SSO connection and set it up from scratch, select “Reset Connection” and follow the prompts.
### Managing directories
On the Admin Portal Directory Sync screen, you can view the directory provider details and connection status, user and group counts, and last sync time. There is also an option to reset the directory.

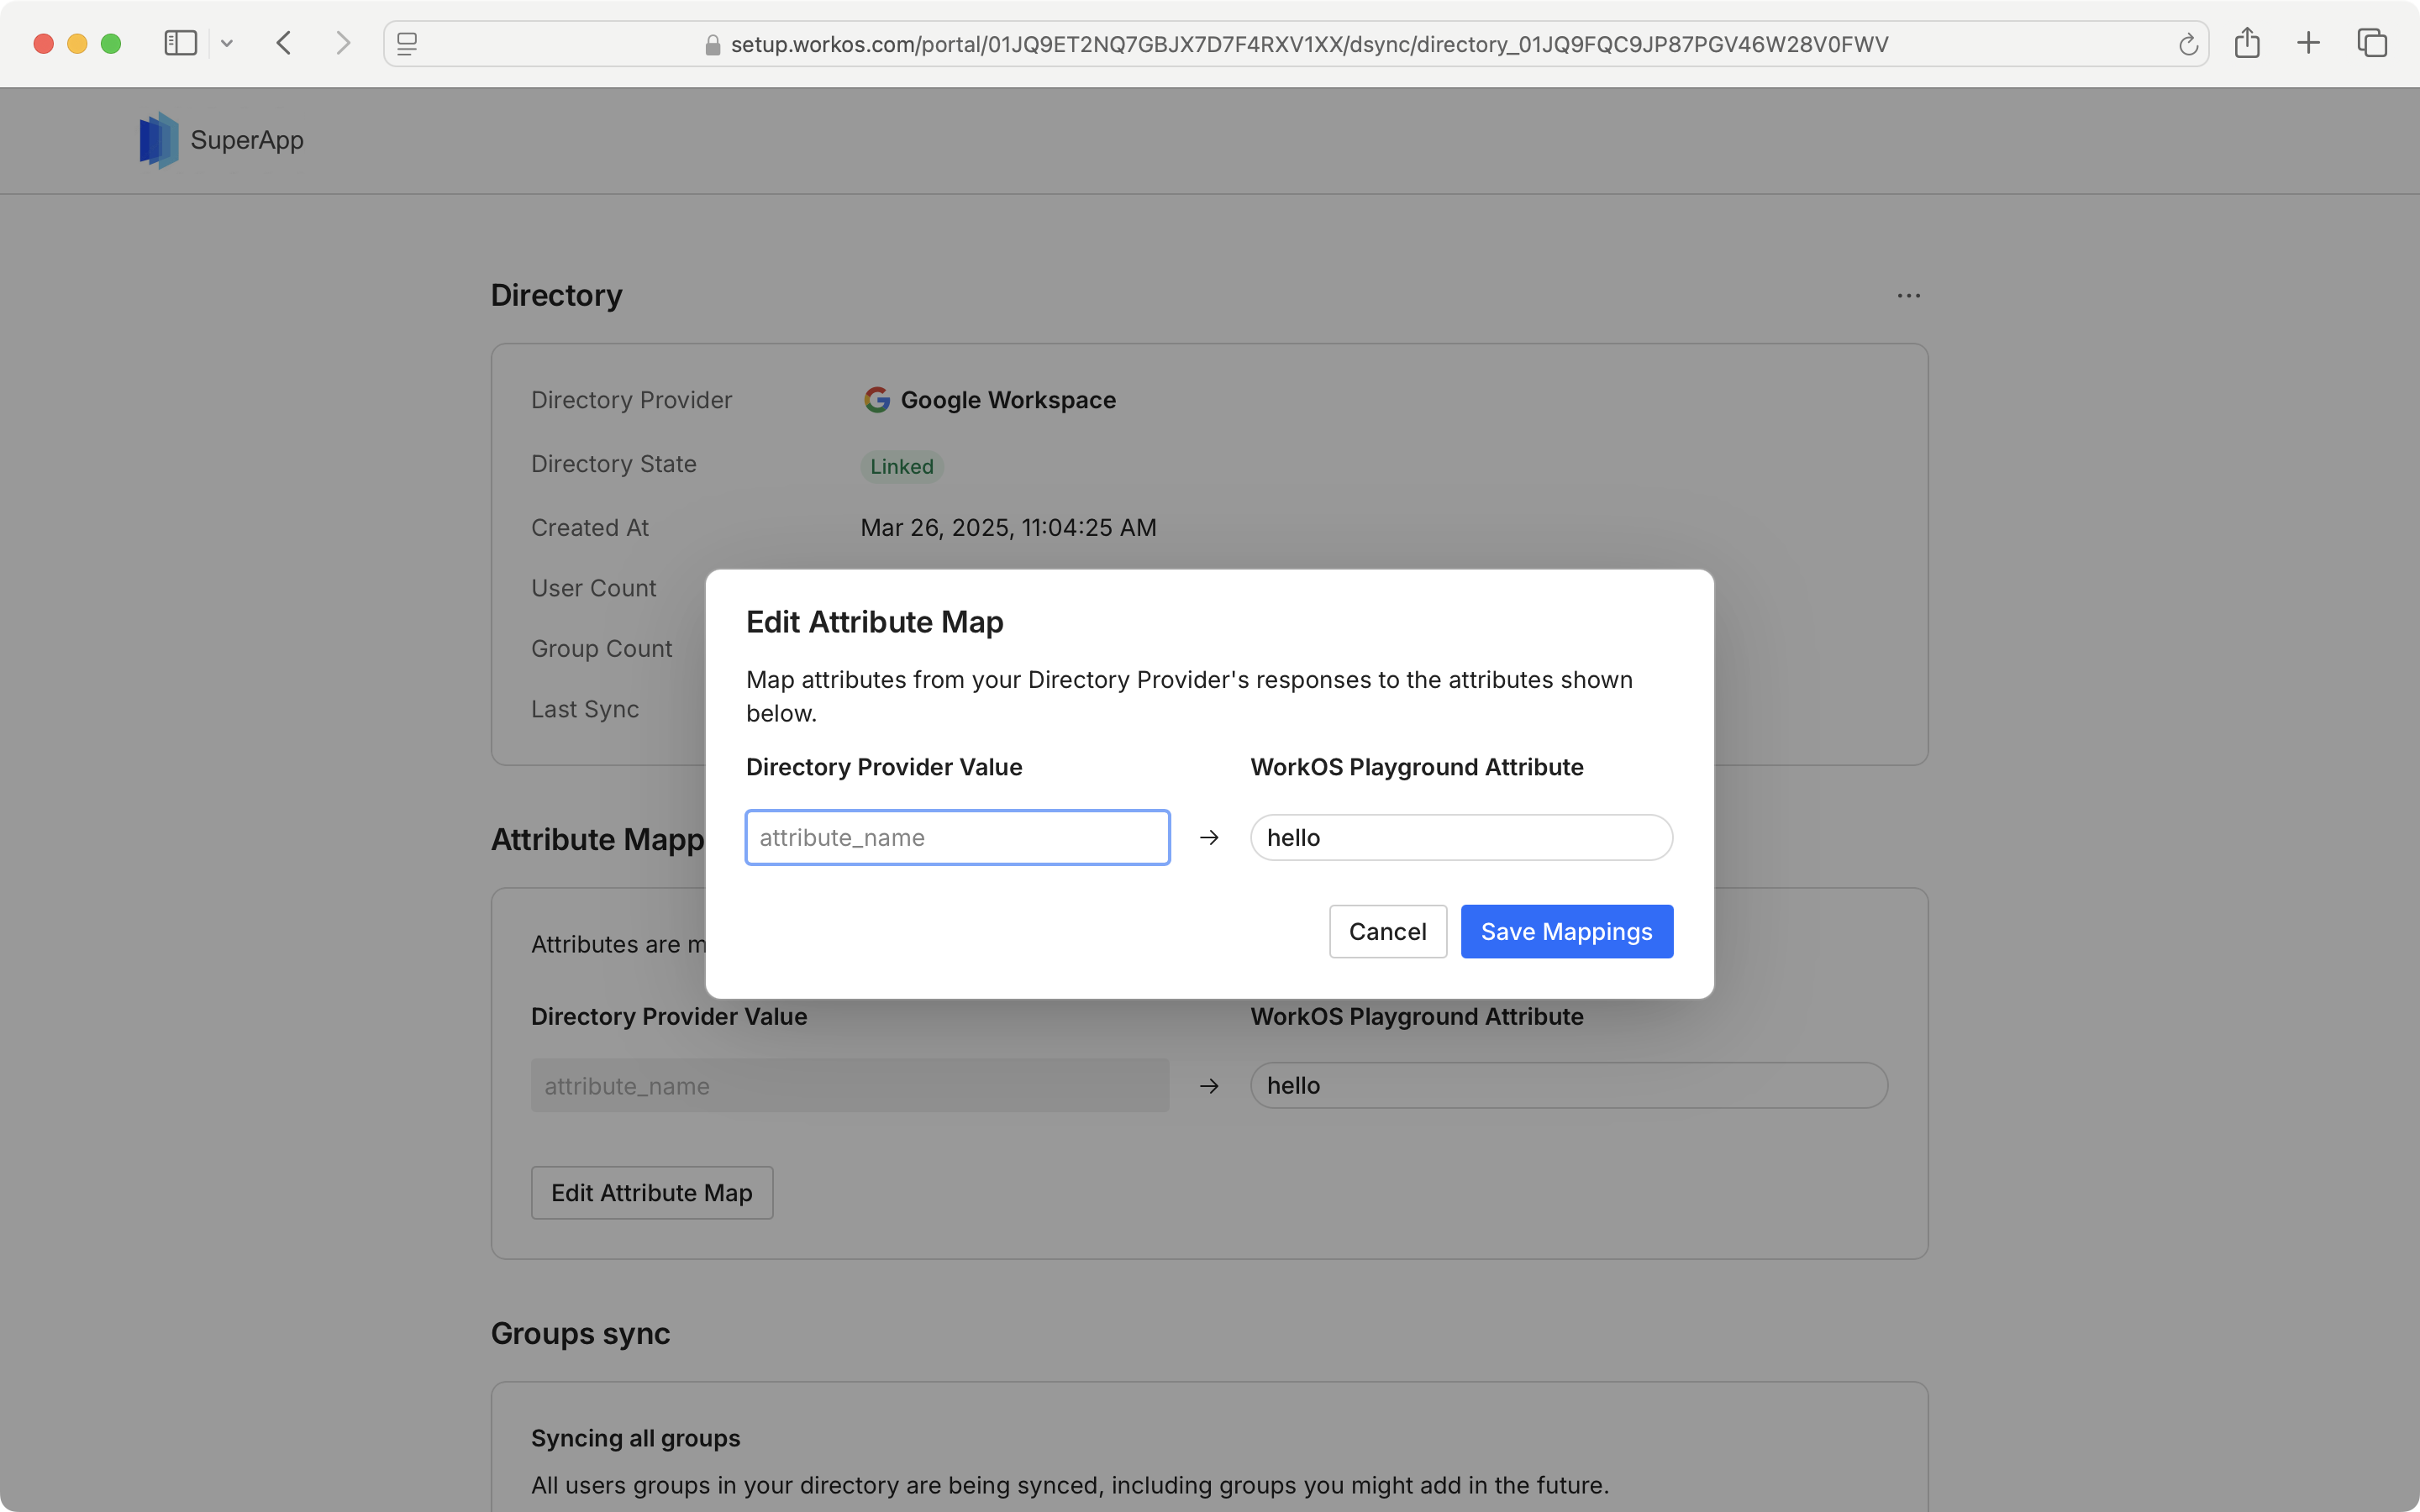
You may also view and edit the attribute map from the synced directory by clicking "Edit Attribute Map".
If you wish to update the groups that are being synced, select "Edit groups sync” and follow the prompts on the next page.
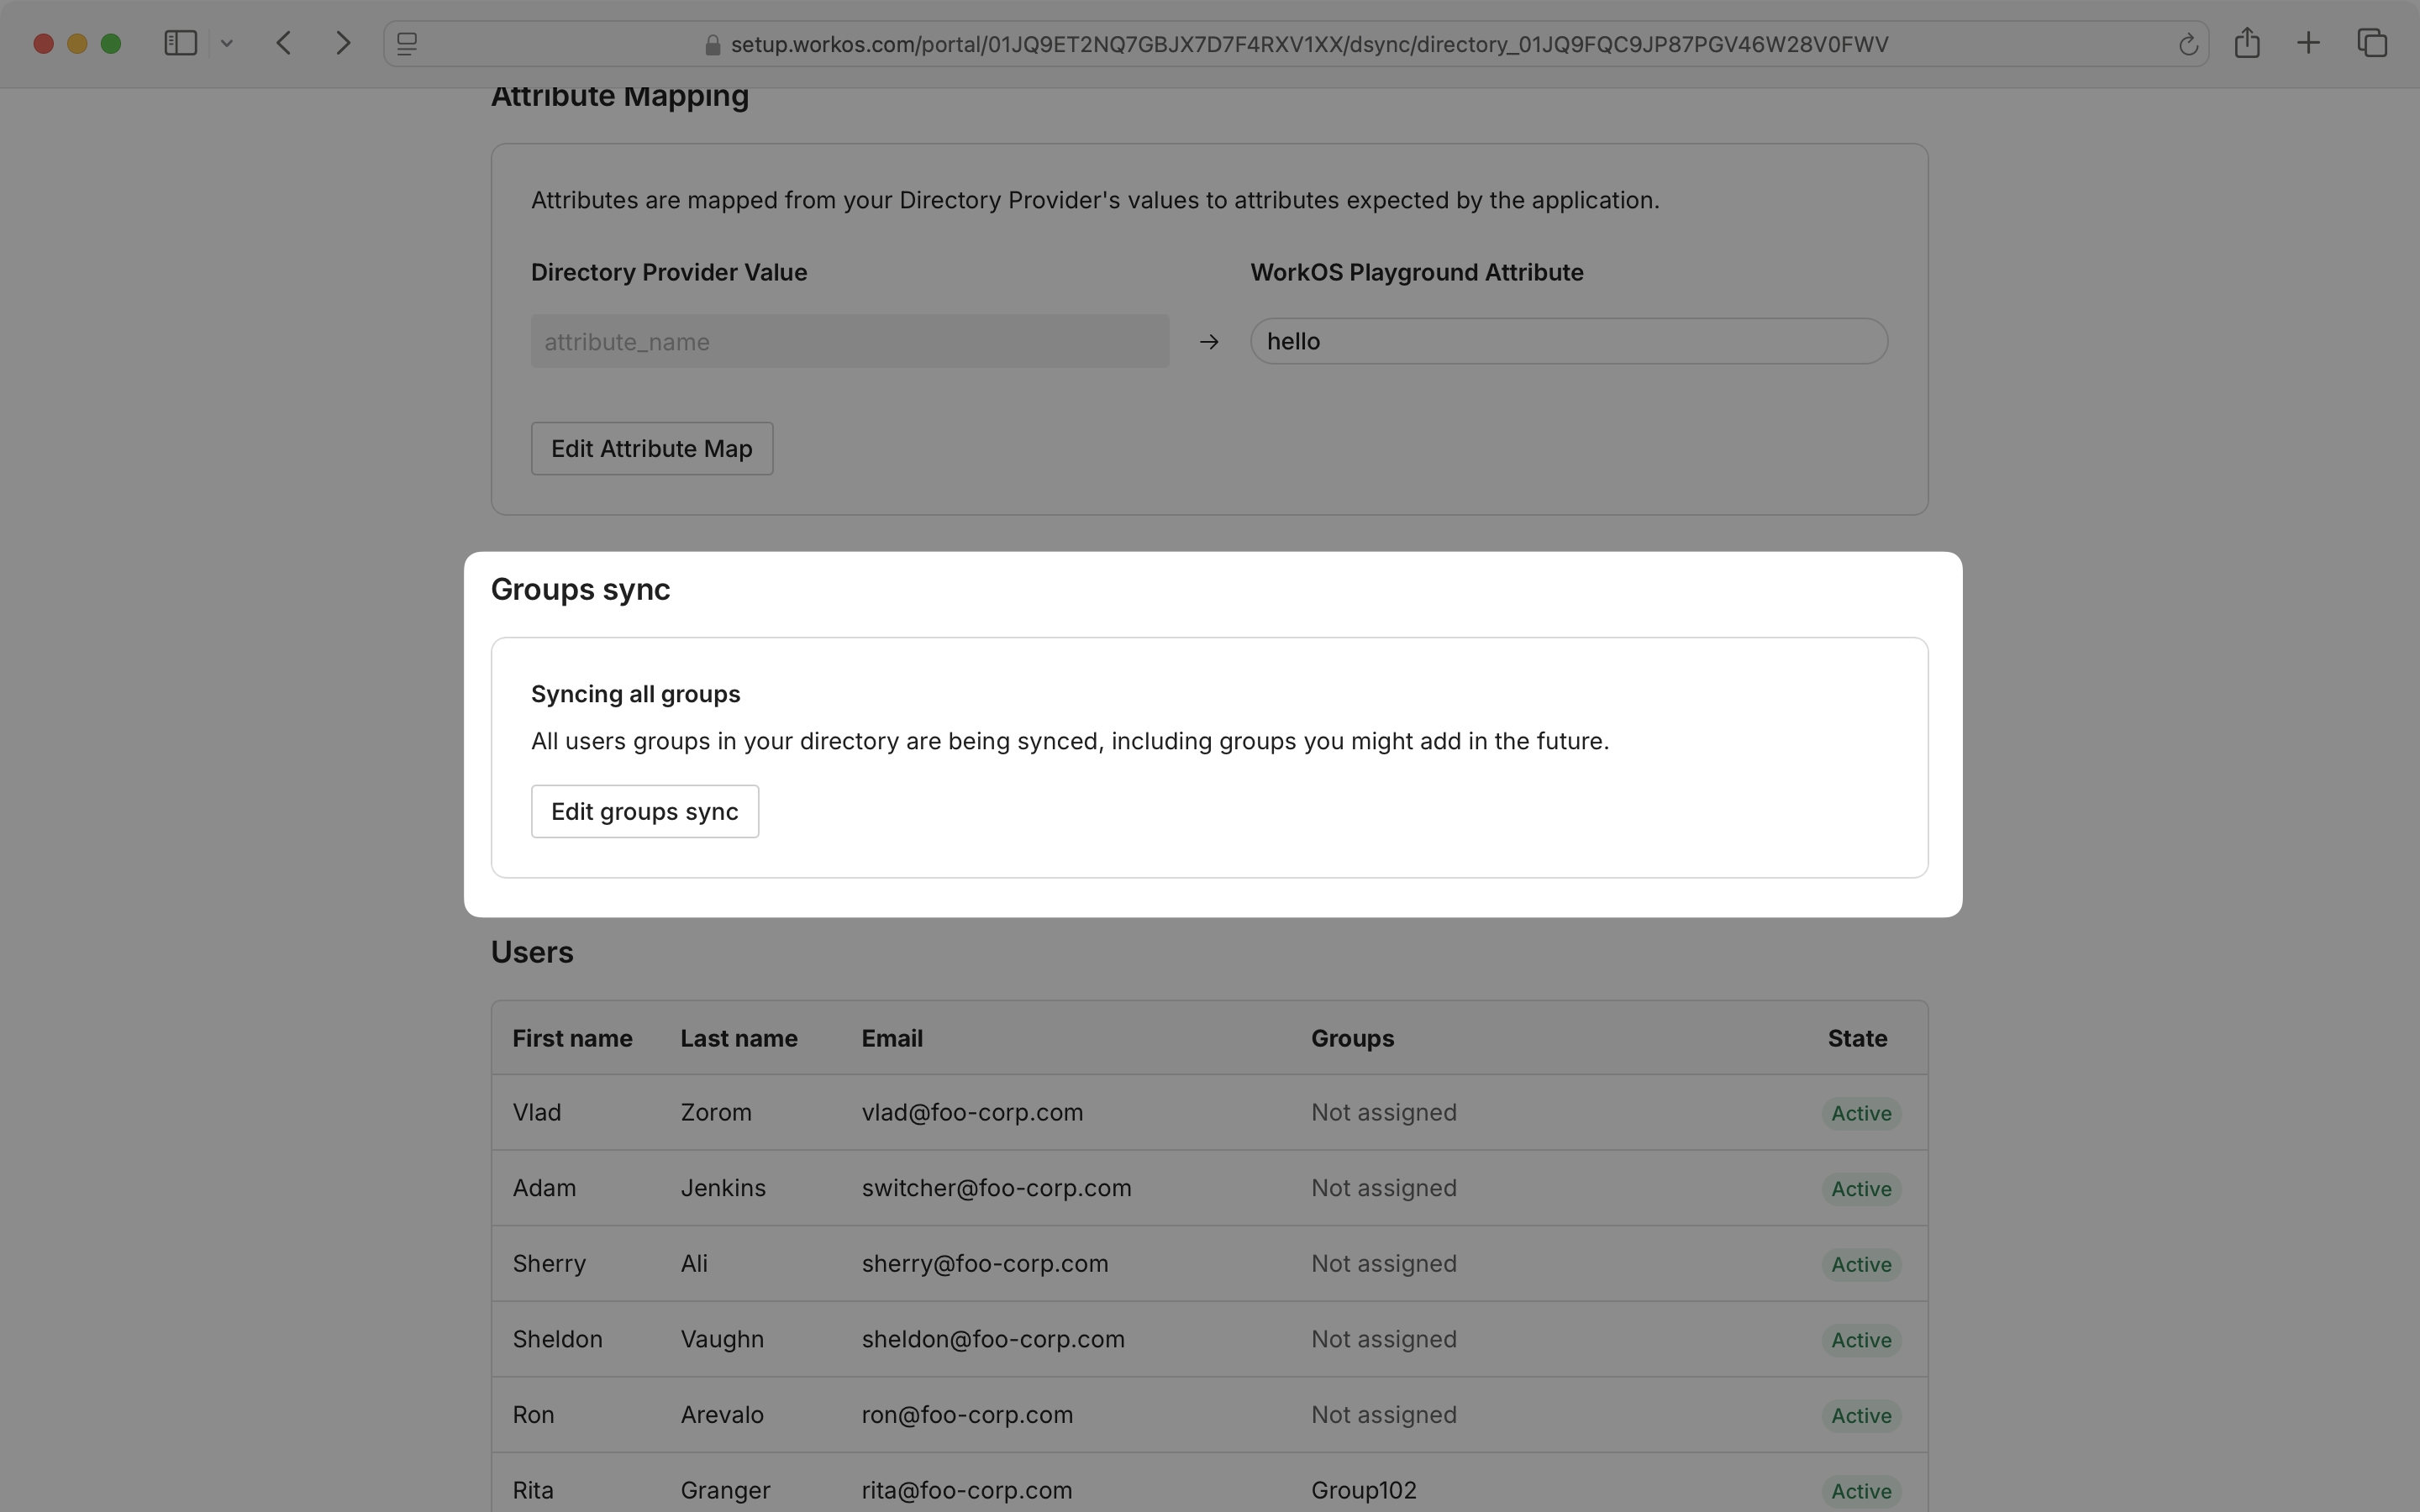
You can also view a complete list of users from all selected groups in your synced directory.
