# Claude Desktop Integration Guide
This guide explains how to integrate Claude Desktop with the TomTom Maps MCP Server to enable location-based tools using TomTom APIs.
## Prerequisites
- Claude Desktop installed (latest version recommended)
- A valid [TomTom API key](https://developer.tomtom.com/)
## Setup
### Option 1: Install Claude Desktop Extension (Recommended)
Each extension is a self-contained binary that bundles Node.js and all native dependencies — **no Node.js installation required**. Dynamic maps work out of the box.
1. Download the `.mcpb` file for your platform from [the latest release page](https://github.com/tomtom-international/tomtom-maps-mcp/releases/latest):
| Platform | File |
|-----------------------|-----------------------------------|
| macOS (Apple Silicon) | `tomtom-maps-mcp-darwin-arm64.mcpb` |
| Linux (x64) | `tomtom-maps-mcp-linux-x64.mcpb` |
| Windows (x64) | `tomtom-maps-mcp-win32-x64.mcpb` |
2. Open Claude Desktop → Settings → Extensions
3. Drag the downloaded extension file into the window and click Install

4. When prompted, enter your TomTom API Key

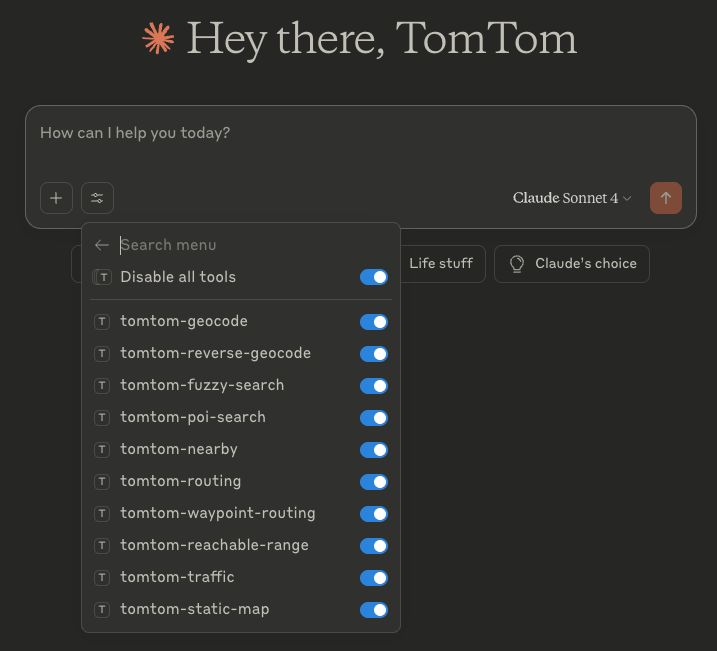
5. Once installed, Click enable, Claude can use the following tools from the TomTom Maps MCP Extension.


### Option 2: Manual JSON Configuration (Advanced)
This method requires Node.js 22+ to be installed on your system.
1. Add the following configuration to your `claude_desktop_config.json`:
```json
{
"mcpServers": {
"tomtom-mcp": {
"command": "npx",
"args": ["-y", "@tomtom-org/tomtom-mcp@latest"],
"env": {
"TOMTOM_API_KEY": ""
}
}
}
}
```
> **Tip:** To use the TomTom Orbis Maps backend (which includes additional tools like EV routing, search along route, and data visualization), add `"MAPS": "tomtom-orbis-maps"` to the `env` block above. See [Available Tools](../README.md#tomtom-orbis-maps-optional-backend) for details.
2. Restart Claude Desktop. You'll see the TomTom Maps MCP tools in the Claude Desktop tools menu.
## Test It
Ask Claude a question like:
> "What's the reachable range from Amsterdam within 30 minutes by car?"
If configured correctly, the MCP server will fetch results from TomTom APIs.
## Troubleshooting
- Ensure `TOMTOM_API_KEY` is valid and active.
- Check that the MCP server is accessible locally.
- If using **Option 1** (extension), make sure you downloaded the correct `.mcpb` for your platform (macOS/Linux/Windows).
- If dynamic maps are not working with **Option 2**, consider using Option 1 instead — it bundles all native dependencies.