
# @springbrand/dsh-plugin-marketplace
[English](README.md) | 中文
[](https://www.npmjs.com/package/@springbrand/dsh-plugin-marketplace)
[](https://github.com/springbrand-lab/dsh-plugin-market/actions/workflows/ci.yml)
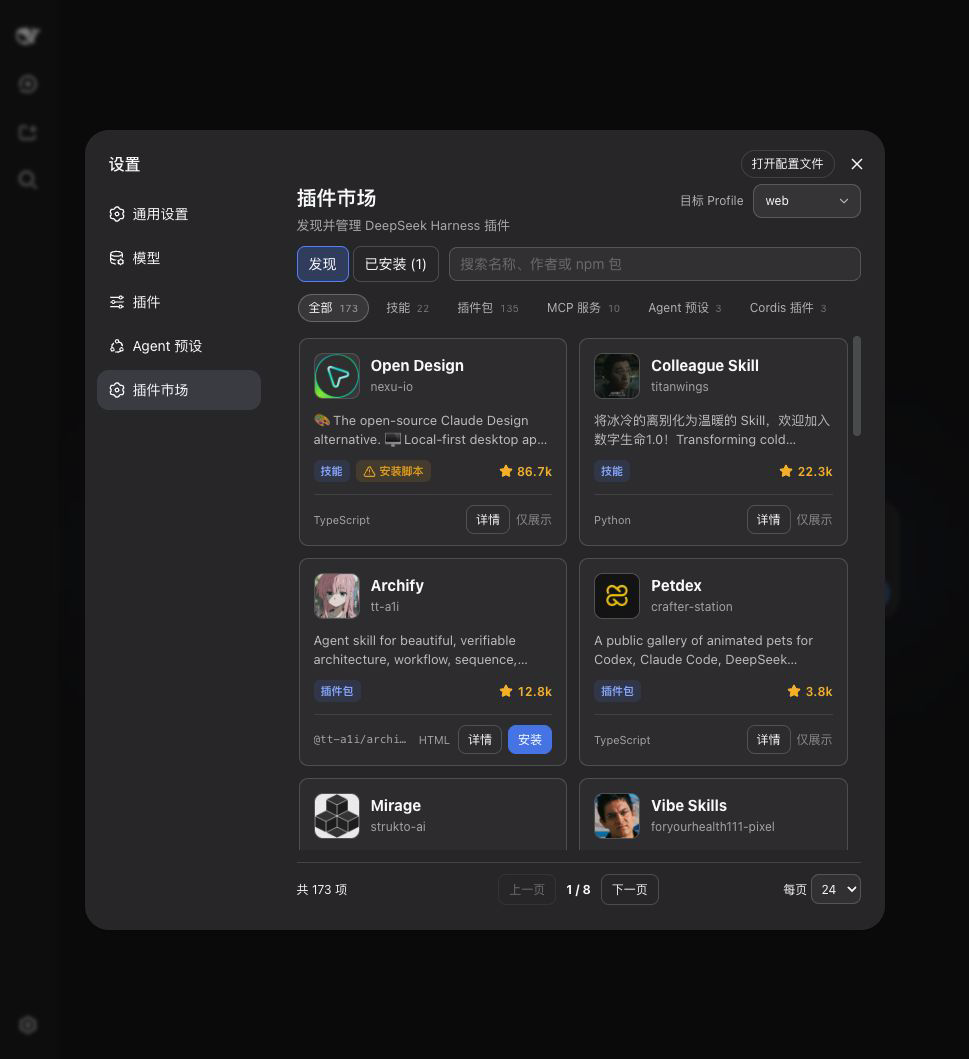
装在 DeepSeek Harness Web 设置页、并随 SpringBrand Desktop 内置的可视化插件市场。打开 **设置 → 插件市场**,即可浏览目录、搜索插件,并安装、更新或卸载插件。
## 从零开始安装
即使没有安装过 DSH,也可以按照下面步骤完成。
1. 打开 [Node.js 官网](https://nodejs.org/),下载并安装 LTS 版本,然后关闭并重新打开终端。macOS 使用“终端”,Windows 使用 PowerShell。
2. 安装 DSH 和 pnpm:
```sh
npm install --global pnpm @deepseek-ai/dsh
```
3. 确认 DSH 已安装:
```sh
dsh --version
```
4. 安装插件市场:
```sh
dsh plugin --profile web add @springbrand/dsh-plugin-marketplace
```
5. 启动 DSH Web:
```sh
dsh web
```
保持终端窗口开启。浏览器通常会自动打开;如果没有,请打开终端中显示的 `http://127.0.0.1:端口号`。进入 **设置 → 插件市场** 即可开始使用。
如果重新打开终端后仍提示 `dsh: command not found`,请改用:
```sh
npx @deepseek-ai/dsh plugin --profile web add @springbrand/dsh-plugin-marketplace
npx @deepseek-ai/dsh web
```
## 已经安装过 DSH
```sh
dsh plugin --profile web add @springbrand/dsh-plugin-marketplace
dsh web
```
## 你会得到
- **浏览与搜索**:按名称、作者、描述或 npm 包名搜索,并显示插件分类、仓库头像和紧凑的 GitHub Star 数。
- **Profile 管理**:普通 DSH 可以在 `web`、`headless` 或其他本地 Profile 间切换目标;SpringBrand Desktop 只允许操作当前激活的 Profile。
- **一处完成安装、更新与卸载**:显示实际安装版本、可更新数量与状态,并可一键更新到最新发布版本。
- **已安装视图**:同时展示目录插件和 Profile 中已有、但目录未收录的依赖。
- **SpringBrand Desktop 中的市场自更新**:把最新版本安装到当前 Profile;移除该 Profile 覆盖后会回退到应用内置版本。
- **明确的生效时机**:当前 Profile 变更后自动重启;其他 Profile 在下次启动时生效。
## 安全
- 只允许安装目录中标记为 `bundle`、`installable`、`npm` 的条目。
- 服务端会重新从目录解析 npm 包名,不接受浏览器提交任意安装源。
- 更新与卸载只接受当前 Profile 中已安装的合法 npm 包名。
- 所有变更接口只接受同源 JSON POST,请求体限制为 8 KiB。
- 普通 DSH 指令通过参数数组直接启动,不经过 shell;SpringBrand Desktop 会把操作交给自身受管的 package operation service。同一时间只执行一个插件操作。
插件属于第三方代码。目录收录不代表安全背书,请只安装你信任的来源。
## 工作方式
```text
[Web 设置页]
|
v
[本插件的本地 HTTP 接口]
|
+--> [dshplugin.market/api/catalog]
|
+--> 普通 DSH:dsh plugin --profile add|update|remove
|
+--> SpringBrand Desktop 插件:desktopPnpm.runPlugin()
|
+--> SpringBrand Desktop 市场覆盖:desktopPnpm.run()
```
在普通 DSH 中,市场默认操作当前运行的 Profile,也可以在页面中选择其他 Profile。SpringBrand Desktop 只暴露当前激活的 Profile,通过 `desktopPnpm` 执行 package operation,并通过 `desktopProfiles` 请求应用有序重启。第三方插件使用 `runPlugin()`,由 DSH reconcile 其 bundle layer;市场自身的 Profile 覆盖直接使用 `run()`,因为其 row 已归 Desktop 所有,再作为 bundle reconcile 会产生重复 row。该插件不提供任意 Hot-mount 或无缝端口交接。
### 哪些 Profile 会出现在目标列表里
普通 DSH 下的列表是:`web`、`headless`、本进程启动时使用的 Profile,以及 `/profiles` 下的每个目录,按名称排序。DSH home 取 `DSH_HOME`,未设置时为 `~/.dsh`。`profiles/node_modules` 不会作为目标出现。
Profile 在初始化之前就会出现在列表中,因此可以在 `web` 会话里直接把插件装进 `headless`,无需先创建该 Profile。**已安装**视图针对每个 Profile 读的是它自己的 `package.json` dependencies——这也是它会列出目录中没有、由本市场之外的途径安装的包的原因。SpringBrand Desktop 还会报告应用内置的市场版本;首次自更新会创建一个 Profile 依赖,并在重启后优先使用它。
## 配置
在 Profile 的 Cordis 配置中可以覆盖:
```yaml
config:
profile: web
catalogUrl: https://dshplugin.market/api/catalog
restartDelayMs: 1500
```
- `profile`:普通 DSH 进程使用的 Profile;默认从启动参数读取。SpringBrand Desktop 始终使用当前激活的 Profile。
- `catalogUrl`:插件目录 JSON 地址,必须使用 HTTP 或 HTTPS。
- `restartDelayMs`:普通 DSH 进程的重启等待时间,范围为 500–30000 毫秒。SpringBrand Desktop 自行持有重启时序。
## 卸载
可以在市场的“已安装”页面卸载,也可以运行:
```sh
dsh plugin --profile web remove @springbrand/dsh-plugin-marketplace
```
## 开发
```sh
npm install
npm run check
```
## License
MIT