# Downstream Game Creation Tutorial 5
## Aim
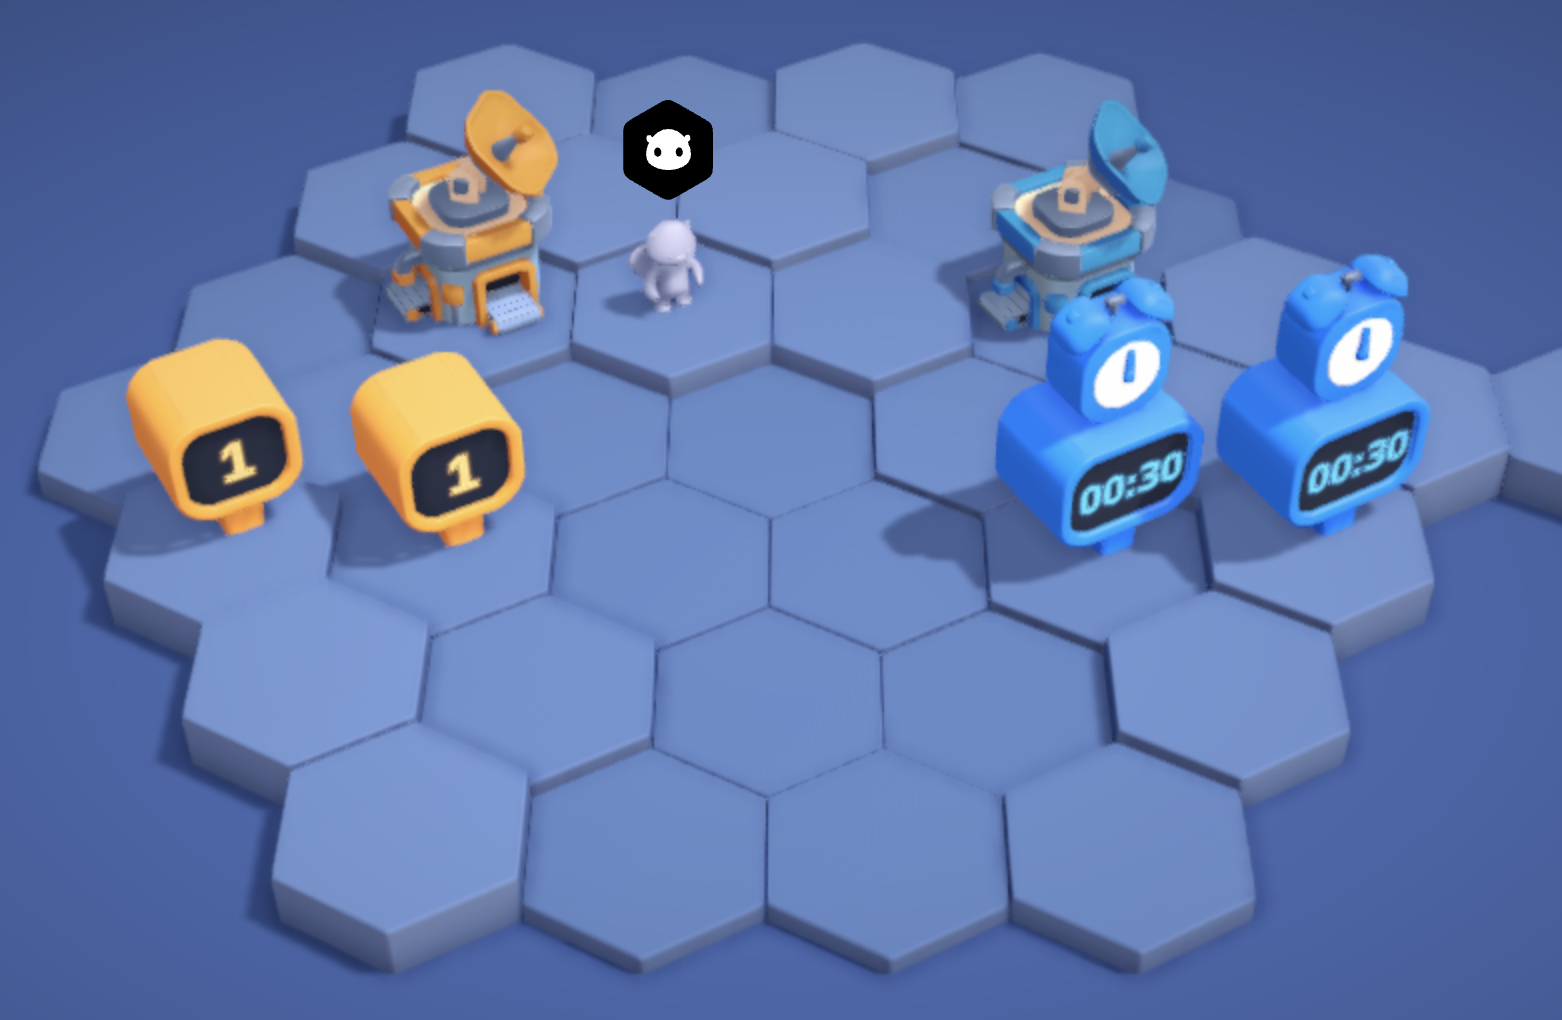
We will follow the steps below to create a downstream map with your own tile layout, a building that can incrememnt an on-chain counter, two buildings that display the counter value, a building that can start a countdown timer and two buildings which will display the countdown.
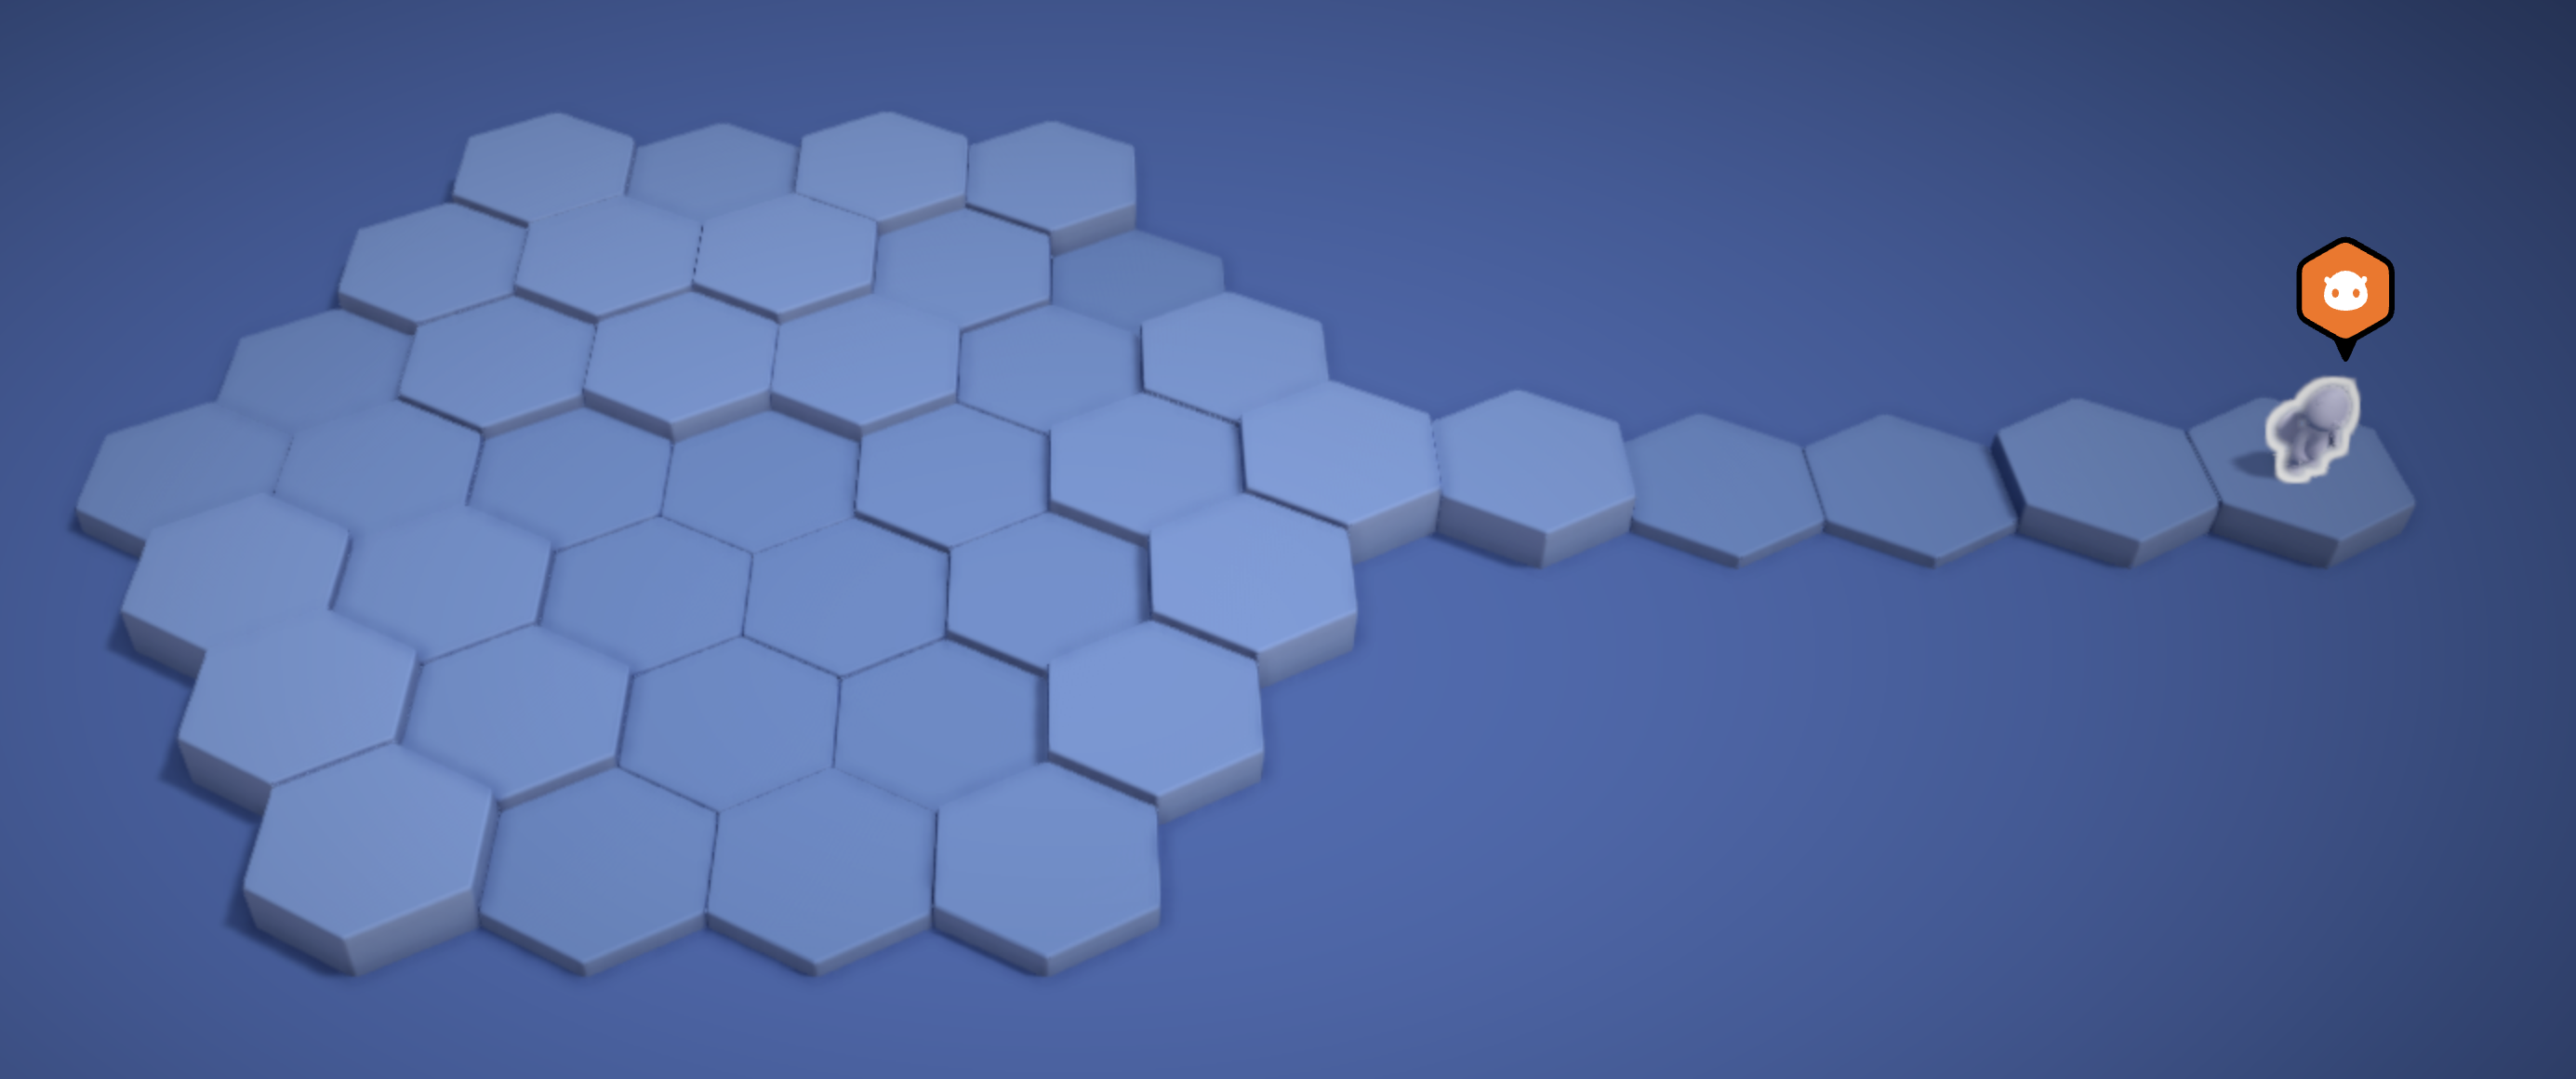
Once complete, you will have used the core Downstream tools to create a map that looks like this when played:
 ## Prerequisites
- This repository cloned to your desktop. (Instructions in the top [readme](../../../../README.md).)
- [Docker Desktop](https://docs.docker.com/get-docker/)
- [npm](https://docs.npmjs.com/downloading-and-installing-node-js-and-npm)
# 1. Deploy the game (The next 4 steps are identical to tutorial 1)
First, deploy an instance of Downstream locally using Docker.
From a terminal in the repository root run:
```bash
docker compose up --pull=always
```
After some time (this could take up to 5 minutes), you should see "ready" in the terminal output:
contracts-1 | +-------+
contracts-1 | | ready |
contracts-1 | +-------+
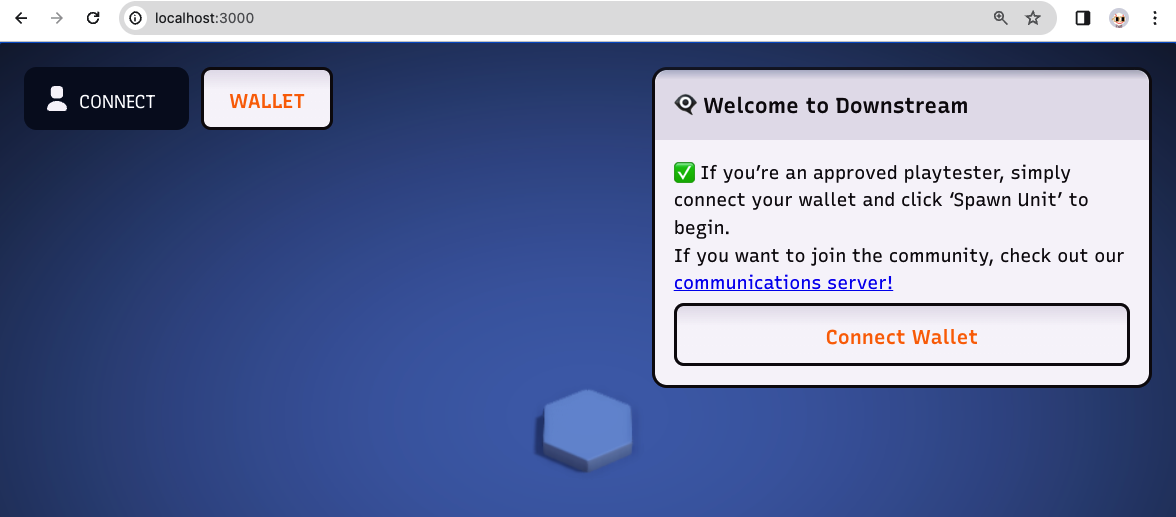
You can now open a web browser and navigate to [http://localhost:3000/zones/1](http://localhost:3000/zones/1) to load the game.
You should see a blue world, with a single hex tile in the center and the **Welcome to Downstream** dialogue box:
## Prerequisites
- This repository cloned to your desktop. (Instructions in the top [readme](../../../../README.md).)
- [Docker Desktop](https://docs.docker.com/get-docker/)
- [npm](https://docs.npmjs.com/downloading-and-installing-node-js-and-npm)
# 1. Deploy the game (The next 4 steps are identical to tutorial 1)
First, deploy an instance of Downstream locally using Docker.
From a terminal in the repository root run:
```bash
docker compose up --pull=always
```
After some time (this could take up to 5 minutes), you should see "ready" in the terminal output:
contracts-1 | +-------+
contracts-1 | | ready |
contracts-1 | +-------+
You can now open a web browser and navigate to [http://localhost:3000/zones/1](http://localhost:3000/zones/1) to load the game.
You should see a blue world, with a single hex tile in the center and the **Welcome to Downstream** dialogue box:
 # 2. Spawn a Unit
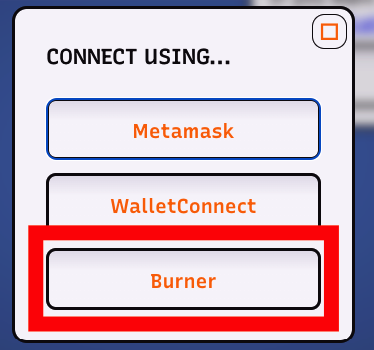
First click the **Connect Wallet** button.
Then, select **Burner**.
# 2. Spawn a Unit
First click the **Connect Wallet** button.
Then, select **Burner**.
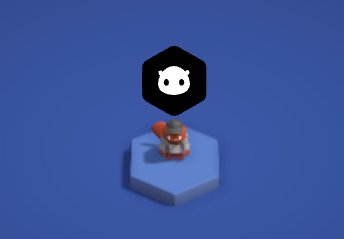
 You can now click "Spawn Unit" and you should see your Unit on the center tile:
 # 3. Create a map
There is no where for the Unit to go so we will now expand the world by creating some tiles.
First, open the the **tile-fabricator**, by opening a web browser and navigating to [http://localhost:3000/tile-fabricator].
Now, draw a map design:
- Left click each tile that you want on your map.
- Zoom in and out with mouse scroll.
- To remove a tile, select **UNDISCOVERED TILE** from the brush drop down and left click to remove tiles.
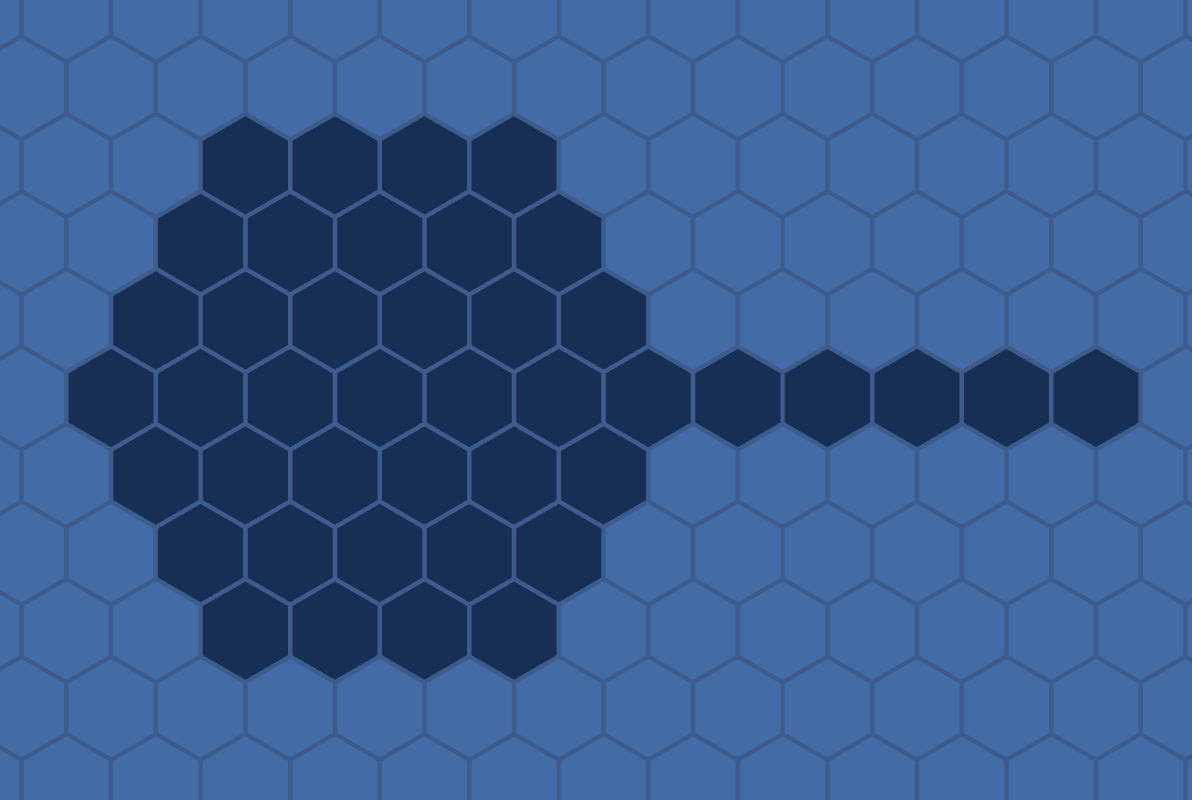
- Draw a map that looks like this:
# 3. Create a map
There is no where for the Unit to go so we will now expand the world by creating some tiles.
First, open the the **tile-fabricator**, by opening a web browser and navigating to [http://localhost:3000/tile-fabricator].
Now, draw a map design:
- Left click each tile that you want on your map.
- Zoom in and out with mouse scroll.
- To remove a tile, select **UNDISCOVERED TILE** from the brush drop down and left click to remove tiles.
- Draw a map that looks like this:
 Once you are happy, export the tiles manifest file:
- Select **Export**.
- Find the downloaded file. It will be named something like `20d6a4ed-bb78-4774-8c0a-50c28451a380.yml`.
Finally, create a new folder in your desktop. This folder is your 'map' and will contain manifests defining tiles, buildings, items and more. For now we'll just copy the new tiles in:
- Create a folder like `/Tutorial5Map`
- Copy the exported tiles manifest into the folder.
- Rename it to `Locations.yaml`.
# 4. Deploy the new tiles
We will use the Downstream CLI to deploy our newly created tiles to our local Downstream instance.
First, install the CLI. From a terminal run:
```bash
npm i -g @playmint/ds-cli
```
Check it is installed from any terminal folder by running:
```bash
ds help
```
Now copy your Burner private key from Downstream:
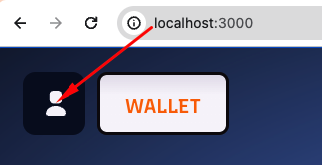
- Browse to [localhost:3000/zones/1]([http://localhost:3000/zones/1]).
- Click the player icon at the top left.
Once you are happy, export the tiles manifest file:
- Select **Export**.
- Find the downloaded file. It will be named something like `20d6a4ed-bb78-4774-8c0a-50c28451a380.yml`.
Finally, create a new folder in your desktop. This folder is your 'map' and will contain manifests defining tiles, buildings, items and more. For now we'll just copy the new tiles in:
- Create a folder like `/Tutorial5Map`
- Copy the exported tiles manifest into the folder.
- Rename it to `Locations.yaml`.
# 4. Deploy the new tiles
We will use the Downstream CLI to deploy our newly created tiles to our local Downstream instance.
First, install the CLI. From a terminal run:
```bash
npm i -g @playmint/ds-cli
```
Check it is installed from any terminal folder by running:
```bash
ds help
```
Now copy your Burner private key from Downstream:
- Browse to [localhost:3000/zones/1]([http://localhost:3000/zones/1]).
- Click the player icon at the top left.
 - Click **show**
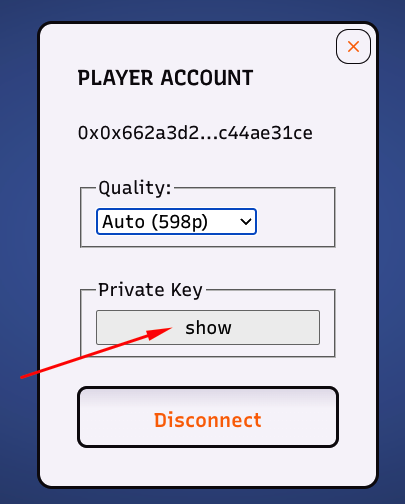 - Highlight and copy the key.
Finally, run the command to deploy your map:
In a terminal at your new folder run the following, where `` can be pasted from the one you just copied:
```bash
ds apply -n local -z 1 -k -f Locations.yaml
```
You should see the terminal output display a series of ✅s for each tile that is deployed.
Browse to [localhost:3000/zones/1]([http://localhost:3000/zones/1]) and you should see your newly created map and be able to move your Unit around it!
- Highlight and copy the key.
Finally, run the command to deploy your map:
In a terminal at your new folder run the following, where `` can be pasted from the one you just copied:
```bash
ds apply -n local -z 1 -k -f Locations.yaml
```
You should see the terminal output display a series of ✅s for each tile that is deployed.
Browse to [localhost:3000/zones/1]([http://localhost:3000/zones/1]) and you should see your newly created map and be able to move your Unit around it!
 # 5. Create a new type of building to increment an on-chain counter
The map is currently empty and there are no buildings to build. So first we are going to create a new type of `custom` building which will be used to increment an on-chain counter.
First, make a `CounterHQ.js`, `CounterHQ.sol` and a `CounterHQ.yaml` file in the same folder as `Locations.yaml`.
To get started, make each of the files like the following skeleton examples:
`CounterHQ.js`
```js
import ds from "downstream";
export default async function update(state) {
const mobileUnit = getMobileUnit(state);
const buildings = state.world?.buildings || [];
const IncrementCounter = () => {};
return {
version: 1,
map: [],
components: [
{
id: "counter-hq",
type: "building",
content: [
{
id: "default",
type: "inline",
html: ``,
buttons: [
{
text: "Increment Counter",
type: "action",
action: IncrementCounter,
},
],
},
],
},
],
};
}
function getMobileUnit(state) {
return state?.selected?.mobileUnit;
}
```
`CounterHQ.sol`
```solidity
// SPDX-License-Identifier: UNLICENSED
pragma solidity ^0.8.13;
import {Game} from "cog/IGame.sol";
import {State} from "cog/IState.sol";
import {Schema} from "@ds/schema/Schema.sol";
import {Actions} from "@ds/actions/Actions.sol";
import {BuildingKind} from "@ds/ext/BuildingKind.sol";
using Schema for State;
contract CounterHQ is BuildingKind {
function increment() external {}
function use(Game ds, bytes24 buildingInstance, bytes24, /*actor*/ bytes calldata payload) public override {
if ((bytes4)(payload) == this.increment.selector) {
_increment(ds, buildingInstance);
}
}
function _increment(Game ds, bytes24 buildingInstance) internal {
}
}
```
`CounterHQ.yaml`
```yaml
kind: BuildingKind
spec:
name: Counter HQ
description: "This building increments an on-chain counter and drives the counter displays"
category: custom
model: 11-03
color: 2
contract:
file: ./CounterHQ.sol
plugin:
file: ./CounterHQ.js
alwaysActive: true
materials:
- name: Green Goo
quantity: 10
- name: Blue Goo
quantity: 10
- name: Red Goo
quantity: 10
```
# 6. Implement the counter incrementor
## Call the contract from the building's plugin code
So far we have a building that can be constructed on the map however it currently doesn't contain anything other than a button that calls an empty `IncrementCounter` function. The first step we need to do is update `CounterHQ.js` to call into the CounterHQ contract. We do this by filling in the `IncrementCounter` function body with the following
`CounterHQ.js`
```js
const IncrementCounter = () => {
const payload = ds.encodeCall("function increment()", []);
ds.dispatch({
name: "BUILDING_USE",
args: [counterHQ.id, mobileUnit.id, payload],
});
};
```
`BUILDING_USE` is always dispatched to call the contract associated with the building however we use the payload which includes the encoded function signature to discern between the functions we wish to call within the contract.
## Implement the incrementor on the contract
Next, we need to fill in the body of the empty `_increment` function within the contract to retrieve the current value of the `count` variable, increment it and set it on the building.
`CounterHQ.sol`
```solidity
function _increment(Game ds, bytes24 buildingInstance) internal {
State state = ds.getState();
uint256 count = uint256(state.getData(buildingInstance, "count"));
ds.getDispatcher().dispatch(
abi.encodeCall(Actions.SET_DATA_ON_BUILDING, (buildingInstance, "count", bytes32(count + 1)))
);
}
```
# 7. Reading the count value from within the plugin
We need to get the `count` value that we set in the previous step. This value is set on the building instance so let's find our counter building instance.
Paste the following helper at the bottom of `CounterHQ.js` after the `update` function
```js
const getBuildingsByType = (buildingsArray, type) => {
return buildingsArray.filter(
(building) =>
building.kind?.name?.value.toLowerCase().trim() ==
type.toLowerCase().trim(),
);
};
```
and call it at the start of the update function with the name of the building which in this case is `Counter HQ`
```js
export default async function update(state) {
...
const buildings = state.world?.buildings || [];
const counterHQ = getBuildingsByType(buildings, "Counter HQ")[0];
...
```
To get the `count` value on the building we need to paste the following helpers at the end of `Counter.js` which facilitates getting the key value pair we want
```js
// -- Onchain data helpers --
function getDataInt(buildingInstance, key) {
var hexVal = getData(buildingInstance, key);
return typeof hexVal === "string" ? parseInt(hexVal, 16) : 0;
}
function getData(buildingInstance, key) {
return getKVPs(buildingInstance)[key];
}
function getKVPs(buildingInstance) {
return (buildingInstance.allData || []).reduce((kvps, data) => {
kvps[data.name] = data.value;
return kvps;
}, {});
}
```
and within the `update` function we are now able to get the value by calling `getDataInt` like so
```js
const count = getDataInt(counterHQ, "count");
```
# 8. Display the count variable
We are now going to display the count by finding all `Counter` buildings within a two tile reference from our `CounterHQ` and supplying them with the `count` value we obtained in the previous step.
## Defining a counter building
A counter building can be defined as a building of category `display` with a `model` of `default`. It has no additional .js or .sol files associated with it.
Create a `Counter.yaml` file in the same folder as the `CounterHQ` building and paste the following:
`Counter.yaml`
```yaml
---
kind: BuildingKind
spec:
name: Counter
description: "Displays a number"
category: display
model: default
color: 0
materials:
- name: Green Goo
quantity: 25
- name: Blue Goo
quantity: 25
- name: Red Goo
quantity: 25
```
## Finding all counter buildings within a 2 tile radius
The raw tile coordinates need decoding a bit to calculate distances between them. To make this easier we can use the following helper functions, which can be pasted at the end of `CounterHQ.js`
```js
function distance(signedHexCoordsA, signedHexCoordsB) {
const coordA = signedHexCoordsA.map(hexToSignedDecimal);
const coordB = signedHexCoordsB.map(hexToSignedDecimal);
return Math.max(
Math.abs(coordA[0] - coordB[0]),
Math.abs(coordA[1] - coordB[1]),
Math.abs(coordA[2] - coordB[2]),
);
}
function hexToSignedDecimal(hex) {
if (hex.startsWith("0x")) {
hex = hex.substr(2);
}
let num = parseInt(hex, 16);
let bits = hex.length * 4;
let maxVal = Math.pow(2, bits);
// Check if the highest bit is set (negative number)
if (num >= maxVal / 2) {
num -= maxVal;
}
return num;
}
```
We are now able to get all `counter` buildings using the `getBuildingsByType` like before and also filter them using the `distance` helper
```js
export default async function update(state) {
...
const counterBuildings = getBuildingsByType(buildings, "counter").filter(
(b) =>
distance(b.location.tile.coords, counterHQ.location.tile.coords) <=
2,
);
...
```
Now we have both the `count` value and the `counter` buildings we can tell the map to update the display on each of the counter buildings by setting a 'map' object for each of them like so.
```js
return {
version: 1,
map: counterBuildings.map((b) => ({
type: "building",
id: `${b.id}`,
key: "labelText",
value: `${count % 100}`,
})),
...
```
# 9. Seeing this in action by placing the buildings on the map
At this stage we have a set of tiles without any buildings on them so let's deploy our newly created buildings and use the tile fabricator to choose where they are located.
At a terminal In your map folder run:
```bash
ds apply -n local -z 1 -k -R -f .
```
This will deploy both `CounterHQ` and the `Counter` building along with the tiles that were placed earlier.
# 5. Create a new type of building to increment an on-chain counter
The map is currently empty and there are no buildings to build. So first we are going to create a new type of `custom` building which will be used to increment an on-chain counter.
First, make a `CounterHQ.js`, `CounterHQ.sol` and a `CounterHQ.yaml` file in the same folder as `Locations.yaml`.
To get started, make each of the files like the following skeleton examples:
`CounterHQ.js`
```js
import ds from "downstream";
export default async function update(state) {
const mobileUnit = getMobileUnit(state);
const buildings = state.world?.buildings || [];
const IncrementCounter = () => {};
return {
version: 1,
map: [],
components: [
{
id: "counter-hq",
type: "building",
content: [
{
id: "default",
type: "inline",
html: ``,
buttons: [
{
text: "Increment Counter",
type: "action",
action: IncrementCounter,
},
],
},
],
},
],
};
}
function getMobileUnit(state) {
return state?.selected?.mobileUnit;
}
```
`CounterHQ.sol`
```solidity
// SPDX-License-Identifier: UNLICENSED
pragma solidity ^0.8.13;
import {Game} from "cog/IGame.sol";
import {State} from "cog/IState.sol";
import {Schema} from "@ds/schema/Schema.sol";
import {Actions} from "@ds/actions/Actions.sol";
import {BuildingKind} from "@ds/ext/BuildingKind.sol";
using Schema for State;
contract CounterHQ is BuildingKind {
function increment() external {}
function use(Game ds, bytes24 buildingInstance, bytes24, /*actor*/ bytes calldata payload) public override {
if ((bytes4)(payload) == this.increment.selector) {
_increment(ds, buildingInstance);
}
}
function _increment(Game ds, bytes24 buildingInstance) internal {
}
}
```
`CounterHQ.yaml`
```yaml
kind: BuildingKind
spec:
name: Counter HQ
description: "This building increments an on-chain counter and drives the counter displays"
category: custom
model: 11-03
color: 2
contract:
file: ./CounterHQ.sol
plugin:
file: ./CounterHQ.js
alwaysActive: true
materials:
- name: Green Goo
quantity: 10
- name: Blue Goo
quantity: 10
- name: Red Goo
quantity: 10
```
# 6. Implement the counter incrementor
## Call the contract from the building's plugin code
So far we have a building that can be constructed on the map however it currently doesn't contain anything other than a button that calls an empty `IncrementCounter` function. The first step we need to do is update `CounterHQ.js` to call into the CounterHQ contract. We do this by filling in the `IncrementCounter` function body with the following
`CounterHQ.js`
```js
const IncrementCounter = () => {
const payload = ds.encodeCall("function increment()", []);
ds.dispatch({
name: "BUILDING_USE",
args: [counterHQ.id, mobileUnit.id, payload],
});
};
```
`BUILDING_USE` is always dispatched to call the contract associated with the building however we use the payload which includes the encoded function signature to discern between the functions we wish to call within the contract.
## Implement the incrementor on the contract
Next, we need to fill in the body of the empty `_increment` function within the contract to retrieve the current value of the `count` variable, increment it and set it on the building.
`CounterHQ.sol`
```solidity
function _increment(Game ds, bytes24 buildingInstance) internal {
State state = ds.getState();
uint256 count = uint256(state.getData(buildingInstance, "count"));
ds.getDispatcher().dispatch(
abi.encodeCall(Actions.SET_DATA_ON_BUILDING, (buildingInstance, "count", bytes32(count + 1)))
);
}
```
# 7. Reading the count value from within the plugin
We need to get the `count` value that we set in the previous step. This value is set on the building instance so let's find our counter building instance.
Paste the following helper at the bottom of `CounterHQ.js` after the `update` function
```js
const getBuildingsByType = (buildingsArray, type) => {
return buildingsArray.filter(
(building) =>
building.kind?.name?.value.toLowerCase().trim() ==
type.toLowerCase().trim(),
);
};
```
and call it at the start of the update function with the name of the building which in this case is `Counter HQ`
```js
export default async function update(state) {
...
const buildings = state.world?.buildings || [];
const counterHQ = getBuildingsByType(buildings, "Counter HQ")[0];
...
```
To get the `count` value on the building we need to paste the following helpers at the end of `Counter.js` which facilitates getting the key value pair we want
```js
// -- Onchain data helpers --
function getDataInt(buildingInstance, key) {
var hexVal = getData(buildingInstance, key);
return typeof hexVal === "string" ? parseInt(hexVal, 16) : 0;
}
function getData(buildingInstance, key) {
return getKVPs(buildingInstance)[key];
}
function getKVPs(buildingInstance) {
return (buildingInstance.allData || []).reduce((kvps, data) => {
kvps[data.name] = data.value;
return kvps;
}, {});
}
```
and within the `update` function we are now able to get the value by calling `getDataInt` like so
```js
const count = getDataInt(counterHQ, "count");
```
# 8. Display the count variable
We are now going to display the count by finding all `Counter` buildings within a two tile reference from our `CounterHQ` and supplying them with the `count` value we obtained in the previous step.
## Defining a counter building
A counter building can be defined as a building of category `display` with a `model` of `default`. It has no additional .js or .sol files associated with it.
Create a `Counter.yaml` file in the same folder as the `CounterHQ` building and paste the following:
`Counter.yaml`
```yaml
---
kind: BuildingKind
spec:
name: Counter
description: "Displays a number"
category: display
model: default
color: 0
materials:
- name: Green Goo
quantity: 25
- name: Blue Goo
quantity: 25
- name: Red Goo
quantity: 25
```
## Finding all counter buildings within a 2 tile radius
The raw tile coordinates need decoding a bit to calculate distances between them. To make this easier we can use the following helper functions, which can be pasted at the end of `CounterHQ.js`
```js
function distance(signedHexCoordsA, signedHexCoordsB) {
const coordA = signedHexCoordsA.map(hexToSignedDecimal);
const coordB = signedHexCoordsB.map(hexToSignedDecimal);
return Math.max(
Math.abs(coordA[0] - coordB[0]),
Math.abs(coordA[1] - coordB[1]),
Math.abs(coordA[2] - coordB[2]),
);
}
function hexToSignedDecimal(hex) {
if (hex.startsWith("0x")) {
hex = hex.substr(2);
}
let num = parseInt(hex, 16);
let bits = hex.length * 4;
let maxVal = Math.pow(2, bits);
// Check if the highest bit is set (negative number)
if (num >= maxVal / 2) {
num -= maxVal;
}
return num;
}
```
We are now able to get all `counter` buildings using the `getBuildingsByType` like before and also filter them using the `distance` helper
```js
export default async function update(state) {
...
const counterBuildings = getBuildingsByType(buildings, "counter").filter(
(b) =>
distance(b.location.tile.coords, counterHQ.location.tile.coords) <=
2,
);
...
```
Now we have both the `count` value and the `counter` buildings we can tell the map to update the display on each of the counter buildings by setting a 'map' object for each of them like so.
```js
return {
version: 1,
map: counterBuildings.map((b) => ({
type: "building",
id: `${b.id}`,
key: "labelText",
value: `${count % 100}`,
})),
...
```
# 9. Seeing this in action by placing the buildings on the map
At this stage we have a set of tiles without any buildings on them so let's deploy our newly created buildings and use the tile fabricator to choose where they are located.
At a terminal In your map folder run:
```bash
ds apply -n local -z 1 -k -R -f .
```
This will deploy both `CounterHQ` and the `Counter` building along with the tiles that were placed earlier.
 open the **tile-fabricator**, by opening a web browser and navigating to [http://localhost:3000/tile-fabricator]. If it was already open then you'll need to refresh the page.
In the 'brush' list you should now see our custom buildings
open the **tile-fabricator**, by opening a web browser and navigating to [http://localhost:3000/tile-fabricator]. If it was already open then you'll need to refresh the page.
In the 'brush' list you should now see our custom buildings
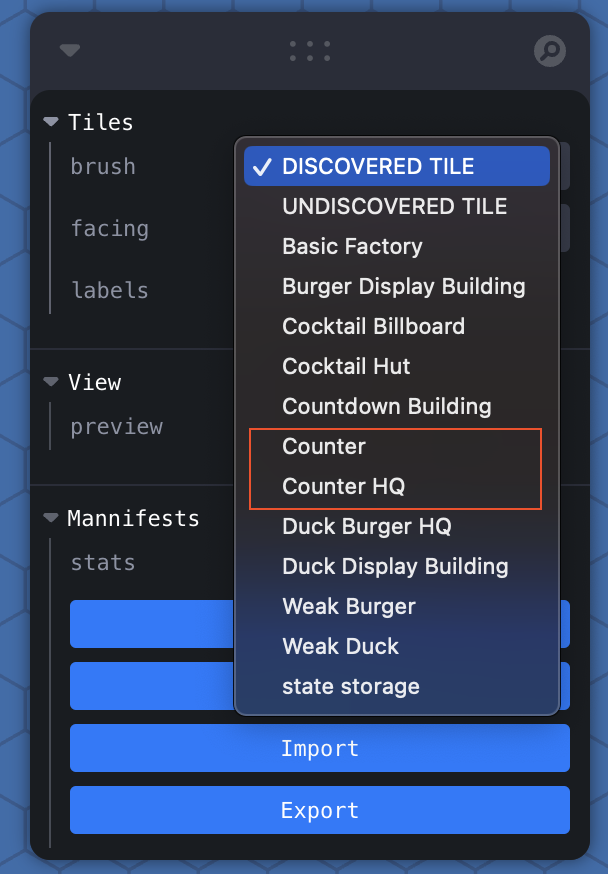 - Select the HQ and place on the map
- Select the counter building and place two within a 2 tile radius of the HQ
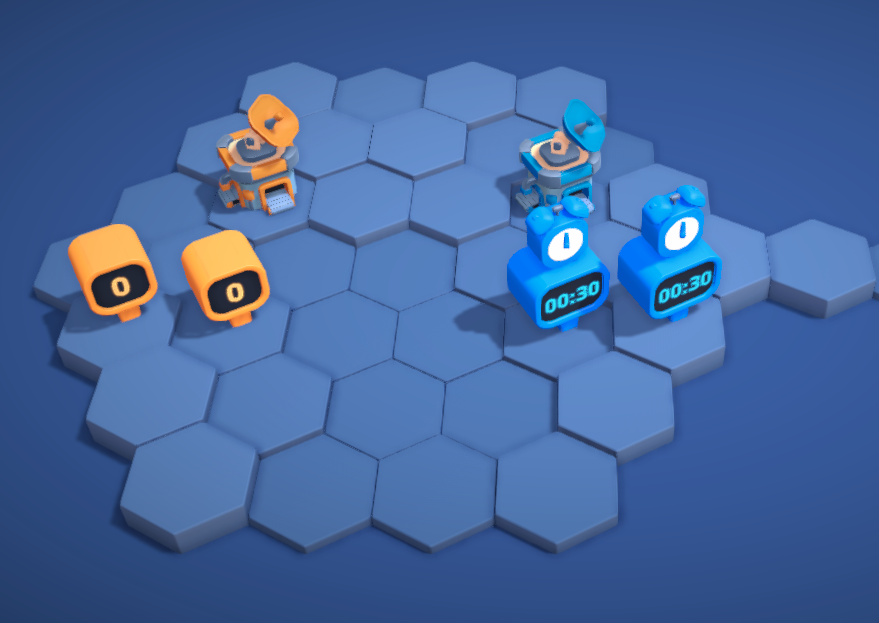
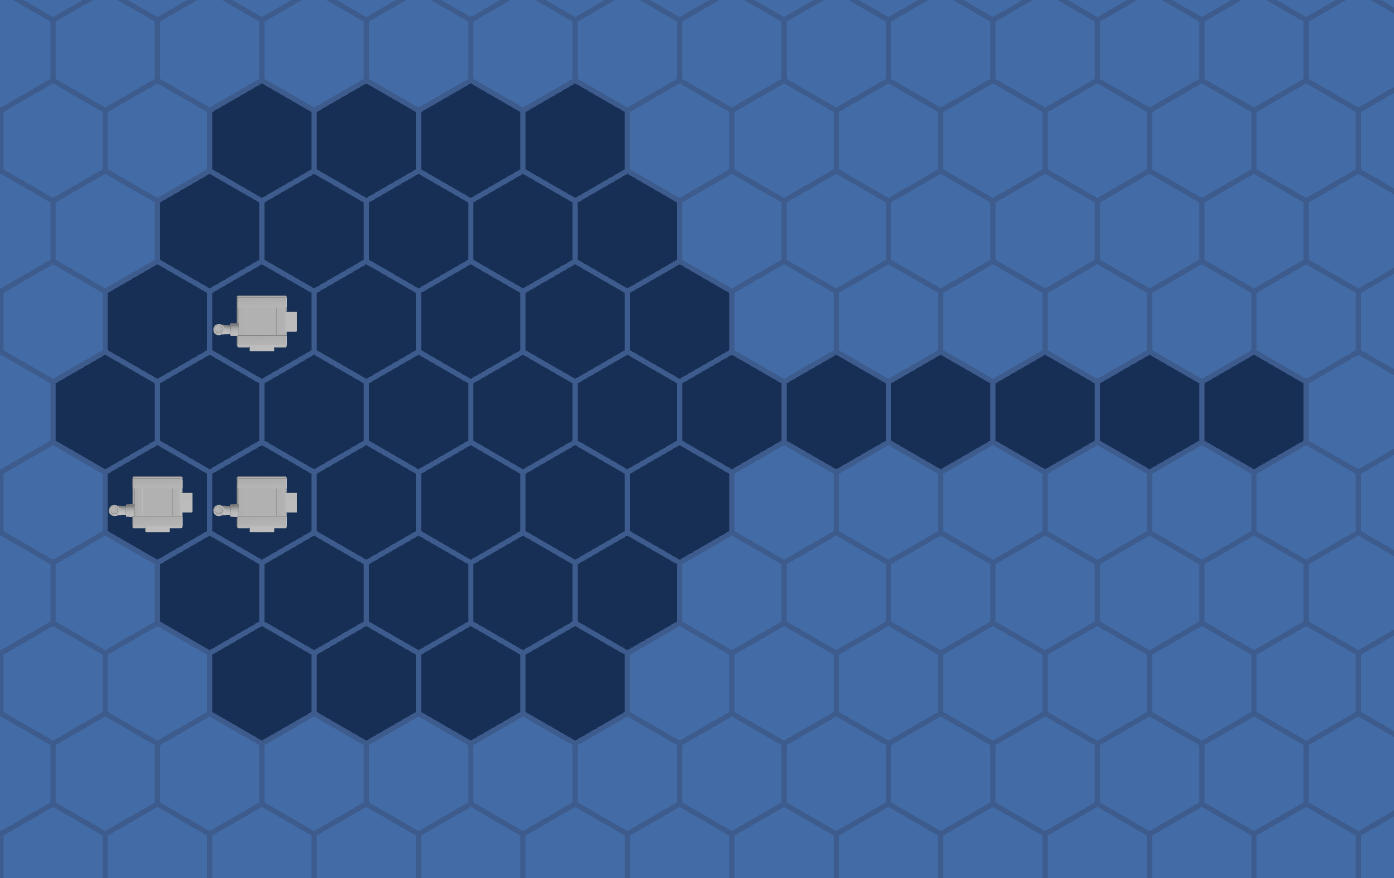
You should now have a map that looks similar to below
- Select the HQ and place on the map
- Select the counter building and place two within a 2 tile radius of the HQ
You should now have a map that looks similar to below
 Export the tiles and save over `Locations.yaml`
Run the deploy command again which will redeploy all tiles and building definitions along with the locations of the buildings we have just chosen.
```bash
ds apply -n local -z 1 -k -R -f .
```
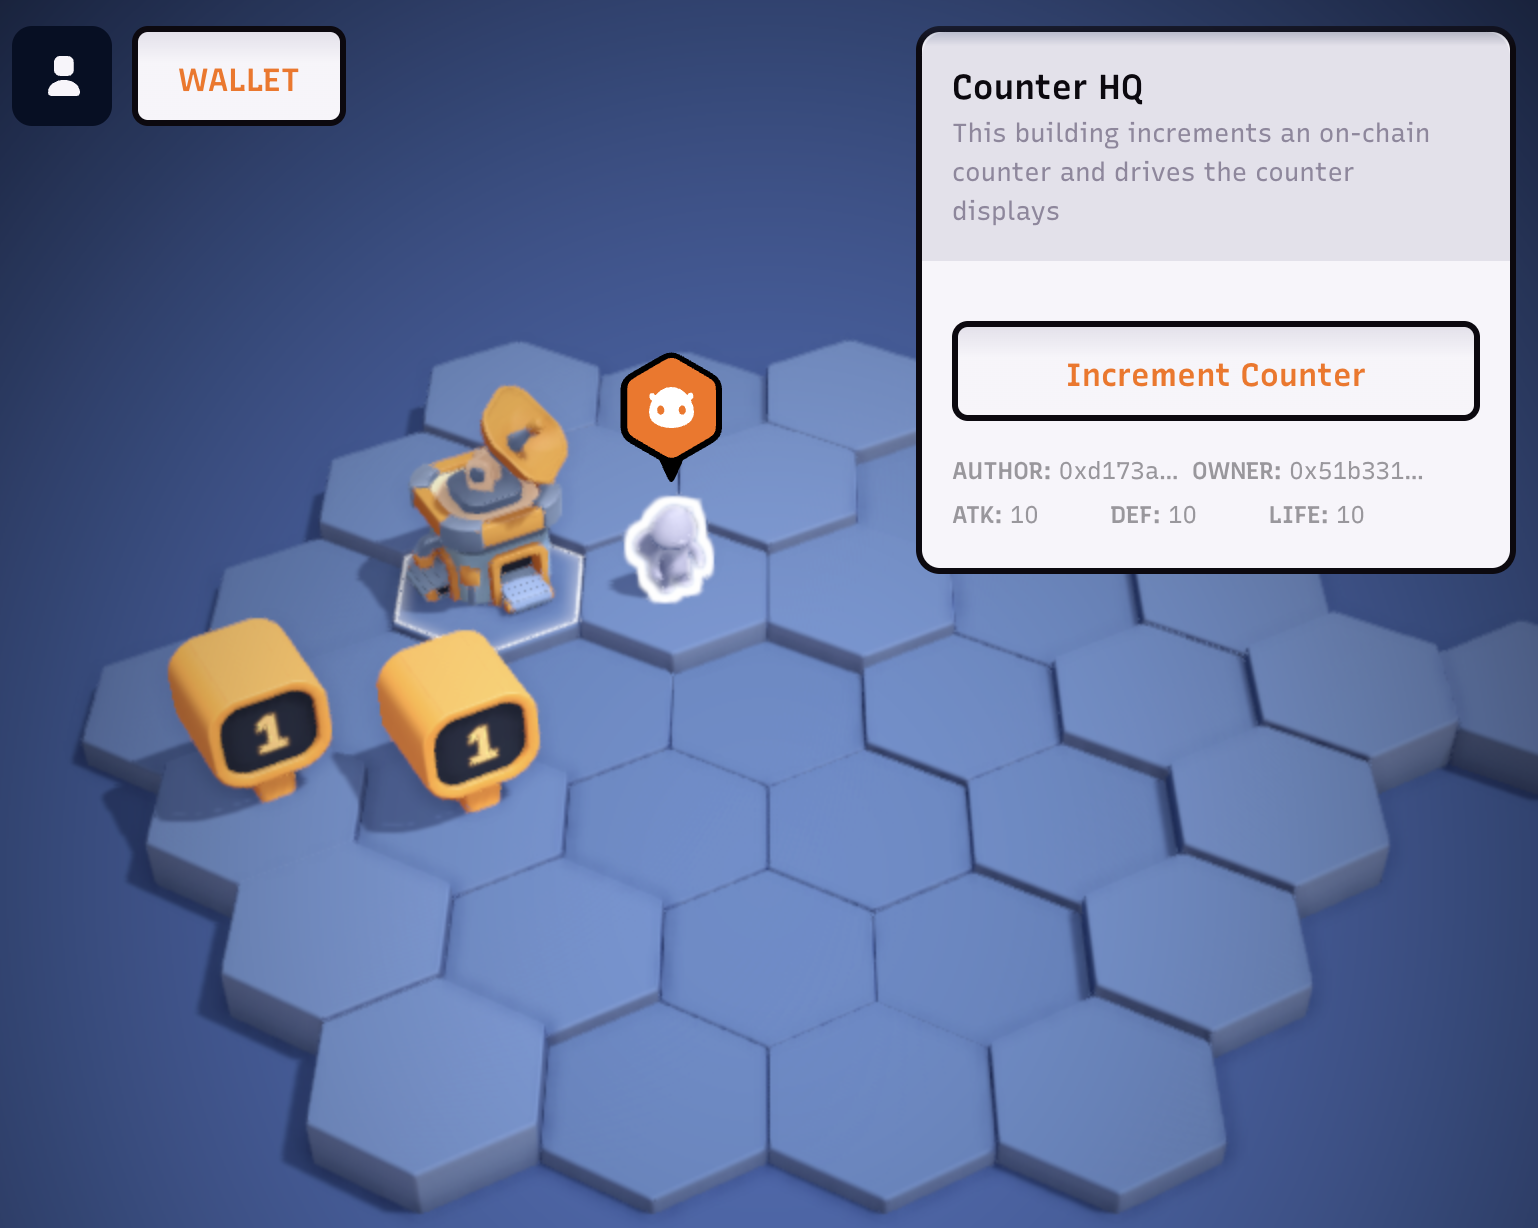
Browse to or refresh [localhost:3000/zones/1]([http://localhost:3000/zones/1]) and you should see the Counter HQ building along with the two Counter buildings on the map. By moving your Unit next to the HQ building and selecting it, you will be able to increment the counter via the building's plugin UI.
Export the tiles and save over `Locations.yaml`
Run the deploy command again which will redeploy all tiles and building definitions along with the locations of the buildings we have just chosen.
```bash
ds apply -n local -z 1 -k -R -f .
```
Browse to or refresh [localhost:3000/zones/1]([http://localhost:3000/zones/1]) and you should see the Counter HQ building along with the two Counter buildings on the map. By moving your Unit next to the HQ building and selecting it, you will be able to increment the counter via the building's plugin UI.

 # 10. Create a new type of building to start a countdown timer
First, make a `Countdown.js`, `Countdown.sol` and a `Countdown.yaml` file in the same folder as `Locations.yaml`.
Make each of the files like the following skeleton examples.
`Countdown.js`
```js
import ds from "downstream";
const BLOCK_TIME_SECS = 2;
export default async function update(state, block) {
const mobileUnit = getMobileUnit(state);
const buildings = state.world?.buildings || [];
const countdownHQ = getBuildingsByType(buildings, "Countdown HQ")[0];
const countdownBuildings = getBuildingsByType(
buildings,
"Countdown",
).filter(
(b) =>
distance(
b.location.tile.coords,
countdownHQ.location.tile.coords,
) <= 2,
);
const startTimer = (durationSecs) => {};
return {
version: 1,
map: [],
components: [
{
id: "countdown-HQ",
type: "building",
content: [
{
id: "default",
type: "inline",
html: ``,
buttons: [
{
text: "Start 30 second timer",
type: "action",
action: () => startTimer(30),
},
{
text: "Start 1 minute timer",
type: "action",
action: () => startTimer(60),
},
],
},
],
},
],
};
}
function getMobileUnit(state) {
return state?.selected?.mobileUnit;
}
const getBuildingsByType = (buildingsArray, type) => {
return buildingsArray.filter(
(building) =>
building.kind?.name?.value.toLowerCase().trim() ==
type.toLowerCase().trim(),
);
};
function distance(signedHexCoordsA, signedHexCoordsB) {
const coordA = signedHexCoordsA.map(hexToSignedDecimal);
const coordB = signedHexCoordsB.map(hexToSignedDecimal);
return Math.max(
Math.abs(coordA[0] - coordB[0]),
Math.abs(coordA[1] - coordB[1]),
Math.abs(coordA[2] - coordB[2]),
);
}
function hexToSignedDecimal(hex) {
if (hex.startsWith("0x")) {
hex = hex.substr(2);
}
let num = parseInt(hex, 16);
let bits = hex.length * 4;
let maxVal = Math.pow(2, bits);
// Check if the highest bit is set (negative number)
if (num >= maxVal / 2) {
num -= maxVal;
}
return num;
}
// -- Onchain data helpers --
function getDataInt(buildingInstance, key) {
var hexVal = getData(buildingInstance, key);
return typeof hexVal === "string" ? parseInt(hexVal, 16) : 0;
}
function getData(buildingInstance, key) {
return getKVPs(buildingInstance)[key];
}
function getKVPs(buildingInstance) {
return (buildingInstance.allData || []).reduce((kvps, data) => {
kvps[data.name] = data.value;
return kvps;
}, {});
}
```
`Countdown.sol`
```solidity
// SPDX-License-Identifier: UNLICENSED
pragma solidity ^0.8.13;
import {Game} from "cog/IGame.sol";
import {State} from "cog/IState.sol";
import {Schema} from "@ds/schema/Schema.sol";
import {Actions} from "@ds/actions/Actions.sol";
import {BuildingKind} from "@ds/ext/BuildingKind.sol";
using Schema for State;
contract CountdownHQ is BuildingKind {
function startTimer(uint256 endBlock) external {}
function use(Game ds, bytes24 buildingInstance, bytes24, /*actor*/ bytes calldata payload) public override {
if ((bytes4)(payload) == this.startTimer.selector) {
(uint256 endBlock) = abi.decode(payload[4:], (uint256));
_startTimer(ds, buildingInstance, endBlock);
}
}
function _startTimer(Game ds, bytes24 buildingInstance, uint256 endBlock) internal {}
}
```
`Countdown.yaml`
```yaml
kind: BuildingKind
spec:
name: Countdown HQ
description: "This building is an example of driving countdown buildings"
category: custom
model: 11-03
color: 0
contract:
file: ./CountdownHQ.sol
plugin:
file: ./CountdownHQ.js
alwaysActive: true
materials:
- name: Green Goo
quantity: 10
- name: Blue Goo
quantity: 10
- name: Red Goo
quantity: 10
```
# 11. Implement the start timer functions in both the plugin and contract
The implementation of the timer is essentially the case of setting a future block number for when the timer will end. The current block number is passed into the main `update` function which we can add to the number of blocks we want the timer to last for.
We can use the following code for the `startTimer` function
`CountdownHQ.js`
```js
const startTimer = (durationSecs) => {
const endBlock = block + durationSecs / BLOCK_TIME_SECS;
const payload = ds.encodeCall("function startTimer(uint256)", [endBlock]);
ds.dispatch({
name: "BUILDING_USE",
args: [countdownHQ.id, mobileUnit.id, payload],
});
};
```
This function is called from our button's `action` handler, which we already defined in the skeleton code earlier.
```js
return {
...
buttons: [
{
text: "Start 30 second timer",
type: "action",
action: () => startTimer(30),
},
{
text: "Start 1 minute timer",
type: "action",
action: () => startTimer(60),
},
],
....
};
```
Currently the plugin is calling the `CountdownHQ` contract however it isn't currently doing anything with the block number we have calculated for `endBlock` so let's fill in the body of `_startTimer` in the contract to set the start and end blocks as building data.
`CountdownHQ.sol`
```solidity
function _startTimer(Game ds, bytes24 buildingInstance, uint256 endBlock) internal {
ds.getDispatcher().dispatch(
abi.encodeCall(Actions.SET_DATA_ON_BUILDING, (buildingInstance, "startBlock", bytes32(block.number)))
);
ds.getDispatcher().dispatch(
abi.encodeCall(Actions.SET_DATA_ON_BUILDING, (buildingInstance, "endBlock", bytes32(endBlock)))
);
}
```
# 12. Displaying the countdown
We are currently setting start and end block numbers to act as the duration of our countdown however we are not displaying this countdown yet.
First, we need to define a countdown building which will act as the display. Like the `Counter` building, it is a `display` category of building but this time with a model of `countdown`. Create a `Countdown.yaml` file with the following definition
`Countdown.yaml`
```yaml
---
kind: BuildingKind
spec:
name: Countdown
description: "Countdown something!"
category: display
model: countdown
color: 4
materials:
- name: Green Goo
quantity: 25
- name: Blue Goo
quantity: 25
- name: Red Goo
quantity: 25
```
Next we need to drive this building's display. In the skeleton code we pasted earlier we are already searching for all `Countdown` buildings within a 2 tile radius however we still need to calculate the elapsed and remaining time and use map objects to update the displays.
Let's use the following code to get the `startBlock` and `endBlock` we saved to the `CountdownHQ` building instance and calculate the start and end times from them.
`CountdownHQ.js`
```js
const startBlock = getDataInt(countdownHQ, "startBlock");
const endBlock = getDataInt(countdownHQ, "endBlock");
const remainingBlocks = Math.max(endBlock - block, 0);
const elapsedBlocks = block - startBlock;
const remainingTimeMs = remainingBlocks * BLOCK_TIME_SECS * 1000;
const elapsedTimeMS = elapsedBlocks * BLOCK_TIME_SECS * 1000;
const now = Date.now();
const startTime = now - elapsedTimeMS;
const endTime = now + remainingTimeMs;
```
Lastly we need to map each of the countdown buildings to map objects that drive their displays
`CountdownHQ.js`
```js
map: countdownBuildings.flatMap((b) => {
// If the startBlock hasn't been set then we're in the initial state therefore we
// set the label text so the countdown displays '00:30' without ringing
return startBlock === 0
? [
{
type: "building",
id: `${b.id}`,
key: "labelText",
value: `00:30`,
},
]
: [
{
type: "building",
id: `${b.id}`,
key: "countdown-start",
value: `${startTime}`,
},
{
type: "building",
id: `${b.id}`,
key: "countdown-end",
value: `${endTime}`,
},
];
}),
```
# 13. Placing the CountdownHQ and two countdown buildings on the map
We have now implemented everything needed to start and display a countdown however we still need to place the buildings on the map. We can redeploy our map as before to be able to place our new buildings in the **tile fabricator** or if we know the coordinates we wish to place the buildings we can define the locations directly in yaml. To do this make a `Buildings.yaml` file in the same folder as `Locations.yaml` and paste the following.
`Buildings.yaml`
```yaml
---
kind: Building
spec:
name: Countdown HQ
location: [-7, 1, 6]
---
kind: Building
spec:
name: Countdown
location: [-6, -1, 7]
---
kind: Building
spec:
name: Countdown
location: [-5, -1, 6]
```
Now deploy the map as before and you should see our new buildings on the map.
```bash
ds apply -n local -z 1 -k -R -f .
```
# 10. Create a new type of building to start a countdown timer
First, make a `Countdown.js`, `Countdown.sol` and a `Countdown.yaml` file in the same folder as `Locations.yaml`.
Make each of the files like the following skeleton examples.
`Countdown.js`
```js
import ds from "downstream";
const BLOCK_TIME_SECS = 2;
export default async function update(state, block) {
const mobileUnit = getMobileUnit(state);
const buildings = state.world?.buildings || [];
const countdownHQ = getBuildingsByType(buildings, "Countdown HQ")[0];
const countdownBuildings = getBuildingsByType(
buildings,
"Countdown",
).filter(
(b) =>
distance(
b.location.tile.coords,
countdownHQ.location.tile.coords,
) <= 2,
);
const startTimer = (durationSecs) => {};
return {
version: 1,
map: [],
components: [
{
id: "countdown-HQ",
type: "building",
content: [
{
id: "default",
type: "inline",
html: ``,
buttons: [
{
text: "Start 30 second timer",
type: "action",
action: () => startTimer(30),
},
{
text: "Start 1 minute timer",
type: "action",
action: () => startTimer(60),
},
],
},
],
},
],
};
}
function getMobileUnit(state) {
return state?.selected?.mobileUnit;
}
const getBuildingsByType = (buildingsArray, type) => {
return buildingsArray.filter(
(building) =>
building.kind?.name?.value.toLowerCase().trim() ==
type.toLowerCase().trim(),
);
};
function distance(signedHexCoordsA, signedHexCoordsB) {
const coordA = signedHexCoordsA.map(hexToSignedDecimal);
const coordB = signedHexCoordsB.map(hexToSignedDecimal);
return Math.max(
Math.abs(coordA[0] - coordB[0]),
Math.abs(coordA[1] - coordB[1]),
Math.abs(coordA[2] - coordB[2]),
);
}
function hexToSignedDecimal(hex) {
if (hex.startsWith("0x")) {
hex = hex.substr(2);
}
let num = parseInt(hex, 16);
let bits = hex.length * 4;
let maxVal = Math.pow(2, bits);
// Check if the highest bit is set (negative number)
if (num >= maxVal / 2) {
num -= maxVal;
}
return num;
}
// -- Onchain data helpers --
function getDataInt(buildingInstance, key) {
var hexVal = getData(buildingInstance, key);
return typeof hexVal === "string" ? parseInt(hexVal, 16) : 0;
}
function getData(buildingInstance, key) {
return getKVPs(buildingInstance)[key];
}
function getKVPs(buildingInstance) {
return (buildingInstance.allData || []).reduce((kvps, data) => {
kvps[data.name] = data.value;
return kvps;
}, {});
}
```
`Countdown.sol`
```solidity
// SPDX-License-Identifier: UNLICENSED
pragma solidity ^0.8.13;
import {Game} from "cog/IGame.sol";
import {State} from "cog/IState.sol";
import {Schema} from "@ds/schema/Schema.sol";
import {Actions} from "@ds/actions/Actions.sol";
import {BuildingKind} from "@ds/ext/BuildingKind.sol";
using Schema for State;
contract CountdownHQ is BuildingKind {
function startTimer(uint256 endBlock) external {}
function use(Game ds, bytes24 buildingInstance, bytes24, /*actor*/ bytes calldata payload) public override {
if ((bytes4)(payload) == this.startTimer.selector) {
(uint256 endBlock) = abi.decode(payload[4:], (uint256));
_startTimer(ds, buildingInstance, endBlock);
}
}
function _startTimer(Game ds, bytes24 buildingInstance, uint256 endBlock) internal {}
}
```
`Countdown.yaml`
```yaml
kind: BuildingKind
spec:
name: Countdown HQ
description: "This building is an example of driving countdown buildings"
category: custom
model: 11-03
color: 0
contract:
file: ./CountdownHQ.sol
plugin:
file: ./CountdownHQ.js
alwaysActive: true
materials:
- name: Green Goo
quantity: 10
- name: Blue Goo
quantity: 10
- name: Red Goo
quantity: 10
```
# 11. Implement the start timer functions in both the plugin and contract
The implementation of the timer is essentially the case of setting a future block number for when the timer will end. The current block number is passed into the main `update` function which we can add to the number of blocks we want the timer to last for.
We can use the following code for the `startTimer` function
`CountdownHQ.js`
```js
const startTimer = (durationSecs) => {
const endBlock = block + durationSecs / BLOCK_TIME_SECS;
const payload = ds.encodeCall("function startTimer(uint256)", [endBlock]);
ds.dispatch({
name: "BUILDING_USE",
args: [countdownHQ.id, mobileUnit.id, payload],
});
};
```
This function is called from our button's `action` handler, which we already defined in the skeleton code earlier.
```js
return {
...
buttons: [
{
text: "Start 30 second timer",
type: "action",
action: () => startTimer(30),
},
{
text: "Start 1 minute timer",
type: "action",
action: () => startTimer(60),
},
],
....
};
```
Currently the plugin is calling the `CountdownHQ` contract however it isn't currently doing anything with the block number we have calculated for `endBlock` so let's fill in the body of `_startTimer` in the contract to set the start and end blocks as building data.
`CountdownHQ.sol`
```solidity
function _startTimer(Game ds, bytes24 buildingInstance, uint256 endBlock) internal {
ds.getDispatcher().dispatch(
abi.encodeCall(Actions.SET_DATA_ON_BUILDING, (buildingInstance, "startBlock", bytes32(block.number)))
);
ds.getDispatcher().dispatch(
abi.encodeCall(Actions.SET_DATA_ON_BUILDING, (buildingInstance, "endBlock", bytes32(endBlock)))
);
}
```
# 12. Displaying the countdown
We are currently setting start and end block numbers to act as the duration of our countdown however we are not displaying this countdown yet.
First, we need to define a countdown building which will act as the display. Like the `Counter` building, it is a `display` category of building but this time with a model of `countdown`. Create a `Countdown.yaml` file with the following definition
`Countdown.yaml`
```yaml
---
kind: BuildingKind
spec:
name: Countdown
description: "Countdown something!"
category: display
model: countdown
color: 4
materials:
- name: Green Goo
quantity: 25
- name: Blue Goo
quantity: 25
- name: Red Goo
quantity: 25
```
Next we need to drive this building's display. In the skeleton code we pasted earlier we are already searching for all `Countdown` buildings within a 2 tile radius however we still need to calculate the elapsed and remaining time and use map objects to update the displays.
Let's use the following code to get the `startBlock` and `endBlock` we saved to the `CountdownHQ` building instance and calculate the start and end times from them.
`CountdownHQ.js`
```js
const startBlock = getDataInt(countdownHQ, "startBlock");
const endBlock = getDataInt(countdownHQ, "endBlock");
const remainingBlocks = Math.max(endBlock - block, 0);
const elapsedBlocks = block - startBlock;
const remainingTimeMs = remainingBlocks * BLOCK_TIME_SECS * 1000;
const elapsedTimeMS = elapsedBlocks * BLOCK_TIME_SECS * 1000;
const now = Date.now();
const startTime = now - elapsedTimeMS;
const endTime = now + remainingTimeMs;
```
Lastly we need to map each of the countdown buildings to map objects that drive their displays
`CountdownHQ.js`
```js
map: countdownBuildings.flatMap((b) => {
// If the startBlock hasn't been set then we're in the initial state therefore we
// set the label text so the countdown displays '00:30' without ringing
return startBlock === 0
? [
{
type: "building",
id: `${b.id}`,
key: "labelText",
value: `00:30`,
},
]
: [
{
type: "building",
id: `${b.id}`,
key: "countdown-start",
value: `${startTime}`,
},
{
type: "building",
id: `${b.id}`,
key: "countdown-end",
value: `${endTime}`,
},
];
}),
```
# 13. Placing the CountdownHQ and two countdown buildings on the map
We have now implemented everything needed to start and display a countdown however we still need to place the buildings on the map. We can redeploy our map as before to be able to place our new buildings in the **tile fabricator** or if we know the coordinates we wish to place the buildings we can define the locations directly in yaml. To do this make a `Buildings.yaml` file in the same folder as `Locations.yaml` and paste the following.
`Buildings.yaml`
```yaml
---
kind: Building
spec:
name: Countdown HQ
location: [-7, 1, 6]
---
kind: Building
spec:
name: Countdown
location: [-6, -1, 7]
---
kind: Building
spec:
name: Countdown
location: [-5, -1, 6]
```
Now deploy the map as before and you should see our new buildings on the map.
```bash
ds apply -n local -z 1 -k -R -f .
```