 ## 1. Setup
Follow steps 1 through 4 of `tutorial-room-1` to get started. This will walk you through:
- Deploying the game
- Spawning a unit
- Creating a map
- Deploying new tiles
https://github.com/playmint/ds/blob/main/contracts/src/maps/tutorial-room-1/README.md
## 1. Setup
Follow steps 1 through 4 of `tutorial-room-1` to get started. This will walk you through:
- Deploying the game
- Spawning a unit
- Creating a map
- Deploying new tiles
https://github.com/playmint/ds/blob/main/contracts/src/maps/tutorial-room-1/README.md
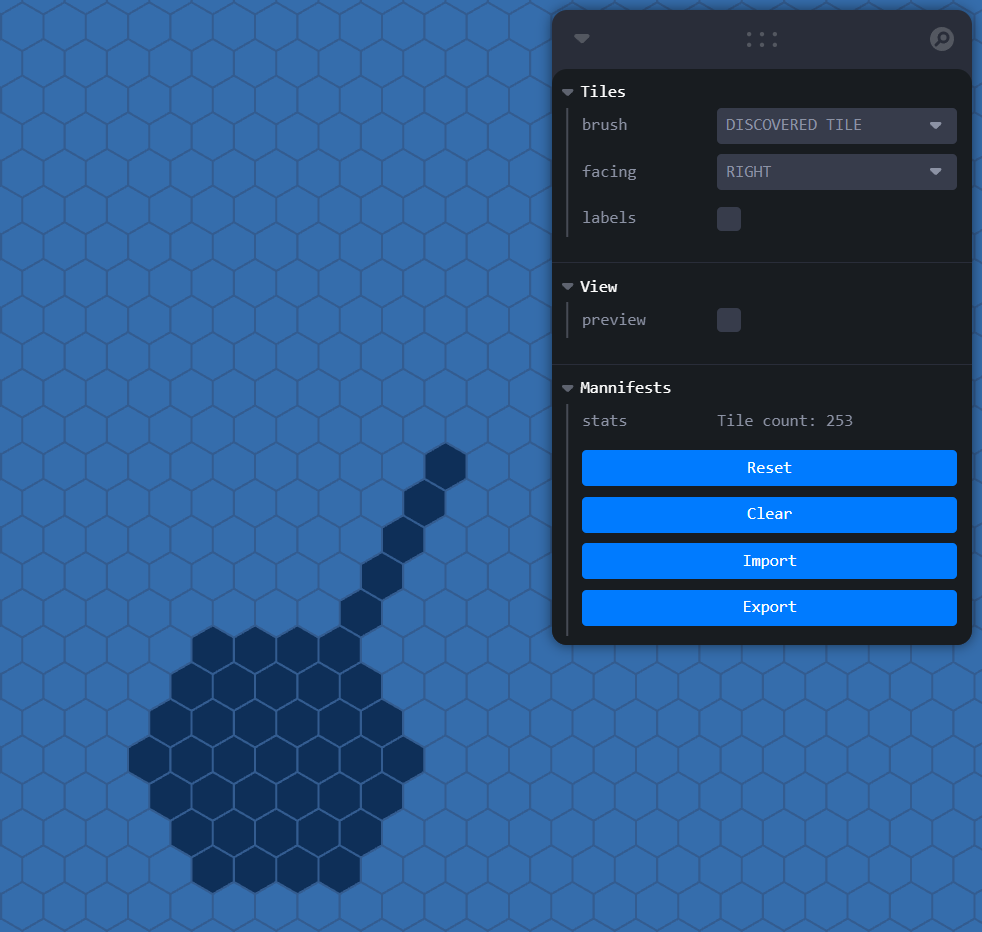 ## Let's create the files
If you're following along, you should copy the `.yaml` files from `tutorial-room-4` into your own map. If you'd like to learn more about how we use the `.yaml` files, please review [tutorial-room-1](https://github.com/playmint/ds/blob/main/contracts/src/maps/tutorial-room-1/README.md)
## 2. Changing Tile Colours
### Create file: DiscoCentre.js
Let's work on the `"Disco Centre"` we defined in the `.yaml`.
To start with, make a `boolean` variable that we'll use to allow the player to change the behaviour of the tiles:
```js
let disco = false;
```
We're also going to define some `const`(s) to be used as:
- The radius
```js
const TILE_COLOUR_DISTANCE = 3;
```
- The tile ID prefix
```js
const TILE_ID_PREFIX = "0xe5a62ffc";
```
- A function to allow the player to change the state of the "disco"
```js
const toggleDisco = () => {
disco = !disco;
};
```
Now in the update function:
```js
export default async function update(state) {
...
}
```
Find the `"Disco Centre"`:
```js
const discoCentre = state.world?.buildings.find(
(b) => b.kind?.name?.value == "Disco Centre",
);
if (!discoCentre){
return;
}
```
Since this is an `alwaysActive` plugin, we `return` with nothing if we can't find the `discoCentre` in the map. Otherwise, it would be trying to run the rest of the logic, even if the building can't be found in the world.
Since the output `map` and buttons shown to the player in the plugin UI will change depending on the state of the Disco Centre, we're going to dynamically build these arrays:
```js
const map = [];
const buttons = [];
```
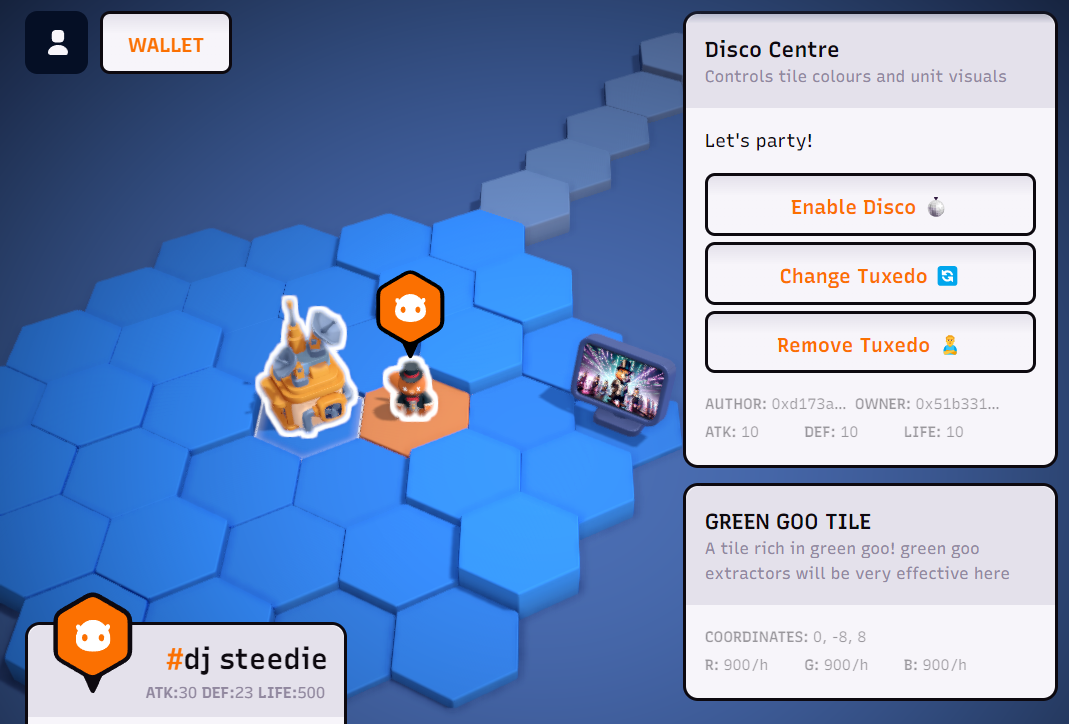
First, we'll push an "Enable"/"Disable" button which will call the action `toggleDisco`:
```js
buttons.push({
text: `${disco ? 'Disable' : 'Enable'} Disco 🪩`,
type: 'action',
action: toggleDisco,
disabled: false,
});
```
For the rest of the logic, we want to make sure our mobile unit is selected:
```js
const mobileUnit = getMobileUnit(state);
const unitTileId = null;
if (mobileUnit){
...
```
Now we need:
```js
const buildingTileCoords = getTileCoords(discoCentre?.location?.tile?.coords);
const unitTileCoords = getTileCoords(mobileUnit?.nextLocation?.tile?.coords);
const unitDistanceFromBuilding = distance(buildingTileCoords, unitTileCoords);
```
- `buildingTileCoords` will be used so that when getting tiles within a radius, it will be relative to the building position.
- `unitTileCoords` will be used so we can implement logic that relates to the unit position.
- `unitDistanceFromBuilding` will be used to make sure only the tile under the unit within the range will be changed.
Please review the `tutorial-room-4` example code to see what the helper functions are doing.
### Now let's start pushing tile colours to the map
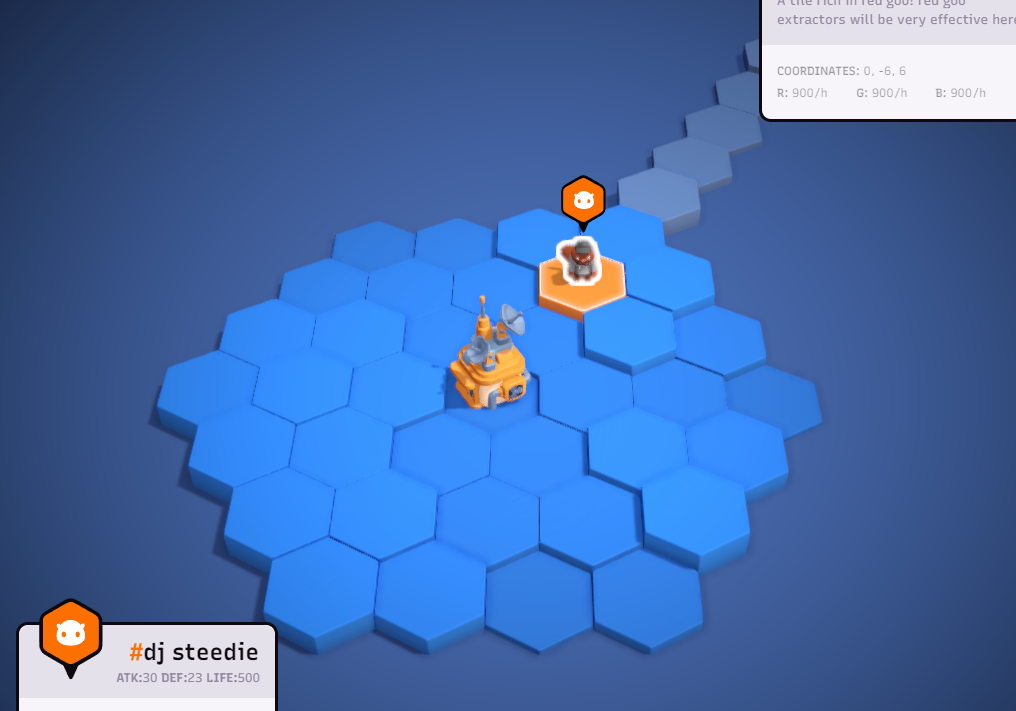
Let's make it so the tile the user is standing on turns orange!
```js
if (unitDistanceFromBuilding <= TILE_COLOUR_DISTANCE) {
// Orange tile under the unit
map.push({
type: 'tile',
key: 'color',
id: getTileIdFromCoords(unitTileCoords),
value: '#f58c02',
});
}
```
Note that `value` accepts any hex colour value! In this case, we've used an orange colour.
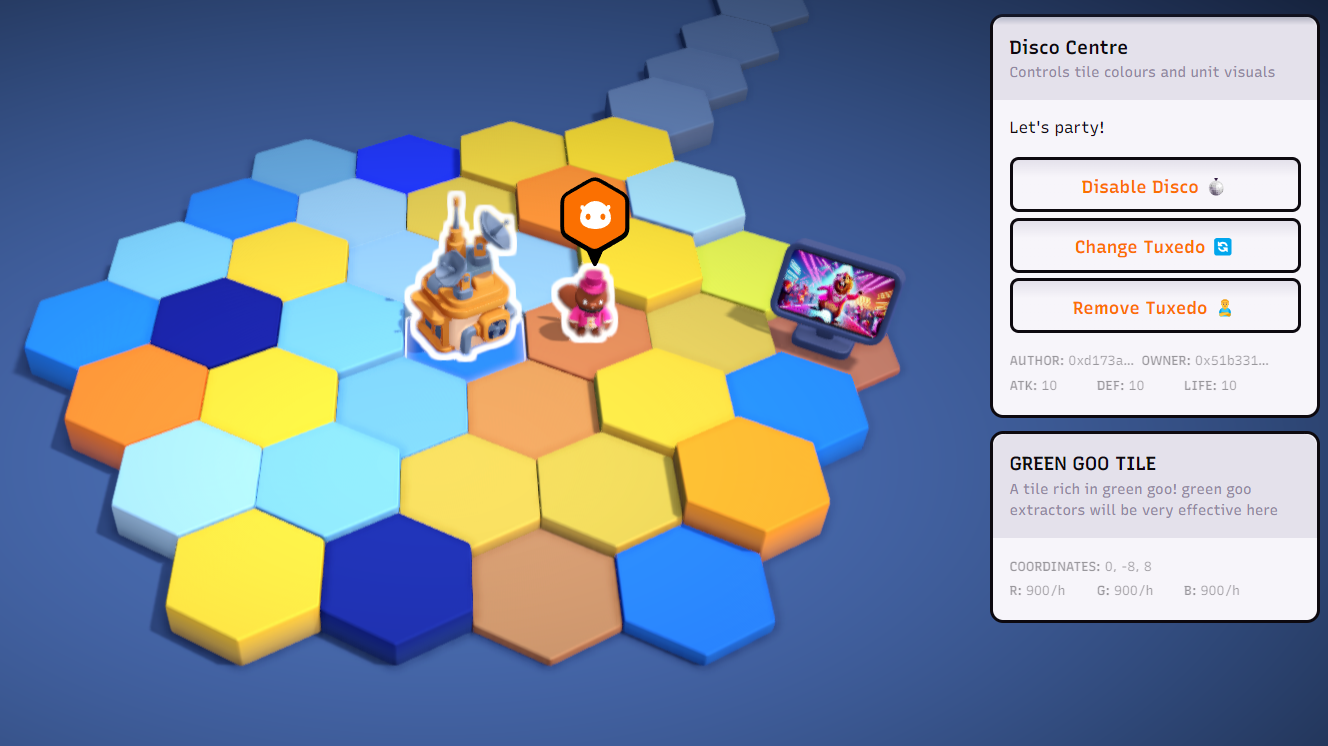
Now, let's implement the "disco" tiles!
Since we already implemented the function that allows the player to toggle the `disco` `boolean`, we can use that to change the logic for how the tiles behave:
```js
if (disco) {
getTilesInRange(discoCentre, TILE_COLOUR_DISTANCE).forEach((t) => {
if (t !== unitTileId) {
map.push(
{
type: "tile",
key: "color",
id: `${t}`,
value: themedRandomColour(),
}
);
}
});
}else{
getTilesInRange(discoCentre, TILE_COLOUR_DISTANCE).forEach((t) => {
if (t !== unitTileId) {
map.push(
{
type: "tile",
key: "color",
id: `${t}`,
value: '#3386d4',
}
);
}
});
}
```
The helper function `getTilesInRange` is returning a list of tile IDs. We make sure the tile ID isn't the one the player is standing on, otherwise we'd overwrite the orange colour we set before.
As you can see, if `disco` is true, we're giving each tile a random (themed) colour.
`themedRandomColour()` simply returns a random hex string from a predefined array:
```js
function themedRandomColour(){
const colours = ['#0000FF', '#1E90FF', '#ADD8E6', '#87CEEB', '#00008B', '#FFD700', '#FFFF00', '#FFA500', '#FF8C00'];
return colours[Math.floor(Math.random() * colours.length)];
}
```
if `disco` is false, it makes each tile (except for the one the unit is standing on) blue.
And for colouring the tiles, that's it! Once you've passed in the `map` array we pushed to, to the `map`, feel free to [give it a test run](https://github.com/playmint/ds/blob/main/contracts/src/maps/tutorial-room-1/README.md#8-deploy-the-whole-map-folder)!
```js
return {
version: 1,
map: map,
...
```
## Let's create the files
If you're following along, you should copy the `.yaml` files from `tutorial-room-4` into your own map. If you'd like to learn more about how we use the `.yaml` files, please review [tutorial-room-1](https://github.com/playmint/ds/blob/main/contracts/src/maps/tutorial-room-1/README.md)
## 2. Changing Tile Colours
### Create file: DiscoCentre.js
Let's work on the `"Disco Centre"` we defined in the `.yaml`.
To start with, make a `boolean` variable that we'll use to allow the player to change the behaviour of the tiles:
```js
let disco = false;
```
We're also going to define some `const`(s) to be used as:
- The radius
```js
const TILE_COLOUR_DISTANCE = 3;
```
- The tile ID prefix
```js
const TILE_ID_PREFIX = "0xe5a62ffc";
```
- A function to allow the player to change the state of the "disco"
```js
const toggleDisco = () => {
disco = !disco;
};
```
Now in the update function:
```js
export default async function update(state) {
...
}
```
Find the `"Disco Centre"`:
```js
const discoCentre = state.world?.buildings.find(
(b) => b.kind?.name?.value == "Disco Centre",
);
if (!discoCentre){
return;
}
```
Since this is an `alwaysActive` plugin, we `return` with nothing if we can't find the `discoCentre` in the map. Otherwise, it would be trying to run the rest of the logic, even if the building can't be found in the world.
Since the output `map` and buttons shown to the player in the plugin UI will change depending on the state of the Disco Centre, we're going to dynamically build these arrays:
```js
const map = [];
const buttons = [];
```
First, we'll push an "Enable"/"Disable" button which will call the action `toggleDisco`:
```js
buttons.push({
text: `${disco ? 'Disable' : 'Enable'} Disco 🪩`,
type: 'action',
action: toggleDisco,
disabled: false,
});
```
For the rest of the logic, we want to make sure our mobile unit is selected:
```js
const mobileUnit = getMobileUnit(state);
const unitTileId = null;
if (mobileUnit){
...
```
Now we need:
```js
const buildingTileCoords = getTileCoords(discoCentre?.location?.tile?.coords);
const unitTileCoords = getTileCoords(mobileUnit?.nextLocation?.tile?.coords);
const unitDistanceFromBuilding = distance(buildingTileCoords, unitTileCoords);
```
- `buildingTileCoords` will be used so that when getting tiles within a radius, it will be relative to the building position.
- `unitTileCoords` will be used so we can implement logic that relates to the unit position.
- `unitDistanceFromBuilding` will be used to make sure only the tile under the unit within the range will be changed.
Please review the `tutorial-room-4` example code to see what the helper functions are doing.
### Now let's start pushing tile colours to the map
Let's make it so the tile the user is standing on turns orange!
```js
if (unitDistanceFromBuilding <= TILE_COLOUR_DISTANCE) {
// Orange tile under the unit
map.push({
type: 'tile',
key: 'color',
id: getTileIdFromCoords(unitTileCoords),
value: '#f58c02',
});
}
```
Note that `value` accepts any hex colour value! In this case, we've used an orange colour.
Now, let's implement the "disco" tiles!
Since we already implemented the function that allows the player to toggle the `disco` `boolean`, we can use that to change the logic for how the tiles behave:
```js
if (disco) {
getTilesInRange(discoCentre, TILE_COLOUR_DISTANCE).forEach((t) => {
if (t !== unitTileId) {
map.push(
{
type: "tile",
key: "color",
id: `${t}`,
value: themedRandomColour(),
}
);
}
});
}else{
getTilesInRange(discoCentre, TILE_COLOUR_DISTANCE).forEach((t) => {
if (t !== unitTileId) {
map.push(
{
type: "tile",
key: "color",
id: `${t}`,
value: '#3386d4',
}
);
}
});
}
```
The helper function `getTilesInRange` is returning a list of tile IDs. We make sure the tile ID isn't the one the player is standing on, otherwise we'd overwrite the orange colour we set before.
As you can see, if `disco` is true, we're giving each tile a random (themed) colour.
`themedRandomColour()` simply returns a random hex string from a predefined array:
```js
function themedRandomColour(){
const colours = ['#0000FF', '#1E90FF', '#ADD8E6', '#87CEEB', '#00008B', '#FFD700', '#FFFF00', '#FFA500', '#FF8C00'];
return colours[Math.floor(Math.random() * colours.length)];
}
```
if `disco` is false, it makes each tile (except for the one the unit is standing on) blue.
And for colouring the tiles, that's it! Once you've passed in the `map` array we pushed to, to the `map`, feel free to [give it a test run](https://github.com/playmint/ds/blob/main/contracts/src/maps/tutorial-room-1/README.md#8-deploy-the-whole-map-folder)!
```js
return {
version: 1,
map: map,
...
```
 ## 3. Changing Unit Model
Changing the unit model follows a similar process to changing the tile colours.
Before the update function, declare a `boolean`: dressed, and a `number`: selectedTux:
```js
let dressed = false;
let selectedTux = 1;
```
Make the function `toggleDressed()` to give the player control to change their unit's model:
```js
const toggleDressed = () => {
dressed = !dressed;
};
```
And we'll use another function to change the variation of the model:
```js
const changeTux = () => {
selectedTux = selectedTux % 2 + 1;
};
```
Next, the logic should be handled inside the `if (mobileUnit)` statement:
```js
if (dressed){
if (unitDistanceFromBuilding <= TILE_COLOUR_DISTANCE){
// Change unit model
map.push({
type: "unit",
key: "model",
id: mobileUnit.id,
value: `Unit_Tuxedo_0${selectedTux}`,
});
}
// Add button to change tuxedo model variation
buttons.push({
text: `Change Tuxedo 🔄`,
type: 'action',
action: changeTux,
disabled: false,
});
}
```
As you can see here, we add a button giving the player the option to change the variation of tuxedo model they're wearing if they have `dressed` toggled on. In our example, it's switching between `"Unit_Tuxedo_01"`, and `"Unit_Tuxedo_02"`.
outside of the `if (dressed)` statement, add the option to allow them to wear/remove the tuxedo:
```js
buttons.push({
text: dressed ? 'Remove Tuxedo 🙎♂️' : 'Wear Tuxedo 🤵',
type: 'action',
action: toggleDressed,
disabled: false,
});
```
That's the `Disco Centre` logic done! Remember to pass in the `map` and `buttons` arrays in the `return` block:
```js
return {
version: 1,
map: map,
components: [
{
id: 'colour-controller',
type: 'building',
content: [
{
id: 'default',
type: 'inline',
html: '
## 3. Changing Unit Model
Changing the unit model follows a similar process to changing the tile colours.
Before the update function, declare a `boolean`: dressed, and a `number`: selectedTux:
```js
let dressed = false;
let selectedTux = 1;
```
Make the function `toggleDressed()` to give the player control to change their unit's model:
```js
const toggleDressed = () => {
dressed = !dressed;
};
```
And we'll use another function to change the variation of the model:
```js
const changeTux = () => {
selectedTux = selectedTux % 2 + 1;
};
```
Next, the logic should be handled inside the `if (mobileUnit)` statement:
```js
if (dressed){
if (unitDistanceFromBuilding <= TILE_COLOUR_DISTANCE){
// Change unit model
map.push({
type: "unit",
key: "model",
id: mobileUnit.id,
value: `Unit_Tuxedo_0${selectedTux}`,
});
}
// Add button to change tuxedo model variation
buttons.push({
text: `Change Tuxedo 🔄`,
type: 'action',
action: changeTux,
disabled: false,
});
}
```
As you can see here, we add a button giving the player the option to change the variation of tuxedo model they're wearing if they have `dressed` toggled on. In our example, it's switching between `"Unit_Tuxedo_01"`, and `"Unit_Tuxedo_02"`.
outside of the `if (dressed)` statement, add the option to allow them to wear/remove the tuxedo:
```js
buttons.push({
text: dressed ? 'Remove Tuxedo 🙎♂️' : 'Wear Tuxedo 🤵',
type: 'action',
action: toggleDressed,
disabled: false,
});
```
That's the `Disco Centre` logic done! Remember to pass in the `map` and `buttons` arrays in the `return` block:
```js
return {
version: 1,
map: map,
components: [
{
id: 'colour-controller',
type: 'building',
content: [
{
id: 'default',
type: 'inline',
html: 'Let\'s party!
', buttons: buttons, }, ], }, ], }; ```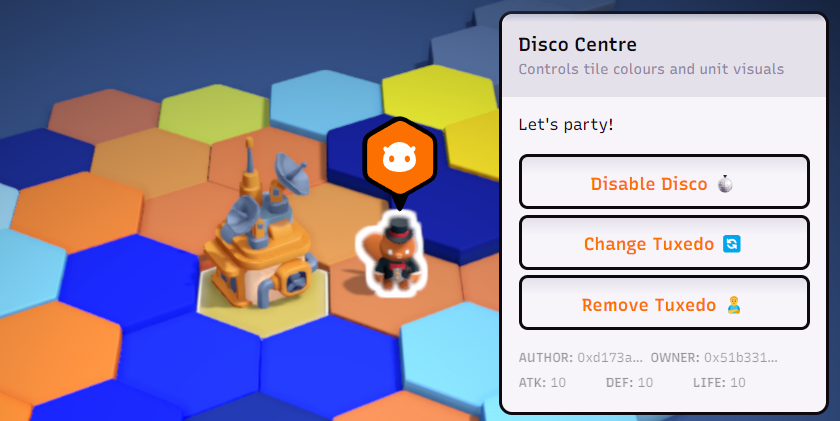 ## 4. Disco Billboard
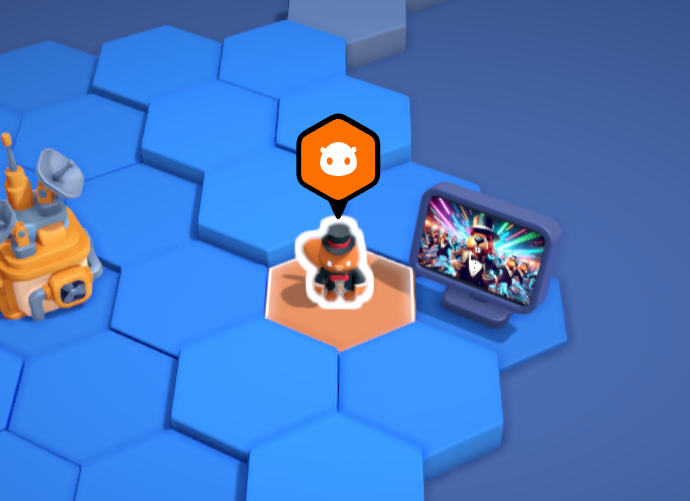
Let's create a billboard to display images in the world.
### Create file: DiscoBillboard.js
In this example, we're hosting a set of images displaying beavers at a disco!
```js
const images = [
'https://assets.downstream.game/examples/disco-beaver-0.jpeg',
'https://assets.downstream.game/examples/disco-beaver-1.jpeg',
'https://assets.downstream.game/examples/disco-beaver-2.jpeg',
'https://assets.downstream.game/examples/disco-beaver-3.jpeg',
'https://assets.downstream.game/examples/disco-beaver-4.jpeg',
'https://assets.downstream.game/examples/disco-beaver-5.jpeg',
'https://assets.downstream.game/examples/disco-beaver-6.jpeg',
'https://assets.downstream.game/examples/disco-beaver-7.jpeg',
];
```
When the plugin loads, we can select a random image:
```js
let selectedImg = Math.floor(Math.random() * images.length) + 1;
```
If we want the user to be able to change the image, we can made a function to be called when a button is clicked:
```js
const changeImg = () => {
selectedImg = (selectedImg + 1) % images.length;
};
```
In the `update` function, we should search the world for the `"Disco Billboard"`:
```js
const discoBillboard = state.world?.buildings.find(
(b) => b.kind?.name?.value == "Disco Billboard",
);
if (!discoBillboard){
return;
}
```
Since we're not using as much logic here as we did for the Disco Centre, we can just define the `map` is a `const`:
```js
const map = [
{
type: "building",
key: "image",
id: `${discoBillboard.id}`,
value: images[selectedImg],
},
];
```
- For the ID, we're using the billboard we found in the world.
- For the value, we pass in an image URL.
We'll also define `buttons` as a `const` array of `map`(s):
```js
const buttons = [
{
text: `Change Billboard Image 🔄`,
type: 'action',
action: changeImg,
disabled: false,
},
];
```
The `action` is calling the function we created to iterate through the image URL array.
Be sure to include these `map`, and `buttons` properties your `update` function's `return` block.
## 4. Disco Billboard
Let's create a billboard to display images in the world.
### Create file: DiscoBillboard.js
In this example, we're hosting a set of images displaying beavers at a disco!
```js
const images = [
'https://assets.downstream.game/examples/disco-beaver-0.jpeg',
'https://assets.downstream.game/examples/disco-beaver-1.jpeg',
'https://assets.downstream.game/examples/disco-beaver-2.jpeg',
'https://assets.downstream.game/examples/disco-beaver-3.jpeg',
'https://assets.downstream.game/examples/disco-beaver-4.jpeg',
'https://assets.downstream.game/examples/disco-beaver-5.jpeg',
'https://assets.downstream.game/examples/disco-beaver-6.jpeg',
'https://assets.downstream.game/examples/disco-beaver-7.jpeg',
];
```
When the plugin loads, we can select a random image:
```js
let selectedImg = Math.floor(Math.random() * images.length) + 1;
```
If we want the user to be able to change the image, we can made a function to be called when a button is clicked:
```js
const changeImg = () => {
selectedImg = (selectedImg + 1) % images.length;
};
```
In the `update` function, we should search the world for the `"Disco Billboard"`:
```js
const discoBillboard = state.world?.buildings.find(
(b) => b.kind?.name?.value == "Disco Billboard",
);
if (!discoBillboard){
return;
}
```
Since we're not using as much logic here as we did for the Disco Centre, we can just define the `map` is a `const`:
```js
const map = [
{
type: "building",
key: "image",
id: `${discoBillboard.id}`,
value: images[selectedImg],
},
];
```
- For the ID, we're using the billboard we found in the world.
- For the value, we pass in an image URL.
We'll also define `buttons` as a `const` array of `map`(s):
```js
const buttons = [
{
text: `Change Billboard Image 🔄`,
type: 'action',
action: changeImg,
disabled: false,
},
];
```
The `action` is calling the function we created to iterate through the image URL array.
Be sure to include these `map`, and `buttons` properties your `update` function's `return` block.
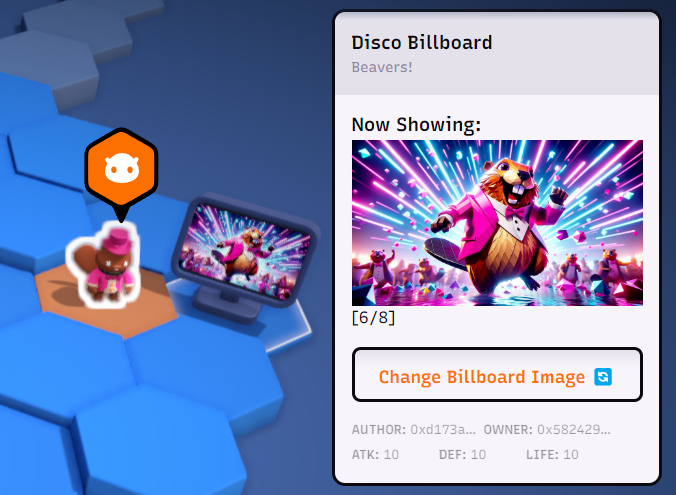
 ## 5. Custom Plugin UI
We can implement HTML into our plugin UI. This is a good way of creating custom experiences for players. In our example, we'll display what image is being shown on the billboard:
```js
html: `
## 5. Custom Plugin UI
We can implement HTML into our plugin UI. This is a good way of creating custom experiences for players. In our example, we'll display what image is being shown on the billboard:
```js
html: `
 ## You did it, good job! 🥳
At this point, everything should be working! Feel free to refer to the example files to learn more about the implementation.
## You did it, good job! 🥳
At this point, everything should be working! Feel free to refer to the example files to learn more about the implementation.