# Downstream Game Creation Tutorial 1
## Aim
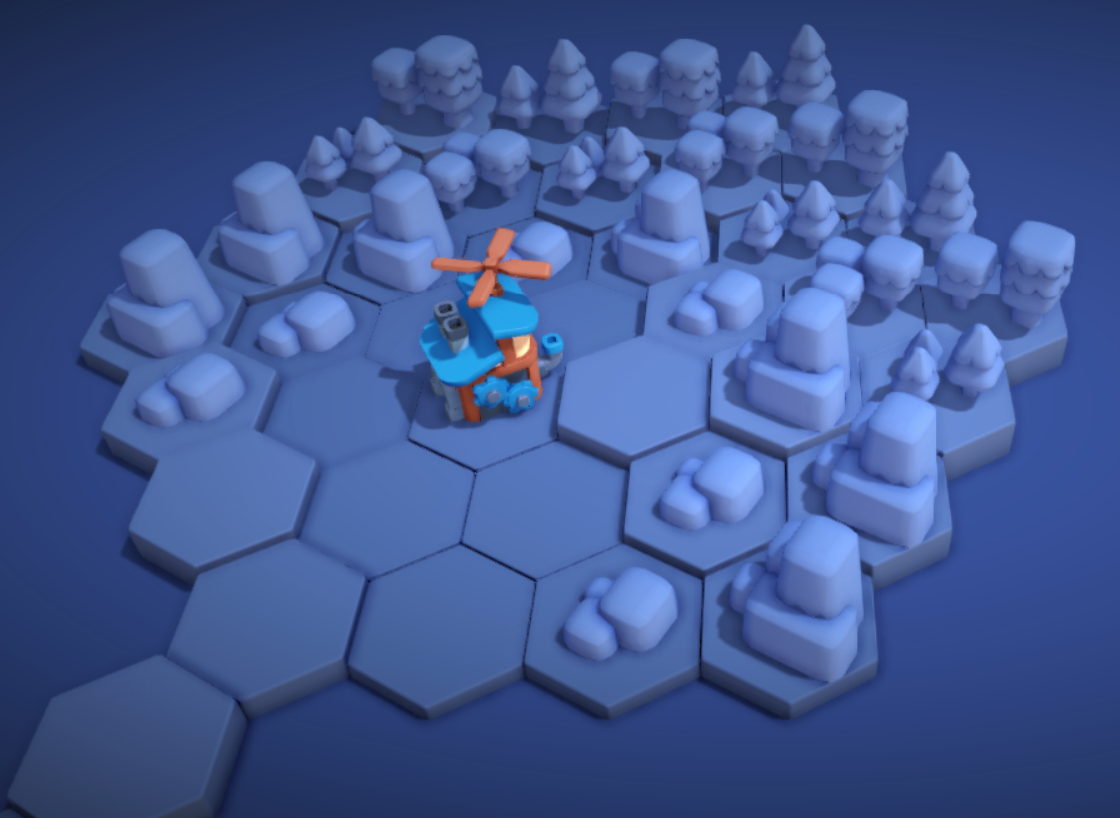
We will follow the steps below to create a simple downstream map, with your own tile layout and your own factory building.
Once complete, you will have used the core Downstream tools to create a map that looks like this when played:
 [Watch a video run through of this tutorial.](https://drive.google.com/file/d/1C6Zou1v_ad8OlvZjKmixuvBBLpVJvkRZ/view?usp=drive_link)
## Prerequisites
- This repository cloned to your desktop. (Instructions in the top [readme](../../../../README.md).)
- [Docker Desktop](https://docs.docker.com/get-docker/)
- [npm](https://docs.npmjs.com/downloading-and-installing-node-js-and-npm) or [npm Windows](https://nodejs.org/en/download/)
## 1. Deploy the game
First, deploy an instance of Downstream locally using Docker.
From a terminal in the repository root run:
```bash
docker compose up --pull=always
```
After some time (this could take up to 5 minutes), you should see "ready" in the terminal output:
contracts-1 | +-------+
contracts-1 | | ready |
contracts-1 | +-------+
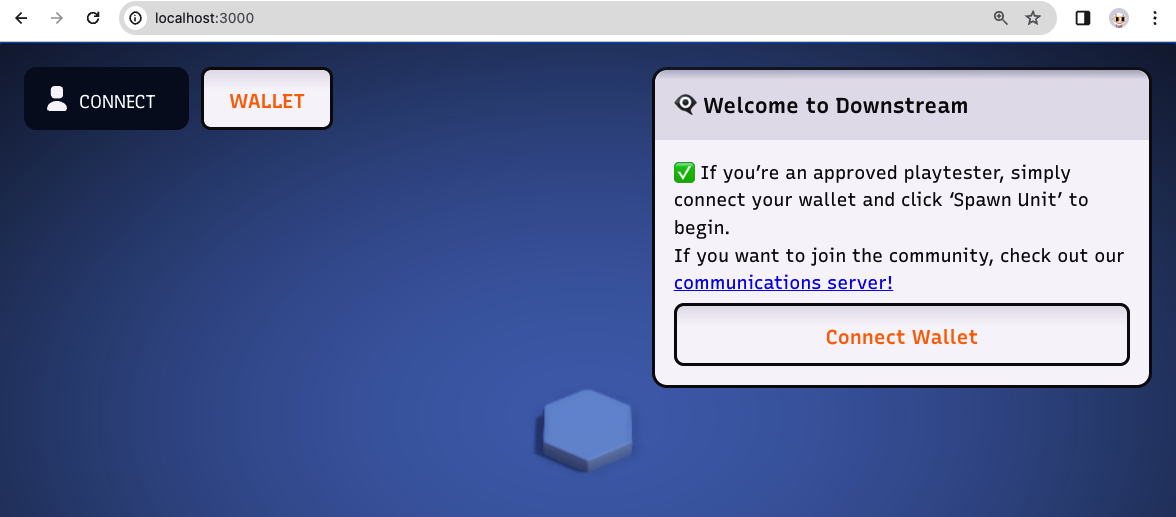
You can now open a web browser and navigate to [http://localhost:3000] to load the front page.
From here you can select a zone, select Zone 1 as it will be owned by the deployer.
You should see a blue world, with a single hex tile in the center and the **Welcome to Zone 1** dialogue box:
[Watch a video run through of this tutorial.](https://drive.google.com/file/d/1C6Zou1v_ad8OlvZjKmixuvBBLpVJvkRZ/view?usp=drive_link)
## Prerequisites
- This repository cloned to your desktop. (Instructions in the top [readme](../../../../README.md).)
- [Docker Desktop](https://docs.docker.com/get-docker/)
- [npm](https://docs.npmjs.com/downloading-and-installing-node-js-and-npm) or [npm Windows](https://nodejs.org/en/download/)
## 1. Deploy the game
First, deploy an instance of Downstream locally using Docker.
From a terminal in the repository root run:
```bash
docker compose up --pull=always
```
After some time (this could take up to 5 minutes), you should see "ready" in the terminal output:
contracts-1 | +-------+
contracts-1 | | ready |
contracts-1 | +-------+
You can now open a web browser and navigate to [http://localhost:3000] to load the front page.
From here you can select a zone, select Zone 1 as it will be owned by the deployer.
You should see a blue world, with a single hex tile in the center and the **Welcome to Zone 1** dialogue box:
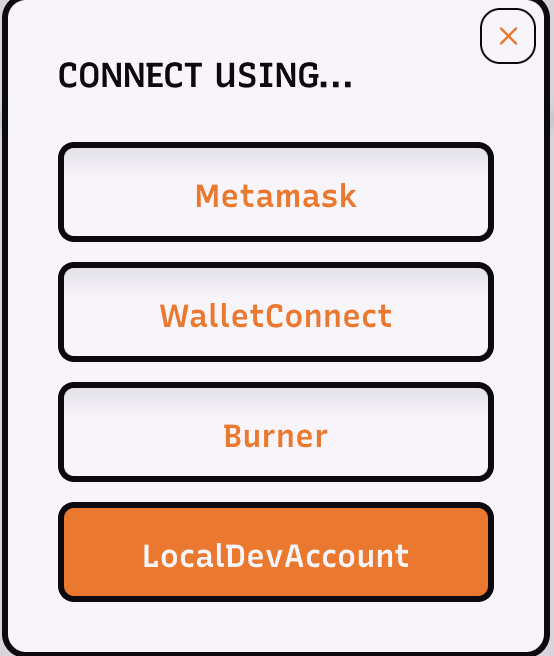
 ## 2. Enter the Zone and Spawn a Unit
First click the **Connect Wallet** button.
Then, select **LocalDevAccount**.
Then visit Zone 1 (Zone 1 will be owned by the LocalDevAccount)
## 2. Enter the Zone and Spawn a Unit
First click the **Connect Wallet** button.
Then, select **LocalDevAccount**.
Then visit Zone 1 (Zone 1 will be owned by the LocalDevAccount)
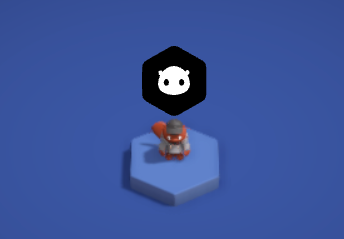
 You can now click "Spawn Unit" and you should see your Unit on the center tile:
 ## 3. Create a map
There is no where for the Unit to go so we will now expand the world by creating some tiles.
First, open the the **tile-fabricator**, by opening a web browser and navigating to [http://localhost:3000/tile-fabricator].
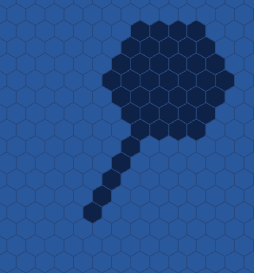
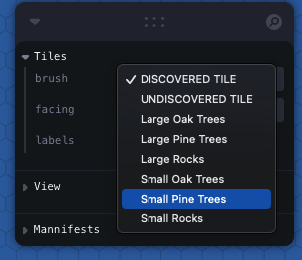
Now, draw a map design:
- Left click each tile that you want on your map.
- Zoom in and out with mouse scroll.
- To remove a tile, select **UNDISCOVERED TILE** from the brush drop down and left click to remove tiles.
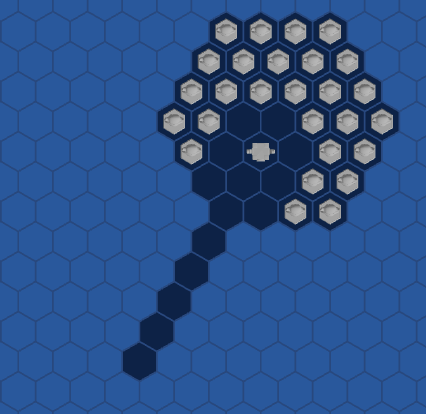
- Draw a map that looks like this:
## 3. Create a map
There is no where for the Unit to go so we will now expand the world by creating some tiles.
First, open the the **tile-fabricator**, by opening a web browser and navigating to [http://localhost:3000/tile-fabricator].
Now, draw a map design:
- Left click each tile that you want on your map.
- Zoom in and out with mouse scroll.
- To remove a tile, select **UNDISCOVERED TILE** from the brush drop down and left click to remove tiles.
- Draw a map that looks like this:
 Once you are happy, export the tiles manifest file:
- Select **Export**.
- Find the downloaded file. It will be named something like `20d6a4ed-bb78-4774-8c0a-50c28451a380.yml`.
Finally, create a new folder in your desktop. This folder is your 'map' and will contain manifests defining tiles, buildings, items and more. For now we'll just copy the new tiles in:
- Create a folder like /Tutorial1Map
- Copy the exported tiles manifest into the folder.
- Rename it to 'Locations.yaml'.
## 4. Deploy the new tiles
We will use the Downstream CLI to deploy our newly created tiles to our local Downstream instance.
First, install the CLI. From a terminal run:
```bash
npm i -g @playmint/ds-cli
```
Check it is installed from any terminal folder by running:
```bash
ds help
```
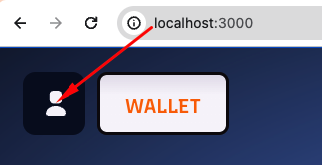
Now copy your Burner private key from Downstream:
- Browse to [localhost:3000]([http://localhost:3000]).
- Click the player icon at the top left.
Once you are happy, export the tiles manifest file:
- Select **Export**.
- Find the downloaded file. It will be named something like `20d6a4ed-bb78-4774-8c0a-50c28451a380.yml`.
Finally, create a new folder in your desktop. This folder is your 'map' and will contain manifests defining tiles, buildings, items and more. For now we'll just copy the new tiles in:
- Create a folder like /Tutorial1Map
- Copy the exported tiles manifest into the folder.
- Rename it to 'Locations.yaml'.
## 4. Deploy the new tiles
We will use the Downstream CLI to deploy our newly created tiles to our local Downstream instance.
First, install the CLI. From a terminal run:
```bash
npm i -g @playmint/ds-cli
```
Check it is installed from any terminal folder by running:
```bash
ds help
```
Now copy your Burner private key from Downstream:
- Browse to [localhost:3000]([http://localhost:3000]).
- Click the player icon at the top left.
 - Click **show**
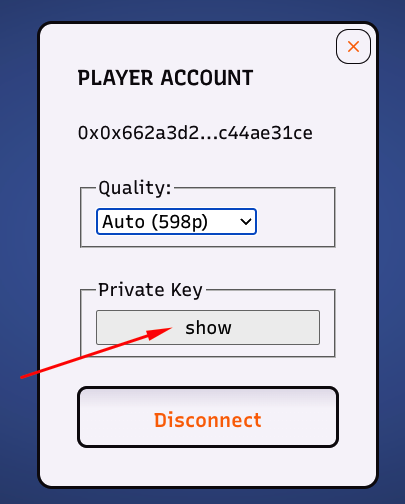 - Highlight and copy the key.
Finally, run the command to deploy your map:
In a terminal at your new folder run the following, where `` can be pasted from the one you just copied:
```bash
ds apply -n local -z 1 -k -f Locations.yaml
```
We are using Zone 1 (`-z 1`) as the LocalDevAccount already owns Zone 1 and it saves up some time!
Note: If using Windows you get the error "running scripts is disabled on this system", open Powershell as an Administrator and run `Set-ExecutionPolicy RemoteSigned`
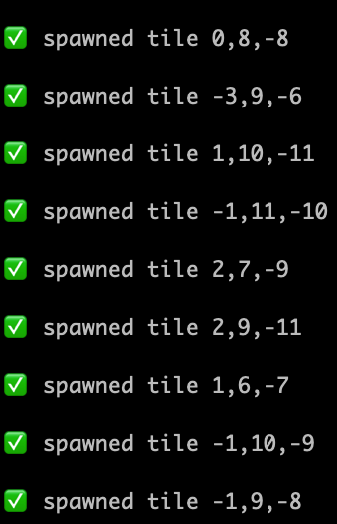
You should see the terminal output display a series of ✅s for each tile that is deployed.
- Highlight and copy the key.
Finally, run the command to deploy your map:
In a terminal at your new folder run the following, where `` can be pasted from the one you just copied:
```bash
ds apply -n local -z 1 -k -f Locations.yaml
```
We are using Zone 1 (`-z 1`) as the LocalDevAccount already owns Zone 1 and it saves up some time!
Note: If using Windows you get the error "running scripts is disabled on this system", open Powershell as an Administrator and run `Set-ExecutionPolicy RemoteSigned`
You should see the terminal output display a series of ✅s for each tile that is deployed.
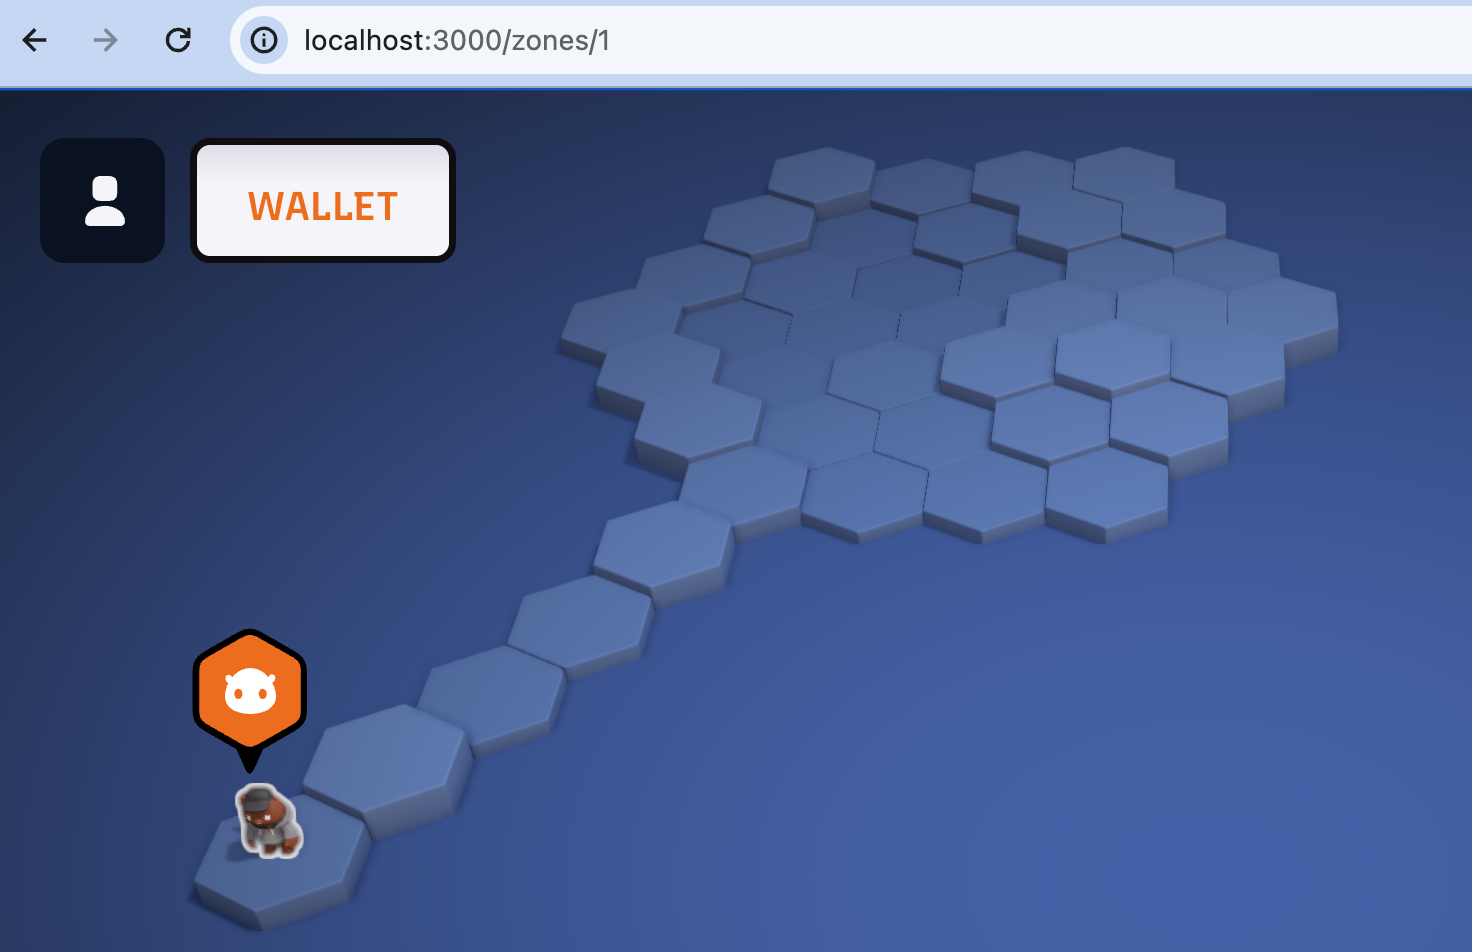
 Browse to [localhost:3000/zones/1](http://localhost:3000/zones/1) and you should see your newly created map and be able to move your Unit around it!
 ## 5. Create a new type of building
The map is currently empty and there are no buildings to build. So we are going to create a new kind of 'Factory' building that crafts a new kind of item.
First, open the the **building-fabricator**, by opening a web browser and navigating to [http://localhost:3000/building-fabricator].
You should see a page like this:
## 5. Create a new type of building
The map is currently empty and there are no buildings to build. So we are going to create a new kind of 'Factory' building that crafts a new kind of item.
First, open the the **building-fabricator**, by opening a web browser and navigating to [http://localhost:3000/building-fabricator].
You should see a page like this:
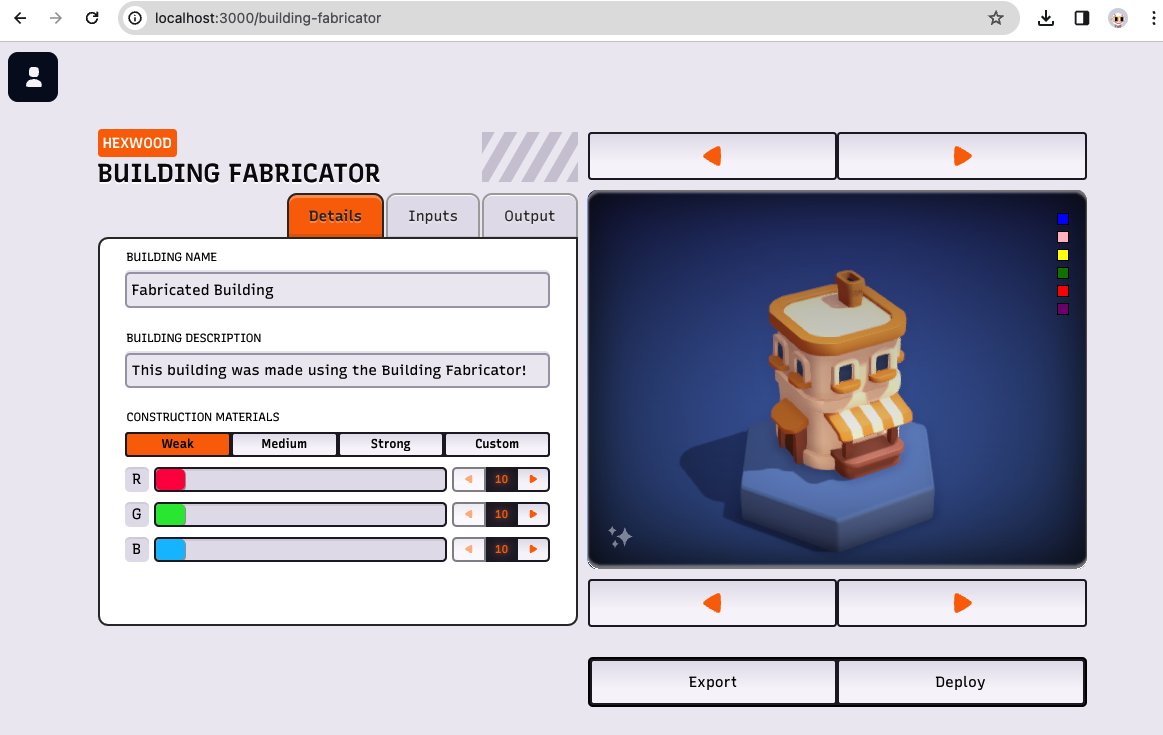 Now give the building a name and description.
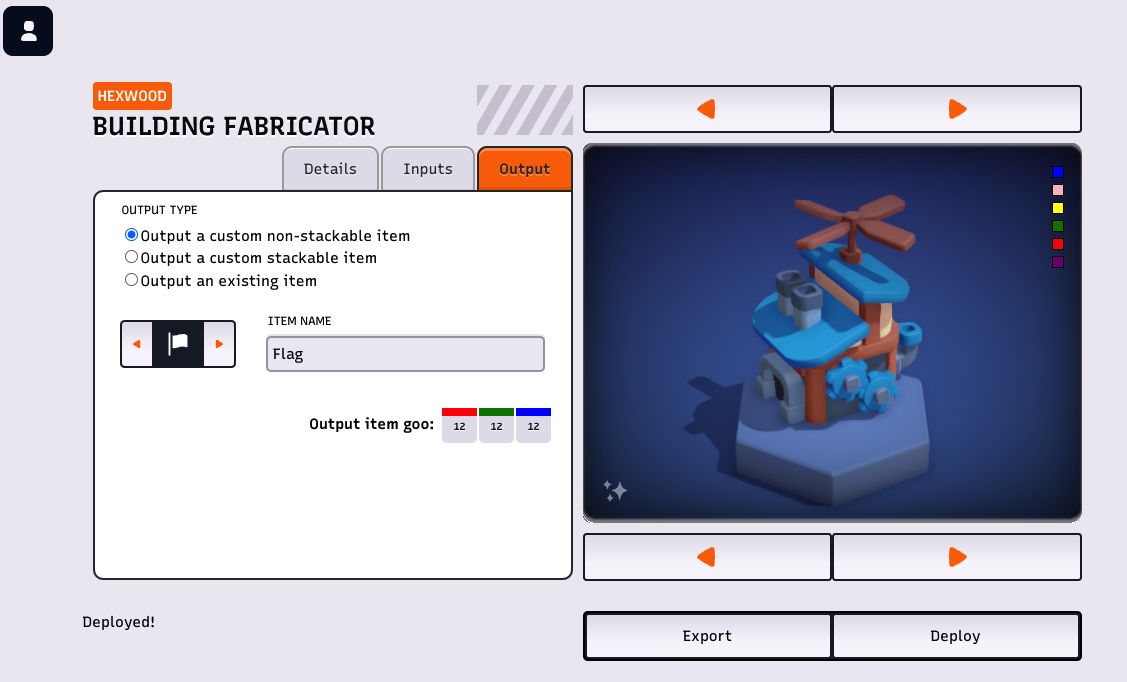
Then, click on the **Output** tab and define the item that can be crafted by this factory:
- Select an icon.
- Choose a name.
You can change the appearance of the building by clicking on the arrows and colour squares.
Now give the building a name and description.
Then, click on the **Output** tab and define the item that can be crafted by this factory:
- Select an icon.
- Choose a name.
You can change the appearance of the building by clicking on the arrows and colour squares.
 Once you are happy, export the building source code:
- Select **Export**.
- Find the downloaded zip file. It will be named something like `BasicFactory.zip`.
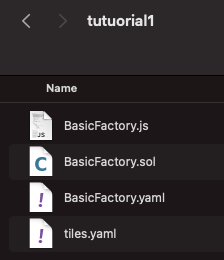
- Extract the files to the same folder as Locations.yaml.
You should now have a folder that looks this:
Once you are happy, export the building source code:
- Select **Export**.
- Find the downloaded zip file. It will be named something like `BasicFactory.zip`.
- Extract the files to the same folder as Locations.yaml.
You should now have a folder that looks this:
 ## 6. Deploy the new type of building
We will use the Downstream CLI to deploy our newly created building to our local Downstream instance.
Deploying the building is the same as the tiles manifest but passing BasicFactory.yaml instead of Locations.yaml:
- In a terminal in the folder with your exported building source.
- (using the same `` as above)
- Still using Zone 1 (`-z 1`)
- `ds apply -n local -z 1 -k -f BasicFactory.yaml`
You should see the terminal output display for the building kind and item kind defined by your new factory:
## 6. Deploy the new type of building
We will use the Downstream CLI to deploy our newly created building to our local Downstream instance.
Deploying the building is the same as the tiles manifest but passing BasicFactory.yaml instead of Locations.yaml:
- In a terminal in the folder with your exported building source.
- (using the same `` as above)
- Still using Zone 1 (`-z 1`)
- `ds apply -n local -z 1 -k -f BasicFactory.yaml`
You should see the terminal output display for the building kind and item kind defined by your new factory:
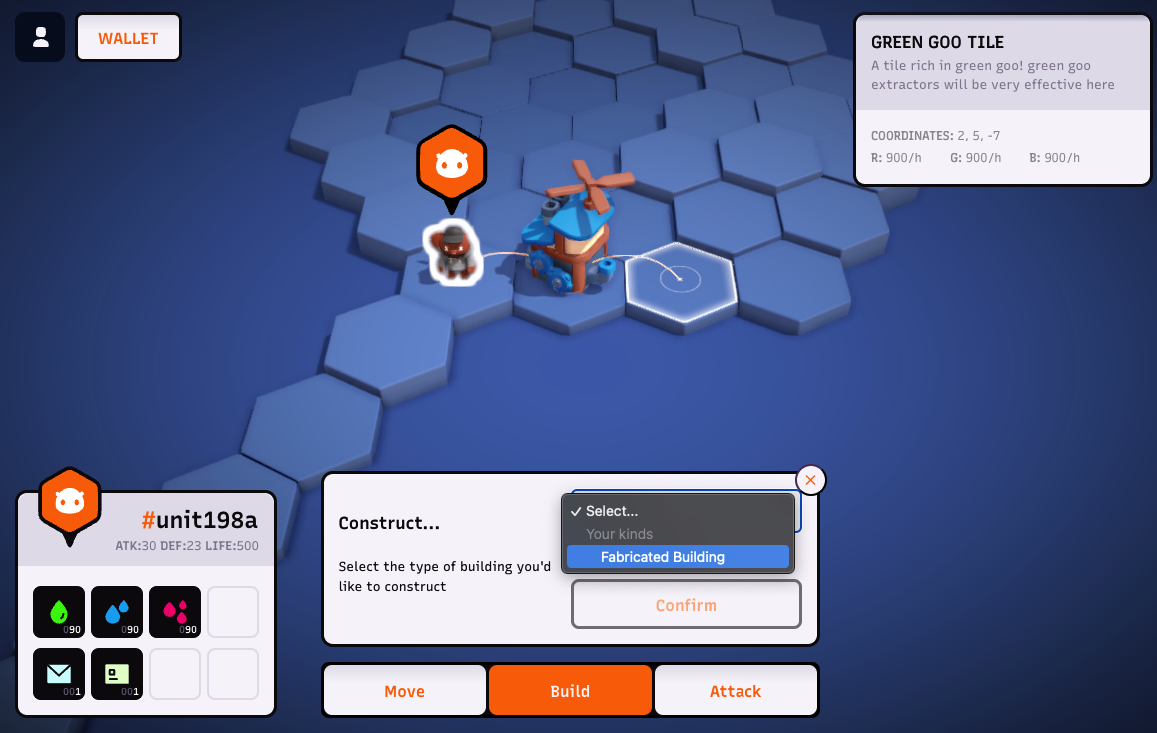
 This type of building now exists in our local instance of Downstream, which means it is available for Units to build on the map:
- Browse to [http://localhost:3000/zones/1].
- Select the build action.
- Choose your new building type from the drop down list.
- Confirm.
You should now have an instance of your building deployed to the map!
This type of building now exists in our local instance of Downstream, which means it is available for Units to build on the map:
- Browse to [http://localhost:3000/zones/1].
- Select the build action.
- Choose your new building type from the drop down list.
- Confirm.
You should now have an instance of your building deployed to the map!
 ## 7. Add some decorations
There are plenty for examples of pre-made building kinds in the ds repository that can be copy and pasted into your map folder.
We will add some decorative blocking buildings to your map and see how everything in the map folder can be deployed at once.
First copy the [blockers.yaml](./blockers.yaml) to your map folder.
Now, use the [tile-fabricator](http://localhost:3000/tile-fabricator) to add some blockers to your map:
- Press the **import** button, navigate to your map folder, and select blockers.yaml.
- New building types will now be available in the **Brush** drop done.
## 7. Add some decorations
There are plenty for examples of pre-made building kinds in the ds repository that can be copy and pasted into your map folder.
We will add some decorative blocking buildings to your map and see how everything in the map folder can be deployed at once.
First copy the [blockers.yaml](./blockers.yaml) to your map folder.
Now, use the [tile-fabricator](http://localhost:3000/tile-fabricator) to add some blockers to your map:
- Press the **import** button, navigate to your map folder, and select blockers.yaml.
- New building types will now be available in the **Brush** drop done.
 - Choose a building type and place instances with left mouse click.
 - When you're happy, press the **export** button.
- Replace your old Locations.yaml with the new downloaded manifest.
## 8. Deploy the whole map folder
To complete the tutorial, we're going to deploy your whole map folder together.
First, stop the Downstream instance running in Docker with **ctrl-c**, and restart it by running `docker compose up`.
Once you see "ready", browse to the game and check you have a single tile world.
Now you can `ds apply` the whole map folder by passing the `-R` flag and the folder path. At a terminal In your map folder run:
```bash
ds apply -n local -z 1 -k -R -f .
```
Browsing back to the game, you should now see your new map.
- When you're happy, press the **export** button.
- Replace your old Locations.yaml with the new downloaded manifest.
## 8. Deploy the whole map folder
To complete the tutorial, we're going to deploy your whole map folder together.
First, stop the Downstream instance running in Docker with **ctrl-c**, and restart it by running `docker compose up`.
Once you see "ready", browse to the game and check you have a single tile world.
Now you can `ds apply` the whole map folder by passing the `-R` flag and the folder path. At a terminal In your map folder run:
```bash
ds apply -n local -z 1 -k -R -f .
```
Browsing back to the game, you should now see your new map.