# @pickra/copy-code-block
- [What](#what)
- [Why](#why)
- [Credit](#credit)
- [Usage](#usage)
- [Custom Styles](#If-you-don't-like-the-styles,-you-can-override-them)
- [Syntax Highlighting](#Syntax-highlighting)
- [Syntax Highlighting For Specific Code Segments](#Syntax-highlighting-for-specific-code-segments)
- [Built-in syntax highlighting](#Built-in-syntax-highlighting)
- [Dev](#dev)
- [Tests](#tests)
## What
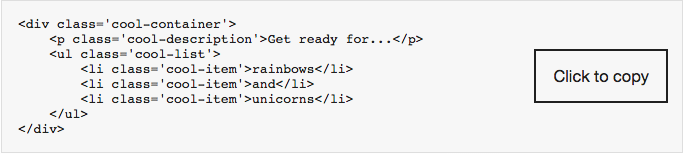
copy-code-block accepts a code file or code in a string. CCB returns the transformed code and
a button that can copy the displayed code to the clipboard.
Below is the no frills default...
Check out the [examples](https://pickra.github.io/copy-code-block/) for all the options.
## Why
I wanted to use [@storybook/html](https://www.npmjs.com/package/@storybook/html) to build HTML/CSS
components and have the 'copy code to the clipboard' functionality from [@storybook/addon-info](https://www.npmjs.com/package/@storybook/addon-info). But this isn't [currently supported](https://github.com/storybooks/storybook/issues/4832), as of Dec, 2018.
Enter `copy-code-block`, a solution to display code in the browser and copy it to the clipboard.
BUT `copy-code-block` isn't just for storybook, it'll work anywhere javascript is used.
AND it ~~HAS THE POWER OF GREYSKULL~~ can syntax highlight any language.
## Credit
Couldn't have done this without [kgroat](https://github.com/kgroat).
## Usage
```javascript
import copyCodeBlock from '@pickra/copy-code-block';
// OR
const copyCodeBlock = require('@pickra/copy-code-block');
```
Then add it to your code
```javascript
import anHtmlFile from './anHtmlFile.html';
copyCodeBlock(anHtmlFile);
```
OR
```javascript
copyCodeBlock('Thundercats
')
```
OR
```javascript
`${copyCodeBlock('Thundercats
')}`
```
### If you don't like the styles, you can override them.
```javascript
import anHtmlFile from './anHtmlFile.html';
copyCodeBlock(anHtmlFile, options);
```
The options argument is an object. There are five customizable colors:
- `textColor`
- `background`
- `borderColor`
- `buttonTextColor`
- `buttonBackground`
These are the colors used for `color`, `backgroundColor`, and `borderColor` for the entire code block as well as the copy button. If no `buttonTextColor` or `buttonBackground` is supplied, they fall back to `textColor` or `background` respectively.
You can find all the defaults [here](./src/utils.js#L58).
You may also override the CSS classes by passing a template literal into the `cssOverrides` option. Such as:
```
{
cssOverrides: `
.container {
display: block;
padding: 1rem;
margin-bottom: 2rem;
}
.container code {
padding: 1.5rem;
}
`
}
```
Examples for CSS overrides are included in the stories for each of the languages.
### Syntax highlighting
If you want syntax highlighting, you'll need to `npm install highlight.js`.
Then you need to initialize your language:
```javascript
import hljs from 'highlight.js/lib/highlight';
hljs.registerLanguage('xml', require('highlight.js/lib/languages/xml'));
```
Or, if you want all of the languages:
```javascript
import 'highlight.js';
```
Then, when you're calling `copyCodeBlock`, tell it what language to use:
```javascript
import anHtmlFile from './anHtmlFile.html';
copyCodeBlock(anHtmlFile, { lang: 'xml' });
```
NOTE: the 1st argument passed to `hljs.registerLanguage` is the value for lang in `copyCodeBlock`'s options object. The languages all have [aliases](https://github.com/highlightjs/highlight.js/blob/master/docs/css-classes-reference.rst#language-names-and-aliases). So if you wanted to use HTML, you could register it as `html`, a valid alias for `xml`...
```javascript
hljs.registerLanguage('html', require('highlight.js/lib/languages/xml'));
```
...but you still have to require the `xml` language. Then use `html` as the `lang` value in `copyCodeBlock`'s options object...
```javascript
copyCodeBlock(anHtmlFile, { lang: 'html' });
```
If you supply `lang: 'auto'`, this will tell highlight.js to attempt to automatically choose a language from whichever ones are loaded.
#### Syntax highlighting for specific code segments.
For an idea of how to do this look at [the custom html example](./examples/customHtml.js) or [the custom rust example](./examples/rust.stories.js#L23).
NOTE: camelCase colors get converted to hyphen-case, such as `metaString` converts to
`meta-string` in the rust example.
For a complete list of `hljs` classes, see [their CSS class reference](https://github.com/highlightjs/highlight.js/blob/master/docs/css-classes-reference.rst#stylable-classes). To see which classes are used by a specific language, find the language [from the complete list](https://github.com/highlightjs/highlight.js/tree/master/src/languages) and look for properties called `className`.
#### Built-in syntax highlighting
Another option for styling the highlighted code is to choose any of [hightlight.js's built-in styles](https://highlightjs.org/static/demo/) by importing it as so:
```javascript
import 'highlight.js/styles/a11y-light.css';
```
NOTE: using `textColor` may override the built-in syntax highlighting.
## Dev
**Requirements:** `node` 6.0.0 or higher, `npm` 3.8.6 or higher
- `npm start`, runs storybook
## Tests
- `npm start`
- in a different terminal, `npm t` runs all the tests
### To run 1 test file, prepend `-- -t tests/theTestFileName.js`
```
npm t -- -t tests/SimplHTML.js
```
### To run 1 testcase, prepend `--testcase "name of testcase"`
```
npm t -- -t tests/SimplHTML.js --testcase "Simple HTML"
```