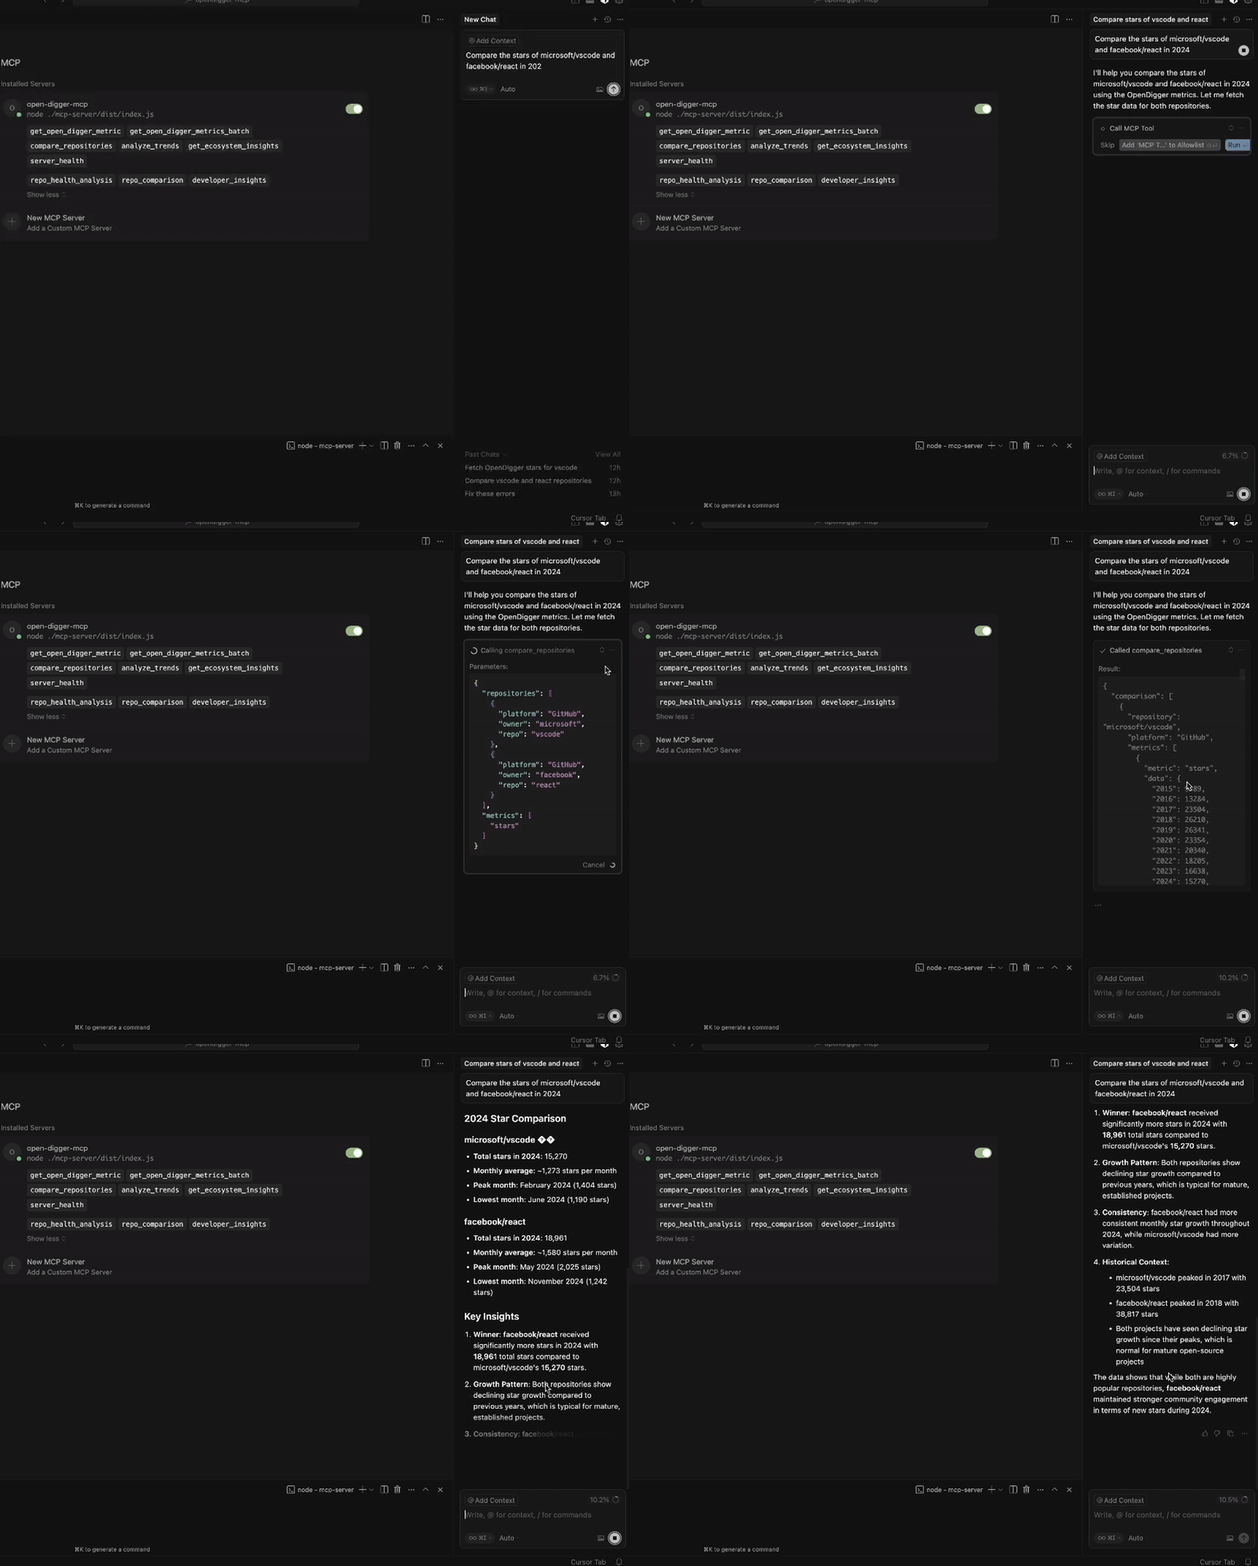
# OpenDigger MCP Server
A Model Context Protocol (MCP) server for OpenDigger enabling advanced repository analytics and insights through tools and prompts.
## Quick Start
```bash
# Setup
git clone https://github.com/X-lab2017/open-digger-mcp-server.git
# (Optional) Ensure you're on the master branch
git checkout master
cd open-digger-mcp-server && cd mcp-server
npm install
npm run build
# Start server
npm start
```
> [!IMPORTANT]
> Don't forget to configure Cursor (update path in .cursor/mcp.json)
Expected output:
```
OpenDigger MCP Server running (on stdio)...
```
> [!IMPORTANT]
> If you are using Cursor AI IDE, you should see the MCP server (**`open-digger-mcp`**) toast in the bottom-left corner. You should _**enable**_ it, & now you can start using the tools and prompts provided by the MCP server. To verify, open Cursor Settings and check the MCP Servers section → you should see `open-digger-mcp` listed there.
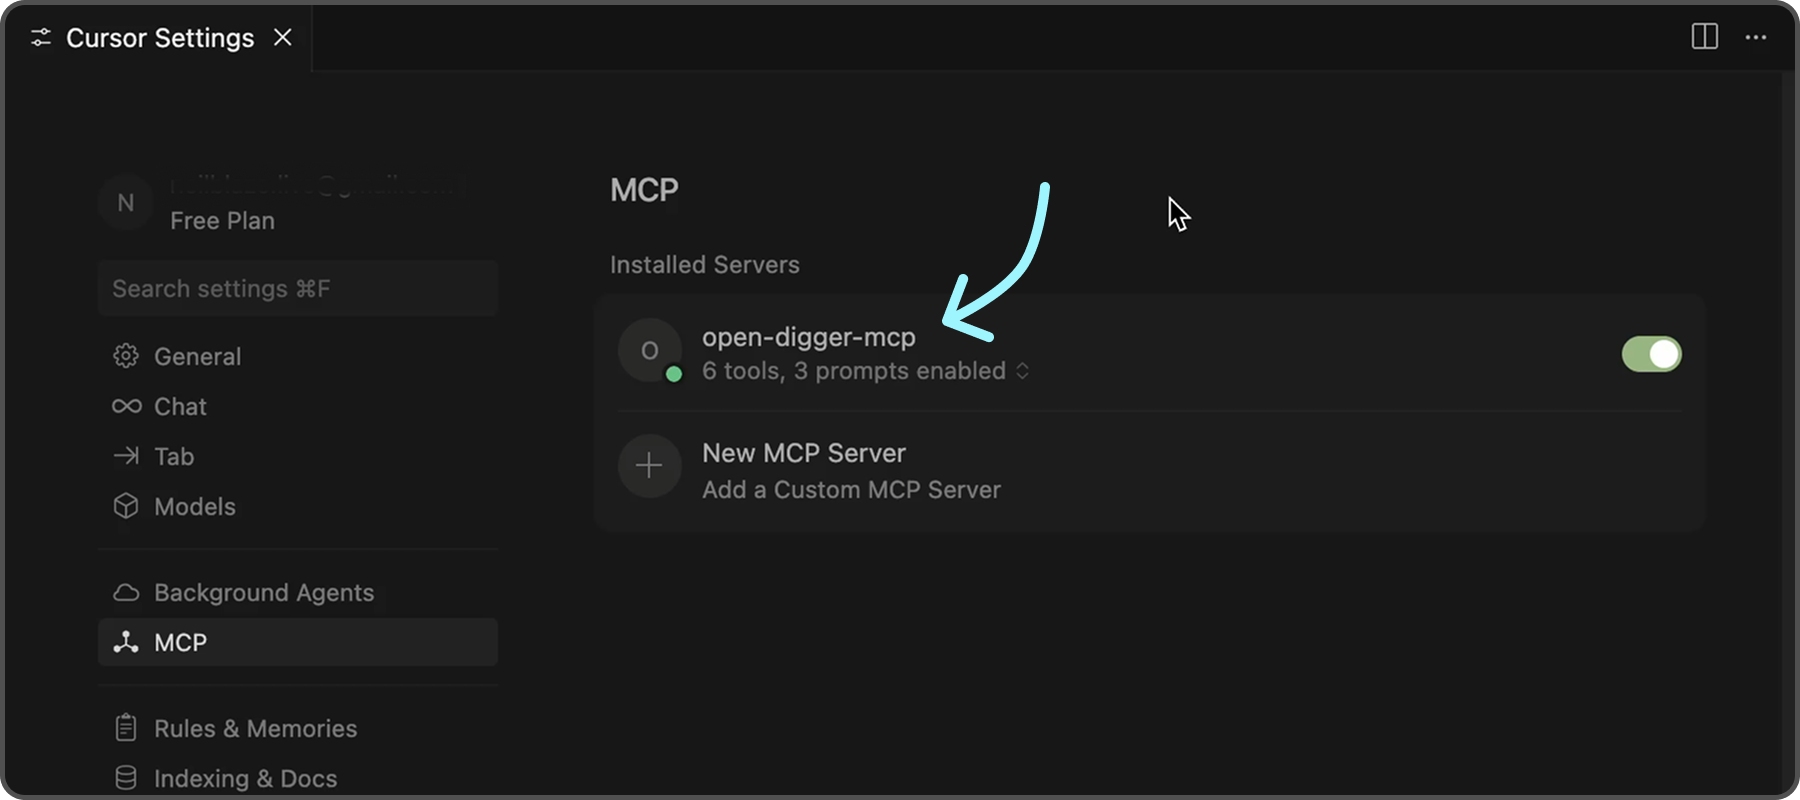
To further confirm that the server is functioning correctly, you can check the following indicators in Cursor:
- ✅ **Green dot** next to "open-digger-mcp" title
- ✅ **"6 tools"** displayed in server status
- ✅ **"3 prompts"** displayed in server status
- ✅ **No error messages** or red indicators
> [!TIP]
> Please refer to [`Installation.md`](./INSTALLATION.md) for detailed installation instructions and configuration options for different IDEs.
---
## Features
### Tools (6 Available)
| No. | Tool | Description |
|-----|-------------------------------------|--------------------------------------------------|
| 1 | **`get_open_digger_metric`** | Fetch single repository metrics |
| 2 | **`get_open_digger_metrics_batch`** | Batch operations for multiple metrics |
| 3 | **`compare_repositories`** | Multi-repository comparative analysis |
| 4 | **`analyze_trends`** | Growth trend analysis over time periods |
| 5 | **`get_ecosystem_insights`** | Ecosystem analytics & insights |
| 6 | **`server_health`** | System diagnostics and health monitoring (Beta) |d
### Prompts (3 Available)
1. **`repo_health_analysis`** - Comprehensive repository health reports
2. **`repo_comparison`** - Competitive repository analysis
3. **`developer_insights`** - Developer activity and contribution analysis
### Metrics
- **Core Metrics**: `openrank`, `stars`, `forks`, `contributors`, `participants`, `issues_new`, `issues_closed`, `pull_requests`, `commits`, `activity`
- **Extended Metrics**: `technical_fork`, `bus_factor`, `releases`, `inactive_contributors`, `maintainer_count`, `community_activity`
- **Additional Metrics**: `change_requests`, `pull_requests_accepted`, `pull_requests_merged`, `issue_comments`, `issue_response_time`, `code_change_lines`, `developer_network`
---
## 💡 Usage Examples
### 💠 Repository Comparison
```
Compare microsoft/vscode and facebook/react using the compare_repositories tool
```
### 💠 Health Analysis
```
Generate a health report for microsoft/vscode using the repo_health_analysis prompt
```
### 💠 Trend Analysis
```
Analyze the growth trends for contributors in microsoft/vscode over 2 years
```
---
## Server Status Check
After starting the server, verify it's working:
```bash
# In a new terminal
echo '{"jsonrpc":"2.0","id":1,"method":"tools/list","params":{}}' | node dist/index.js
```
Expected response should list all 6 tools.
## Configuration
### Environment Variables (.env)
```bash
# Cache configuration (recommended)
CACHE_TTL_SECONDS=300
# Optional SSE server
SSE_PORT=3001
SSE_HOST=127.0.0.1
```
### Cursor MCP (.cursor/mcp.json)
```json
{
"mcpServers": {
"open-digger": {
"command": "node",
"args": ["/full/path/to/dist/index.js"],
"cwd": "/full/path/to/project",
"env": {
"CACHE_TTL_SECONDS": "300"
}
}
}
}
```
> [!TIP]
> Replace `/full/path/to/open-digger-mcp-server` with your actual project directory path. Use `pwd` to get the current directory path.
## Development
```bash
npm run watch # Development mode
npm run build # Compile TypeScript
npm run clean # Clean build files
npm run sse:test # Test SSE server
```
> [!TIP]
> Beside Cursor, you can also use other MCP clients like VS Code, Claude Chat, or the official [MCP Inspector](https://modelcontextprotocol.io/docs/tools/inspector).
## Troubleshooting
### Common Issues
**Server not appearing in Cursor:**
1. Verify absolute paths in `.cursor/mcp.json`
2. Restart Cursor completely (Cmd+Q / Alt+F4)
3. Check MCP Settings section for error messages
**Permission errors:**
```bash
chmod +x dist/index.js
```
**Build errors:**
```bash
npm run clean
npm install
npm run build
```
**Cache issues:**
```bash
# Clear npm cache
npm cache clean --force
# Rebuild
npm run clean && npm run build
```
---
## Contributing
1. Fork the repository
2. Create your feature branch (`git checkout -b feature/amazing-feature`)
3. Commit changes (`git commit -m 'Add amazing feature'`)
4. Push to branch (`git push origin feature/amazing-feature`)
5. Open a Pull Request
## License
Apache-2.0 License - see [LICENSE](LICENSE) file for details.